Sunday, April 6, 2025

Cards - I Win - Acetate Butterflies

I make some cards for the I Win charity.

 I was at ReUse Center yesterday and found a 12x12" sheet of acetate with pink butterflies on it.

I cut the sheet into 4 pieces I could use. The one corner had butterflies too big for my A2 cards.

Then I dug in my stash to find paintable 12x12 card stock.  I used some of my alcohol inks to stain the paper in 4 different colors.

On this card I chose a scallop patterned paintable card stock and added green alcohol ink diluted with rubbing alcohol applied with a sponge.

I mounted the acetate and green paper to the Kiwi Kiss card base.  Greeting and white insert was added.

For this card I chose a heavy 110lb white card base.

I trimmed the acetate to be a bit smaller than the purple paintable card stock layer.  These are held together with black tiny brads. Then this layer was adhered to the card base with double sided tape.

I added a SU Word Window punchie greeting in black to coordinate with the brads.  It is mounted to the acetate with 3D foam tape.

A white insert was added.


Love this one!

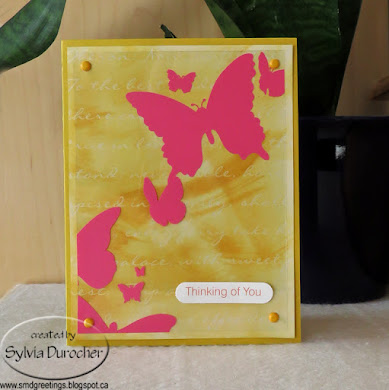
The A2 card base is SU Crushed Curry.

I added a paintable card stock layer which has script on it.  It has been painted with yellow alcohol ink diluted with rubbing alcohol and applied with a sponge.

The paintable layer and the acetate had held together with yellow mini brads in each corner.  This is adhered with double sided tape.

I added a SU Word Window punchie greeting in pink.

A white insert and we are good do go.

I will press these over night.

The card base for this cards is Stampin Up Taken with Teal.  

The paintable layer has a script pattern. It was colored with alcohol ink diluted with rubbing alchol and applied with a sponge.

I attached the acetate and the blue painted layer with white tiny brads in each corner.   This was then adhered to the card base with double sided tape.

I added a blue SU Word Window punchie greeting in the top left hand corner.  It is attached with 3D foam tape.

A white insert and we are good to go.

Friday, April 4, 2025

Cards - A2 - Scraps on my desk

The card base is dark brown textured cardstock.  

I cut a piece from a scrap of this gold and kraft polka dot card stock to leave a small border and adhered it to the card front.

I glued a strip of the card base card stock across the front aligned to the top.

I cut a bird on a branch with the Tim Holtz die and adhered it on with Scotch Quick Glue.

I used a gold sharpie marker to add an eye to the bird and some marks on the cardstock strip and branch.

A white insert and an off white envelope.  Yeah!

I chose a Stampin Up Kiwi Kiss card base for this card.

I cut a piece of SU designer paper which was just begging to be colored.  I used some Prismacolor pencils to color the main flower and the surrounding leaves.  I left the lilies white.

This layer was adhered to the card front with double sided tape.

Really simple but effective.

A white insert and envelope and another hits the stash.


Another Kiwi Kiss card base with a totally different card front.

The designer paper is a leftover.  I cut the layer leaving a small border then I cut it again and turned over the small piece to show the script back side.  I taped these together with clear tape.  It was adhered to the card front.

I added a narrow strip of dark brown cardstock over the join.  

I cut a bird on the branch again this time in Baja Breeze and used quick dry glue attached him along the strip.

A white quarter sheet insert and a matching envelope.


A cute baby card.  I painted this little bear a few weeks ago for my Macro Monday challenge on Flickr. 

I turned it into a card.  I trimmed it to the 3x3 size which is the limit for MM.

I layered it onto dark brown cardstock leaving a nice border.

I mounted it onto a Baja Breeze card base.

Dug into my stash of greetings and added this 2" oval punchie mounted with 3D foam tape.

Added a quarter sheet insert and an envelope.


Thursday, April 3, 2025

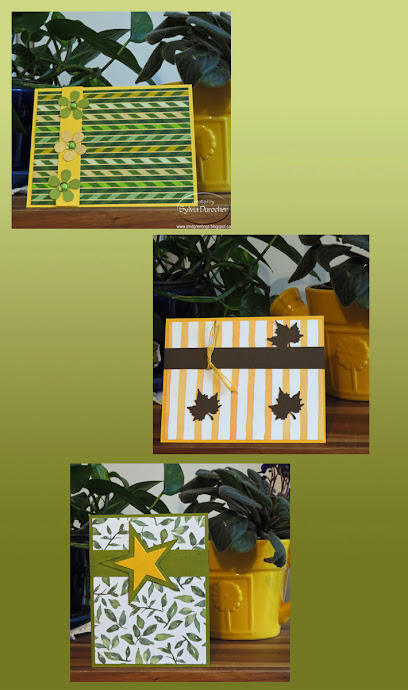
Cards - A2 - Serendipity Paper

I created a 8.5 x 11 sheet of serendipity paper when I created cards with the origami paper this week.   

I cut it into 4 pieces to make the best use of it.  That means A2 cards.

I started with So Saffron card base to measure 4.25 x 5.5 folded.

I adhered my collage paper to the front leaving a small border. 

I cut a strip of the same card stock and added a length of Early Espresso grosgrain ribbon.

I added Spellbinder charm die cut hung with ivory crochet cotton.

A white quarter sheet insert and an ivory envelope.

For this card I chose the same yellow card base and adhered the piece of collage paper to the front leaving a small border.

I added a length of Early Espresso card stock across the landscape (wide) card in the top half

I cut a Sizzix Primitive Star with the yellow medium die. It was mounted onto the brown strip with 3D foam tape.

A white quarter sheet insert and ivory envelope.

I was lucky to get 50 of these envelopes at the thrift store this week for $2.00.


Another wide card.

The card base is Early Espresso and the collage paper was trimmed to leave a small border.

I added a card stock strip of brown and topped with a narrower strip of So Saffron card stock.

I punched a pine tree from dark brown card stock and adhered it with Scotch Quick Dry adhesive on the left hand side.

A white quarter sheet insert and an ivory envelope to complete the card.


The fourth card in this series made with serendipity paper.  I used origami papers 3x3 collaged to card stock.  

I chose a ginger colored card stock and adhered the trimmed collage paper to the front.

I added a strip of the same card stock to the front once I had added a length of dark brown grosgrain ribbon across it.

I hung a square charm cut with Spellbinder die set.

I added a white insert and an ivory envelope.

Not my normal color scheme but they worked out well.

Wednesday, April 2, 2025

Slow Stitching - April 2025 - Week 1

I chose tea for the subject of my April slow stitching square.

I chose a mottle blue piece of cotton fabric which I invisible basted to a thin cotton foundation layer.

I chose to create a tea bag and tag which adds a border around my square.

The tea bag has been running stitch around the edge of it with seed stitches towards the bottom to represent the tea.  

The green tag is at the other end onto which I added TEA lettered in turquoise.

The string was embroidery with stem stitch in a grey floss. 

Tuesday, April 1, 2025

Cards - A7 - Bands and Ribbon

Another set of A7 cards.

I started this one with a pack of origami paper 3x3 inches with travel and writing theme.

I just selected a few and glued them down to the front of my ivory card base.

I chose a light green card stock strip to overlay on the front and embossed it with a Stampin Up Script folder.  I then used SU Tea Stain ink to highlight the writing.  I added a length of Always Artichoke seam binding which I touched with the same ink to help it fit in.  I knotted onto the strip. I adhered it to the card front with double sided tape. 

Added a white insert and an off white envelope from my stash of free ones from years ago.

This designer paper is leftover from a previous card making session.

I love the colors.  I chose a Lost Lagoon card base and adhered the designer paper cut to leave a small border.

I chose a piece of Cherry Cobbler card stock and embossed it with a Cuttlebug folder.  I knotted a length of Baja Breeze seam binding around it and trimmed the ends.

The strip was adhered to the card front in the landscape (wide) orientation.  This seems to have a bit of a Christmas vibe.

Added a white insert and off white envelope.


I started with a designer paper leftover.

I added a Stampin Up Island Indigo card base.  I trimmed the patterned paper to leave a small border and adhered it to the front.

I added a card stock strip in Pumpkin Pie and embossed it with the D'vine Swirl folder.  I rubbed the swirls with a More Mustard ink pad. 

I added a coordinating knot of satin ribbon and adhered the strip to the card front.

I finished the card with a white insert and an off white envelope.