Showing posts with label tan. Show all posts

Saturday, February 21, 2026

Card Making - House Cards

I have been working on a House Card project.

When I bought a new to me place back in May and moved in June I was so grateful to my real estate agent.

I thought it would be nice as I was a card maker to make her some cards.  We discussed it and came up with some designs. The first samples were not quite right.  I am a bright colors person and she is a neutrals person.

I cut the houses with my Cricut machine and the Wrap It Up cartridge and some black card stock. She wanted a neutral background and I gave away much of the 12x12 DSP to my sister when I gave up classes after I retired.

So I made some up with ivory card stock and a bit of strong tea.

The gold heart was cut with a Sizzix multi sized thin lets set. I traced around it with a fine black marker to give it some definition. 

The banner was printed and then washed with tea as well so coordinate well with the card.  I cut the banner ends by hand with scissors.  They have a white quarter sheet insert and white envelope.

This set of cards includes red card bases and navy card bases to go with the logo.

The white layer was cut with a multi sized tag set.  I then cut the chimney with the end of a gift bow die in my collection.

I printed the sentiment then cut it with a smaller sized die from the same set.  The colored offset layer behind was cut by hand with scissors and the paper cutter. It is the other color from the card base. Blue on red card and red on blue card.

They have a white quarter sheet insert and white envelope.
I cut some with the chimney on the right hand side and some on the left hand side.

I am not used to doing production work since I have not offered classes for years.

I had to inject some variety and what limited way I had.


This is a panel card on white or off white A2 card bases.

I designed all the elements my self and inserted the logo she sent me.

I printed the rounded window topped frame and logo in color then I printed the scene in black so I could watercolor it with out the ink running.

I used my Stampin Up Watercolor Wonder Crayons.  I have 2 sets which I bought second hand. One set is mostly Subtles and the other Rich Regals but some colors have been swapped.

I used the Subtles for this project. 

I cut the tan window die cut with a QuicKutz die which is two pieces so it had to be aligned for every cut.  I quickly make a drawing on paper I put under the clear plate so that made aligning easier.
Once cut the die cut was adhered with double sided tape. These come with white envelopes.

So glad to show my appreciation.

Sunday, February 9, 2020

Sewing Project - Quilt 6 - Green Squares in Tan

I have completed another quilt for donation.  This project morphed from the original materials I had selected.  I chose black for the sashing but decided the fabrics were too dark to have dark sashing. 

Finished Size: 42.50" x 55.25"

Front: Green patterned fabric cut into 10" squares

Backing: Hunter Green Flannelette

Batting: Cotton Sheet


Sashing: Caramel dual texture fabric cut 4 inches wide

Binding: Caramel dual texture fabric cut to 2 5/8 inches wide  You can check out the Fool Proof Quilt Binding video for details.


Thread: Dark Green cotton thread  

Binding stitching: Stitch in the ditch.  I pinned very closely and had perfect capture of the folded edge on the back. Excellent.


Quilting: One quarter inch around each square on the square with green thread keeps the caramel intact and matched well with the green back. I remembered to add the next row of sashing before quilting so I have a good edge to follow.  A quarter inch foot helps a lot! Great investment.


The thread spool was taller than my regular spools and was dancing around on my spindle.  I added a straw on the spindle that fit into the hole of the spool. Perfect solution.

Lessons Learned: 
Measure twice cut once - on the rows of sashing I cut them 42 inches after doing some math (not my strongest skill) thinking that would give me extra but the row of squares was 43" wide when it came to quilting.  I did have enough fabric to re-cut the 5 rows of sashing to 45" to leave me some extra.

It worked out in the end because the too short sashing was turned into the binding.  I did have to add about a foot to have enough.  I was going to use black for binding but since I had what I needed I went ahead with the caramel.

It is getting easier as I improve with each one.

Made several green scraps disappear as well!

Wednesday, March 27, 2019

Sympathy Card - Photo

I am sending this photo card to my aunt who recently lost a friend.  They share mutual interests and were walking buddies.

The friend she met in the last few years and was much too young to pass away.

This is a petrified wood tree trunk taken at the Royal Alberta Museum.  I love the colors in this image with the off center focal point.  As you can see by the number of rings it was a very old tree.


Tuesday, November 6, 2018

Thank You Cards - Donation

This is a 4" square of woodgrain designer paper which was ripped into 2 pieces.  The pieces were adhered off set top and bottom on the front of a tan card.

I adhered a greeting of an oval color printed punchie adhered to a Soft Suede scalloped oval.  It was adhered with 3D foam tape to add some dimension to the card.

I am dropping off another set of Thank You cards as I teach my Christmas Card class at Compassion House.


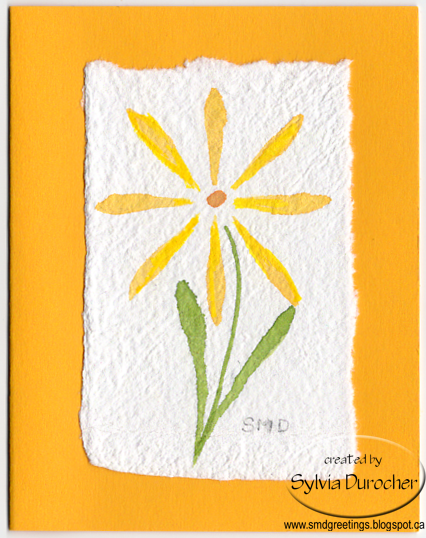
I wrote a note to the ED in this hand painted daisy card.  I used to make these years ago and I love that it is my own work.

I need to get back to creating my own art which I do mostly with photography.  I do my own decorative paper and a bit of painting.

Monday, May 21, 2018

Apron - Shirt - Tan Burgundy Navy Stripes

I made up a shirt apron as well.

This process takes a men`s XL shirt and makes it into a quick apron.  I started with a 100% cotton shirt in a stripe pattern.

I cut the front on a slant from the arm hole to the collar then along the back of the collar down the other side.  This was hemmed by folding the fabric over and again and stitching to create a hem.


I used half of the back which was removed to make the 2 front slanted patch pockets.  I switched the direction of the stripe so they would show up nicely.

The pockets are reinforces on the corners to ensure they will hold during regular wear.  The original pocket on the right hand side is still there but because the lines align you can barely see it.

In this case I did not sew down the front button hole layer as I did not what to have navy stitching on my tan front stripes.


I used some of the other half of the back to create the ties.  Cutting along the stripes I cut a 2 inch strip, folded each side into the center and then folded in half again.

I stitched along the non fold edge with the navy thread in the machine.
Makes a sturdy tie but not too heavy to create a bow.

I reinforced where the tie connects with the apron with stitching in a box pattern to ensure it does not come loose.

The ties were 30 inches or so and tie nicely at the back in a knot or bow.

Because the shirt had short sleeves it just provides enough fabric to create the extras one needs.  There is very little fabric leftover.

This fabric is not as heavy as I had hoped so the apron is lighter weight than I would like it to be.

I expect it will do its job of protecting your clothes none the less.


Sunday, June 25, 2017

Iced Cappuccino

Getting caught up on my cards for the Coffee Loving Cardmaker Summer Bloghop.


For this card I used the free digi from Stamplorations.  You can find the it here.

I printed it on a quarter sheet of white card stock.  I then colored it with pencil crayons.  I used blue for background, tan for coffee and pink for roses. I cut it out and traced the edge with a black marker to eliminate the white edge.  I added a small pink flower in the middle ban of the cup on the right because it felt too open.  I guess I could have stamped something there as well. 

I then embossed a quarter sheet of pink card stock with the Sizzix Softly Falling folder and trimmed it to leave a small border.  I then wrapped a piece of white seam binding around it and placed the knot on the right hand side. 
The coffee accent was adhered to the pink with 3D foam tape to give the ribbon some room.  Then it was adhered to the light blue card base.  Love it!

Stamplorations is doing a never ending challenge. You can link a card made with their stamps & images.  So I am linking to that challenge as well.


Thursday, September 25, 2014

Snow Angel Card Set

Another set of Christmas cards for the auction.  I started with a photo I took of a vintage snow angel Christmas decoration.  I added a night sky in warm tones then layered over it a texture background of falling snow that I designed. I added a snowbank on the bottom of the card with the "Peaceful Wishes" greeting layered over it.  I printed this onto ivory card stock.  I then added a matte gold star die cut with the Sizzix die.  This was added to the card front with a glue dot to add just a wee bit of dimension. Super happy with this one!


I then packaged the set of 20 cards in a clear square box.  I added a spacer just like the retail industry does which worked out really well. The box was purchased from a packaging store.

This looks great.