Showing posts with label white. Show all posts

Wednesday, June 24, 2026

Sewing Project - Bag - Magenta Large

I made a shopping bag from the stitched piece I worked on a while back.  Thought it would be a cushion cover but sure the stitching would have held up. 

I folded the flower stitched piece to 12"x12" and ironed well.  I then cut a piece of white microfiber to 13.5" by 13.5". I laid the magenta piece onto the white and folded the white forwarded as a binding and sewed all the way around.  This will support the loosely woven polyester substrate flower stitched piece.  I then tacked the whole piece to ensure integrity of both layers. 

I had some gradient cotton in purples to warm pinks which worked well with the magenta piece.  I cut the outside piece 21 inches square.

I chose white microfiber for the lining. It's nice to have a light lining so you can see what is inside your bag. I cut the lining 21"W by 24"T. 

The finished size is 19" square with the handles extending 13" from the top edge of the bag.

I added a key clip and extra loop on the inside of the bag.

The straps were cut 1.5" by 42" from the magenta cotton fabric. The ends tuck into the front and back pockets and are stitched from pockets to the bag edge which distributes the load.  

After it was finished I decided that the magenta straps were too flimsy so I added some white microfiber to them as well. I cut a piece 3.25" W and 31" L. Folded in half then pressed each side in to have 4 layers in the end.  I then stitched that to the back of the cotton magenta strap.  Stronger, longer wearing and pretty. 

The front accent pocket measures 12 inches square.  The back lined pocket measures 12"Wx10"T and is split at 5 inches.

I added 3" boxed corners on the bottom.

Scan on the left or click here to find the "My Bag" line.


Sunday, June 14, 2026

2026 Slow Stitching Project - Page 23 - L1 - Lemon, Licorice, Lace & Linen

 I am following K3N Cloth Tales' slow stitching project for 2026. 

It is 52 weeks A-Z of slow stitching where K gives us a prompt for week 1 and the second week is a community prompt from the suggestions offered in the comments from the viewers.

This week's K prompt was log cabin but I am not much for traditional patterns so I chose my own.

Lemon yellow, Licorice (black) and Battenberg Lace on white Linen.

I started with the square Licorice piece of cotton which I invisible basted down with black. I then added the piece of hand dyed quilting cotton in Lemon. I purchased this from Pat of Pat Man and Bobbin Quilting at a show last fall.  I added stick stitches on the left with Lemon thread. I then added Licorice French knots. I added a length of black Lace along the fuzzy edge of the Lemon piece stitch with black thread.  I then added a circle of Battenburg Lace which was stitched down the white around the edge and Lemon in the center. L1 just left of the bottom of the circle. The base fabric for each page is white Linen.

Wednesday, May 20, 2026

Cards - Stitched on Fabric

I chose to upcycle a piece of denim. 

I trimmed it to 4.00 x 5.25" keeping the seam on the left of center. I added a square of red gingham in top left hand corner.  I stitched it with white crosses and red French knots. 

I added running stitches parallel to the seam then red running stitching horizontally along the top of the piece of denim. 

I found a metal button that I thought would work well and then added a circle of white then a circle of red running stitch around the button.

I had pulled threads to create some fluffy edges so I had threads which matched in color. I couched some in an arch around the button. 

I stitched the fabric to a navy A2 card base. A nice country looking card.

I loved this scrap piece of linen because of the colors and the watercolor feeling.

I saw a flower so I stitched along the edges of the petals and added some dark in and around the center.

I stitched on a metal butterfly charm on the right hand side where there was a bit of open space.

I stitched the fabric layer to the front of a turquoise A2 card base.

I will bringing fabric cards to the gallery.

Sunday, May 10, 2026

2026 Slow Stitching Project - Page 18 - I2

 I am following the slow stitch project hosted by K3N Cloth Tales.  The community prompt was Interlocking Is.  I chose Interlocking circles which is an Irish symbol for the Trinity.  The rings are Indigo on Ivory linen.  I cut the circles from Indigo fabric with 2 thin dies from my Spellbinder smooth circle dies. Once laid out, I cut 2 of the circles to ensure that the were positioned by going under the other rings appropriately. I used the couching stitch along both outside edges of the rings. I chose yellow, red and white embroidery floss of the 3 separate objects.

Saturday, May 2, 2026

Slow Stitching Project - Memory Game


I was inspired to make a Memory Game as a slow stitching project.

The round game pieces are fleece circles with black on the back side and white with shapes in colors stitched on the front side. The shapes are stitched to the white circle with the overcast stitch in matching thread.  Then the black and white circles are held together with blanket stitch in black thread so the backs are solid color. 

The game rules are posted on the right.

The game pieces are stored in gold spray paint Tetley Tea tins which dictated the pieces would be round.  There are 6 pairs (12 pieces) which are stored in the tin.

Coming to a Christmas Craft sale in November.

Wednesday, April 22, 2026

DIY Project - Quilt Design Wall / Photography Backdrop

I finally got my Quilt Design Wall put up so I could hang my second quilt this year and photography it.

This is a multi purpose set up because space is at a premium in this place.

1. I can hang quilts for my final photos.

2. I can use this as a photography backdrop - Hanging fabric/paper from the cafe hooks at the top lets me set up my camera on the tripod and go back 7ft which gives me a lot of flexibility. Always there to use at a moment's notice.

3. I can hang my flannel design wall when I am making a quilt. The design wall is white 100% cotton flannel and the quilt fabric pieces stick to it and make moving the pieces around really easy. The size will accommodate any quilt I will make.  It measures 72" Wide x 80" Tall.

I was lucky to get the right hand hanger and the middle one into 2x4 with the left one in an anchor.  That will support anything I will use this for.

The tools came in handy. Drill for the anchor install, level, screwdrivers, hammer and nails to assess whether I was in only dry wall or I had hit a stud. I did use my stud finder as well. The square to make sure I was even to the closet wall.

The dowel at 3/8" in diameter and 72 inches long was not straight so you can see in the top right hand photo that I had to tie the dowel to the hook support so it would not pop out of the hooks.  The dowel and cafe hooks will stay there all the time as they are placed above the trim of the closet doors. 

The metal rods which acts as weights for the design wall will stay in all the time.  I fold the wall in half height wise then roll it onto the rods.

To store the wall I made a custom bag to hold it.  This way it stays clean and some what wrinkle free.

I then added a hook to the shelf in the craft room closet where the bag can hang. 

Done and dusted.

Super happy with the final result.


Upgrade: 20260427 - I found out that I could put a larger dowel if I pulled it through the sides instead of passing it by the mouth of the hooks so I headed to RONA and purchased a 1/2" x 72" dowel.  I sanded it and gave it a coat of Tung Oil. I hung it up the next morning.  Much better.


Friday, April 10, 2026

Fabric Flowers - Singles

The pink lace was found in my stash. I ran a row of stitching along the bottom edge of the lace and tugged until it formed a circle about 5" in diameter and tied off the gathering thread.  I then stitched the 2 ends together.  

I created the flower center with a 2.5"circle of pink linen fabric, a circle of batting, two 1.75" cardstock circles, a brad paper fastener and a pink felt circle backer.

I added 10 four inch circles of white tulle behind the lace to add some dimension.

The pink wire stem is 6 strands of 24 gauge wire which is held in place between the 2 cardstock circles and the fastener going through a circle at the top end. The linen and batting in front and tulle in the back. The felt backer is stitched on to hide the brad.

I got a ball of natural jute cording from the ReUse Ctr recently.  I cut the jute to 5 inches long and attached to a 1.75" metal ring with half hitch knots.  It took 27 pieces to fill it in nicely.

I cut 3" circles of black plaid fabric. In one I wrapped a pompom which fit in the hole of the jute ring.  The other was placed behind the jute ring. All these layers were handstitched together.

The wire stem is 8 strands of bronze 24 gauge wire to hold this heavy flower.

The same system of 2 card stock circles with the fastener was used in this flower.

A 2" black felt circle was used as the backer to hide the brad and stitching.
I used 2 colors of organza ribbon for this flower.  The loops of ribbon were hand stitched to a circle of ivory canvas fabric.
The outside ivory ones measured 4.5 inches long with 8 around the outside edge. The second ivory row the length was 4 inches long and placed inside the outer ring. The gold ribbon measured 3" long and forms the 3 row.

The wire was placed behind the canvas and stitched on at the center. The large pearl button was stitched in the center of the flower.

A 3 inch of cotton was stitched on as a backer to make it pretty.

The wire is 6 strands of 24 gauge gold wire twisted to a length of about 12" long.
The blue tulle and denim flower features a beautiful seeded button in the center.

The white fine tulle was cut to 4.5 inches round.  I layered several layers of a coarser navy tulle cut to be a bit smaller than the white tulle.

The denim circle was cut to be a bit smaller than the navy and I stitched a row of vertical long stitches all the way around in navy thread.  The edge of the circle was cut to a wavy pattern.

The navy wire stem was stitched to the back of the flower through the hole at the top. 

The seed button in navy with a shank back was stitched in the center.

These flowers headed for the Art Gallery Gift shop.

Thursday, March 26, 2026

Fabric Flower Bouquet - 04

I combined my Hot Pink Vase Wrap with my Tulle flower into a Fabric Flower Bouquet.

I cut a blue circle of fabric for the water. The glass I am using for the bouquet is a drinking glass so it has no lid. I cut a piece of chipboard bigger than the opening of the glass.  I made some slits from the outer edge to the size of the opening. I tacked the blue "water" fabric to the chip board and made a hole in the center. I pushed the wire from the flower through the hole then I twisted the wire stem onto a piece of bamboo skewer which measured just under the height of the glass.  Then I placed it inside the glass making sure the fabric was pressed between the chipboard edge and the side of the glass.  This keeps the flower in the center of the vase.

A very bright and cheery color for spring.

Fabric Flower - White Tulle with Hot Pink Accents

I made a flower to coordinate with my Hot Pink Vase Wrap.

The white tulle was cut to .75 wide and 4.5 inches long.  I put 65 of them onto a 1.75" metal ring with half hitch knots. Then I added 5 hot pink lengths of frilly yarn. That took a long time.

I punched a 2" heavy cardstock circle to create the support for the wire stem.  I stitched the gold twisted wire onto the card stock.  

I then placed a layer of batting and the hot pink cotton fabric to create the center of the flower.  I stitched these layers from the back with heavy thread over the covered ring. 

I then stitched a hot pink fabric circle on the back to cover the wire and stitching. 

Friday, February 20, 2026

2026 Slow Stitching Project - Page 7 - D1

I am following K3N Cloth Tales' slow stitch project for 2026.  This week's prompt was Drawn Thread Work.

I did not have a piece of fabric loose enough to do this technique effectively. At least it was a woven piece of fabric. I could have chosen something else but I pushed through.

One of the challenges is that the thread in one direction is quite heavy but the other way it is so fine that it was impossible to isolate them.

I pulled threads horizontally in three places.  I used some of the pulled threads to tie the thin threads on the light blue near the center of the piece. 

I did some stitching with the pulled threads but this piece was not a great experience but it is what it is.  I understand I was not alone struggling with the technique.

Saturday, February 14, 2026

2026 Slow Stitching Project - Page 6 - C2

I am following K3N Cloth Tales challenge for 2026.

My fabric is white linen backed with white cotton invisible basted together.  Measures 7"T x 8"W.

This week the prompt was Community. I created Circles to represent Cobalt blue for family, Crimson red for neighbours, yellow for On-Line Community and the small Cobalt blue Circle because I forgot them the first time around. 


I added a large Circle done in Chain stitch to represent my world which included flowers.

I added 3 borders with Cross stitch. 

I placed a running stitch along the binding edge in white thread. I am caught up before K3N publishes on Monday. 

Monday, January 26, 2026

2026 Slow Stitching Project - Page 4 - B2 Boro Stitching Visible Mending

Another page in my 2026 Stitch Book.  I am following K3N Cloth Tales slow stitch project for 2026. 

I wanted to do a Japanese Boro Stitching inspired piece.  My stitching is quite a bit all over the  place. I just had to add bit of red in the piece and a white circle for a focal element. Not traditional at all.

I did use my long Sashiko needle and some heavy cotton embroidery thread on the navy back layer which worked really well.

I added patches as I went along. I used some lighter weight white cotton embroidery thread for the red pieces with the Sashiko needle.

Some red embroidery floss at 3 strands for the light blue piece in the top right hand corner.

Some light blue embroidery floss at 3 strands on the white circle with seed stitch in the middle and white floss 2 strands and the Blanket stitch all the way around.   It looks way more like visible mending rather Boro stitching.  I enjoyed it.

I am tacking my pages together so I don't lose track of them which is the navy thread on the left hand side. 

Friday, December 12, 2025

Slow Stitching - Door Decor - Bethlehem Star


 I made a Christmas piece for my door.  It features the Bethlehem Star.   I chose a dark blue background fabric with a flannel foundation layer. Cut 6x8 inches. The star was cut with the Sizzix Star and Starburst die from white felt. It was stitched along each of the points with white thread.  The stars around were stitched with white thread as well. I tried to have a variety of sizes. 

I used some eyelet lace and other lace to create the hills around the town.  I put the building in the v shape where the hills met. I hand cut the buildings from grey felt and added yellow windows. I did highlight the building in white to help them stand out a bit more. 

Again, the backer fabric was dark blue cut to 8x10 inches. Folded to the front and folded again and top stitched to create the frame.  I added a hanger on the back of twill tape which I attached by hand.


Monday, September 29, 2025

Sewing Project - Nightgown Upgrade

I am feeling better from being quite sick with COVID.

I have been home for 9 days and just feeling able to do more than the basics of taking care of myself.

I bought this nightgown this summer but I found it just a bit too short.  When I was on a visit with my sister a while back I found some black starry organza and thought "That should do the trick".

I cut the organza to 12 inches high and the width of the fabric. I cut 2 lenghths and created a loop with two rench seams.  I then folded the loop in half so that the fold was on the bottom.  I alloted the excess fabric in pleats along the way to the point where the full loop fit along the hem of the garment.  I sewed the raw edges along the hem.

Now I had to make it pretty.  Again, in the last few weeks I found a roll of wide frilly ribbon which I thought could play a part in this project. I pinned the ribbon on top of the raw edges of the organza and that cleaned up all the edges.

Now the garment is 6 inches longer to just below the knee and I am surrounded by gold and silver stars as I head for dream land.  Works for me.

There was a manufacturers label on the garment but it was aligned vertically instead of horizontally.  This made it difficult to hang on the hook in my bedroom closet.

I added a twill tape loop on the back neckline so that it hangs more easily in the closet.

Really happy with this small sewing  project.

I have missed my sewing so much in the last year. 
Today was the 1 year anniversary of the flood at the old condo.  I have been in renovation mode for that long.

Wednesday, September 10, 2025

Card Making - Sets Continue

I switched to the "In Full Bloom" Simply Scrapping Kit for these cards.

I picked the Sage Shadow card stock from the 12x12 kit and trimmed it down to make two A2 cards with a few left over pieces.

On the left, I cut the desinger paper to 4.00x5.25 inches and then wrapped a wide piece of Baja Breeze gros grain ribbon around it and taped the ends to the back. I adhered the layer to the card front. I created an accent by punching a bee from the DSP with the .75 inch circle punch then added a 1" punched circle in Barely Banana card stock. Layered these and adhered over the ribbon.  On the right is the other designer paper in the kit. I ripped the right hand edge of the DSP layer leaving to show the white core of the paper. I added a strip of white card stock on the left and then added another circle bee accent like in the previous card.

Contiued with the same scrapping kit. 
Cut each of the designer papers to the leave a small border. The A2 card bases are Barely Banana card stock 12x12 cut to 8.5 x 11 cut in two for these cards. 

On the left, I created an accent with a strip of Sage Shadow with Barely Banana  squares and bling brads. The strip was mounted with 3D foam tape to accommodate the brad backs which are quick thick.  On the right, I made slits in the designer paper to accommodate a strip of Barely Banana card stock making sure I did  not cover the yellow elements. I taped that strip down on the back with scotch tape. I added a narrow strip of Lavendar Lace cardstock over the yellow and adhered with double sided tape. 

Each card gets a white quarter sheet insert and a white envelope.

Tuesday, September 9, 2025

Back to Card Making - Card Sets

I need a few cards for upcoming events so I spent a couple of days in the craft room.

I am working with the Stampin Up "Friends and Flowers" simply scrapping kit.

I chose Whisper White card bases in the A2 size. I chose one of the designer papers in the kit which is Tempting Turquoise with white flowers. I added some white seam binding across the width of the cards and tied in a knot in front.  The left card has a daisy accent created with my large daisy punch with a circle center all held with a tiny white brad.  The right hand card has a button accent with white thread through the holes placed in the bottom right hand corners.

This set of cards is working with the same scrapping set. I chose the striped designer paper. 

On the card on left I chose some sticker from the set to cover the raspberry stripes. I used one of the square stickers and topped it with a square of designer paper. I added a greeting in the turquoise strip - Thinking of You from the Teeny Wishes set stamped in Chocolate Chip. The right hand card highlighted the raspberry color and I chose the square sticker in that color, added a square of turquoise floral DSP, a flower sticker along with a leaf sticker. The center of the flower is another of the stickers. 

Wednesday, July 30, 2025

Slow Stitching - July 2025 - Week 5

With most of my social groups represented and an extra week in July I decided to add seed stitching to the background of this piece.

I used white floss so it only adds texture with not much visual presence to this piece.

It was a lot of work but slow stitching is always so enjoyable.

I have done this month's piece in advance because of the move with took place recently.

It adds some substance to the piece as well.

Upon reflection there a Flickr photography community that I have forgotten to include in this piece.

It has been a valuable experience to remind myself of these wonderful communities.


Wednesday, March 12, 2025

Slow Stitching 2025 - March - Week 2

K3N Cloth Tales Comfort Coverlet 2025 Slow Stitching project - March - Week 2.

I started slow stitching some texture to my 4 bands of color.

On the navy band I added Sashiko stitching with white thread.  I am happy with the consistency of my stitches.  

I really need a palm thimble to do much more of the beautiful stitching.  I have found a tutorial to my my own so I will move forward with that project and post it when I am done.

I plan different patterns on each of the colors.


Saturday, January 25, 2025

Sylvia's Simple Shots

 My plants are doing well in temporary accommodations.  They still have an east window like they did at home. 

The African Violets bloomed so it was happy.

There was a good dining room light which kept them company.

It was bitterly cold this Sunday so I stayed in and watched TV.

I had access to Youtube so I was able to watch my regular Sunday posters.


The scope of work for the kitchen did not include anything other than the front of the cupboards.  

Of course, the bottom edges were brown to match the previous color.  Once the restoration project was finished I used the leftover paint to do the those edges to match the fronts.

Really helped the look of the kitchen.


The plumbers were in on Thursday to reconnect all the water related items.  Kitchen sink, dishwasher, bathroom sink, toilet, and the laundry center.

This was the message left by the plumbers.

Would I still be able to move home when I planned?  

This experience has taught me to roll with the punches and keep moving.  

I talked to the carpenter for his opinion, then my brother in law and then headed out to buy a new faucet. I then called our building plumbing company and I was able to get the faucet installed on Friday.  Yes. 
Bright and early the plumber was there to install the faucet.

At the same time the company hired by my insurance was there to put in place the fridge, stove, the freezer and the pine cabinets on either side.  Busy time!

I thought I would get the bathroom set up first and then at 11:30 am or so I opened the vanity in the bathroom to this!  A leak!

I called the was given a site visit in the next few hours.

What to do now?


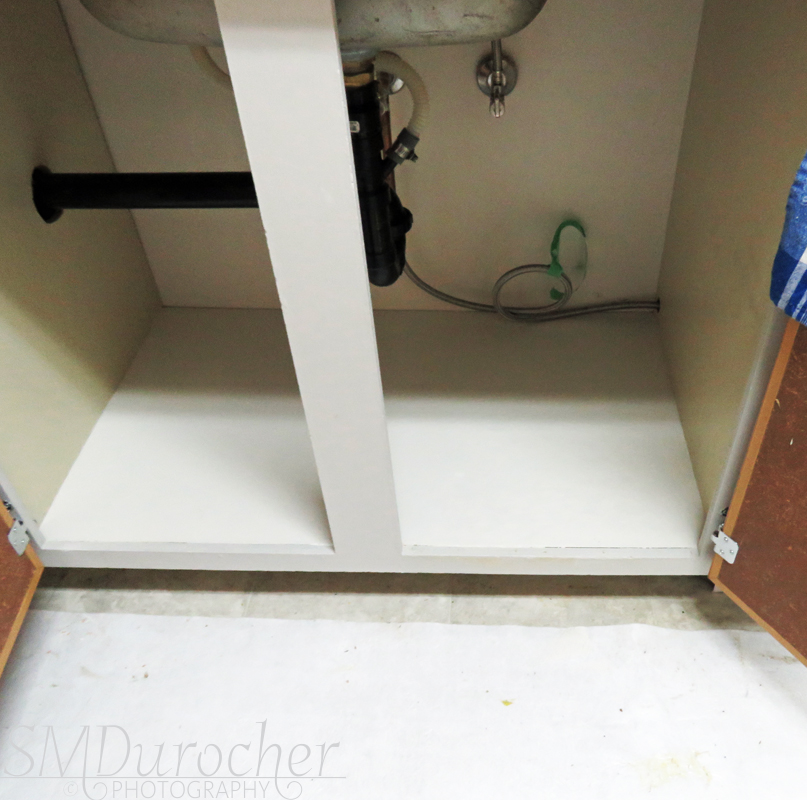
I chose to be productive and painted the bottom of the cabinet under the sink.

It is just particle board and over the years it had lost it's finish.

I used semi gloss in the same color as the walls in the place.  

It really brighten up the space to match the rest of the kitchen.

The plumber returned about 1:30pm and gave the drain just a bit of a turn.   Then tested the drain with 3 full sinks of water and all was dry!

So at 2 pm it was confirmed that I could move home.  I brought most of my stuff back home but stayed one more night because check out time was 11 am and at that time I still did not know if everything was going to be okay to move back.

I was checked out by 8 am and headed home with my overnight bag and my back pack.

I started cleaning.

I headed out for brunch with my friend which I have not seen since the fall.

We had a great visit, great food, and a relaxing time.

Wednesday, January 22, 2025

Slow Stitching 2025 - Week 4

This is week 4 of the 2025 Slow Stitching Comfort Coverlet hosted by K3N Cloth Tales.

This week I couched a circle of white tiny rick rack all the way around the outer circle of my design.

I really enjoyed the couching and I think it solidified the outside circle.

I have gone ahead with my stitching because I may be moving back home this week. Yeah!