Showing posts with label batik. Show all posts

Friday, October 3, 2025

Sewing Project - Fold Over Wallets

Another set of Fold Over Wallets.

I found a long scrap of this screen printed linen in my stash. Platinum Collection © NNXIX US Canada.

It had a wide selvage edge so I just layed the next strip over that edge and aligned the designs till I was happy and pinned it.  Then I did that again to give me a strip of fabric wider than the 5.25 inches and just over the 11 inches tall I needed. 

I sewed these pieces together with the same overcast stitch I used on my fabric collage piece with the yellow thread from the previous session.

Then, I found a piece of fabric for the lining and I used the grey stretchy fabric for the elastic.

I found this batick fabric in my scrap stash.  Gorgeous deep rich colors.  It is a heavier fabric but ironed beautifully.

I chose a coordinating brown cotton for the lining fabric.

I added a blue elastic to keep the wallet closed.

Love the vibrant yellow in this wallet.

These again, are all lined with RFID fabric to prevent the theft of your information on your credit / payment cards.

What cards can you put in these wallets: All kinds - credit cards, transit cards, library cards, loyalty cards, business cards (yours or those you need to access regularly). 

Another medium weight fabric in stripes of white, grey and blues.  Working with this weight works really well for this product.

I chose a white cotton lining fabric and a grey stretchy fabric for the closure.

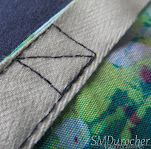
The elastic is placed at the 3.25 inches from the bottom edge of the fabric.  I reinforce the seam where it is as it will be a stress point.  It is easier to choose fabric that is works in any direction.  The one above I wanted the back to the be the front but I put my elastic in the other place and the prettiest piece is on the back.  It does allow one to see it all at least.

Tuesday, December 10, 2024

Purple Dove Stitching

I was donated some batik fabric from one of the girls at Sewing Group a couple of weeks ago.

The pieces were large enough to create an accent panel for a bag.

I tucked the 4 triangles in each corner then couched the seams to the foundation layer.

I used a white piece of linen as the background of my focal element.  I cut the bird from a coordinating fabric from my stash. I made the wing from the same purple batik. Some heavy stitching for the eye.

Not sure when it will end up as a bag.  

Thursday, April 25, 2024

Sewing Project - Wine Bottle Bag - Batik Phoenix

Another wine bag today. 

This is batik fabric from a shirt. I used one of the sleeves which featured a phoenix bird motif so I cut the fabric to ensure the birds were on the front.

I was short on the length so I added a strip of black on the bottom. I also added a twill tape accent at the top edge.

It was quilted to the flannel with the same wavy stitch as before.

The lining is beautifully soft yellow cotton fabric.

The handle is double sided with black on top and yellow lining fabric on the underside.

I had decided to place the "My Bag" tag along the top of these wine bags just left of the handle.

This is my current model of tag and stitching them with white thread is working well.

Looking forward to making a few more of these bags. I am finally able to sew them with out mistakes but designing accents is taking time out of the sewing process.


For information on "My Bag" line:


Thursday, March 14, 2024

Sewing Project - Book Sleeve - Red Batik


I started with the red piece of batik fabric.  I did not have enough to make the whole sleeve so I pulled a few fabric from my stash to complete the colors in the fabric.  I added some black, red and taupe.

I wanted most of the front to feature the batik fabric.  I added black on either side then a piece of taupe on the right hand side.  The back features 2 pieces of batik and black and taupe.  The taupe was on the opposite side so they would not be together when I sewed the bag. I added a strip of red along the top front to finish off the piece of fabric.  Piecing together the fabric took much longer than using a single piece of fabric. There were more choices to make coordinating the colors and the fabrics.

I then laid it onto my flannel padding piece and top stitched the red pieces with red thread and the black the matching thread. Now those pieces were one.

I used some red cotton poly as the liner.  Again, cut the the same size at the main fabric which is 12 inches wide by 19 inches tall.

I wanted the handles both to be black as it was sturdy fabric and a dark color. I just had one piece so I made the back handle out of all red fabric.  The handles were cut to 12 inches long with top stitching.

I used a hair elastic for the loop but I would not do it again.  The center is very hard and the elastic is very dimensional which made it harder to sew into the seam.

I chose a vintage cream button for the front of the sleeve.


For information on the "My Bag" Line


Saturday, February 24, 2024

Card - Slow Stitching - Pojagi Butterfly

I created the pojagi cloth element from thin fabrics I found at the ReUse Center.

The green butterfly was on one of them so I chose to keep it. I found some fabrics which worked with the color of the blue fabric.

All handstitched then backed with another fabric to finish off the edges.

A great organic element.  I added the small orange button for a bit of interest and dimension.

Mounted to a Stampin Up Baja Breeze card base. 

With a quarter sheet insert and a white envelope it is pressing before it hits my card box.

Monday, January 17, 2022

Art Portfolio Carry Bag

As I de-clutter I am finding pieces of art so I decided that I needed a place for those to be stored all in one place. I decided a bag to hold a mat board sandwich would work. I have a piece of mat board 32"W x 25"T.  After checking the pieces of leftover fabric stash, I had a navy piece that would work with the mat board.  When we emptied Mom and Dad's apartment a piece of batik fabric that was made by my brother in art school was returned to me so I decided that would be appropriate for this project.  I chose a couple of other colors to complement the bag.

I needed sturdy material for the handles so I chose polyester twill tape in an warm white color.  They will run the full height of the bag to distribute the weight.

I wanted a flap over the top because I did not have a zipper long enough to close the top.  By adding a piece of teal which matched the batik that worked well.

I added the piece then worked out the flap and where the bottom would be.  The bottom was just a folded edge and I thought it needed to be reinforced so I sewed a narrow strip of the navy along the bottom. I also sewed box corners to allow for the depth of my mat board sandwich.

The mat board sandwich will be 2 pieces of similar sized mat board stuck together at the bottom with duct tape. 

I will leave about an inch of tape between the 2 to allow the sandwich to grow.

It is quite big but I thought I would maximize the use of the fabric and board I had.  Maybe I am destined to do a large art piece.  The sunrise piece is quite large.


The batik piece on the front serves as a pocket.  You can see a pad of drawing paper peeking out of it in this picture.

It is quite large and should fit any type of paper pad I need should I eventually take to a class.

A button on the pocket keeps its contents in place. A twill tape loop slips over the large purple button.
All the stress point have been reinforced.

Now I needed to keep the top closed and I decided that I would use a couple of pieces of velcro 3 inches wide near the handles.  The pieces were sewn on to the front and the closing top flap.

Now, I had stitching  showing on my flap so I placed a strip of batik fabric across the flap to look pretty and cover the stitching.


Next,  I needed a visual reminder as to where the velcro was and a grabbing point to pull on the flap.  

I added 2 short loops of the same twill tape I used for the handles.

I think this bag will work well to store my art pieces and allow me to find them when I am needing one of them.

I need another piece of mat board before I can assemble my sandwich.

Happy with this project. 

Sunday, November 28, 2021

Decorate A Bag Fundraiser - 2 more

 I picked up 2 more bags when I delivered my 3 pieces of art for the Four Seasons Member show on Saturday.

You can find the details of the first in this post. 

I was gifted the batik embroidered leaf squares by a fellow quilter a couple of years ago.  I made a quilt with several of them.  Check out the details - Applique Leaves Quilt.

I added a 2" wide strip of black cotton fabric around the square.  I was thinking of making a pocket but I felt the leaf had to stand up straight so that idea was out.  I pressed the edge over and pinned it really well and appliqued it to the front of the bag.

I found on the first one it helped to have a strip at the top to stabilize the top edge.

Here I added a strip of black.  I cut 2 inch strips, sewed them together to have a strip at least 30 inches long.

Sewed it up and turned it inside out.  Once well pinned I appliqued it along the top edge of the muslin bag.

There is a tab of strip which is held down by the blue button.  This gives a place to hook something should the need arise. 

Again, the strip provides some stiffness to the top edge which is helpful with such a light bag.

Love the wonderful blue colors in the leaf.  

The black sashing really makes the leaf the focal point.

The blue button picks up and repeats the blue in the leaf.

I just love the watercolor effect of batik fabrics.  The background as well as the leaf are this type of fabric.

 
The button is simply decorative.

On this third bag, I did put a pocket.   I used leftovers from a man's shirt which I turned into an apron a couple of years ago. 

The pocket was cut from one of the sleeves.  Wonderful navy and burgundy stripes provides a bit of a different style to this one.

Tacked the upper corners well.  Added another strip along the top edge.  I wanted the stripes to go up and down so I had to combine several pieces to make all the way around the bag.  I chose 3 buttons to go on the strip. The center one is shanked to accommodate the loop from the pocket.

I am really happy with these contributions to the fundraiser.  I will deliver them to the gallery later this week.


I like that fact that the loop is long so it will accommodate a book or something a little taller than the 8" pocket.

The loop is just a piece of fabric folded the edges to the center then onto itself and I put one line of stitching down the edge.

The bags are about 13 inches square with fairly long handles.

Makes a great bag for all kinds of purposes. 

Tuesday, April 28, 2020

Sewing Project - Coin Purse V2

I created my Coin Purse V2 today.  Based on the first one I did in Sept 2019 I decided some improvements could be implemented.  You can check  Coin Purse V1. 

The changes were:
1) More durable fabric
2) Stiffer backer
3) Different closure

I lost the original pattern and there was no documentation in my Project Binder so I had to redraw the pattern.  Thank goodness for my blog where I had a photo of the measurements. 


I decided to use the dark green of my jacket for this project as it will be durable.  I chose a white satin for the inside so that I can see what coins I have. For the backer I used a 3" piece of stiff pellon as well as this thin 3" circle of plastic I found in my stash of old stencils.  The measurements include the .25 inch seam allowance.
I used Velcro instead of snaps as the closure.  That was able to be added with machine stitching which was faster.  I added a pull tab in the seam for the top which gives better leverage with Velcro closure.  

I ended up with the pieces of batik fabric on the inside of the purse because I miscalculated when putting my layers together so I just added another small piece to the front.  It will fray as I use the purse and become more organic in the process. I have made great use of the 2 small pieces of batik I got for free at the ReUse center.
The pouch part is created by hand stitching the corners together. You have to figure out how far to go based on how the folds meet in the middle. I just lucked out on mine.

Sunday, April 26, 2020

Sewing Project - Zippered Tote - EDC

I made myself a zippered multi pocket tote today.  I have been thinking about this project for several months.  It will replace this one.

I wanted to make some improvements mainly a zipper at the top to ensure the contents stay inside. I wanted more outside pockets. Having a pen handy is always nice.  I have purchased a small binder to use which would not have a space for a pen so the bag needed one.

I did watch several videos as refresher on assembling a tote and in particular for the zipper. 

The fabric I used is from a fall jacket that the zipper has been a problem.  I have replaced the jacket.  Since I have been wearing the jacket for at least 7 years and the fabric seems indestructible,  why not use it for a bag that will get a lot of use.  I used one sleeve from the jacket, the dark green outer fabric and the navy lining.  I used the inside of the green as my good side of the bag.

The exterior piece of the tote measures 9.25 T and 20.5" W.  I used grey thread since I did not have any dark green thread.  Would have been better on the strap top stitching if it had been dark.

The pocket panels I created from batik cotton in wonderful colors on one side and a cherry colored cotton on the other side.  I only had 2 small pieces of the batik so I wanted to make best use of it. Those are 4.5" W and 9.25 T same as the main piece. I top stitched just below the cherry on the top before I sewed the panels to the dark green exterior along the other edge. I placed the panels 2.25" apart based on the center of the exterior panel at 10.25 inches.  I am planning a 2" box bottom.

The straps pieces were cut 1.5 inches wide and over 35 inches long.  I used the bias seam approach from my quilts to connect 2 pieces to create my straps. I sewed the side then turned them inside out.

Finished they were .5 " wide and 33" inches long.   I wanted the straps to run the full length of the tote.

I created 2 bags with the lining one just a smidge smaller than the exterior one.  I sewed the 2 side seams, boxed the corners on both at 2" then tacked them down to the bottom with a triangle of stitching.  This was done on the green and the navy one.  I added a narrow channel of green fabric on the one side.

I placed the exterior inside the lining and sewed the top edge leaving an open space to turn them inside out.  Once right side out and the lining in the tote and put a line of decorative stitching along the top to close the opening and add a bit of stiffness to the top edge.

The straps were added once the tote was assembled because I wanted them to hold the lining in place as well as create the pockets on the outside.  I placed them 2.25" from the side seam. I started on the bottom, pinned everything very well and tacked the strap 2 inches from the top edge.  Putting on the straps was quite challenging because there not much room to maneuver.

Just being patient and pinning very closely it worked out well.  I have 6 outside pockets in this tote.  The center pockets are larger and the side ones are smaller.  Just what I wanted.  I added some batik fabric at the very top of the handles where they will get the most wear.

Then it was the zipper.  I had prepared the zipper ahead of time and wanted to insert it inside for a recessed one.  But of course, the batik fabric panels on each side were too long now that I had box corners.  Plan B.  I just sewed the panels to the outside of the tote where I had reinforced the edge with decorative stitch earlier.   I added extra reinforcement X a little higher on the strap now that I had cotton behind it which will give it more strength and it is still not too close to the zipper.

I added pull tabs at each end of the zipper to help with opening and closing it.  I left extra zipper so that the bag can be opened the full width of the bag. Makes getting things in and out easy.


The channel on the one side is designed to hold a pen.  I am still a notebook and pen person.  I carry a note book every time I got out which contains listings of the day's list as well anything I am on the hunt for.  I track size, color, and other details so I am prepared when the right thing comes along.

That is why I always carry my measuring tape. In the past it lived in a pouch but this will do nicely.

Considering the old is 3 years old and barely shows wear this one should last a long time.   I love the batik fabric and it works so well with the dark green fabric of the tote.

It took most of the day but really happy with this project.

Sunday, March 29, 2020

Sewing Project - Quilt 9 - Appliqued Leaves One

I finished another quilt.   The wonderful appliqued leaves which are the focal point of this quilt were given to me by the lady in charge of quilting group. The ginger fabric also came along for the ride that day.  The backing of the leaf squares is wonderful batik as well as the leaves. Beautiful! Thank you Linda.

Finished Size: 41.5" x 50.25" T

Front: Appliqued Batik Leaves, dark brown cotton sashing and Island Paradise by Northcott in the large panels.


Pieces:
6.25" Squares for leaves
3 inch brown sashing
Ginger panels 10 inches and 22 inches wide

Accents: Appliqued Batik Leaves
 
Backing: Tone on Tone Caramel cotton fabric which had to be pieced from two pieces.


Batting: Flannelette Sheet
  
Thread: Warm brown on front and light cream on the back for the highlight stitching and binding. White for assembly and quilting.

Binding: Ginger print fabric cut to 2 5/8 inches wide and 200 inches long.  You can check out this
Fool Proof Quilt Binding video for how I now do this.


Binding stitching: Stitch in the ditch.  I pinned very closely and had near perfect capture of the folded edge on the back. Used warm brown thread on top and bottom for it to disappear.

Quilting: I quilted the Ginger Fabric panels with 1/4 inch top stitching. The quilting was done with a warm brown thread on top and light cream on the back which works with the light backing. It was a lot of pinning and it worked out well.

Lessons Learned: 
It took a bit of time to work out the layout as the image on the right was the first layout considered.
I was just not a fan of cutting up the Ginger fabric into small pieces.  I am really happy with the layout I chose which makes the column of leaves the focal point. Thanks to my sister for the brainstorming session.

Working out how to piece the backing fabric to be large enough took a bit more time.

I did really well this time with my stitch in the ditch binding so it disappears.  I am getting better.

I was not sure the cooler dark brown would work well with the other pieces which were warm browns.  Under social distancing I was not going out to find a fabric that worked better.  There was some of that brown in the leaves.  I think it worked out.

I am super happy with the quilt.  I am glad I stretched my comfort zone and tried a different layout.

The blue leaves will show up in another quilt.

Friday, March 9, 2018

Exchange Cards - Teapots

I'm late getting my exchange cards for February out.  I've used some teapot photos I took recently.

Love this Japanese Teapot.  I added some bamboo chop sticks and a coordinating tea cup.  It was placed on a piece of batik fabric in coordinating colors.

I cut the photo to 4x4 inches.  I used  Martha Stewart corner rounder punch on the top left and bottom right corners.  I glued the photo to a deep blue card aligned top and sides. 

I added an oval greeting in blue on white.  This was adhered to the card front with 3D foam tape.


This small green teapot is wonderful as it's surface is matte and creates less reflections. Paired with a tiny white porcelain tea cup set and some spring tulips in deep yellow. 

I chose a deep yellow card.  I corner rounded the corners same as the first one. I added a Stampin Up Decorative Label punchie in black then a Modern Label punchie greeting in deep yellow as well.  It is mounted with 3D foam tape.

These are on their way to my exchange partners late but done!

Wednesday, December 6, 2017

Christmas Card Order - My Photos

I had an order for manger cards again this year.

I made a few Christmas cards in this set with photos.  This one is the Nativity which used to sit in my office when I worked.

I love the stars in the deep purple sky.  The big star above the baby.  I used gold mesh as straw on the floor.

The blue green below is a batik wall hanging.


This one is burgundy velvet curtains in the background with gold holy family in the foreground. These had color printed frames.
 I photographed this holy family at a nativity display.  I replaced the background on this one with a purple handmade paper digital from my collection. 

I then added that to the solid 3.5x5 inch photo. 

I added the words from "O Holy Night" on the right hand side.  It was adhered to a deep purple card base.

This is my small nativity which I photographed a while back.  It comes out every year.

I cut the photo to almost square.  I mounted it to  a brown Tim Holtz Cameo Frame with 3D foam tape. 

This was adhered to a tan card.