Showing posts with label scallop oval. Show all posts

Tuesday, November 6, 2018

Thank You Cards - Donation

This is a 4" square of woodgrain designer paper which was ripped into 2 pieces.  The pieces were adhered off set top and bottom on the front of a tan card.

I adhered a greeting of an oval color printed punchie adhered to a Soft Suede scalloped oval.  It was adhered with 3D foam tape to add some dimension to the card.

I am dropping off another set of Thank You cards as I teach my Christmas Card class at Compassion House.


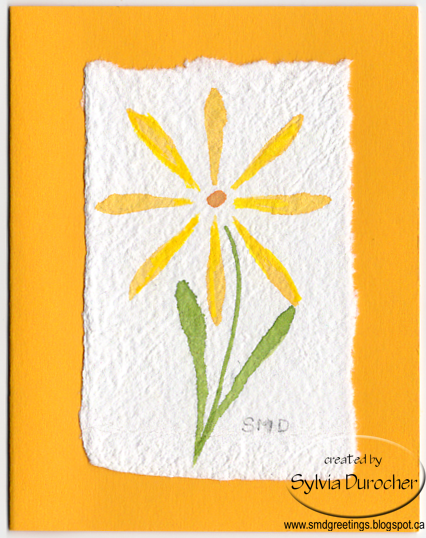
I wrote a note to the ED in this hand painted daisy card.  I used to make these years ago and I love that it is my own work.

I need to get back to creating my own art which I do mostly with photography.  I do my own decorative paper and a bit of painting.

Monday, October 9, 2017

Card Exchange

I created these cards with supplies from a Card Club kits.

I created the background layer with the 4 quadrant graphic, the circle and star element and the greeting with black and Blushing Bride.  I printed it on a white card which leaves a small border.  It was adhered to the front of a black card.

I adhered the lily circle elements in the three open spaces on the grid.  I added black fiber in the center of the card below the grid filling the space between the graphic and the greeting.


I glued the 4 inch square offset from the center onto the landscape blue card. I punched holes on either side into which I threaded a salmon colored satin ribbon and made a bow on the right hand side.

I added the greeting onto blue scallop oval cut with Spellbinder Nestabilities.  The oval element was then adhered to the card front with 3D foam tape.

These are off to my exchange card partners.


Friday, September 1, 2017

Christmas Card Challenge - Scallop Oval / Lavender

This is my card for my blog Christmas Card Challenge.  The theme for September is Scallop Oval and Lavender.   I chose a white card then layered a piece lavender designer paper cut to leave a small border.  I then cut a scallop oval from lavender card stock with Spellbinder Nestabilities die.  I placed a iridescent fabric snowflake on every other scallop with a light purple tiny brad.  I placed a large white snowflake created with a Martha Stewart snowflake punch, the layered a medium snowflake again cut with a Martha Stewart punch then an iridescent fabric snowflake all held in place with a light purple tiny brad.  I chose not to include a sentiment as the snowflake says winter very nicely.  Sometimes I have folks on my Christmas Card list which do not celebrate so a winter card works in that situation.

Have you started your Christmas Card Making?  Get started today!

Thursday, October 20, 2016

Card Fronts Relayered #3

This is another church card.  The frame with the clear centre is one from Photo Elements.  I placed the music sheet with O Little Town of Bethlehem behind it and created a graphic I could use in my layout software.
I added the greeting in red at the top of the card front and a script font.  The leaves for the red flower were added too.
The card front was color printed.
The red silk flower was added to the bottom right hand corner with a gold sequin and a gold tiny brad.
This card front was trimmed and layered onto a red new card base.


This is a card I designed from an advent class several years ago.

I trimmed the card front and layered it onto a new navy blue card base which matched the navy scallop oval in the centre of the card.


Another church card.
I designed the large greeting with fonts.
I added the faded green oval background and printed it on white card stock.
The flower is made of 2 confetti daisies held in place with a white tiny brad.

This card front was trimmed and layered onto a new red card base.  A new insert was added and it's ready to give again.


Not all the cards donated come to me in good shape. Sometimes the card back has been punched with holes because the recipient put it on their bulletin board, so the front is salvaged and re-layered.  Sometime only the card front arrives, again it likely can be re-layered.  Sometimes the card front was not assembled very well, the elements may not be glued on straight, maybe there is glue residue where it should not be, or some other aspect that makes the card front not able to be re-used.  It happens.  I give a second life to as many as I can.

As I reviews cards and kits I have made years ago I am amazed at how many I have done.  Christmas is my favorite time of year and I don't need a big excuse to participate in it at any level.  Cards have been a natural go to for me for a long time. Sending paper cards is in decline.  I'm working on digital Christmas cards.  I made some last year and have to design new ones for this year.

Friday, March 4, 2016

Decorative Paper - Card Set 2

This decorative paper was done with liquid acrylic paint applied to a piece of acrylic board. I then picked it up with a 4x6 photo paper.  This features a warm yellow with deep blue and where they merged a deep green.  I trimmed the decorative paper to leave a small border.  I adhered it to the front of a dark green card.  The greeting was color printed in navy on vellum and clear embossed.  It was trimmed and placed in the bottom third of the card and held in place with tiny navy brads.  I added green sequins onto the brads then added a few more held in place with Bling Zots.


This card features letterpress decorative paper in pink and navy.  I added a piece of navy crisp ribbon across the bottom third of the card.  I added a white and blue silk flowers and a white sequin all held in place with a tiny navy brad.  This accent was placed on the right hand side and is offset with a scallop oval greeting in the top left corner.

This paper was created with watercolor onto heavy bond paper.  It features teal and purple colors in a very diluted colors.  I cut the paper to leave a small border. I ripped the top and bottom edges of the vellum greeting.  I placed the heart to the left then put adhesive under it and added it to the card front. I cut the wedding couple with the Cricut and the Stretch Your Imagination cartridge.  It was cut at 4 inches with the silhouette option.  I cut it from brushed white card stock.  I used quick dry adhesive applied with a very narrow tip to get the glue only where I wanted. it.

Tuesday, August 4, 2015

Silver Sparkle Joy

I started with a piece of very sparkly decorative paper.  I punched stars in it with a Creative Memories star border punch.  I punched on each edge.  This decorative paper has so many colors depending on the reflection of the light.  I chose a light aqua card which shows up the stars very nicely.  I then needed a central element.  I checked my collection of stamps and chose this Posh Impressions Joy stamp that I have owned for years!  I stamped it in black on vellum then embossed it with Silver Sparkle embossing powder.  I cut it down with Spellbinder Smooth Oval Nestabilities thin dies. 
I then cut a piece of silver foil paper with the coordinating Scalloped Oval by Spellbinder.  I mounted the vellum to the silver oval and then adhered this layer to the center of the card front.
I love the sparkle of this decorative paper and the silver sparkle coordinates really well with it.

I'm submitting this card to following challenge(s):
Crafty Hazelnuts Christmas Card Challenge - Anything Goes

Sunday, July 26, 2015

Joy to the World Challenge

I started with the Tim Holtz JOY Mover & Shaper cut from green card stock.  I then cut the word out of the piece of card stock with one of the Spellbinder Smooth Oval Nestabilities.  I cut a scalloped oval with the corresponding SB Nestabilities from gold card stock.  These were adhered together.  I cut the TH Ornamenal die from ivory music decorative paper.  I chose a deep red card onto which I stamped some washi tape from the Stampin Up Tape It stamp set in black ink.  I colored printed the "to the World" greeting in black and I applied a bit of TH Antique Linen Distress Stain to just remove the whiteness of the card stock. I flagged the end of the banner with the SU Chevron punch.   I then layered it onto the same green card stock as the Joy die cut leaving a tiny border. I adhered the Ornamental die cut to the card front then adhered the banner in the bottom third of the card.  I then adhered the Joy scalloped oval with 3D foam tape.

Submitting this card to the following challenges:
Sparkles Christmas Card Challenge - Anything Goes
Holly Jolly Christmas Card Challenge - Inspired by a Christmas Carol

Wednesday, March 19, 2014

R2G Card Kit - Scallop Oval - Joy to the World

Another kit for my upcoming class. These are leftover from this class.

I chose a oval greeting from Graphics Fairy which was all ready red. There were several color choices.  I printed those on white card stock and cut them out with one of the Spell Binder smooth oval nestabilities.  I glued that to the large scallop oval.  I glued the snowflake designer paper background to the moss green card.  I added 3D foam tape behind the scallop oval and mounted it to the card front.  Just a nice quick easy card.

Wednesday, October 2, 2013

R2G Card Kit - Gentle Bethlehem

Another Ready 2 Got card kit.
I started with the Bethlehem drawing which I created.  I added an oval background which was runs from dark to light. I color printed the oval Bethlehem then cut it with Spellbinder smooth oval nestabilities, largest of the small set.  I selected the card stock based on the color of the background. I cut the scalloped oval from the same card stock as the card with the coordinating nestabilities. I punched the Stampin Up Modern Label from same color. I color printed the greeting in a matching color and punched it with the SU Word Window. I embossed the background with the HA Dots folder from the Christmas Words and Dots embossing folders set.  It's trimmed to leave a small border and glued to the card front. Both the oval and the greeting is mounted to the background with 3D Foam tape.

Sunday, September 1, 2013

Card - Flourish Birthday

I made this card for my niece's birthday.   I'm going to see her today so I thought I would get a card ready.  I started with a warm brown card and I added a layer of DSP from a scrap and I don't have the credit information.  I tied a piece of caramel seam binding to the this piece, taped the ribbon on the back to keep it in place then adhered the layer to the card front.  I cut a piece of the same paper as the card with the Stampin Up Deco Label framelit.  I added a Spellbinder Scallop Oval (large) in the same paper as the background layer.  I stamped a butterfly on a piece of ivory card stock and cut it with the corresponding SB Smooth Oval.  This layer was all assembled then mounted to the card front with 3D foam tape. 

Sunday, August 18, 2013

Card - 90th Birthday

I made this card for a friend who is turning 90 soon and we are celebrating today!
I started with an ivory felt textured card stock where the 8.5x11 is folded in half.  I found a piece of designer paper by Basic Grey - Wisteria - white dynasty which matched the color very well.  I trimmed it leaving a leave a small border.  I found the rose spray digital on Graphics Fairy and I sized it to fit inside the Sizzix Scallop Oval Frame die.  I used this technique to ensure it was properly centered.  I rubbed the edge of the black out oval with a coordinating blue ink pad.  I reassembled them and glued them to the card front.  I cut the Cheery Lynn Ribbon Eyelet Border from the same paper as the card.  I placed a slit in the fold of the card and ran the blue seam binding through the inside of the card and then pulled it through it from the right and left and knotted it off center.  I placed a bit of double sided tape under the ribbon border and some tape on the inside of the card of the ribbon to help keep it in place.  I color printed the greeting and cut it out with one of the Stampin Up Apothecary Framelits.  A bit of adhesive to tack it down and 2 blue brads on either end to hold it to the card front. 

Sunday, July 7, 2013

Upcycled - Peach Roses

I created a set of 4 cards by upcycling a large card.  I die cut the flowers with a Spellbinder smooth oval die and then cut a scallop oval to match from the coordinating green card stock.  I selected some peach card stock and embossed it with the Big Shot and the Cuttlebug Swiss Dots folder.  I added a piece of white seam binding across the centre and taped both ends to the back, leaving a bit of slack to allow me to tie the short piece on with a knot.  I mounted the oval rose accent with 3D foam tape.

Tuesday, June 18, 2013

Card - Farewell - Blue Floral

Another card for the farewells at work.  I started with a large half sheet leaf green card.  I added the designer paper, which I ripped at about 1/3 down from the top.  I added a strip of blue card stock down the center at 8.25" tall onto which I added a length of bright green grosgrain ribbon. The ends of the ribbon were taped to the back of the DP.  This layer was then adhered to the card front.  I cut a scallop oval in an off white card stock with Spellbinder Nestabilities, then layered a smooth oval of the same blue as the strip, then a punched some sprigs of green leaves from some green card stock with the Martha Stewart punch.  I added 3 off white silk hydrangea flowers to the center held in place with a large blue brad.

Sunday, October 14, 2012

Invites - 60 Wed Anniversary

I was asked by a couple I know to design and make the invitations for their 60th Wedding Anniversary.  I made 4 samples and this is the one they chose. Here's a link to the others.
I started with a soft lavender card.  I embossed the white layer with the Cuttlebug Rebecca folder.  I then trimmed it all around to leave just a small border of card color.  I cut the oval accent with my  Spellbinder nestabilities dies.  The oval accent works really well in the centre of the embossed layer. The scalloped oval for the lavendar and smooth oval for the white layer.  I color printed the central oval and then cut it.  These were glued together and then mounted in the center of the embossing with 3D foam tape. 
60 years of marriage is a great testament their love, commitment and faith.  Congratulations!

Thursday, September 13, 2012

Card - Burgundy & Navy - New Job

I made this card for a friend who is moving to a new job!  It's exciting for her and sad for me because I will see her less often.
I started with a burgundy card which is top folded.  I embossed a piece of white card stock with SU Vintage Wallpaper embossing folder then trimmed it to leave a border.  I wrapped a piece of navy seam binding across and taped the ends to the back and adhered it to the card front.  I designed the greeting with a butterfly to signify the possibilities which are coming for her.  I color printed the sentiment on white and cut it with one of the SB Smooth Oval Nestabilities dies.  I cut a piece of the same burgundy card stock with the matching SB Scallop Oval die.  I layered these and then mounted the element to the card front over the seam binding with 3D foam tape.

Saturday, April 14, 2012

All Occasion Stack Class - Floral Toile Ovals

I have my class today making all occasion cards.  For this card I started with designer paper in the form of mat pad by K&C Company.  I has striped and floral toile mat in coordinating colors.  Here I have selected an olive color and matched it with Old Olive card stock.  I cut the striped paper to leave a small border all around. I added a piece of ivory gross grain ribbon placed about 2/3 down the card.  I put a slit in the card fold and pulled the ribbon end through and taped it down on the card inside.  I cut the scalloped oval in the solid card stock with SB nestabilities dies.  I selected the matching smooth oval nestabilities die to cut the floral toile paper.  These were layered together then mounted to the card front with 3D foam tape.  

Saturday, March 17, 2012

Baby Boy Card 2

I created a couple more baby boy cards with the leftovers from the previous cards I made.  For these ones I cut the blue giraffe color printed on the vellum with my Creative Memories oval cutter.  I then but a bit of tape behind his nose to keep him in place while I trimmed around with scallop decorative scissors.  I found coordinating blue card stock which I trimmed leaving a small border around on the white card. This was adhered to the white card front.  I chose a white flower and brad to add an accent on the right top corner.  This also helps to keep the vellum where it belongs.  A couple more cards for my stash.

Tuesday, March 6, 2012

Card - Taupe and Blue

I started again with a taupe card. I found some designer paper to coordinate.  This paper had a bit of silver/blue in to I cut an oval with my Creative Memories oval cutter, embossed it with the Cuttlebug Stylized Flowers folder. I then glued it to a blue grey card stock and cut around it with scallop scissors.  I brushed the flowers and couple other areas with Bashful Blue ink to highlight them.  I punched a slot at the top and bottom to run organza ribbon through the back and over the card front.  I added a bow at the top of the oval.

Friday, March 2, 2012

Card - Birthday Oval

I made this card for a friend with a birthday today.
From my stash of designer paper I found several strips of paper in similar color scheme.  I cut them down and glued the to the card front.  I selected an off white paper for the scallop oval, then Always Artichoke DP for the oval then the same off white card stock for the greeting.  The ovals were cut with Nestabilities thin dies. I stamped the greeting in the centre of the small oval with Always Artichoke ink.  The sentiment accent was then assembled.  I chose Spring Moss and vanilla gross grain ribbon to create the horizontal element across the card.  The oval accent was then layered over the ribbon.  The "i" in birthday did not have a dot so I colored a tiny white brad with AA ink to have it fit in.  Worked well!

Thursday, January 19, 2012

Cards - Wedding

I started with a soft gray textured card and I added this wonderful damask handmade paper. I found some ivory shimmery organza ribbon and added it  across the card.  I added POW glitter paper hearts to both cards. To the left I added another smaller bit of ribbon and tied it to the other piece which makes a bow. On the right I mounted the heart to a scallop oval cut with SB nestabilities. I decided to make these wedding cards.  I will place these in my ready to go box!