Showing posts with label So Saffron. Show all posts

Tuesday, September 9, 2025

Card Making - Sets Continue

I switched the designer paper to Well Worn which gives me masculine cards for variety.

These a DSP Splits which means I cut the designer paper to 4.00 x 5.25 inches then cut again at 3.5 inches.  

This designer paper is double sided so I can just turn the small piece over and tape it on the back scotch tape and I have the same size layer to work with. on the left I add a piece of Crumb Cake card stock and a strip of Not Quite Navy.  I used my square punch to punchout some square to repeat the pattern on the left hand side of the card. I then glued a few of the small punchies on the right hand side with Bling Zots. 

Another set of cards with theWell Worn Designer Paper Set.

I cut the designer paper to leave a small border on the Crumb Cake card base.  On th left I created an accent with the Tim Holtz Bracket die in Cajun Craze, then a strip of Crumb Cake then a strip of Not Quite Navy.  I adhered these the added 3 holes. I strung some shiny cord through them and knotted it at the center front. I added a star brad through the center hole.  This accent was then adhered to the card front. On the right, I created an accent with a piece of So Saffron card stock riipped on the right. Added a strip of Cajun Craze and a narrow strip of Not Quite Navy.  I then poked holes on either side of the navy and using a large needle stitched the criss cross pattern over it with yellow yarn. 

Again, A2 size with white quarter sheet inserts and white envelopes.

Friday, August 15, 2025

Thank You Cards - Finally Set 2

The card base is SU Taken with Teal in the A2 size in portrait orientation.

Trimmed the rough edges off this piece and ripped the bottom edge.

I saw flowers in the salt marks in this piece so I took my fine black marker and drew them in.

Added stems and leaves reaching to the bottom of the paper with additional grassy strokes.


It pays to save bits of ephemera.  The green yarn came in really handy.

The A2 card base is SU Pumpkin Pie with a watecolor panel marked with saran wrap on wet color and left to dry.

I punched 4 holes with the 1/8 inch punch. Two on the right and 2 on the left.  I taped the end of the green yarn found in the stash and was able string it through the holes and knot both ends.

I added a SU Artisan Label punchie colored with pencils and held on the yarn with a orange clip.


With the yarn still on my table I used in this card.

I trimmed the waterolor to crisp straight edges.

I layed a strip of double sided tape to the back of the watercolor piece.  Layed my pieces of green yarn then added another piece of ds tape and adhered it to the SU Dusty Durango card base.

Once adhered, I picked apart the strands of the yarn to create this wavy row of goodness.

I added an 2 inch oval punchie greeting below the yarn frill.

The A2 card base is SU Island Indigo.

I added a piece of SU ribbon in So Saffron and flagged the bottom end.  Trimmed the top edge to the top of the card.

I mounted the piece of rough edge watercolor panel over the ribbon aligned along the top.

Each card has a white quarter sheet insert with a white envelope.

Tuesday, April 29, 2025

Cards - Charity - Butterflies

 More cards for the IWin Charity.

I chose the Crate Paper Designer paper which made the cut when I de-cluttered a while back because it had Stampin Up colors. Pear Pizzaz, So Saffron and Brave Burgundy.

For this card I have an A2 card base in Pear Pizzaz with a layer of DSP and a coordinating strip placed vertically. 

The greeting is a SU Decorative greeting punchie which has been warmed with the Laurentian pencil crayon - Arizona Topaz 80. Great match for So Saffron. Also I punched a green one and cut it in half and glued the halves offset at the back of the greeting.

The Martha Stewart butterfly punchie with black marker additions was adhered with a Bling Zot. White quarter sheet insert.

The other Pear Pizzaz card with a layer of DSP and a horizontal strip across the top third. 

A So Saffron Martha Stewart Butterfly punchie with black marker enhancements adhered with Bling Zot.

The greeting is a SU Small Oval punchie with a similar punchie cut in half and attached offset at the back.  The accent was then adhered with 3D foam tape.

A white blank quarter sheet insert added to the inside.
This set has So Saffron card bases in the A2 size.

This is a portrait (tall) orientation with a layer of DSP on the front then a strip of Bravo Burgundy mounted horizontally across the top third.

A yellow Martha Stewart butterfly with black marker embellishments held in place with a Bling Zot.

The greeting is a SU Modern Label punchie with a Word Window punchie embellished with the pencil crayon to warm up the white card stock.

A white quarter sheet insert added.


A So Saffron card base in the A2 size set in the wide or landscape orientation.

A strip of Pear Pizzaz card stock mounted vertically on the left hand side. 

The yellow Martha Stewart Butterfly with it's black marker embellishments attached with a Bling Zot.

The Modern Label punchie greeting this time in green with a similarly enhanced Word Window greeting with the Arizona Topaz pencil crayon.

A white quarter sheet insert.


These cards feature a Bravo Burgundy A2 card base with a layer of the designer paper adhered to the front.

A narrow strip of the deep red card stock mounted on the left hand side with a circle of So Saffron with the MS Butterfly punchie mounted onto it.  Black marker used to add the body and antennae.

The greeting is the Stampin Up Modern Label punchie topped with a Word Window greeting warmed up with a pencil crayon.  It adhered to card front with 3D foam tape.

A white quarter sheet insert.


This card is the same Bravo Burgundy card base with the designer card stock layer.

A narrow strip mounted vertically with a 1.75 inch circle punchie and a butterfly stick I found at the ReUse center the other day. Very blingy.

A Modern Label punchie with a Word Window greeting warmed up with a yellow pencil crayon which matched perfectly.

A white quarter sheet insert.

Hopefully my car will be ready to come home today after it's over night compression test.

Thursday, April 3, 2025

Cards - A2 - Serendipity Paper

I created a 8.5 x 11 sheet of serendipity paper when I created cards with the origami paper this week.   

I cut it into 4 pieces to make the best use of it.  That means A2 cards.

I started with So Saffron card base to measure 4.25 x 5.5 folded.

I adhered my collage paper to the front leaving a small border. 

I cut a strip of the same card stock and added a length of Early Espresso grosgrain ribbon.

I added Spellbinder charm die cut hung with ivory crochet cotton.

A white quarter sheet insert and an ivory envelope.

For this card I chose the same yellow card base and adhered the piece of collage paper to the front leaving a small border.

I added a length of Early Espresso card stock across the landscape (wide) card in the top half

I cut a Sizzix Primitive Star with the yellow medium die. It was mounted onto the brown strip with 3D foam tape.

A white quarter sheet insert and ivory envelope.

I was lucky to get 50 of these envelopes at the thrift store this week for $2.00.


Another wide card.

The card base is Early Espresso and the collage paper was trimmed to leave a small border.

I added a card stock strip of brown and topped with a narrower strip of So Saffron card stock.

I punched a pine tree from dark brown card stock and adhered it with Scotch Quick Dry adhesive on the left hand side.

A white quarter sheet insert and an ivory envelope to complete the card.


The fourth card in this series made with serendipity paper.  I used origami papers 3x3 collaged to card stock.  

I chose a ginger colored card stock and adhered the trimmed collage paper to the front.

I added a strip of the same card stock to the front once I had added a length of dark brown grosgrain ribbon across it.

I hung a square charm cut with Spellbinder die set.

I added a white insert and an ivory envelope.

Not my normal color scheme but they worked out well.

Thursday, August 29, 2024

Cards - Self Closing Card - No need for envelopes

I'm working on a new card design. 

It is a self closing card where the card closes onto itself and seals for mailing all in one go.

For this one I used a 1/2 sheet of 12x12 designer paper and cut it in half.  I chose to put the plain side out and the patterned inside.  I added a TH Cameo Frame die in red to coordinate then adhered one of my 4x4 photos from past calendars in the center trimmed to fit.  Then came the bling of gold star sequins on the top and bottom held in place with red tiny brads.

An ivory insert on the right hand side with a stamped sentiment.  These cards provide a good amount of room to include a few lines of greetings to the recipient. 

Once it is ready to go the card is closed and the double sided tape on the small flap seals the card.  Turn it over and address it, add a stamp and a return address and you are ready to mail.

I will cello them so the card front and sentiment are visible.  This allows the one to choose the one that fits the occasion the best.

Each will be an original and unique design.


I used the TH Caged Bird die for this card.

My background is a piece of marbled paper. I chose my colors based on it, so grey for the cage and branch and dusty purple for the bird. I then watercolored some handmade paper flowers to coordinate and place them at the top and bottom of the cage. They are held in place with tiny lavender brads. 

I added a strip of the card base card stock along the left hand side of the layout. Taped the ends to the back.  Adhere the element to the card with double sided tape. 

A white insert on the right hand side.

I thought I would try a landscape orientation and watercolor.  

The wide does not work so well because you can't see the art and the sentiment at the same time.  

A quick watercolor which worked out pretty well.

I spent most of the day making these cards then trying to decide if they are a viable product for the Christmas Store.

I go through this every year and I will just do what I like and not worry about who else might like it.

I need quite a few more Christmas cards so that works.

I love Bethlehem cards and I have not included a palm tree before.

The stamp is from a Stampin Up set in royal blue ink.

Thursday, June 13, 2024

Cards - All Occasion - Gold Decorative Paper

 I found a sheet of this decorative paper at the ReUse Center a while back. I have used it as a background for photography but now it had to be used.

I recognized that almost any card color would work with it so then it was to decide embellishments.  

I need cards for my card box.

I chose SU Soft Sky A2 card base. I ripped a piece of the paper and adhered it to card front with ds tape and some glue stick. 

I cut a label with one of the labels from the Chalk Talk die set which included the small oval hole die.

I chose a gold ribbon to go across the bottom so I had to use the SU Slot punch to make a hole in the fold to allow the ribbon to go through.  Once pulled across I taped the ends to the inside of the card.

I cut a star from the gold decorative paper and adhered it to the label.  The insert had to be adjusted a bit to allow for the slot in the fold.  I used the slot punch again.  A half sheet insert and a white envelope.

For this card I chose a red A2 card base and again ripped a piece of the gold decorative paper to fit the card front.  I use double sided tape and glue stick to ensure adhesion.

I wrapped a piece of gold grosgrain ribbon across the front and taped the ends to the inside.  

I cut a heart with one of Sizzix Hearts thinlit die set.  I embossed it with the D'vine Swirl folder.  I mounted it over the paper and ribbon with 3D foam tape.

A half sheet insert and white envelope and an another card in the box.


This card has a SU Crushed Curry textured card stock base in the A2 size. 

I ripped a piece of the decorative paper for the card front and used DS tape and glue stick to stick it to the front.

I added a length of So Saffron rick rack along the left side and taped the ends to the inside.

I chose a SU Really Rust and So Saffron quarter sheet pieces of card stock and ran them through the Big Shot with the Tim Holtz Tattered Flowers die.   Then I choose the alternating sized flowers and layered them.  I did embossed the 3rd one with the Swiss Dots folder. I added a gold round sequin on to the gold mini brad which holds all the layers to the card front.   I added a half sheet insert and white envelope.

I chose a SU So Saffron A2 card base for this card. 

I ripped a piece of the gold decorative paper and adhered to the card front. 

I ran a length of So Saffron rick rack along the top edge of the card and taped the ends to the inside. 

I cut a star from SU Daffodil Delight card stock with the SU Star thinlit dies and glued a gold star sequin onto it with a Bling Zot.  Then this accent was adhered tot he card front with 3D foam tape.

A half sheet insert and white envelope and I had a set of 4 cards.

Tuesday, June 11, 2024

Card - HB - Blue Birdie

A blue bird card for a friend celebrating a birthday this week.

I chose a SU So Saffron A2 card base.  Then a piece of blue watercolor designer paper but to leave a narrow border.

I added a length of rick rack along the left hand side and taped the ends to the back.  This was then adhered to the card front with ds tape.

I punched the bird with the SU Bird Builder punch. Punched the branch again in green.

The bird was assembled and then adhered to the card front with 3D tape. 

Quarter sheet insert and it is on its way! 

Thursday, July 20, 2023

Set of Cards

I made a set of cards with one single sheet of designer paper.  The design is by graphic45 - Couture Collection - Gorgeous - I agree it is a beautiful floral paper. Rich colors and a dramatic black background.  This paper measures 12x12 inches. Cutting 4 inch strips I ended up with 6 pieces for A2 cards. With the direction of the design all the cards were created in the portrait orientation.

Next I selected card bases for these cards.  With the colors in the paper there was lots to choose from.  Finally, I chose Old Olive, Lost Lagoon, and Dusty Durango.

For card 1 I cut the layer down from the top and flipped the piece to show off the blue striped backside. I then added a strip of orange card stock across the split.

I added a Decorative Label greeting mounted with 3D foam tape. A white quarter sheet insert finished the card.

For card 2 I did the same layout but put the stripes on the bottom this time.  I laid a length of So Saffron ribbon across the split.

The base this time is Lost Lagoon.

I layered silk flowers in warm tones and a small gold sequin onto a tiny black brad to create the floral accent which I mounted on the bottom left hand side.  The brad was pushed through the designer paper keeping all layers together.

This layer was then adhered to the card front with double sided tape.

A white quarter sheet insert was added.
This is card 3.

Here I split the layer top to bottom instead of side to side. Once split I flipped the small piece and taped back the designer paper so I could handle it as a full piece.

I added a length of Apricot Appeal grosgrain ribbon over the split and taped the ends to the back.

I added a Dusty Durango butterfly accent on the bottom right side.  The butterfly was cut with the Sizzix Winged Beauties thin dies.  I used my steel plate to ensure all the tiny spaces were well cut. I wrapped black thread around the body of the butterfly and left the ends to be the antennae.  Adhered with double sided tape.

Quarter sheet insert completed the card.


Card 4 has an Old Olive card base.  

The designer paper was left at 4.00 x 5.25 inches.  

I wrapped a length of Baja Breeze ribbon across the middle and taped the ends to the back.  

I added a Artisan Label greeting with black letters which was adhered with 3 D foam tape over top of the ribbon on the right hand side.

A quarter sheet white insert completed the card.


Card 5 is similar to card three.

This time the ribbon is So Saffron which is wrapped over the designer paper top to the bottom with the ends taped to the back of the layer.

I added some Candy Dots to the left of the ribbon in pink tones to coordinate with the large flower near the bottom of the card.

A white quarter sheet insert on the inside.


Card 6 repeats the lay out of the DSP split with the striped paper on the bottom.  

A length of wide Tango Tangerine ribbon across the split with ends taped to the back.

I found 2 tiny turquoise blue buttons in my stash.  They are adhered to the ribbon with Bling Zots.

A white insert on the inside.

This makes a nice set of card with enough variety to be interesting.  Versatile in that some have greetings and others are left blank to used for any occasion.

Happy with this set which will given as a gift.

Wednesday, June 16, 2021

Special Birthday Card

My first card made with Stampin Up supplies since the major clear out of card making supplies in my craft space.

The card stock is Certainly Celery topped with a piece of Porcelain Prints DSP. 

I added twill ribbon in the same shade.  I added a short piece of Not Quite Navy tied in a knot.
I punched a couple of Five Petals punchies in those 2 colors. I added a small So Saffron flower in the center all held in place with a mini brad.  I adhered the flower to card front with 3D foam tape.  

The greeting is a color printed circle punchie with a NQN backer.

Tuesday, September 18, 2018

Card Making - 3 Styles

When designing cards for this class at Compassion House I chose versatile designs where different paper, card stock and accent would create a different card.

Style 1 - Ripped 4 inch - The designer paper is cut to 4 inches square.  It is ripped and the pieces are positioned to the edges leaving the yellow card showing in between.  I chose a butterfly accent color printed and punched with the Stampin Up Decorative Label.  The colors on this one is Old Olive and So Saffron.  This label is adhere with 3D foam tape.


 Style 2 - DSP Split - I chose warm colored designer for fall cards.  The 4 inch x 5.25 inch piece is cut at 3.5 inches then the 2 pieces are taped back together.

I added a piece of ivory grosgrain ribbon across the join and tape the ends to the back of the layer.  I created an accent of silk flowers starting with a tiny yellow handmade paper one on the gold brad, then the orange one, another yellow, a deep rust one then the final large yellow one.  A hole was made through the designer paper layer then the prongs spread apart on the back.

The layer was then adhered to the front of a deep brown card.

The greeting was printed on tan card stock and it was adhered to the card front with 3D foam tape.  The card works without a greeting as well.


Style 3 -  Square - The designer paper chosen is Stampin Up Autumn Spice.  The card color selected is More Mustard. The designer paper was cut to 4 inches square.  The edges were rubbed with an Early Espresso ink pad.

The buttons are from Stampin Up and matches the card color. I tied a length of Early Espresso thread, knotted and trimmed.

The greeting was color printed in Cajun Craze and clear embossed.  They were cut apart to 1" tall.  The end was flagged with scissors.  It held in place with Zots. Once placed the button was adhered with a large Zot to the left of the words of the greeting.

Sunday, January 28, 2018

Card Gift Set - Bridal Shower

I made a set of cards for the bride to be as the shower is this week. They will make great thank you cards.

I chose a Stampin Up simply scrappin' kit named Love Sparkles which had the right theme for this set.  The colors in the set are Whisper White, So Saffron, Regal Rose and Chocolate Chip.  The kit had the card stock, the designer paper and the embellishments so making 16 cards took about 1.5 hours. Excellent!

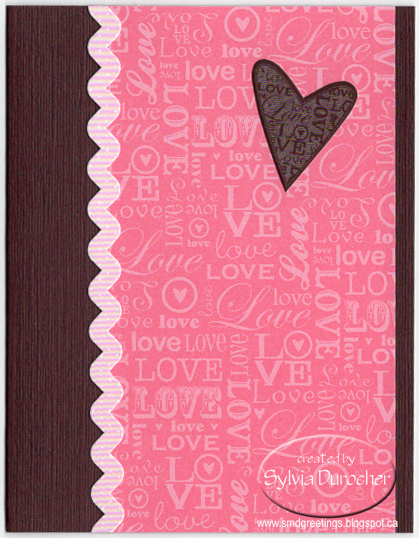
I made 4 cards in each color.  I chose this Regal Rose Love Words designer paper and cut it to 5.5 x 3 inches.  I adhered it to the right side of the card leaving a small border of card stock color.  I added a strip embellishment which is adhesive and well as a Pretty in Pink heart die cut.

 I followed a sketch from a card challenge at Fab Friday.


Fab Friday mostly features Stampin Up products offers regular card challenges.

This is the sketch FabFri129 for this week. 


This kit features textured card stock, adhesive die cut embellishments, and various adhesive strips. With most of the kit used in these cards it means a bit more stuff out the door.

On the Chocolate Chip one I used the same Regal Rose Love Words designer paper and added a Pretty in Pink zigzag strip with a words heart.

On the Regal Rose one again the same Love Words DSP with a pretty polka dot border and circle heart die cut.

On the So Saffron cards I chose the striped designer paper with a narrow border in Chocolate Chip with a Regal Rose heart die cut.

Sunday, November 20, 2016

Sympathy - Vintage Floral Frame

I made cards for the family who lost a daughter, sister, wife and mother this week.

I chose a vintage window frame with floral branches from the Old Design Shop.

I filled the frame with the sentiment.  I colored the frame with several Stampin Up colors. I chose Certainly Celery, Perfect Plum, Bashful Blue, and So Saffron.

Once printed I fussy cut the frame then mounted it to the front of a card matching the color in the frame with 3D foam tape.

Monday, September 26, 2016

Card Club - Sept - Square Greeting

I wanted to include a card suitable for male recipients.
I chose an olive card and this designer paper from Bella Boulevard - One Fall Day by Stephanie Hunt - Needle in a Haystack. It was trimmed to leave a small border.
I then wrapped a piece of wide So Saffron ribbon across the bottom third of the designer paper piece and taped the ends to the back.
I trimmed the greeting close to the border then layered it onto a deep teal layer.  The greeting was adhered to the card front with 3D foam tape.

Monday, April 11, 2016

Sympathy - Lattice Die

I needed several sympathy cards so I thought I would participate in a challenge at the same time.

I started with a Stampin Up Tangerine Tango card.  I cut a piece of Whisper White to leave a nice border.  I then, embossed it with the SU Stripes Embossing Folder.  This layer was adhered to the card front.  I cut a piece of Pool Party with the SU Lattice Die.  I adhered it to the top 2/3 of the card with Bling Zots on the four largest intersections.  This works well as it is being adhered to a textured layer.  I stamped the sentiment from the Simply Sketched Stamp Set onto Whisper White card stock with Pumpkin Pie classic ink.  I punched the right hand side with the Banner Triple punch then I punched a So Saffron piece of card stock to align on the left and leave a border on the top, bottom and right hand side.


Submitting to the following challenge:
SU FabFri #84 - color challenge 


Wednesday, March 16, 2016

Gender Reveal Party - Thank You Cards

I attended my first gender reveal party tonight.  Never heard of it before. Not sure if it's a trend. When everyone had arrived the cake was cut to reveal the gender of the baby.  The middle layer of the cake was blue so they are expecting a boy.  Everyone was excited!! The baby has a great great grandmother and some of great grand mothers and a couple grandmothers.  He will be well loved.

We were asked to bring something for the couple/baby. It was the gift opening before the baby shower.

I made these quick gender neutral baby thank you cards with the Stampin Up Little Additions stamp set.  The color combination of So Saffron yellow and Lovely Lilac mauve.  These are printed on store bought thank you cards.  Worked out well.

Saturday, June 6, 2015

Card - Butterfly Thank you

This is a card made with Stampin Up product. I started with a Soft Suede card.  I added a layer of Delicate Dots DSP cut to leave a small border.  I punched top right and bottom left corners with a corner rounder.  I cut a piece of Rose Red card stock with one of the flowers from the Flower Fair framelits.  I ran it through the Pretty Print embossing folder.  I brushed the embossing with ink pad. I stamped the greeting from an unknown stamp set with Soft Suede on Whisper White and embossed with clear powder. I brushed the edges with the ink.  I cut the butterfly with the Sizzix Winged Beauties thinlit from So Saffron card stock.  I used an Aqua Painter to add the body of the butterfly with Soft Suede ink.  The greeting is adhered to the card front with 3D foam tape.
Submitting to the following challenges:
Pals Paper Arts - 254 Color Challenge

Wednesday, June 3, 2015

Greeting Card Gift Set with Folder

I decided to package some of my Stampin Up cards in gifts.  At this time, these would make great gifts for teachers. 
I designed the cover with the Stampin Up Tea Shoppe stamp set.  I used 3 different tea cups on the 3 folders. I mixed So Saffron with a few different colors. Not Quite Navy, Island Indigo and Elegant Eggplant.  The folder holds 4 cards protected in cellophane sleeves.The folder measures 6" x 11". I scored the 11" side folder at 5.5" then .75" on each side to create the spine.  I placed 2 one quarter inch holes in the spine .75 inches from the center of the 6" spine.  I used a piece of So Saffron 7/8" twill ribbon and I created an innie outie bow then flagged both ends.  The folder is used as a card for the recipient.  Their name can be written on the front and your sentiments can be put on the inside cover.


This second picture shows the cellophane sleeves with 2 cards each.  The sleeves are adhered into the spine.