Showing posts with label ginger. Show all posts

Thursday, April 3, 2025

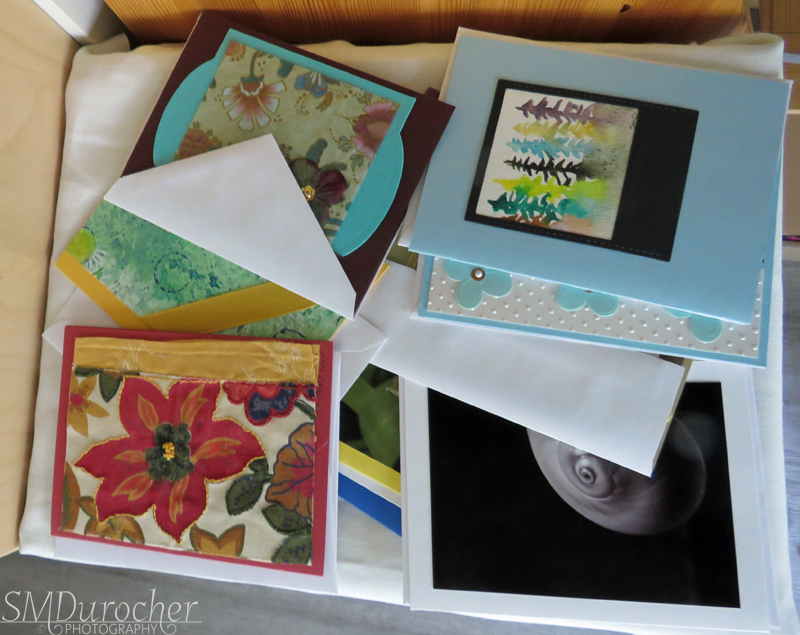
Cards - A2 - Serendipity Paper

I created a 8.5 x 11 sheet of serendipity paper when I created cards with the origami paper this week.   

I cut it into 4 pieces to make the best use of it.  That means A2 cards.

I started with So Saffron card base to measure 4.25 x 5.5 folded.

I adhered my collage paper to the front leaving a small border. 

I cut a strip of the same card stock and added a length of Early Espresso grosgrain ribbon.

I added Spellbinder charm die cut hung with ivory crochet cotton.

A white quarter sheet insert and an ivory envelope.

For this card I chose the same yellow card base and adhered the piece of collage paper to the front leaving a small border.

I added a length of Early Espresso card stock across the landscape (wide) card in the top half

I cut a Sizzix Primitive Star with the yellow medium die. It was mounted onto the brown strip with 3D foam tape.

A white quarter sheet insert and ivory envelope.

I was lucky to get 50 of these envelopes at the thrift store this week for $2.00.


Another wide card.

The card base is Early Espresso and the collage paper was trimmed to leave a small border.

I added a card stock strip of brown and topped with a narrower strip of So Saffron card stock.

I punched a pine tree from dark brown card stock and adhered it with Scotch Quick Dry adhesive on the left hand side.

A white quarter sheet insert and an ivory envelope to complete the card.


The fourth card in this series made with serendipity paper.  I used origami papers 3x3 collaged to card stock.  

I chose a ginger colored card stock and adhered the trimmed collage paper to the front.

I added a strip of the same card stock to the front once I had added a length of dark brown grosgrain ribbon across it.

I hung a square charm cut with Spellbinder die set.

I added a white insert and an ivory envelope.

Not my normal color scheme but they worked out well.

Saturday, September 28, 2024

Sylvia"s Simple Shot

We have so few red leaf trees in our province.

This one was at a small park near my sisters house.  I was on a walk in the morning before heading to the ReUse Center. The sun was highlighting the red beautifully.

I was blessed to have supper with the same sister later in the day after she had been to see her husband in hospital and I did some errands.


I headed to West Edmonton Mall Monday morning to have a visit with one of my sister's who had just returned from PEI the night before.  

We ate at the food court where each of us could have our choice.  I had Vietnamese noodle bowl. Delicious.

She had the grandsons while their Mom and Dad were at an appointment near by.


I took advantage of being at WEM to visit the David's Tea store - only one in Edmonton.

I had some great ginger tea at my aunts earlier this year so I selected a ginger tea.  

It gives me a non caffeinated option which I can chose to drink more often.


I decided to visit the Old Strathcona Antique Mall and called a friend who generally meets me there. She was free!  

I have not seen her physically for about 2 years so it was nice to chat and we headed to Swiss Chalet for supper after traipsing through the antiques.

There is so much wonderful items there.

Check out the frilly lampshade on a Fenton glass base from I think the 1940s.

Amber handle on a mirrored tray.

Always a good time.

I put together a set of cards for her since she is a card giver.  

I have been supporting my friend who do give cards with some from my stash.

It is a win - win.  Cards leave my house and they get free cards which helps all the way around.


An Irish Country Practice - Patrick Taylor is a book I finished this week.  

There are new faces at the practice Not only has O’Reilly taken a new trainee under his wing, Doctor Connor Nelson, he’s also added a spirited Labrador puppy to his ever-expanding household at Number One Main Street. 

Meanwhile, his trusted partner, young Doctor Barry Laverty, finds himself wondering if he’s truly ready to settle down and start a family with his lovely fiancĂ©e, Sue.

This was a very deja vu read. Many things sound familiar but I have no record of reading it before.

Always, a joy to spend time with the doctors at Number One Main Street in Ballybucklebo.

Tuesday, April 23, 2024

Art Show - AAC - Redux Show 2024 - Upcycled Every Day Carry Bag

This my second piece in the Spruce Grove Gallery - Form Redux Show which opens today.

It is an Every Day Carry Bag which was made with upcycled fabrics from a box of fabric given to me by Michelle at ReImagined Fabrics. You can find her on Instagram #reimaginedfabrics  Other bits were chosen from my thrifted/reclaimed stash as well as pieces collected from the ReUse Center.

I made myself one of these bags several years ago.

Title: Upcycled Every Day Carry Bag

Size: 15.00 T x 13.00 W inches

Medium: Fabric Bag with embellishments


I started with the beige cotton fabric for the main part of the bag.  All the seams are finished inside so no raw edges anywhere.  I added a zipper insert made from a beautiful leaf patterned fabric from this box of scraps and squares with a teal zipper chosen from my stash of reclaimed zippers.

I chose a taupe microfiber for the handles which means they will last a long time.

The bag features 3 pockets. The front pocket was made with the accent fabric and I added a coordinating blue button that I found in my stash. The back pocket is a reused Carhartt pant pocket with a velcro closure. I sewed the pocket to the back of the bag which creates a pocket and added an accent fabric tag to the help with the opening the Velcro on the ginger colored pocket. I added some teal slow stitching to the flap of the pocket.

The ginger heavy weight fabric was added to the bottom to show less dirt and will wear much better than the beige cotton fabric. 

A few pieces of tomato red bias tape was added as an accent color which was again pulled from my thrifted supply.

I added a little bling on the zipper pull which was brought from a ReUse Center donation.  

Inside I added a clip for your keys which again was found at the ReUse Center.

It is on display at the gallery and is for sale.  The reception is Saturday April 27th at 1-3pm.


Information on "My Bag" line:

Friday, March 1, 2024

Sewing Project - Recycled Fabric - Everyday Carry Bag

I made a bag from all recycled materials.  The fabrics came from the box from Michelle at ReImagined Fabrics.

The bag is beige cotton duck fabric. 

A beautiful leaf pattern cotton fabric was used for the zipper insert, the tab on the front pocket and the tab on ginger pocket.  

I added a piece of ginger cotton denim to the bottom of the back to improve wear ability and keep it cleaner. 

I chose a small piece of red for the trim on the zipper insert, the loop on the front pocket and the key hook on the inside.

The bag features 3 pockets - the front leaf patterned one, the back ginger denim one, and the space between the ginger pocket and the bag.

It has a teal zipper at the top in the normal for me completed finished zipper insert

I used taupe cotton poly blend for the handles and made them as long as I could. They are placed on either side of the pockets.  They are well reinforced in the stress areas.

The the seams are finished which looks smart and there are no raw edges in sight.

I added a tab on the ginger pocket so that it provide better leverage to open the velcro closure. It is center which the velcro was not.
This button is from my stash of recycled materials as well as the teal zipper.

It was the perfect color to match the teal color in the patterned fabric.


I included a keys hook on the inside so they will always be at hand and easy to find in the bag.

The bag measures 12x12 square so it is not a big bag.  I guess, you would call it purse sized.  


For information on the "My Bag" Line

Saturday, December 9, 2023

Sylvia's Simple Shots

It's the first Sunday of Advent.  I placed my advent wreath on the pine secretary this year as furniture shifted when the sofa was removed from the living room.

I added pine cones in the cylinders this year with a small bird perching on a branch in the front.

The first candle is lit which is the candle of HOPE. 

The first candle harkens us back to Isaiah’s foretelling of the birth of Christ and all of the promises God gave us in the Old Testament that would be fulfilled by the birth of Jesus.


I had police cars all over the block this evening.  I was not able to discover till Monday what had happened.  There were many crusiers and officers on the main road which had been closed to traffic. 

Turns out that police were called when a man armed with a knife was approaching people on the street. A confrontation occurred and a police officer discharged his weapon, killing the man. An ASIRT investigation continued into the early morning hours. A TV crew from one of the local news station was on the scene for a while. 

That is totally scary!

We had a bit of snow fall overnight.  There has been very little snow fall this fall.

With the temperature hovering near freezing it disappeared by weeks end.


The Paris Bookseller by Kerry Maher is the book I finished this week.  It is a novel based on a real woman named Sylvia Beach from the USA. When a young woman opens her shop - Shakespeare and Company in 1919 on a quiet Paris street in 1919, she has no idea that she and her book store will change the course of literature itself. 

Her bookstore becomes the hub for English book readers and writers.  Famous writers spend time in her little shop and she becomes friends with many.  James Joyce, the Irish writer is one of these.  When his book Ulysses is banned she takes a great risk and publishes it under the the auspices of Shakespeare and Company.  

She was very loyal to Joyce and went over and beyond to get his book published but the writer was not appreciative. He could not pay his rent, had marital strife, and health issues which consumed him.  Eventually, he did repay the debts owed and the money due her from books sales with a short thank you note. It was a very interesting book.

It was the time of year again to deal with a low pressure tire warning on the car.

It was much less stressful this year knowing what I had learned last year.  I headed off to the service station, put my money in the machine and topped all the tires to 35 psi.

At least it was not -20C like last year.

All is well!


I discovered these cookies this week. I do love ginger and they deliver a great taste.  I am not a fan of a gingersnap and after talking to my sister it was suggested that there may not be any molasses in these.  I believe that is the difference.

It makes a nice end to a meal and they can be in the house and I will not eat the whole box in a sitting.  That is what I need,

Loving them.

They were on sale as well so that is a bonus.

We had our opening of the Christmas Store on Saturday.

We had good attendance.  I met and spoke to quite a few folks from our group. 

I believe several folks left with bags in hand so that is a good thing.

I enjoyed a cup of hot chocolate which was very good along with some beautiful short bread cookies.  There was a nice variety of flavors of hot chocolate and tea and some other holiday goodies.

It was a very good time.


Sunday, October 16, 2022

Small Gifts - Oil Diffusers - One of a Kind - Set 3

I am loving this creative process of making cool felt diffusers for these diverse type of containers. 

Here, I have a two inch square crystal napkin holder laid down flat with the hole facing up.  I made a different type of felt flower for this one.  You can find the tutorial for this flower here

Teal Blossom - I chose teal felt and cut six 2 inch circles then a yellow one for the center of the flower and a green one for the base.  I thought the green one suggests leaves without having actual leaves imposing onto the edge of the glass. I really wanted to be able to see the 4 corners of the napkin holder.

The video suggests hot glue but I chose to stitch this flower together which makes a cleaner end product.

I then stitched it to a white felt ball which helps the flower stay in place on the napkin holder.

This flower design is full and very easy to put together.

On the right is a photo of the top. 

With the oil being placed on the yellow center it will keep any discoloration to a minimum.

With Love Cup - This is a beautiful Mikasa - With Love pattern ivory bone china cup from the early 1980's.  

I decided to make the diffuser an ivory felt stuffy decorated with a  round petal pattern. 

I found this Petal Pattern video on line. The opening of the cup measures 2.75 inches but I needed to add some for seams and for puffiness. I cut 2 ivory felt circles measuring 3.5 inches in diameter and sewed them together with a 1/4 inch seam leaving an opening to turn it inside out. I then stuffed it with cotton batting and slip stitched the opening closed.  I then created the petal pattern according to the video using warm rose yarn to match the cup.

To accent the center I added a warm green circle topped with a gold metal filigree accent which was stitched on with the same yarn. 

I have created a spacer to place under the petal to keep it at the top of the cup.  I could keep the drops of oil to the center to lessen an discoloration of the ivory felt.  This diffuser would fit in nicely in a kitchen, a dining room, a reading nook or even on a bedside table. 

Time to Unwind - A ball of variegated yarn to encompass many shades of brown and reds which brings in the colors in the basket as well.  I created the ball by hand to be just the right size for the basket.

I created custom sized knitting needles from skewers cut down to about 4 inches.  I glued wooden beads to the blunt end.  Once the beads were dry I used Distress Ink of Antique Linen and Vintage Photo to add some color to the needles to be more in keeping with the overall color scheme. 

I added the More Mustard tag which was color printed and punched with the 2 inch circle punch.

Perfect quiet time to enjoy the aromatherapy of essential oils.

Triangular Trio - A set of three felt flowers with white pom pom centers set in a triangular bottle.

The flowers are purple, grey and light blue.  Each has a yellow fringe surrounding the white pom in the middle.

Each flower has a twisted silver wire stem which is terminated at the bottom with a iridescent ebead just before the end curl.

I have wrapped a length of yellow grosgrain ribbon around the neck of the bottle to repeat the yellow in the bouquet.

The essential oil can be applied to either the felt or the pom pom. The essential oil may discolor the white centers.

I wanted a less flowery option in a diffuser.

Tiny Beer - This diffuser started with a vintage etched crystal shot glass with a nice handle. It measures 4 inches tall. 

I rolled a piece of ginger colored felt to be the beer and placed it in the bottom of the glass.

Now I needed to create the frothy foam at the top of the drink.  I rummaged through  my yarn stash to find a messy white yarn which I wrapped around a white pom pom.  I secured the head to the beer with hot glue.

I think it looks great!

Sunday, March 29, 2020

Sewing Project - Quilt 9 - Appliqued Leaves One

I finished another quilt.   The wonderful appliqued leaves which are the focal point of this quilt were given to me by the lady in charge of quilting group. The ginger fabric also came along for the ride that day.  The backing of the leaf squares is wonderful batik as well as the leaves. Beautiful! Thank you Linda.

Finished Size: 41.5" x 50.25" T

Front: Appliqued Batik Leaves, dark brown cotton sashing and Island Paradise by Northcott in the large panels.


Pieces:
6.25" Squares for leaves
3 inch brown sashing
Ginger panels 10 inches and 22 inches wide

Accents: Appliqued Batik Leaves
 
Backing: Tone on Tone Caramel cotton fabric which had to be pieced from two pieces.


Batting: Flannelette Sheet
  
Thread: Warm brown on front and light cream on the back for the highlight stitching and binding. White for assembly and quilting.

Binding: Ginger print fabric cut to 2 5/8 inches wide and 200 inches long.  You can check out this
Fool Proof Quilt Binding video for how I now do this.


Binding stitching: Stitch in the ditch.  I pinned very closely and had near perfect capture of the folded edge on the back. Used warm brown thread on top and bottom for it to disappear.

Quilting: I quilted the Ginger Fabric panels with 1/4 inch top stitching. The quilting was done with a warm brown thread on top and light cream on the back which works with the light backing. It was a lot of pinning and it worked out well.

Lessons Learned: 
It took a bit of time to work out the layout as the image on the right was the first layout considered.
I was just not a fan of cutting up the Ginger fabric into small pieces.  I am really happy with the layout I chose which makes the column of leaves the focal point. Thanks to my sister for the brainstorming session.

Working out how to piece the backing fabric to be large enough took a bit more time.

I did really well this time with my stitch in the ditch binding so it disappears.  I am getting better.

I was not sure the cooler dark brown would work well with the other pieces which were warm browns.  Under social distancing I was not going out to find a fabric that worked better.  There was some of that brown in the leaves.  I think it worked out.

I am super happy with the quilt.  I am glad I stretched my comfort zone and tried a different layout.

The blue leaves will show up in another quilt.

Tuesday, April 16, 2019

Warm Birthday Card

I made a quick card for my brother in law who celebrates a birthday this week.

I chose a warm ginger colored card base. 

I added some polka dot designer paper top and bottom aligned to card edges.

I cut greeting with the Memory Box Jumbled Happy Birthday thin lit.  I cut 2 happys and 1 birthday.  The light ginger ones were mounted over the designer paper and the dark brown one was adhered in the center of the card.    I used Scotch Quick Dry Adhesive to adhered these as the bottle has a fine tip which makes applied the glue where I want it easy.  In the mail this afternoon with warm wishes.

Friday, March 29, 2019

R2Go Stack Kit - Custom

I had a request for a custom Ready 2 Go Stack Kit.  She wanted the greetings to be about praying.

I chose to used No.8 envelopes with double sided designer card stock.  The 12x12 was cut 3 3/8 inch wide and 12 inch tall.  I then scored the fold at 6.25 inches. I added a 1/2 inch strip of black card stock at the bottom.  The easiest way to do that is to tape a strip bigger than what you need along the edge with invisible tape.  Then trim all 3 sides with the paper trimmer.

To repeat the black I cut a scallop border in black as well which I glued along the top edge and again trimmed on the left and right sides with scissors. 

The vellum greetings are 2 x 4.25 inches.  Color printed in black and clear embossed.  It this then adhered aligned with the top of the card and centered.  The scallop border is then adhered on top of that aligned with the top.

A white insert is added for the giver's personal message.

The paper is by The Girls' Paperie - Jubilee - Carousel.

This time I cut the paper the same way.  I scored it at 2 inches then from there 6.25 inches. This creates a gatefold card with the opening in the middle.

I added an Espresso brown strip of card stock along the edge and taped it down.  This one is wider than the .5 inch needed so it over laps onto the flap on the right.

I created greetings on stone colored paper which would work both pieces of designer paper I chose.  The letters are the dark brown of the small strip.  They are cut to 2" square.  It was adhered centered on the brown strip but with double sided tape only on the left hand side.

The paper is by Carta Bella - Beautiful Moments - Beautiful Banner Paper.  The other paper also had horizontal lines going across the card.

Another portrait tall card.  You have to be careful when folding designer paper because it has a white core and if the paper fibers are not well scored they will crease and expose the core which does not look great.  I ran my tool along the score line from both sides to stretch and soften the fibers.  Works well.

I added a half inch strip of coordinating ginger card stock along the bottom again attached with invisible tape. 

With the same card stock I punched the squares with the Creative Memories Double Square punch which does 1.5 and 1.25 inch squares which layer well.  The solid card stock is the larger and the greeting is the smaller. I used my corner rounder punch to do 2 of the corners. I adhered 3 squares aligned down the center of the card.

The greeting was printed in blue on ivory card stock, punched and corner rounded.  It was adhered to the center square. 

The paper is by Carta Bella - Traditions - Antique Damask. The other designer is very similar in pattern and color.

Monday, July 30, 2018

Gift Box of All Occasion Cards - Donation

I made a gift box of all occasion cards for an upcoming charity event.

I included 12 cards with white envelopes with blank inserts.  A few have greetings but most can be used for any occasion.

I started with a black card base.  I cut a 6 inch circle with my Creative Memories Cutter.  I then cut the circle in half.  I aligned the straight edge to the right hand side of the card and adhered it to the card front.  I trimmed the top and bottom of the half circle to the card edge.  I used the wonderful music designer paper.

I added a black die cut flower and then a metallic Prima and a small black die cut one.  These are held in place with a mini gold brad.


This is a similar card with the straight edge on the left hand side this time.

I aligned 9 handmade paper flowers by Prima in warm tones along the curved edge.  I alternated the colors from tan, ivory and a rosy taupe color.

They are held in place with a tiny copper brad with a small black sequin in the center.

This card features polka dot designer paper by Fancy Pants Designs - Like Father Like Son - Stud Muffin.
I ripped the right hand side of the designer paper then adhered the straight side to the left hand side of a forest green card.  I added a piece of celery grosgrain ribbon wrapped around the card front and knotted it.

I created the greeting accent with a warm green scalloped circle, topped with a 1.25 circle of the same color as the card, then a 1" circle stamped greeting in chocolate brown.


With the wonderful colors in this designer paper several options were possible for the car color.  Here I have selected a terra cotta colored card base.  I ripped both edges then adhered it to the card front.  I wrapped a piece of celery grosgrain ribbon across the front of the card and taped the ends on the inside of the card.

I created an accent with a scallop circle, then a blue smooth circle then 2 layered butterflies.  I held these pieces together with a white tiny brad. The accent was adhered to the card front with 3D foam tape.

Very similar cards with the half circles on the left edge then the right hand side.

An accent was created with silk and handmade paper flowers.  This is  held in place with a green mini brad.

I added a grey knitting ribbon wrapped around the card front and knotted on the front.  I added a few more from my stash to make a total of 12.

Monday, January 22, 2018

Card Club Kit - Set 4 - Card 3

I chose the designer made by Doodlebug Designs - Chocolate Decadence.  It was trimmed to 4.00 x 5.5 inches.   It was adhered to the warm brown card front.

I cut a large butterfly with the Sizzix Winged Beauties thinlet set from bronze metallic card stock.  I placed it onto the oval kraft tag and used a push pin to create a hole in body of the butterfly. Push the brad into the hole and turn over and spread prongs apart.

Cut the 3D foam tape in half and place them onto the back of the tag.  Add the ginger ribbon and trim the ends with scissors.  Remove the release paper from the tag and adhere it to the card front.


Monday, March 27, 2017

Card Club - March - Bird on a Branch

I started with a ginger colored card which coordinated with the rusty color in the designer paper.  The designer paper is by Authentique - Collection Hope - Adorn.  I cut it to 3 x 5.5 inches and ripped the top half in off making sure not to leave a white ripped edge. I trimmed it slightly and adhered it to the bottom of the card front.
I cut the Bird Branch by Tim Holtz from kraft card stock.  I then cut just the bird from blue card stock.  I applied Tim Holtz Distress Stain - Gathered Twigs onto the branch to give me some variation in color on the branch.  I glued the branch to the card front and trimmed it to the edge of the card.  I trimmed the bird die cut to ensure I only had legs and adhered him directly over the kraft colored one.  I used a push pin to make a hole for the eye and placed the tiny brad and pressed the prongs apart inside.
Option: A greeting could be added to the right of the bird.

Saturday, August 6, 2016

Sympathy & Get Well Cards

I made this card for a friend who lost her husband to brain cancer recently.  He fought a brave fight for several years.  I will miss him. 

I started with a warm brown card. 

I cut a piece of designer paper to 4.00 x 5.25 inches then cut it again at 3.5 inches.  I flipped the larger piece over to reveal the polka dots.  I taped these pieces back together then placed a piece of ginger colored ribbon across the join and taped the ends tot he back.  This layer was then adhered to the card front.

I punched a Stampin Up Decorative Label a coordinating blue card stock and printed the greeting in the same blue onto ivory card stock.  Punched the greeting.  I cut the blue label in half crosswise and trimmed the points off.  I then adhered the halves offset to the left and right sides. I adhered the greeting to the card front aligned over the ribbon with 3D foam tape.

The get well card was assembled in the same way as the first card but I placed the dots on the top this time.