Showing posts with label holy family. Show all posts

Saturday, November 25, 2023

Sylvia's Simple Shots

I am always on the look out for small nativity sets that I can photograph for Christmas cards. 

I found this one at a thrift store a few weeks back.   They are snow people. 

My new ceramic tree has come in handy again. That was a good purchase.

The NOEL came from the ReUse Center.  The tiny lights also came from the thrift store.  They use AA batteries which I always have on hand.

I plan on applying a wash to these ceramic figures to give them more definition.  This was a very quick set up. I will have to take a few shots on the nativity while it is white because I will not be able to reverse the process.

Here's the box for the nativity.  I expect it is discount store purchase which did not cost a lot to buy new.

As you can see it has more characters which includes the 3 wisemen, a couple of animals so there is plenty of potential there.


The construction in my area just continues.  I am not sure who will occupy these tall apartment buildings when they are done.

The very tall building they built several years ago which limits the sun that hits my window is about half full.

This project started late summer so I heard through my open windows for all the fall.  At least we have very good windows and now that they are closed I don't hear it any more.


I finished this book this week. The Left-Handed Booksellers of London by Garth Nix.  When I looked it up online it is designated as a teen novel.  I really enjoyed the book.

The main character is Susan Arkshaw who is a twenty something looking for her father.  She has the summer to look before she started class at university in the fall in London.  She finds herself a job and a place to stay. Her Mom is keeping the details of his identity to herself so she turns to the man who has been a family friend for years.  He always sent gifts at Christmas and her birthday - Frank Thringley. When she is at his house things get really weird. He is dispatched by Merlin a young left-handed bookseller (one of the fighting ones).  With the right-handed bookseller they form an extended family of magical beings who police the mythic and legendary Old World when it intrudes on the modern world - in addition to running several bookshops.

Her life is turned upside down that summer as the magical beings help her make sense of who she is and the powers that are just being awakened in her which leads to the identify of her father.

I replaced the glass in my bathroom.  I bought the glass at the thrift shop for less than $2.  The one I had been using was a Mikasa which I purchased at least a year ago.  I was now finding that it's bowl was too large now it seemed for my hand. 

This is a great drinking vessel of very thin glass. Very nice quality.  I looked up the name Spielgelau - this is a water glass from the Definition series.  It is 16 ounces.  A set of 4 small ones retails for $80.00 so I guess I did alright.

I like to start my day with a large glass of water and this fits the bill.  The bowl is a better size for my hand.

Easy to clean as my hand fits into the top easily.

An excellent addition.

Monday, November 13, 2023

Greenland Garden Center

I met the girls at Tim Horton's for coffee then headed to Greenland Garden Center for a photo shoot!

Mistake! It is a day off today in lieu of Remembrance Day so the place was packed with wonderful Christmas decorations but also a ton of people young and old.

I did manage a few shots before I just gave up.  I did buy a pick of jingle bells on my way out. 

There was a light which reminded of my stained glass light project. There were many nativities available, I liked this one a lot.  Nice and simple for one with very little space. The birds are always great. 

I see that the felt ball garland is still in vogue this year.  These were gorgeous but with a crazy price and no tree to put it on it stayed on the shelf. It could hang elsewhere I suppose.

Tuesday, October 24, 2023

Christmas Cards - Gold Foil Manger

I made another set of Christmas cards for by card box.

These are A2 sized at 4.25 x 5.5 inches. 

I used the free gold foil card stock I received recently.  I cut the letter sized card stock into quarters. I placed it on the  Stampin Up Sunburst thinlit aligning the top left hand corner and ran it through the Big Shot.

The designer paper I selected is Crate Paper - Holly Collection - Garland  with a beautiful felt finish.  Love the soft colors. This piece was trimmed to 4.00 x 5.25 inches.

Based on this DSP I chose SU Pool Party as my card base. I used an extra half sheet of the same to punch my 2 inch circles.

I used the Penny Black Manger die on the gold foil card stock to coordinate.  I adhered the manger die to the 2 inch circle of Pool Party with a gold star tiny brad through the star in the die cut. I also added double sided tape behind the crib.

I applied double sided tape to the back of each of the rays in the sunburst. It was then aligned along the top left hand corner and press down.  I then trimmed the sunburst to the edge of the designer paper layer.  It was then adhered to the Pool Party card base.  I then adhered the circle manger accent to the middle of the sunburst with 3D foam tape.  I added a quarter sheet insert and an ivory envelope and they are ready to go.  Super happy with this set.

Saturday, May 1, 2021

Christmas Card Challenge - Pencil Crayon on Kraft

I chose pencil crayons on kraft card stock for my challenge in May.  

I printed the main image from the Gentle Peace stamp set onto kraft card stock.  I then spent a pleasant evening coloring them with pencil crayons. Laurentian pencils I found the nicest to use.  I ran the black pencil along the edges to remove the lightest of the edge.

I chose a light blue card base to coordinate with the image as well as a strip of warm green to put behind the Holy Family image. 

I printed the sentiment onto kraft card stock, flagged the ends, ran a black pencil crayon along the edges and 

adhered it with 3D foam tape.

Adding a seasonal insert and an envelope and they are ready for the card box.


This next card I coordinated the card base with the edge of the frame of the stained glass window.  I chose a Pea Green textured card base.

I chose a warm brown strip of card stock to coordinate with Joseph's garment.

Both the main image and sentiment has black pencil crayon edges.

The sentiment is adhered with 3D foam tape.

This card has blue in the rays and a light mustard yellow in the window behind the family.

I chose a blue card base and a piece of coordinating card stock.  I added a bit of texture on the light piece with pencil crayon.


This card has a warm green card base onto which I rubbed gold pencil crayon to match the gold in the stained glass frame.  

I adhered the main image onto a layer of gold paper and trimmed around leaving a small border.

I cut the ends of the sentiment square this time.

I did a similar technique last year in March 2020.


Sunday, December 20, 2020

Christmas Card Order - JOY Nativity

I received a request for a large order of Christmas Cards late in November.  I prepared 3 samples within a price range which fit their budget. They made their selection quickly and I got started.  I proposed 4 different colors of card stock to provide some variety in the cards. I did not have enough card stock in any one particular color either. I used Stampin Up card stock for the project.  Very good quality card in 8.5 x 11 size and I planned to use the coordinating ink in the spatter final touch.  

The holy family die cut was cut in heavy black card stock with the Penny Black Manger die. It was adhered to a white card stock layer where the J and Y were printed in black and the die cut was the O.  The die cut was held in place with a mini star brad.  The JOY layer was adhered to the card front with double side tape. The quarter insert was glued in with glue stick.

There was pressing when the card was folded then again when the JOY layer was adhered.  The spattering was the final step and then they were dried overnight.

The card stock is Lucky Limeade.

The spatter was mixed from other reinkers as I did not have that particular ink.  I had to experiment a bit. In the final color I used 4 drops of Old Olive to 2 drops of Kiwi Kiss.

This card stock is Lovely Lilac. When I checked the package which had been opened I discovered 4 sheets of textured card.  Another bit of variety to the overall project.

With out the exact reinker color more experimenting was needed.  The final color was 3 drops of Orchid Opulence to 1 of Brilliant Blue.


The card stock for this card is Buckaroo Blue.

It's interesting to see the weight of the card stock change over time.  It has become quite a bit thinner over the years.

I had to mix this ink for this one as well.  After some experimenting the final was 1 drop of Brocade Blue to 1 drop of Baja Breeze.

I was very happy to be able to create the colors I needed and it went pretty well.


The card base for this is Regal Rose. 

I had the exact reinker for this color so that was a breeze and it was a good thing as it was the last set.

I am sure the cards will be a blessing to those who receive them.  I expect some folks are just not doing Christmas at all this year which includes no Christmas cards.  

With no craft sales to attend this year, sales were way down so I really appreciate this order.
 

Tuesday, December 8, 2020

Christmas Cards - Photo

I worked on Christmas card all day today.  

I decided to work with the supplies I had at home so I put together these gold trifold cards with my tiny nativity photo.  These are A7 5x7 cards.

Looks great.

I bought postage a while back so I have what I need with to trip out of the house.

I can just drop these in the mailbox.

The next card I paired the same gold tri fold cards with my Green Holy Family photo where it fit inside the card.

These will be in the mail tomorrow.

Another task complete.

On to Christmas tree, lights and door decoration.


Wednesday, April 1, 2020

Christmas Card Challenge - April - Holy Family

The theme for my April Christmas Card Challenge is Holy Family. 

I chose a ivory card base and the designer paper is by Provo Craft - Stone Washed Denim Suede cut to 4.00 x 5.25 inches and adhered to the card front.

I chose my Penny Black Manger Die to cut the family from ivory pearl card stock. 

I cut the navy ornament from textured linen card stock with the one of the Spellbinder 2011 Heirloom Ornament Nestabilities dies. I punched a hole at the top with a 1/8" hole punch. Added a length of ivory thread. 

I used tape runner on the back to of the family to adhere it to the center of the ornament.  The ornament was adhered with double sided tape.  I added a bit under the greeting to keep the threads in place.

The banner greeting was color printed in navy then fussy cut with scissors.  It was adhered to the card front with three small pieces of 3D foam tape.  A seasonal insert quarter sheet insert was added and I have 6 more cards in the box. Yeah!

Sunday, March 1, 2020

Nativity Photo Shoot - Card Samples

A friend set up a different nativity than her usual Willow Tree one this passed Christmas season. It is stained glass which is one of my favorite styles. I found out that it was her mother's and it came to her a few years ago. It was gorgeous so we arranged for me to photograph it with the idea of making Christmas cards. For her, she liked the idea that she could give personal cards to family and I loved the nativity. Win Win.  
I arrived with lights, backdrops fabrics and stand, and camera gear.  I set it up on her dining room table. It had the Holy Family, three Wisemen and 3 Shepherds which were separate pieces so it offered a good amount of flexibility in layout. It was very delicate so I had to very careful. I spent several hours using mostly natural light pouring in from her dining room window. I did run out of light in late afternoon which brought the photo shoot to an end.

Following are the cards I have prepared as samples for her.

This one on the left features the Holy Family by itself.

It is a 5x7 panel card with a 4x6 photo on the front.

The greeting was added to the photo.

A sentiment and credits have been added to the back.


This is a different photo of the Holy Family.  I love how Joseph's robe glistens.  It was printed 4x4 inches and I printed the sentiment above the photo.


It is an A2 panel with the greeting on the front and a sentiment and credits on the back.

This card features the full set including the Shepherds and the 3 Wisemen.

It was printed at 3.5x 5.00 inches and placed on an A2 card (4.25 x 5.5 inches folded at the top).

I printed the greeting at the top along with credits on the back.

This one has a quarter sheet sentiment insert adhered to the inside.

I have used 110lb white card stock in all of these cards.


This card is also an A2 with a top fold.

This photo features the Holy Family and the 3 Wisemen with a different background.

It is much warmer in tone.

This one also has a quarter sheet insert on the inside.

She will have to decide which photo she likes the most, the style of the card she prefers then I will be making Christmas cards. 

It will be so much fun.

Saturday, October 26, 2019

Ready 2 Go Christmas Stack Kit - Set 13

I started with a light blue card base.

I adhered a lavender card stock layer leaving a small border.

I recycled a card with an angel announcing the birth of Jesus.  I added a gold star brad over the one on this layer.  It was adhered to the card front.

The greeting was color printed on blue card stock and fussy cut to the border. It was adhered to the card front with 3D foam tape.

A quarter sheet insert with a seasonal sentiment was added to the inside of the card.


More purple for this card in a deep colored card stock which works with the tail feathers.

I added a white layer leaving a small border.

I added the iridescent purple snowflake with a purple small brad onto the silver greeting layer.  It was then adhered to the card front with 3D foam tape.

A quarter sheet insert with a seasonal sentiment was added to the inside of the card.


Another shade of purple for this card.  I chose a grape color textured card base.

I then layered a warm green layer to the card front leaving a small border.

I added the small gold star brad to the Holy Family layer then it was adhered to the card front.

The greeting was color printed on warm white card stock and fussy cut to the border. It was adhered to the card front with 3D foam tape.

A quarter sheet insert with a seasonal sentiment was added to the inside of the card.

Friday, October 25, 2019

Ready 2 Go Christmas Stack Kit - Set 12

I started with the water color layer that I had leftover from this set of cards.

I printed my Bethlehem design onto vellum and embossed it with gold powder.  They were cut to 3.5 inches square.  It was aligned behind the hole in the layer created with the Stampin Up Window Frame thinlit and taped in place.

The vellum greeting was created in the same way as the Bethlehem.  I ripped the top and bottom edges.  It was layed across the water color layer and the ends pressed to the back and taped down.

The water color layer was mounted to the white card front with 4 pieces of 3D foam tape.

A quarter sheet insert with seasonal sentiment was adhered to the inside of the card.


I started with the Holy Family Ornament which I made for a project last year.  There were a few leftovers.

I chose to keep the card quite neutral to allow the ornament to shine.  I picked a kraft card base.

I added designer paper layer by Creative Imaginations - The Studio Barn.  It is just an ivory background with texture printed on it.  It is cut to 4.00 x 5.25 inches.

I added an cream and gold 1/8 th inch ribbon across the DSP layer with the ends tape to the back. I tied a short length to simulate a bow on the right hand side.

This layer was adhered to the card front.

I then mounted the ornament to the card front with 3D foam tape.

A quarter sheet insert with seasonal sentiment was adhered to the inside of the card.

Friday, November 23, 2018

Christmas Photo Cards - Craft Sale

I have been spending a good chunk of time working on still life photography as the weather outside is less conducive to being out with camera.

I filled a vintage hobnail candy dish with Christmas ornaments.  I chose a variety of sizes, shapes and finishes. Some were shiny others matte; silver, green, red were the colors I chose; and I had round, pinecone, stars and hearts for shapes.

I decided to make the silver heart the focal element.  Shiny surfaces are hard to photograph because your camera as well as anything else near ends up reflected in it`s surface.


This is a resin Nativity home decor item which I bought recently.  I loved the colors in it and it had enough relief to make it interesting.  It stands on it`s own.  I created a gold background which mirrored it`s warm tones and provided a nice bokeh effect.

I am not providing an insert in my photo cards to it`s nice to have the sentiment on the front.  I created on with a light sentiment but the one with the dark base is by far the best one.


I originally created this image for a Christmas card order a while back.

This is one of my stained glass Nativities with a tealight in behind.   I love the soft seamless background and how the pink is picked up on the bottom of the image.

I translated the image to a 4x6 format and printed a few in the different colors.

I have a good variety so they should appeal to quite a few buyers at the sale tomorrow.

Thursday, November 1, 2018

Photo Christmas Card - 5x7 - WC Nativity

Here's my little nativity again with the great stable background.This time a wide or landscape layout.

This time I removed the words from the garments of Joseph and Mary and left the ones on Baby Jesus.

The ceramic star in hung in the sky in the background that helps to ground the focal figures to the composition.
You get more of the stable in this photo so it comes down to personal preference.

Wednesday, October 31, 2018

Photo Christmas Card - 5x7 - Pebble Art Nativity

I created my own art for this card.

I discovered Pebble Art this summer.  I was inspired and started collecting small rocks with flat one side. 

This fall I put together this Nativity and photographed it.  I added the sentiment and had it printed.

This is a 5x7 card.

There will be several of this one on my sales table as well.

Tuesday, October 30, 2018

Christmas Cards - Extras

There's sometimes extras left after I am done putting together my card kits.  This is an extra from the Bethlehem Stack kit.

This is a white card with a black layer leaving as small border.

I created the blue background and cut it with the Tim Holtz Arch Frame die.  I cut the Bethlehem with the Taylored Expressions Border die which about 6 inches long.  This the other end than the one I used for the kit.

I punched the Stampin Up Modern Label punch from the same sheet to ensure it matched.  I added a greeting from another set I created this week. It is adhered with 3 D foam tape.

The Creative Memories star is attached with a tiny copper star brad.  This element was then adhered to the card front.


This is my first sample for the Christmas Stack kit but decided that an ivory addition on the right would work better.

A commercial card was cut to capture the essential element.  I added a silver strip on the right but since the silver foil elements look black it does not work so well.

I added 3 iridescent sequins with Bling Zots.

These are going into my Christmas Card box.

Monday, October 29, 2018

R2Go Christmas Stack - Soft Sky Dove & Holy Family

I started with a beautiful dove glittered large card. I cut it down to leave me with this dove glitter image with warm blues, cool purples and glittered snowflakes.

I chose a soft sky card base onto which this layer was adhered in the tall or portrait orientation.

I printed the greeting in deep purple blue and punched it out with the Stampin Up Modern Label punch.  It was adhered to the card front with 3D foam tape.
 
I added 3 iridescent sequins with Bling Zots.

I added a quarter sheet insert for the sentiment inside.


This card is a similar sketch with the wide or landscape orientation.

I had just enough of these to complete the kit.

I cut down the card and added a strip to the right hand side to complete the card layer leaving a small border.

I added a silver foil SU Modern Label punch with a SU Word Window punchie adhered to the card front with 3D foam tape.

This time 3 silver stars were adhered to the card front.

Tuesday, August 28, 2018

Christmas Card - Holy Family

I up cycled a commercial card front into a new card.

I trimmed the front leaving the square with the stable image and the greeting.

I adhered it to the front of a blue card.  I added a piece of silver glitter washi tape to coordinate with the silver greeting and scroll frame.

Another one for my card box.

Thursday, November 2, 2017

Christmas Stack Kit - 3 Nativities

I got the Christmas Stack Kit done with the photos used in this card set.

I used the 4x6 photos I designed and cut out the nativities with a paper cutter leaving a small border of the color around the image.

I cut black card stock with the Tim Holtz Cameo Frame.  I designed the nativity photos to exactly fit in this frame.

I chose card stock which matched the color of the border on the nativities.  A light aqua, taupe and light blue.

I adhered the nativity photo to the center of  the black frame. I applied 5 squares of 3D foam tape to back of the frame 4 corners and center.  I then adhered the frame to the front of the card.

Love these! 
The kit has been added to my Stack Kit page.

Wednesday, November 1, 2017

Holy Family Photo Christmas Cards


I take photos of nativity sets whenever I can. This was taken during the 2016 Christmas season.

This time I was working on supplies for a stack card kit for my class on Monday.  I printed a few extra to make some cards for the craft sale.

Here I have adjusted the orientation of the photo to accommodate my needs for the card kit.  I added a color fill background and added a greeting.

For this card with a 4x6 photo I had to reduce the space between the photo and the greeting so I trimmed the photo down to a narrow color border.  I then trimmed the greeting to the same width as the photo.  These were adhered to the card front of a heavy white card. 


Left: This little nativity I have used before.


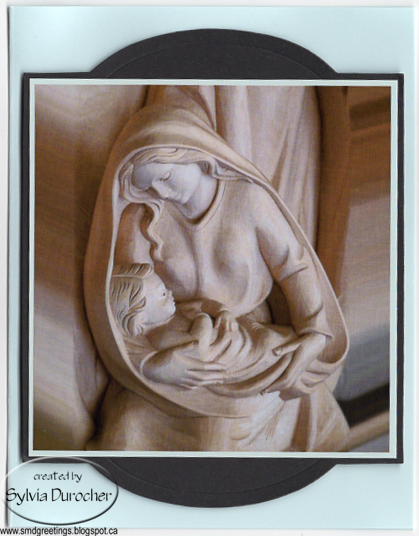
Right: I designed this card with a Mother and Child photo from Pixabay.  I`ve used this image several times.

The stack kit should be ready soon.

Christmas Card Challenge - Nov - Navy Square

This is my card for the Christmas Card Challenge this month.  I have chosen Navy and Square for this card.

I chose a navy card.  I created a vellum greeting layer with a frame where the greeting is placed at the bottom of frame replacing the line. I printed it then embossed with gold powder.  It was trimmed to leave a small border of navy.

I cut the holy family with the Penny Black Manger thin die from gold card stock.

The frame was cut from white card stock with the Stitched Square Frames by Die-Namics.  I adhered the frame on the diagonal to the vellum then placed adhesive behind the frame on the back of the vellum to ensure that the adhesive does not show through the vellum.  The vellum was then adhered to the card front.

I then placed the gold holy family die cut in the center of the diamond square and attached it with a tiny gold star brad in the center of the star of the die. I have over 100 cards in my box so I am ready to start addressing.

I have posted an alternative with a clear vellum and banner greeting which was adhered to the card front with 3D foam tape.

Saturday, October 14, 2017

Monochromatic Nativity

I spent a few hours this afternoon photographing this small nativity to achieve a nice bokeh background.

The photo was printed on white card stock and fussy cut to the edge of the printing.  I rubbed the edges with a black ink pad to get rid of the white cut edge and soften the corners. 

I cut the Tim Holtz Cameo Frame from taupe grey card stock.  I adhered it to the front of a black card. I adhered the nativity element to the center of the die cut with 3D foam tape. Skipped the brads on this one.