Showing posts with label Basic Grey. Show all posts

Friday, May 31, 2024

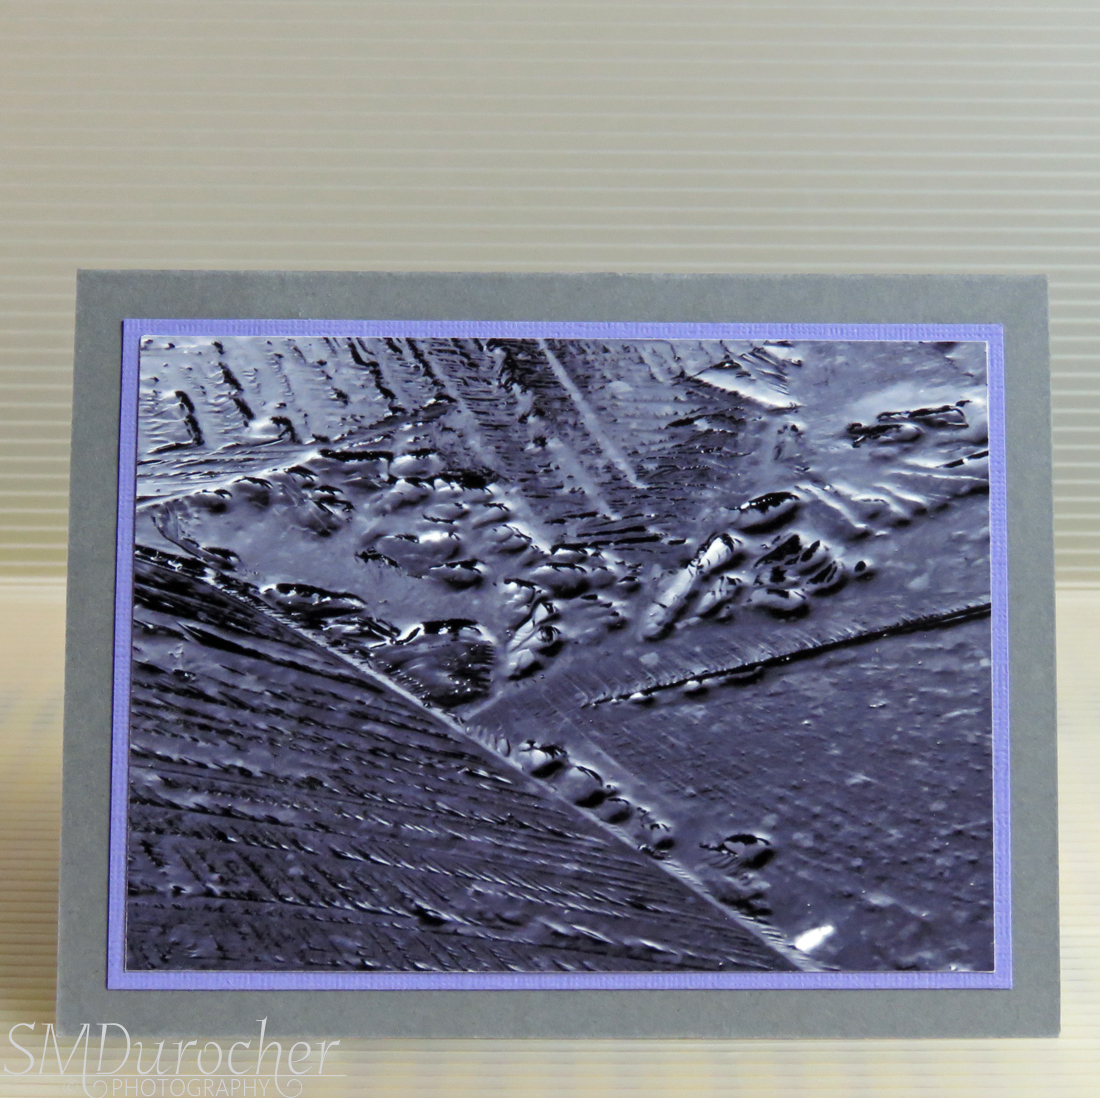
Photo Cards - Abstract

I created these 2 cards with a print I produced for a art show earlier this year which just did not work.

It was a 4x10 photo print of ice broken in a puddle in the spring.

I decided to trim it to a size I could place on cards.  I then layered it with a piece of Lovely Lilac card stock.

Then this was adhered to a black A2 card base.

A white quarter sheet insert and white envelope finished the card.

It is pressing under books overnight.


This is the other half of the print.

I used the same light purple card stock layer.

I mounted this one on a Basic Grey A2 card base.

A white quarter sheet insert and white envelope finished the card.

Glad to have another 2 cards into the card box.


Sunday, April 23, 2023

Card - Thank You with Bees

I made a card for my niece who passed along a great deal on a Janome Serger earlier this year. After a servicing it has been working really well. 

I wanted a card with warm tones. I found a bee graphic on line that I liked then transferred some of the elements to watercolor paper.

I watercolored the background in a light shade of Daffodil Delight. The image was painted with Daffodil Delight and More Mustard. Outlined the elements with dark grey watercolor and a fine brush.  I then created a few shadow hexagons around the outlined ones which I think worked out really well.

Once dry, I mounted the painting onto a Summer Sun card in the A6 size (just a bit smaller than half sheet size).  I placed a piece of narrow stitched grosgrain ribbon in Basic Grey around the inside of the card and taped the ends to be under the watercolor layer.  I added a Modern Label punchie greeting with a yellow offset with a grey greeting on white.  I watercolored the white punchie to be just a little less stark.

Saturday, January 7, 2023

Set of Cards and Greetings

I made a set of cards for my niece as a gift.  I chose designer paper and coordinating card bases.

The first 2 are the paisley paper with Kiwi Kiss, Soft Sky and Chocolate Chip bases with strips of Early Espresso and Choc Chip.

The bottom left and right are Basic Gray card bases with a coordinating designer papers. Featuring punched white card stock panels.  The punch is the Martha Steward Arche Lattice.


The top right is Old Olive card base with a coordinating designer paper with a ripped white card stock panel.  

The right is Groovy Guava card base with designer paper in soft warm blues and a ripped panel matching the card.

The bottom left took a while to figure out but found the card base needed to be Summer Starfruit. The designer paper is the same with the left strip turned to the other side. 

Middle right is a burgundy card base with a coordinating designer paper with a ripped white card stock panel.

The bottom right is Old Olive card base with striped designer paper with a ripped navy card stock panel.

The greetings included birthday, thinking of you in the colors of the cards I had made.

I added a pack of 3D foam tape to adhere them where ever on the card front she decided to use them.

The shapes included tags, circles and banners.

I hope she and her family will enjoy giving these cards throughout the year when special occasions arise and time is short.

This allows for a handmade card on a quick turn around.


Thursday, September 8, 2022

Card Exchange - Red & Black Daisies

I started with the plastic daisy accent and built the cards around that.  I added a silver cardstock scallop behind the daisy and held all this together with a black mini brad.

The designer paper is Stampin Up. I chose it for the black and white circles.  I wrapped a piece of grey twine around this layer and taped it in place at the back.  This was then adhered to the front of the black card base. I added the daisy accent in top left hand corner over the twine.

The greeting is color printed circle in red layer over a red Modern Label punchie. This was adhered with 3D foam tape.  A quarter sheet white blank insert was added.

This is very similar supplies with the opposite color scheme based on the black daisy.  I chose the portrait orientation this time. 

The twine was wrapped on the diagonal off each corner of the designer paper and knotted to the front then taped to the back.  The same paper was used here.This layer was adhered to a Real Red card base.

The scallop circle is Real Red as well and layered the same way.  Adhered to the top left hand corner.

The circle greeting is color printed in black and punched with the 1.25 inch circle punch. The Real Red circle is punched with the 1.38 inch then adhered to the back of the greeting circle.

This this then adhered to the card front with 3D foam tape.  

A blank insert and a white envelope rounds out the card.

These are off in the mail tomorrow.

Friday, June 10, 2022

Card Kit Order - Single Simple Layout

I got a call from a friend this week asking if I was still making cards and kits.  Of course, COVID has put a hold on Card Club for the last 2 years.  Beside that, I got rid of lots of supplies when I de-cluttered for moving.  Many of my card making tools are in storage.  Despite that, I said yes.  I am needing a distraction.  She was looking for 20 kits as one of several activities for some down time for women attending camp this summer.  The kits needed to be simple and need few tools to assemble. These need glue, scotch tape and scissors. My Stampin Up card stock cupboard is full so that was good.  I had basic punches, ribbon, brads, and decorative paper.

I decided that all the greetings would be the SU Modern Label punch with a Word Window punchies of color printed greetings on white card stock.  I printed some Early Espresso, Black, and Night of Navy.

I decided that I would make the kits flexible so they could be orientated in tall (portrait) or wide (landscape). These 2 samples, instruction sheet, and extra greetings are being delivered in the bag. I have varied the decorative paper and coordinated the card base colors, the ribbon, and accents.  All the cards will be different.

In this sample the card base is Real Red, the grosgrain ribbon is Real Red. 

The designer paper is Twitterpated.

The scallop circle and Modern Label punchies are Basic Gray. 

The circle punchie is Whisper White.  

I added a red foil star to the accent adhered with a Zot.  It is adhered to the card front with a medium Zot.  

The greeting is adhered with 3D foam tape.

The card is an A2 card which measures 4.25 x 5.5 inches. 

On this sample the decorative paper is kraft with gold foil polka dots.  

The card base is Soft Suede as well as the grosgrain ribbon, the scallop circle punchie and the Modern Label punchie.  

The white greeting is a Word Window punchie.  

The star on the scallop circle is a gold sequin.

The card has a white bond paper insert and a white A2 envelope.

Tuesday, May 21, 2019

2019 Cardmaking - CH - Class 5

I brought Stampin Up Card kits for the class today.


These make great cards for guys.

DSP - SU Just Add Cake DSP custom cut with Cricut The label die cut is adhered in the top half of the card.

Card stock - Stampin Up Early Expresso & Wild Wasabi

Stars - Sizzix Stars and Star#2 cut in EE and WW with tiny star brad. The star accent is layered as shown then a hole is made in the centre with a push pin and the tiny star brad is put through.  This accent is adhered to the center of the DSP diecut with 3D foam tape.

Greetings -  Early Espresso ink on Whisper White Decorative Label with a HB Stamp  The greeting is placed as desired on the bottom of the card and then the excess is trimmed off with scissors. 

DSP - I started with the Stampin Up Prestwick Designer Paper which features Night of Navy, Basic Grey and Garden Green. 

Cardstock - I chose NofN and BG cards and 2 of the sheets from the DSP set.

Greetings - I chose the HB greeting from the Four Square Stamp Set stamped in NofN ink in WW.  I currently do not have a 1.25" punch so I had to carefully cut them with the paper cutter.  I layered it on a 1 3/8 inch punchie of Garden Green. 

I placed the striped paper on the portrait of NofN and the plaid on the BG landscape card.  I added a .5 inch strip of Whisper White then added the trio of squares.  I swapped the DSP for the additional squares so the plaid on the stripes and the other way around.  All squares got a GG layer.  The HB square is adhered with 3D foam tape to emphasize it. 


Unfortunately I was not able to get into the building today so the ladies did not get to make cards.

Monday, July 11, 2016

Star Trio Birthday

I started with a Stampin Up Marina Mist card.
I created my own background with a sponge, a MM ink pad and a piece of photo paper.  I intentionally left the top part white so the happy would contrast with the card color.
Once dry, I cut it with the Memory Box Grand Happy Birthday thin die.  I trimmed to sides down to 5.25 inches and adhered it to the card front.
I cut the stars with the Sizzix Stars #2 Originals Die using Basic Gray and Real Red card stock.  They are held in place with a tiny white star brad.


Sharing with Stampin Up Color Q challenge #349.

Sunday, February 7, 2016

Shower - Baby Girl Shadow Box Frame

I attended a baby shower for my nephew's daughter today.
I designed the personalized square in the center with all the pertinent details for placing into a black shadow box frame.  The information was color printed on 8.5 x 8.5 inch piece of Stampin Up Whisper White.  I chose Pretty in Pink, Regal Rose, and Rose Red as my colors as well as a bit of Basic Grey.  I added a length of Pretty in Pink 1/4″ Stitched Grosgrain in the space I had allowed on the left and adhered the ends to the back.  I punched 3 Sweetheart hearts in Pretty in Pink textured card stock.  I added 3 large buttons and 3 small buttons in the same color held in place with Zots.  The hearts were adhered with 3 D foam tape.  The 8.5 inch printed square was adhered to a piece of pink paper from the Petals & Paisley double sided designer paper set which was trimmed to 10.5 inches square.  This was then adhered to a piece of 12x12 Pretty in Pink card stock. It was mounted inside the shadow box the the back put in place. I added a length of the same ribbon to the back hangers and knotted it to hang the frame on the wall.

The mother requested books instead of cards so I chose the Velveteen Rabbit with a nice pink cover. This is one of my favorite children's book.

Saturday, October 31, 2015

R2G Card Kits - SU - Jumbo Snowflake

I was asked to create some Stampin Up Ready 2 Go Card kits.  This is my first one.

I started with Winter Frost Designer Paper.  I cut it to 4.25 x 3.25 inches and adhered it to the bottom of the Smoke Slate portrait card. I placed the greeting combo from An Eventful Year and Remember December in Basic Grey in the top left hand corner. I cut a strip of Pool Party 4.25 inches wide and glued that at the top of the designer paper just overlapping a smidge. I punched a snowflake from Whisper White with the Jumbo Snowflake Punch and adhered it on the blue strip on the right hand side.

Tuesday, October 20, 2015

Sympathy Cards - Family

These are the cards I made for her sisters and niece.  I continued with the same 4" squares of Stampin Up Elegant Soiree DSP.  This time I used the other side of the paper onto Baja Breeze card stock.  I chose the flower from the Simply Sketched stamp set for this card stamped in BB on VV card stock. I flagged the end of the strip with the Banner Triple punch.
For this next card I used the bird in Basic Grey on VV card stock. Again flagged end of the sentiment layer.  The multi colored side of the Elegant Soiree DSP.
Back to Baja Breeze card with the blue side of the DSP.  This time I stamped the sentiment with Basic Grey Suede then I trimmed around the sentiment.  Mounted it on the right hand side.

They are a large and very close family so it will be a difficult day.

Sympathy Card - Simply Sketched with Elegant Soiree

A dear lady named Linda passed away late last week and today is her funeral.  This is the card I made for her husband.

I started with a sheet of double sided designer paper from Stampin Up Elegant Soiree collection.  The colors in this paper are Very Vanilla, Baja Breeze, Soft Suede, and Basic Grey.  I used the Simply Sketched stamp set with the sympathy option.  This one is stamped in BG on VV then the bottom is flagged with the Triple Banner punch.  I cut the sheet of 12x12 into 9 4x4 inch squares.

I made a set of five cards for her husband to use as he needs.  I ripped the square at about two thirds and ripped again a small strip to remove the white edge.  I cut the butterflies with the Sizzix Winged Beauties framelit set from VV card stock.  I added wax paper between the die and card stock to assist the removal from the die.  Works very well.  The good variety of colors in the DSP allowed three different card colors which made it a quick card making session.

Sunday, April 26, 2015

R2G Christmas Stack Kit - Winter Frost

Here's the next Ready 2 Go Stack Kit designed with the 6x6 inch One Sheet Wonder cutting plan.
For this kit I used the Winter Frost 6x6 DSP pack. the designs I selected are this small snowflake and the other is bolder chain looking design. I choose Pool Party for the cards for this set.  I chose Basic Gray for the greeting, the square and the strip for the snowflake paper and Island Indigo for the bold chain design.  I ran out of Pool Party so I made 1 card in each design with the colors reversed (Basic Gray card with Pool Party layers) for the ornament.


The DSP and the strip were aligned with the fold and then trimmed on the open side as needed. The greeting layer is mounted over the strip with 3D foam tape.
The stamp sets I selected are: Calm Christmas, Keepsake Ornaments with Owl Occasions greeting and Come to Bethlehem. 
You can check out the Season of Style red and green kit here.

Monday, December 23, 2013

Card - Christmas for Girls

This is the same Basic Grey paper from the previous posting.  I smudged the edges with Always Artichoke ink pad.  I placed it onto a AA card.  I placed a large red silk poinsettia, then a medium silver poinsettia then a smaller white silk flower.  These are all held in place with a flower pewter brad. I punched a Stampin Up! Modern Label punch in silver and then a color printed greeting with the SU word window punch.  The greeting is raised with 3D foam tape.

Cards - Christmas for Girls

Here's another card for the girl at work.  Same sketch as previous but in a monochromatic color scheme.  I cut the Tim Holtz Cabinet die from Figgy Pudding by Basic Grey.  I selected a warm grey card.  I embossed the vellum with the Cuttlebug Victorian folder.  I placed white silk poinsettias in 2 different sizes and a small white silk in the centre and held them all in place with a pewter flower brad. I wrapped the white organza around the two layers and tied a knot on the left.  Punched the green color printed greeting with the Stampin Up! Artisan Label punch and added a small bling rhinestone above the Merry.  Punched another from silver card stock and cut it in half width wise and offset the onto the back of the greeting.

Tuesday, January 1, 2013

Christmas Card Challenge - Jan - Folds

Here's my first Christmas Card of 2013.  I am hosting a blog challenge again this year. 
January's theme is Folds.  You can try gate folds, Z folds, Joy Folds, iris folding and twisted card to mention a few.
I chose a Joy Fold card.  It is quite easy to make.  I chose double sided designer paper so that the colors would coordinate well.  The paper is by Basic Grey named Eskimo Kisses - rooftop. I chose a light blue card base cut 4.25 x 8.5 scored at 3". I laid the large piece of DP with the houses showing then turned a smaller piece over to show the blue and white swirls which I put on the small flap of the blue base.  I cut my second piece of card stock from pink 3x8 folded in half.  I added a 1.5x2.875 piece of the house paper on the left side and added a color printed greeting in coordinating colors.  I added a small pink Sizzix heart embossed with Cuttlebug Swiss Dots on the left hand side to keep the flap closed.   Check out this pic giving you a top view.