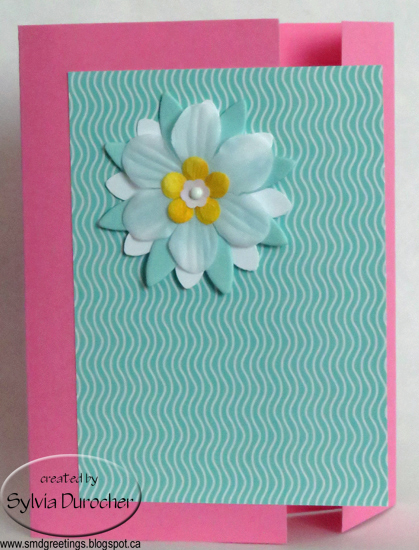
Showing posts with label handmade paper. Show all posts

Monday, July 27, 2026

Cards - Charity Donation

Another set of butterfly cards for I Win charity.

We have a commitment for 80 cards in the fall so we needed to work on getting there.

She pulled out her stash of supplies for the project and we just got started.

I worked with large butterfly die cuts so all the cards are landscape orientation.  

Some lovely warm green colors.  The top right is a wooden butterfly die cut.  The blue one is silk butterflies to which she added the black bodies. 

Love the little orange acetate stickers in the bottom card.  The background is commercial handmade paper with variegated stitching.  

Saturday, October 11, 2025

Cards - Charity - IWin

I found out that we need a few more cards for our delivery to our charity for their work in November.

Since I have time with my one sewing project done I decided to spend some time on cards.

I used the Stampin Up Beautiful Butterflies die to cut the winged creatures.

For this card I chose SU Pacific Point card base in the A2 size. I added a strip of Rich Razzleberry card stock embossed with the DVine Swirls folder. It was adhered on the right of center. 

I added the largest of the butteflies cut from marbled paper. I added a hand cut body with marker antennea. I used the marker to add stitching along both edges of the purple strip. 

The greeting is the classic combo of the Modern Label punchie with the Word Window punchie. I will run out of these printed ones and I hope I have some rubber stamps I can use till I get a new printer.


 For this card, it was designed in the portrait orientation.

I added stitching using the outline of the off cut from the first large butterfly.  I then placed the smaller butterfly from the same marbled paper over it and adhered with double sided tape.  Added the antennea and body to the butterfly.

I added a strip of black card stock along the top of the card and mounted the same greeting combo which featured a purple Modern Label punchie mounted with 3D foam tape.

A white quarter sheet insert and a white envelope will finish each of these cards.

This card featured Night of Navy card base. 

The embossed layer is white done with a Cuttlebug foliage folder. It was placed right of center.

The butterfly was cut from commercial handmade paper printed with silver ink from India.
It received its body and antenna same as the others.

The greeting matches with silver printed paper. Word Window is black with coordinates well.


More marbled paper on this card for the large butterfly.  It received its body and antennea same as the others.  I added stitiching with a black marker.

The card base is Brilliant Blue.

The embossed layer is a piece of Whisper White with was embossed with the Stampin Up Script folder.

The greeting is the Modern Label with matches the butterfly and the Word Window in black.

White quarter sheet insets and white envelopes.


Sunday, August 18, 2024

Card - HB watercolor - Purple

A large purple watercolor card for my aunt who is celebrating a birthday soon.

There is several layers and colors of watercolor brushed across then dried.

Later, I just let color drip down the paper while it was standing.  Catching the drips at the bottom on the desk.

It was then pressed flat.

A simple flower where I punched the flower and painted it with the bits left on the palette. Added a stem and a center.

Half sheet sized card on SU Lavendar Lace cardstock.

I added some clear  rhinestones held in place with Bling Zots. Full sheet insert to hide the brad in the center of the flower. White envelope and it's done.   

Found a new place to take my card pictures where I did not have to move stuff all the time.  See how it goes.

Tuesday, June 25, 2024

Cards - All Occasion - Block Print Paper

I found this Indian Block Print Handmade Paper at the ReUse Center recently and loved it.  I knew that it would work with Stampin Up cardstock colors wonderfully.  The piece was about 9x12 inches so just a few cards.

I chose Baja Breeze and Ruby Red for the card bases in the A2 quarter sheet size.

I cut the decorative paper to leave just a small border.  

I chose a strip of matching card stock to go across the card and then a white scallop circle, with a grey coordinating smooth circle, a bird accent made with the Stampin Up Bird Builder Punch. I added a bit of black which helps to ground the design. A bit stitching around the circle with a fine black marker.

Quarter sheet insert and a white envelope and it is ready to go.

The next layout I used a daisy flower punch which I did one in each color. Then a smaller one in black.  A large white sequin and a coordinating mini brad to hold things together.

I added a strip of white card stock across the landscape card and glued it to the decorative paper leaving the ends hang over. 

I used a push pin to create a hole in each of the layers and mounted the flower accent through to the decorative paper.  Then adhered the whole layer to the card front.

I added black stitching to the white strip with a fine tip marker.

Added a quarter sheet insert and a white envelope.

This card has a Ruby Red card base with a layer of decorative paper adhered with double sided tape.

I created the bird accent with the above mentioned punch in the 3 colors.

With a marker I added the eye and lines to the beak and the stitching around the grey circle.

The accent was then adhered to the card front with double sided tape. 

A white quarter sheet insert and white envelope to finish things off.


Another flower accent card with the alternate color combo from the first one.

The daisy punch accent was assembled the same way with a coordinating warm red mini brad.

A fine black marker for the stitching and the flower adhered to the decorative paper.

This entire layer was then adhered to the landscape card front.

White insert and envelope.  These are now pressing under books overnight to allowing the glue to take a good hold.

I am almost ready to liquidate my designer paper as I very rarely use it and I could use the space for something else. 

Friday, June 14, 2024

Card - Birthday - Watercolor and Flowers

This card is for my aunt who celebrates her birthday soon.  

I chose a SU Crushed Curry textured A2 card base. 

I cut a piece of water color paper left over from the paper I made for these pieces.  I adhered it to the card front.

I wrapped a length of Crushed Curry grosgrain ribbon along the left hand side and knotted it a the top. 

I added 3 handmade paper flowers on the right and held them in place with coordinating mini brads.

I added a SU Modern Label greeting in the bottom right hand corner with 3D foam tape.

I added a quarter sheet insert and envelope.  It is ready to go.
 

Monday, May 27, 2024

Cards - Watercolor - No Greetings

I used some of the leftover watercolor pieces from my entries for the senior show.

Here I have cut a 4 inch piece of watercolor then I mounted it to a SU Cool Caribbean A2 card base.

I added a embossed strip of SU Coral Calypso mounted on the left hand side with a teal blue large dot brad attached.

I added a quarter sheet insert and a white envelope.

I pressed it over night and it is ready for the card box.

I gave my niece another set of cards on the weekend so the box needs refilling.

This card started with a 4.00 x 5.25 inch piece of watercolor paper.

I chose a SU Groovy Guava A2 card base.

I placed a piece of SU Coral Calypso grosgrain ribbon across the watercolor piece and taped the ends to the back. 

I added 5 small handmade paper flowers held in place with tiny brads.  I colored the dark flowers with the leftover watercolor on my palette. Handy!

This layer was adhered to the card front with double sided tape.

I added a quarter sheet insert and a white envelope.  Sitting in my card box.

Thursday, February 8, 2024

Cards - Half Circles

I continue to make cards for friends and family.

The half circle card is a very versatile layout which I have used many times.

I chose some blue watercolor designer paper and cut the 12x12 in 4 pieces.  I cut 6" circles with my Creative Memories circle cutter.  Then those were cut in half on the paper cutter. This paper had a grid on the back that made this very easy.

I chose a grey textured A2 card base.  I adhered the half circle along the left hand side.  I added a royal blue card stock strip along the fold with double sided tape.  

I adhered a Martha Stewart Butterfly punchie in the same blue as the strip with Bling Zots.

Using a silver gel pen I added stitching marks along the circle edge, a fly path for the butterfly, and then dots on the the blue strip.

All cards get a white quarter sheet insert and white envelope.

With a sky blue A2 card stock base and dug in my designer paper stash leftovers and picked this one with paisleys and a good variety of colors.

I only had a smaller piece but by placing the circle guide along the edge half way across I was able to cut a half circle.

It was adhered with double sided tape along the left edge.  I added a dark brown grosgrain ribbon along the fold and knotted it towards the top of the card.

I created a flower accent with a large white silk flower, an aqua handmade paper flower then a small yellow one.  These are held together with a large brown brad.  Once the prongs were pushed apart I added a large Zot to adhere it to the card front.

Excellent.

I chose a leftover piece of the velvet paper with debossed flowers on it.  This feels more like fabric than paper so I decided to cut my half circle with scissors.  I traced the shape with my cutter template with a pencil then  followed the line to cut.  I them adhered it to the card front and trimmed the top and bottom edges.

I decided to pair it with a celery colored grosgrain ribbon.  I punched a hole in the fold of the card with my Stampin Up Slot punch.  I strung my ribbon through it and around the card front tying the knot on the front. 

I chose 2 gold punchies for my Stampin Up Five Petal flower.  I added a couple of silk flower bits in green and red.  

The gold flower sequin was added with a copper star tiny brad.  This accent is then adhered to the card front with a large Zot.

Again, with the other card base in the sky blue color.  

The designer paper half circle was adhered to the left hand side.  

I added a sky blue grosgrain ribbon along the left hand side. 

The flower accent was assembled with 3 different flowers - white silk, yellow silk and aqua handmade paper.  A white flower sequin and a light blue tiny brad.  Once assembled it was adhered to the card front with a large Zot.

I usually vary my card orientations but I was not paying attention and they are all portrait this session.

I chose royal blue textured cardstock for the card base for this card.

I added the blue watercolor designer paper half circle to the left hand side.

With the leftover from the 12x12 piece of dark blue card stock I cut a 1/2 inch strip and glue it to the left hand side along the fold.

I punched a large daisy flower from the blue card stock, added a blue silk flower and a white flower sequin all held together with a white star tiny brad.

Another set of cards for the box so I will have a wide varieyt of cards available when I put together a set of a friend.


Friday, August 4, 2023

Cards - Exchange

My August exchange cards are ready!

Again, I am using 4x4 inch photos from my 4x6 photo calendars.

I believe this is a strawberry flower with morning dew.  I would have taken it at the Community Garden.

I chose a Handsome Hunter card base.  

I cut a Stampin Up Lattice die in white.  I adhered it behind the flower photo allowing only a portion of it to show on the bottom.  

I added small yellow handmade paper flowers, white flower sequins and black tiny brads on the intersections of the die cut.

I then adhered this layer to the front of the card base, added a quarter sheet insert on the right hand panel and a white envelope.

Excellent.


My next card features a Queen Anne Lace flower which I would have taken in Ontario when visiting my sister.

The colors on this one were warmer so I chose a white card base.

I cut the SU Lattice die from a warm green textured card stock.  I split the diecut in two and placed one half on top and bottom of the photo.  The diecut was taped to the back of the photo then the layer was adhered to the card front.

The photo needed a bit of something so I used my fine black marker and added a dash frame all the way around the photo.

The photo has been trimmed to about 3.5 inches square.

I added a white quarter sheet insert and a white envelope and it is ready!

Monday, April 17, 2023

Cards - Birthday

A birthday card for my brother in law.

The card base is Soft Suede.  

I found a piece of watercolor background I made in early January that worked for a guy card.  

I followed a tree image from one I found on line with a dark grey marker.

I then watercolored the tree with brown that I mixed and a green which is a mixture of Always Artichoke and Garden Green.

I mounted on a scrap of black card stock leaving a small border all the way around. Adhered with 3D foam tape. A narrow strip of black card stock under the focal element.

The greeting is a SU Word Window punchie on a black Su Modern Label punchie.


I added a Stampin Up Modern Label punchie greeting to this sunflower card for my sister who has a birthday next week.

The sunflower was stamped with Memories permanent black ink.  I then watercolored it. I ripped the edge on all 4 sides.

I mounted it to one of my small handmade paper sheets in a warm yellow.  This was adhered to a white card with hot glue.

These are off in the mail this morning.


Saturday, April 1, 2023

Card Kits - Flowers

I volunteered to help my sister prepare card kits for my other sister`s daycare.

I first assembled the flower main accents.  Onto the yellow brad I placed a white flower sequin, then a yellow small silk flower, then a medium white one, then a pink bit larger one then a blue large silk flower.  I pressed the prongs of the brad apart on the back. I added a large Zot glue dot still on it`s release paper.

I selected the card stock to match the color of the flower accent.  Here, I choose navy blue.  The various kits feature red, green, turquoise, pink, and peach. The card base measured 11 inches wide and 8.25 inches tall. I scored it at 5.5 inches and folded in half.

I selected green plaid glitter paper to suggest the greenery for the flower.  I cut the plaid paper to 3.25 inches wide and 7 7/8 inches tall which allowed a full 9 scallops.  

The scallops were punched with a Martha Stewart border punch on both side of the strip of glitter paper.

I included a white insert measuring 5 x 8 inches and yellow envelope.

With the card already folded, the green glitter band is adhered onto the card front, the release paper is removed from the back of the flower accent and it is adhered onto the green plaid strip. The white insert is glued to the right hand side of the fold on the inside of the card.  I made 23 kits and provided 1 actual card sample and instructions for the staff. 

All put together, ready to deliver on the Easter weekend.


Sunday, May 1, 2022

Exchange Card - May

These cards are for my card exchange partners. 

I started with the aqua handmade paper flowers then chose the Stampin Up Fresh Prints designer paper then the pink card base.  

This card has a Stampin Up Pretty in Pink card base with a designer paper layer featuring the color of Coastal Cabana which matches super well.

I layered a white flower sequin, a yellow handmade paper flower by Prima, then a white silk flower, the large handmade paper flower and lastly a large white card stock daisy punchie onto a white tiny brad.  Once aligned I pressed it into the DSP and press the prongs apart on the back.

The card base was scored at 1.5 inches then 5.75 inches and folded to the front to create an offset fold.  

The flower accent layer was adhered to the card front with double sided tape just on the left hand side so the Coastal Cabana DSP would overlap the small flap.

The card on the right has the same accent layer of die cut flowers and DSP in Coastal Cabana as the one above.

The card base for this one is Pink Passion which is a deeper version of the one above.

These are headed off to my card exchange buddies.

I added a white quarter sheet insert and a white envelope.


Wednesday, August 18, 2021

Watercolor on Handmade Paper

More reusing supplies from old card kits.  I just loved these small white handmade paper sheets and could not just give them away.  I have painted daisies on these in the past but I wanted to create new art on these.

I am using my Stampin Up Watercolor Wonder crayons in rich regals and brights color families.

This one is an abstract flower in the blue green color family.

I had to trim the handmade paper because the other flowers were not great.  This required an additional layer so i chose some Old Olive on some Not Quite Navy card base.

I always adhere handmade paper to cards with hot glue.  It works the best but you have to be fast before it cools.

This card features a multitude of pinky orange abstract flowers again.  Regal Rose and Old Olive are the colors used.

I did try to put a background of subtle color which did not really work great.

Mounted on a Regal Rose card base.

Each card gets a white blank insert on the inside.

I signed each one as well.


I started with abstract shapes on this piece of handmade paper.  

The colors used are Tango Tangerine and Marina Mist.

I dug through my bling box and found these butterfly confetti sequins which were the right blue color.  I then added them to the handmade paper sheet with orange tiny brads.

I like the fact that there are 2 different designs of butterfly.

Makes me think Santa Fe coloring.

Mounted to the a Marina Mist card base.


This card features Bravo Burgundy as the color in several shades for the flowers.  I was thinking of roses when I painted but I am not sure I succeeded.

Always Artichoke for the stem and leaves with a bit of mixed brown thrown in for good measure.

A bit of spattering in the main colors to lessen the white background.

Mounted to a Bravo Burgundy card base and a white insert.


I tried following the design of the small deep teal handmade paper flowers I had selected as inspiration.  

I had to remind myself - Stick to the 5 petals and make them rounder than usual.  Always Artichoke for the stem and long open leaves.

I mounted the small pale yellow flower then the bit larger teal one onto the watercolored on with a tiny white brad.

Mounted to a deep teal card base of textured card stock.

A bit of spattering to tone down the white background.


I painted the flower with More Mustard and a bit of Daffodil Delight with a lot of long slender petals. I think I should have overlapped some of them.

I really needed Summer Sun to match the card base but I did not get the yellow mix quite as good as I hoped.

A mix of greens and blues for the closed long leaves.

I mounted a small yellow handmade paepr flower in the center of the watercolored one, held in place with a tiny white brad.

These no greeting cards could go into the cards for seniors box but I am not sure yet.

Love the painting.

Sunday, July 18, 2021

Card Box - HB and Thank You

 Another couple of cards for the box.

I started with designer paper from Echo Park called Hello Spring.  I paired it with a purplish Rich Razzleberry card base.

I added a length of Island Indigo 1/4" satin ribbon along the right hand side.  Taped the ends to the back. I added three deep teal and yellow handmade paper flowers on the left side adhered with tiny yellow brads.

This layer was adhered to the front of the card with double sided tape.  This ensures nothing showing on inside of the card. 

The greeting is a Stampin Up Modern Label punchie color printed.  I added the deep purple punch split in half and adhered to the back offset a bit for it to show up.  This layer was adhered to the card front with 3D foam tape.

Ready for an August birthday.


The same paper was paired with a Rose Red card base this time.

I added a white grosgrain ribbon across the bottom third of a landscape oriented card.  Then ends taped to the back and then adhered to the card front.

I added an oval color printed greeting in Rose Red and chalked with the same color around the edges.  It was adhered to the card front with 3D foam tape.

Is resting in the Compassion House box for delivery a little later.

Monday, July 12, 2021

Cards - Birthday and All Occasion

I chose a piece of Stampin Up Designer Paper from the Tea for Two series and cut it into 6 - 4.00 x 5.25" pieces.

The paper was designed with Island Indigo as the deep blue I don't have that color so I substituted Midnight Muse which works well.  Love the quilting pattern.  This is my Angle Rectangle design where the decorative paper is titled on the card front and adhered. Then it is trimmed to the card edges with scissors. 

I added a length of Lucky Limeade Ruffled Ribbon and knotted it on the front aligning it on the left near the fold.

I punched an Artisan Label from a scrap of the same DSP and turned it over to reveal the Calypso Coral polka dot side. I layered a Modern Label blue greeting over that. It was adhered in the bottom right hand corner with 3D foam tape.

This will be a card for one of my quilting sisters.

For this card I have paired it with a Lucky Limeade card base.

I cut the layer at 3.5" and turned the smaller piece over and taped them back together.  I placed a length of Lucky Limeade Ruffled Ribbon along the join and taped the ends to the back.  The layer was then adhered to the card front.

I created the greeting with a SU Scallop Circle punchie in a coordinating orange card stock with a color printed circle greeting.  The blue and green greeting was punched with the 1 3/8 inch circle punch then adhered to the scallop.  This accent was then adhered to the card front over the ribbon with 3D foam tape.

This card is for a friend who celebrates her birthday in early August.


I made a couple of all occasion cards for my card box.

Here I have paired the reverse side which is the Calypso Coral Polka Dots with a coordinating card base. 

I assembled the flower accent with a couple handmade paper flowers (turquoise and yellow) and a couple silk flowers (white and orange).  All held in place on the designer paper with a tiny blue brad. 

The layer was then adhered to the card front with double sided tape.


I used another Midnight Muse card base with the quilting side of the Tea for Two DSP facing out. I made a slit in the designer paper and folded back the triangles to reveal the orange polka dots.  Like the way it repeats the triangles in the paper.

I wrapped a length of narrow organza ribbon in the Lucky Limeade color around the narrowest point of the front layer and tied a bow.  Trimmed the ribbon ends.

The layer was then adhered to the card front.

I added some three warm white Sugar Dots in the triangle space across from the ribbon bow.

Each of these has a white blank insert and has been paired with an white envelope.


Tuesday, June 1, 2021

Cards - Exchange - June

I chose the theme of pink and gold for my card exchange this month.

I chose a white A2 card base with a portrait orientation.

I added a pink textured layer which was embossed with the Stampin Up Subtle 3D folder.  I asked permission to use it before I delivered it to her last month.  Very nice folder. 

I chose a piece of white with foil stars decorative paper and adhered it to the pink layer.  I then punched a slot on the left and right hand side with the Stampin Up slot punch.  I pulled the white grosgrain ribbon through both and tied in on the front. Trimmed both ends.

I added a couple of gold star punchies and a pink handmade paper flower adorned with a gold flower sequin and attached with a gold star tiny brad.

I added a Stampin Up Modern Label punchie greeting color printed in pink, adhered with 3D foam tape. 

I followed most of the supplies from the first one.  

Started with a white card base A2 and put it in the landscape orientation this time.

Same treatment of the pink layer.

Added the ribbon and taped the ends to the back of the pink layer.

I added the gold foil star decorative layer over the ribbon onto the pink layer.  The trimmed piece of grosgrain ribbon I adhered behind the gold star layer and trimmed the ends. 

I added the Modern Label greeting with 3D foam tape above the bit of ribbon. 

I adhered 3 small gold confetti below the ribbon with Bling Zots.

These are off to my partners.

Wednesday, May 19, 2021

Cards - Thanks

Another few cards for Compassion House.

This is reusing a small thank you card. The words are silver foil.  

I just swiped a bit of watercolor in yellow across the words. Then I paired it with a deep yellow card.  

I added a yellow handmade paper flower in the top left hand corner held in place with a silver flower sequin and a silver tiny brad.

This layer was then adhered to the front of the card.


I reused a nature print I did a long time ago.  This is a maple leaf print using a variety of acrylic paints - brown, red, yellow and orange.  Once dry, I spritzed it with orange red watercolor.

I paired it with a warm red card base.  The nature print was adhered to the card front.

I added an oval color printed greeting in warm orange tones and punched out with the 2" oval.


A deep brown card with a designer paper layer of warm blue grey stripes. I wrapped a length of ivory grosgrain ribbon and tape the ends to the back. This was adhered to the card front.

I added the scallop circle greeting in ivory and warm blue grey.  The punches are all Stampin Up - scallop circle, 1 3/8 and 1 1/4 inch circles.  This was mounted with 3D foam tape.

I arranged the 3 hexagons and adhered with double sided tape.  Cut with the SB Hexagon Nestablities.

Tuesday, March 16, 2021

Cards - Acrylic Ink Backgrounds - Thanks

Another few cards with those acrylic ink backgrounds.  

This one is deep burgundy with yellow spots.

I printed the greeting from the Stampin Up You're Lovely Stamp set and cut with the Stampin up Sizzix Deco Labels Framelits Dies.  I colored with flowers with brush markers. 

This was mounted on a black card base with 3D foam tape behind the greeting.


A similar background with a flower accent.

I chose a magenta card base. 

I cut the greeting with the Cricut and the Don Juan cartridge from terracotta textured card stock.   

I punched a Stampin Up Five Petal flower from the same card stock.   I layered this with a salmon color handmade paper flower with an ivory silk flower.  It is held in place with a magenta brad layered with a flower sequin.


I chose a yellow card base for the green acrylic ink background. 

I punched 3 SU Five Petal flowers from pearl white card stock. I added pale yellow handmade paper flowers and small flower sequins.  The flowers are held in place with tiny green brads. 

The greeting is cut with the Don Juan Cricut cartridge at 1" Tall.  It is mounted with 3D foam tape.   All of these have a blank white insert.

Friday, March 12, 2021

Cards - Thanks - Cricut

I wanted to use the rest of the acrylic ink backgrounds I made for these cards so I did not have leftovers hanging about. 

I searched my Cricut cartridges to see which had "thank you" greetings.   I found this one in the Don Juan cartridge. The size of the letters were wide enough for me to put 3D foam tape behind them so I went for it. 

This was cut at 1.5" tall and 4.75" wide. I trimmed the background to fit leaving an even border all the way around on a true blue A2 card base.

Adhered the background and added a bling heart in the top left hand corner.

I chose a yellow A2 (4.25" x 5.5") card base for this card.   

I chose five small handmade paper flowers held in place with green tiny brads. 

I adhered the greeting with 3D foam tape.

It was spattered with the Chartreuse Leaf green ink.


Again, a medium blue card base in A2 size. 

Trimmed the acrylic ink background and adhered it to the card front.

I placed a small silver butterfly in the top left hand corner with a Bling Zot.

Spattered with Prussian Blue ink.

I will have to find a place to donate these. Maybe Compassion House.  Done!

Friday, January 15, 2021

Christmas Card Challenge - Jan - Handmade Paper

I started on my 2021 Christmas Cards. I was inspired by a photo shoot I am planning.  

I used small sheets of handmade paper in light warm blue color.  I chose a deep warm blue card base.

I color printed a star and a greeting from the Stampin Up Bright and Beautiful set in Baja Breeze.  I heated embossed them with clear powder.  I cut the stars by hand and ripped the top and bottom edges of the greeting.

I used tiny blue brads to attach the star and greeting to the sheet of handmade paper.  I added a small sequin to the star and a snowflake sequin behind the greeting.


I have four cards in the card box.

I have not used handmade paper sheets in forever.  It was nice to get some onto cards.