Showing posts with label Note Card Gift Set. Show all posts

Wednesday, September 4, 2019

Donations to a Fundraiser

I prepared a couple of photos to donate as prizes at a fundraiser being held this weekend.

The 8x10 inch frame is metal in a gun metal gray color.  It has very angled edges.

I chose a black mat 8x10 mat with an 5x8 inch opening. It is archival but in a size I would not likely use for the gallery.

The photo is a black and white photo 8x8 inches of chess pieces I took a couple of years ago for Flickr Macro Mondays. It fit perfectly in this frame.

I placed the pawn and shortest piece in the front then aligned the knight in the middle ground and the queen in the background.  I was just making an appealing presentation of the shapes of the pieces.  I have since learned a bit of how chess is played from my grand nephew.
This frame is a warm white color.  It is plastic in an 8x10 inch with a very narrow profile.  It was very easy to assemble the sandwich to insert in the frame.  Very well designed.

I paired it with a shot of The Wilson`s Snipe I took at the wetlands when I first got my zoom.

An oval mat is not likely something I would use for the gallery and it is archival as well.

The photo is an 8x8 inch which I printed a while back.  The color of the frame works really well with the colors in the feather of the bird.


I put together a gift pack of 10 A7 5x7 photo cards as well as a prize at this fundraiser.  I have decided to go back to making A2 cards as those are more efficient in materials and time.

I hope the folks that receive these will enjoy them in their world whatever that may be.

Saturday, August 11, 2018

One Sheet Wonder - Card Set1

I am making a set of cards for friends who have lost a loved one this week.

I am using the One Sheet Wonder concept.  For these cards I used my OSW1 layout.  I used a very versatile designer paper with a bunch of colors called Disco Ball by Recollections.

The layouts can be change as desired.  Here I have chosen landscape and placed my designer paper on the left hand side.  I am using ivory card stock strips to coordinate with the designer paper. Here I chose brown but I see that green would have worked well also. On the next set!
I was able to choose 3 different colors for my card bases because of the wonderful colors in the designer paper. I chose blue and salmon. For the bottom 2 I put a brown butterfly created with the Martha Stewart Butterfly punch.  On the first I chose blue for the butterfly.  They are held in place with Bling Zots.

Thursday, August 2, 2018

Photo Card Gift Set - Donation

Another set of 5x7 inch photo cards.  The process went a little better this time around.


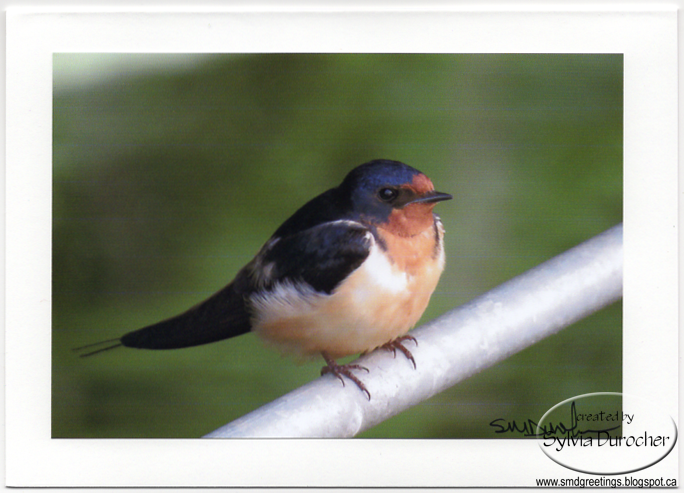
Above is the Tree Swallow
On the left - Great Scaup, Barn Swallow, Black Capped Chickadee, Red Wing Black Bird and the neighbourhood Cat.
On the right - Pink Dahlia


I refurbished a card box by wrapping it with burgundy mulberry paper.  I cut a 7x7 inch white card stock liner. 

I then created a spacer insert for the top of the box. 

Photo Card Gift Set - Donation

I made a set of photo cards in the 5x7 format which is larger than the standard A2 size I normally make.

I adhered one of my photographs in 4x6 size to the front which were individually signed. 

For this set I selected flowers in the set. 

I chose the following and put 2 cards of the same in the box.


Red Dahlia

Yellow Lily

Pink Cosmos

Purple Allium


Making larger cards was challenging in the sense that I need new supporting documents, new envelopes, and new packaging.


This is being donated as a prize for a charity event in the fall.

Saturday, July 14, 2018

Blank Card Set

I made a set of cards for my aunt.  A funeral is a time where friends, service personnel and family are pitching in to make the arrangements.  Having cards handy makes it easy to express appreciation for the help.

In this set of cards I used a grey green card bases with a subtle floral designer paper in shades of green and grey.  The ribbon I used is called Knitting Ribbon.  It is beautiful soft ribbon about 3/8 inch wide. Love it.

I have use Prima Handmade Paper flowers as well with coordinating brads.


The flowers were peach, green, and shades of pink.  I have created a variety of designs with the flowers.

The other card has heart punchies in pink and white with small plastic pink flowers held in place with Bling Zots.

Saturday, June 3, 2017

Note Cards - Wedgwood Cameos


I made a set of note cards with vintage Wedgeport Notes images that I bought at a second hand store a few weeks away. The sticker on the box indicates it was sold in a Woodward`s store.  These stores closed in 1992 so the box of cards is at least 25 years old.  It held 16 images but only 12 of them had ovals which I chose for this project.

I cut the card front with the Stampin Up Aphothecary thin-lit aligning the ovals of the cameos. Since the cutting edges are on the edge of the thin-lit it was easy to see exactly where it was going cut. I then mounted a piece of coordinating card stock at the bottom of the card front.  The left one just has a solid piece which has been just adhered with the edges butted up to each other.  The center one, the coordinating layer was punched with the SU! Eyelet border punch and overlapped the card front.  On the right one, I used one of the SU! Edgelits in the Adorning Accents set again overlapping the pieces. I then adhered the accent onto the ivory card front.

I had a card stock leftover from the 12x12 which I cut down to 1 inch wide. I used 2 of them to create a container to place the 12 cards and envelopes inside. I added a credit label on the outside. This was placed inside a gussetted cello bag which measures 3.5W x 1.25D x 8.5T inches. I just folded the top of the bag like a gift and taped the flap closed.

This used 4 12x12 card stock, a bit of solid card stock, 12 envelopes and the vintage cameos.

Saturday, February 4, 2017

Wedding Shower - Thank Yous & Card

I attended a wedding shower today. I made a set of 24 thank you notes for the bride to be. 
Her colors were blush and navy blue so I chose those for the project.
I created the blush paper by brushing Tim Holtz Tattered Rose Distress Stain onto white pearl card stock.  The sheets were left to dry over night.  I was glad to see that the sheets were back to being flat in the morning.
I made the blush hearts with the Stampin Up! Sweetheart punch.  I was able to get 10 from a strip of card stock 2 inches x 11 inches.  I alternated the bumps to make efficient use of the paper.
The ivory cards have a gold foil greeting the center.  I used the SU Modern Label digital stamp to create the label around the words.  The dots are from the Lemonade Stand digital stamp set.  I printed the label and the dots in Night of Navy.  I adhered the hearts with double sided tape. 

I made a card for the couple.  I chose an ivory textured card stock for the card.  I chose the label from the Everything Eleanor digital stamp set.  I colored it with Night of Navy. 
The sentiment is also in the same dark blue.  I mounted another set of blush hearts in the center of the label. One is mounted with 3D foam tape to allow the other to easily be adhered behind it.
The shower was well attended and the gift table was overflowing with lovely things to get this couple started in their life together.

Wednesday, March 30, 2016

Note Card & Encouragement Card Gift Sets

I made a couple of Note Card and Encouragement Card Gift sets today.

I created some new encouragement cards in the portrait orientation with some great art from Pixabay.  The hummingbird and mushroom ones are posted below.

These cards were included in these 2 gift sets along with some made with a landscape image from Maria (see image below) and some I designed a while back.

One of these will be given to a couple who is starting new roles. 


This landscape was created by Maria S.  I used the image in black as well as I converted the image into sepia, artichoke, and navy.