Friday, October 31, 2014

Happy Halloween!!!


Wishing everyone a Happy Halloween day.  Be safe and have fun.
We had our traditional potluck at work today and all the food was terrific. We had an arm, pepper stuffed with dip and a surprise, spider web table cloths, goblets for punch, mummy candle holders, eyeball devilled eggs and much more!  What fun.

Thursday, October 30, 2014

Photo Challenge - My Favorite Color

The challenge at Claire's blog is My Favorite Color. For me, hot pink is always a favorite.

The photo I took is a bright quilt square with hot pink, turquoise, greens and a bit of yellow.

Wednesday, October 29, 2014

R2G Card Kit - Prince of Peace

I worked are card kits for my up coming classes today.  These are SU Style cards.  I used the Prince of Peace stamp which was sold as a single stamp. It fits into the Deco Label Framelits.

I decided to make some cards in cool colors and other in warm colors.

For the cool set I chose Brilliant Blue for the card base and Whisper White for the embossed layer as well as the stamped die cut.  The stamping was done in the same color as the card. I traced the edges of the die cut with a matching marker. I added an aida ribbon in red as well as a silver metallic ribbon which had the bottom end flagged.  I used the Pretty Print embossing folder.  The die cut was adhered to the card with 3D foam tape.

For the warm set I chose Ruby Red for the card base and Very Vanilla for the embossed layer as well as the stamped die cut. The aida ribbon was green and the metallic ribbon gold.


Tuesday, October 28, 2014

Card Kit Redo!


I spent the day working on Christmas cards for my sale.  I had card kits left over from past classes and decided that it was a waste of resources sitting in a box. I made 52 cards today!!

This is a set that I redid the ornament because I was not as happy as I was originally with the kit. I created card stock ornaments to replace the felt ones.

Monday, October 27, 2014

Card Club - Oct - B&W Plaid Masculine

I started with the black and white plaid card stock. I cut this card stock at 4 inches square then I added a piece of black thread placed on the left hand side and taped the ends to the back.  This layer was adhered to the card front.   I was looking for masculine images for guy cards.   I printed some black and white clipart images I found on the web which were printed on white card stock at 3 inches square and trimmed. In the same card stock as the card I cut a layer at a generous 3 1/8 inches­. The image was layered onto this solid square. This layer was adhered over the b&w plaid square with 3D foam tape.  The greeting was color printed in color to match the card and punched with the Stampin Up Word Window.  This was adhered to a Modern Label punchie from the same black & white plaid card stock.  I then punched a black Modern Label which I cut in half crosswise.  This was glued to the back of the plaid one offset to the left and right.  The greeting was then adhered to the card front below the plaid square as shown.

This set had a tree on a green card, a rooster on a red card and a house on a brown card.

Card Club - Oct - Glitter Circle Trio

I used some card stock with selected flowers glittered as a starting point for this set of cards. I punched the glitter card stock with the Stampin Up 1.25 inch circle punch.  I punched the next layer with the 1 3/8 inch circle punch from deep purple card stock.  I printed my large greeting layer on white card stock in a color to match the card.  The white layer is adhered then the solid circles then the glitter circles.

The other set of card stock was in more muted color tones so I chose an olive card and a lighter purple card stock for the solid circles.

Card Club - Oct - Flower Sticker

I used Dimensional Epoxy Stickers on this set of cards. I matched the card stock to the flower color.  I added a green layer of olive card stock which was embossed with the Cuttlebug Acanthus embossing folder designed by Anna Griffin.  This was adhered to the card front.  I then cut a Tim Holtz label with the Stylized Labels die from butter yellow card stock.  I color printed greetings in dark green on the same card stock as the card. These were punched out with the Stampin Up Modern Label punch.  The flower was placed on the left hand side and the greeting was on the right extending passed the edge of the label.  The label was adhered with 3D foam tape.
The set of stickers  included orange, purple, and pink flowers.

Card Club - Oct - Butterfly

Today is card club and I have the luxury of being on vacation so I have just finished up the kits with plenty of time.

I have used one of the designer papers for the SLAB IV that many of us purchased years ago.  I have been waiting for a designer to work with this paper and this was it.  I started with an olive green card.  The acetate satin ribbon was a donation from one of the girls from card club a while back. It worked well in this design.  I cut 2 lengths, placed it on the designer paper layer, wrapped the ends over the top and bottom and taped the ends to the back.  This layer was glued to the card front.  I then assembled the accent.  I adhered the layers in this order. A 2" square of pink card stock, then a Stampin Up Deco Framelit aligning the corners, a large 2" oval punchie of the same designer paper and a pink butterfly punched with the Martha Stewart Large Butterfly.  This accent was attached to the card front over the ribbon with 3D foam tape.  The kits for class contain a variety of card colors including green, blue green and purple.

Sunday, October 26, 2014

Peace Card Set

I made another set of cards for a donation to a fundraiser.

I found green backgrounds from the web then created the word PEACE with digital images from Aria Sparkle.  I created an oval with a gradient fill with a dark border.  I layered the word on top of it. I found the sprig of olive branch on CLKER.  The bottom one is a gradient background with darker edges.


Once the card was printed I added a pearl white card stock die cut of a dove on the top and a star on the bottom one. These are Sizzix dies.

Coaster Calendars 2015

I'm here with Coaster Calendars for the November 8 2014 sale. These are a nice gift.

Coasters covered with designer paper then pressed while drying to make sure they stay perfectly flat.  I added vellum sentiments cut with the Stampin Up Apothecary Framelit.  I added a small calendar with double sided tape.

Saturday, October 25, 2014

Ready2Fill Calendar - Tall & Slim 2015

I'm working on product for my sale on November 8th.

Here's an update to my Tall & Slim calendar for 2015.  Every year provides an opportunity to tweek things a bit.

These are calendars that you fill with photos then give as a gift. Makes great gifts to grandparents filled with photos of your kids. Did you take a trip this year you want to remember all year long?  Did you have a family event - wedding, reunion at which you took some great shots of those you haven't seen for a while?  Here's a great place to see those folks for a year. A reminder how blessed you are!

Thursday, October 23, 2014

R2G Card Kit - Chalkboard JOY

I made a couple kits of these cards.

I found this chalkboard layer a while back and envisioned this card.  It's taken a while to get them done.  I cut the JOY layer to 4.5" x 3 3/8". I then cut the white layer to 3.75"x 4.75".  I glued these together.  The took a short piece of the red ribbon and flag cut both ends then laid it over the long one make sure about placement.  Then, I tied them together with the white thread. I placed on the JOY layer and taped the ends to the the back.  This layer was then adhered to the black card front.  I love this card.  I made a few for myself.

R2G Christmas Card Stack Kit - Snowflake

I stated with the snowflake designer paper.  It is good weight and was great to work with.  I matched it to a blue card.  I chose to coordinate it with a chocolate silver shimmery ribbon.  I cut the designer paper to leave just a small border and adhered it to the card front.  I then placed the ribbon to the left of centre and taped the ends to the inside of the card. I cut 3 snowflakes: 1 blue the same as the card with a Martha Stewart punch, 2 thin snowflake from mirror card stock with a Stampin Up snowflake sizzlet then 3 a white punchie with a smaller MS punch.  I layered these then placed them over the ribbon on the card front and used a push pin to make a hole for the brad.  I used chocolate brown brad to hold all these layers to the card front with the prong being spread apart inside the card.  I designed the banner greeting then color printed it.  It was trimmed by hand then adhered to the card front with 3D foam tape. I added 3 small rhinestones just above the greeting using mini Zots.

R2G Christmas Card Stack Kit - Joy Star

Here's the second card in this kit.  I chose a purple diamond designer paper which could be used with a few shades of purple card stock.  I chose a deep purple card and matched it with pearl white card stock for the JOY layer.  I paired the copper metallic paper with a lighter card stock. The metallic layer was cut to the 4"x 5.25"inches then the JOY was punched with a Martha Stewart border punch. The punching was pretty easy because I punched the centre one first then just aligned the other two.  The stars are cut with a Sizzix star die with the largest in the metallic card stock and the smaller one in glitter card stock. The designer paper was cut to 3" x 4.75" and layered onto the metallic JOY layer. The metallic star was adhered directly to the designer paper and the glitter star was adhered with 3D foam tape making sure to align the horizontal rays.

Update: When I did the class with this kit the participants discovered that the sentiment insert I had included was portrait but the card was landscape.  As they worked on the other cards my brain was desperately trying to find a way to make the best of the situation.  Here's the solution:

R2G Christmas Card Stack Kit - Christmas Plaid


I started with the traditional Christmas Plaid card stock. I chose red and green card stock which coordinated.  I cut a white layer at 5.25" x 4" which was added to the card front. I cut plaid layer to 5" x 3.75".  I wrapped a white seam binding ribbon around and knotted it to the front. I created the circle greeting with the Merry Christmas going all the way around and I added vintage Christmas card images in the centre. They were color printed then cut with a 2" SB Nestabilities smooth circle die. I glued the circle greeting onto a Stampin Up Deco Label die-cut in the same card stock as the card. It is adhered to the card front with 3D foam tape. As you can see it can be mounted to make a landscape (wide) or portrait (tall) card.

So with the same supplies and just a change of color and orientation creates 2 different looks. Great versatility!

Wednesday, October 22, 2014

Card - Versatile DP Birthday

I made this card for guy who celebrating his birthday next week on a warm beach.

I love this paper because there is so many colors to choose from.  I chose blue with a white layer for this card, but I pulled burgundy, moss green, dark olive, brown and even salmon for some pieces of this paper. I cut the designer paper 3.75 x 3.75 with the layer at 4" square.  I added a printed vellum banner greeting held in place with a Zot and a blue button with white thread on top of that!

Check in later for a card kit with this paper.

Monday, October 20, 2014

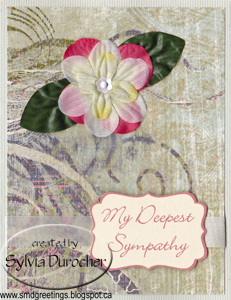
Card - Sympathy - Still more

Here are 2 more cards for those who have lost loved ones. This one for a friend Val who lost her son-in-law. The other for Mary the wife of a friend Brad who passed away.

I started with grey cards onto which I added a layer of designer paper in muted green tones.  I cut the pink card stock with the Stampin Up Window Frames framelits.  I then layered a square of green behind it.  I added several silk flowers and a silk leaf.  I placed a strip of the same green card stock toward to lower edge and added my sentiment which was color printed and punched with the Decorative Label punch.  This was mounted to the card front with 3D foam tape.


The next card is very similar.  This one has a yellow silk flower and a smaller light pink flower.  


Sunday, October 19, 2014

Cards - Sympathy - Silk Flowers

I made a couple sympathy cards this morning for folks who have lost loved ones recently.  The top one is for a lady who lost her husband.
I started with a mint green card and added some K&Company Designer paper in muted tones of green, grey and teal.  I added a ribbon across the bottom and mounted the sentiment on top of it with 3D foam tape.  I added an accent of layered silk flowers and leaves in similar colors. All held in place with a tiny white brad with a gold flower sequin as the outer most layer.

The next one is for a friend who lost her sister at 95. What a long life!  On this card I played on the bits of bright pink in the bottom left hand corner hence the bit of pink in the silk flowers.  The sentiment was color printed and punched with the Stampin Up Decorative Label punch.  Again mounted over a ribbon with 3D foam tape.

Photo - The Color of Evening

I decided to go out and try to get some shots for this Focus on Life Challenge - The Color of Evening.  I was chasing the light as the sun set. The first picture was taken at the top of the river valley.  I loved the great pine trees in silhouette on the left.

I really love the deep yellow in the photo below. It looks like there are heavy clouds tonight so it may rain tonight.

Bottom left was taken in an area where I've gone to take pics before because there are great trees with superb shapes.  I think I waited just a little to late to get some sunset shots.


Friday, October 17, 2014

Note Cards for a Friend

I made some quick note cards for a friend who is having a tough time.

I used Stampin Up images from the Sweet Summer Stamp Set.  I made several with just black images leaving enough space below if she decides to stamp a small sentiment based on who is receiving it.  The color around is the color of the cool envelopes I used.


The cards a bit smaller than a regular A2 card so I am ready to be done with the small envelopes and switch to Nifty Notes instead.

These blooms are Wisteria Wonder, Calypso Coral and Island Indigo with Wild Wasabi. I kept to the same color family.

Here's a link to the last set I made.

Thursday, October 16, 2014

Calendars - Ready 2 Fill - Floral

Here is another product for my upcoming sale. These are calendars you can fill with your own photos.  Makes great gifts for grand parents when filled with photos of the grand kids. This one would work really well for photos of your winter trip to a warm climate.

I have added photo corners punched with the Stampin Up Five Petal punch in Bazzill bling card stock.  The colors are bright yellow - Celebrity and a coral color - Sunset. The kit includes tape runner to adhere your photos and corners.  With a few photos the gifts will ready in a few minutes.

Tuesday, October 14, 2014

Card - Sympathy

I made a few cards for family who are attending my Uncle Joe's funeral today.
I started with a grey card and added a designer paper in grey and ivory florals.  I added a length of ivory twill tape about 1" below the top and tape the ends to the back.  I stamped the sentiment with a Stampendous stamp in Sahara Sand on ivory.  I used a corner punch then rubbed the edges with the same ink pad. Sentiment mounted with 3D foam tape.


 These cards start with a
deep muted grape color card stock.  I added a vellum layer cut to leave a small border.  I added a square of designer paper which I warmed up with a bit of Tim Holtz Antique Linen Distress Stain to go with the ivory greeting I had in my stash.  I added a SU Five Petal Punch in ivory rubbed with a purple ink pad.  I added silk flower flower with a deep purple brad holding all pieces in place.  I added the sentiment with 3D foam tape.  It was color printed and punched with the SU Decorative Label punch.

Monday, October 13, 2014

Photo - Punch of Color

I took this picture at my Mom's while I was home for Thanksgiving. She had a vase of pink Gerber Daisies. I could not resist.

I was going to post this to Sally's challenge "A punch of color" but could not find the posting.  I will wait and see if it appears later.

Sunday, October 12, 2014

Happy Thanksgiving


Wishing you all a Happy Thanksgiving Day.  May you enjoy your day with family, friends, or favorite activities.

Friday, October 10, 2014

Card - Fall Leaves


I made a couple of fall cards for my card exchange group.

I used the SEI Nutmeg designer paper pad again. I cut the layer just a bit smaller than the deep rust card front.  I added a length of wide taupe grosgrain ribbon and taped the ends to the back of the DSP layer. I added a narrow strip of white card stock over the ribbon.  I cut a leaf from copper glitter paper with the Tim Holtz Tattered Leaves die and mounted it to the card front with 3D foam tape.

The next card I punched green maple leaves.  I placed a length of ginger ribbon across the top third of the DSP layer and taped the ends to the back.  I adhered the DSP layer to the card front. I adhered the leaves to the card with 3D foam tape.  I added a SU Modern Label punchie with a white Word Window punchie greeting.  It was mounted with 3D foam tape also.

Thursday, October 9, 2014

SU Book Party Thank Yous

The box arrived today!!  New toys to play with.

These are the cards I made for the ladies who placed an order at my Stampin Up Book Party a couple weeks back. Here's the make and take tags we made.

This is Kiwi Kiss card stock onto which I added a layer of white.  I then selected a sheet of designer paper from the Good Morning Sunshine (retired) set.  I cut the paper into 1" strips and placed three across the tall card.  I used the greeting from the Eventful Year set and color printed it in Kiwi Kiss with a black border.  I then cut them out with the rectangular framelit from the Apothecary set.  I attached the greeting with 2 tiny black brads.  Wrapped a length of black 1/4"grosgrain ribbon below the greeting and taped to the back of the white layer.  Added a short length and knotted it and trimmed the ends.  I trimmed the strips of DSP at a slant by hand with scissors. This layer was then adhered to the card front.

Wednesday, October 8, 2014

Recipe Box Divider Tabs

I'm working on items for our craft sale on November 8th which will raise funds for world missions.

We are having a Kid's Corner where children can shop for their parents.  I am making some of my unused supplies go to a new home.  As participants we are all donating items to the Kid's Corner.

These were purchased several years ago for a 5 year calendar but the concept or the time did not come together.  So, I decided to just make up dividers and fill them with index cards and maybe somebody's Mom or Dad will enjoy it.  I selected card stock which coordinated with the box. I cut pieces of ivory card stock at 3.75 x 6 inches.  I designed the tabs for the Stampin Up Round Tab punch.  I added the word at the center and wanted something to fill the bottom.  After a bit of searching on Ckler I found exactly what I needed.  I decided on 12 dividers. I put names on 10 and left 2 blank. I was able to print 12 tabs on a 4.25 x 11 piece of card stock.  Once printed, I punched them out, folded them in half, applied adhesive and carefully aligned the front one and pressed the back one to meet it.

Tuesday, October 7, 2014

Cards - Grateful

I made a few cards to special people who have been supportive during my health struggle the last 5 weeks or so.

I started with a sheet of paper from the SEI Nutmeg designer paper pad.  I matched it with a deep burgundy card. I placed a piece of rust polka dot grosgrain ribbon across the bottom edge.  I added a Stampin Up Modern Label punchie in ivory card stock stamped with Always Artichoke with one of the stamps from the Small Script stamp set.

I scored this stamp set at a second hand store for just a few bucks.  Great find!

Sunday, October 5, 2014

Photo - Monday Mosaic - Ride in the Country

Here's a mosaic I put together of photos from a trip in the country, giving these a rural theme.

A white barn in the top left then a windmill in the top right.  A rust bloom still untouched by the frost in the left middle.  Bottom left a mural of the harvest in bygone years.  An old abandoned building in the bottom right.

Posting this to Mosaic Monday at Lavendar Cottage.

Photo - Sunset - Goodbye

I'm entering this photo to the Round Robin Photo Challenge - Goodbye. A sunset says goodbye to the day, every day.  I love the deep colors in this photo.  Warm yellows and blues with the dark trees in silhouette.
All the best in your next adventure.

Photo - Red Leaves

I took this photo for Sally Russick's Photo Challenge this week which is Color Photography.

We do have a few red maple leaves this far west. There were many people taking their fall family pictures this afternoon. I liked the contrast between the red and the grey wood.

Thursday, October 2, 2014

HB Card Flip Card Quick

I made a quick card for a girl who turned 12 on Tuesday. We were celebrating with supper.  I know purple is a favorite color.

I chose hot pink for the card.  I added designer paper in purple stripes with pink swirls.  I cut a scallop circle in the same designer paper then printed a purple greeting which I punched out with the Stampin Up Scallop Circle punch.  I added some white seam binding on the right hand side.  I did not have pink to match.


Wednesday, October 1, 2014

Christmas Card Challenge - Oct - Tools Dies

The challenge for October is Tools - Dies.  This could include: Thick Dies from Sizzix or other companies, Electronic Cutters such as Cricut or Silhouette, or Sizzlets, or thin dies such as Spellbinders Nestabilities, Framelits, Thinlits,  Wow hasn't the world of diecutting grown!!


I selected a Flip Card and used the Sizzix Framelits Die Set 11PK Card Circle Flip-its #2. I selected the circle to repeat the circles in the DSP. I cut the card base from a bright green card stock.  Then I cut the layers from Basic Grey Fruitcake Berry Branch DSP. I cut a scallop circle to place on the circle flip.  I added white Martha Stewart snowflake punchie with a glue dot to hold it in place.  I added a piece of cotton ribbon in deep red to the left hand side and knotted it and trimmed the ends.  This is really nice ribbon and was bought at my local arts and crafts store in the Christmas ribbon section.

The picture on the right is of the card open.