Tuesday, April 16, 2019

Thank You Cards - donated

I dropped another set of thank you cards at Compassion House as I was there to facilitate a card making session.

The women staying there for their cancer treatments are encouraged to prepare a thank you card for those who donate funds to keep this wonderful house running.

These are recycled commercial cards with additional layers added to provide more interest.

Love the gold foil ones.  I have the backs which will show up somewhere in card making on my desk.


I love these daffodils.  Watercolor always feeds my soul.  I love the border and the cute butterflies.  With a good variety to of colors I was able to coordinate them with ivory and yellow card bases. I added green layers.


These glitter cards I was able to watercolor myself.  They are very sparkly and I really enjoyed the process of applying color as I saw fit.

I added thank you circle greetings in turquoise to coordinate with the handmade flower to these copper flower cards.


I added layers to these beautiful blue stripes and marbled ones.  Adding turquoise card base on the first with a daisy punchie in the bottom left and corner.  I added black to the second one.  


I added purple silk flowers to the one on the left.  Then coordinated the card base with the flowers.


The one on the right I added to a burgundy card base to match the border around the greeting.  I added a daisy punchie from burgundy card stock and held in place with a small brad.

That is 14 cards.   I do not really know how many the house uses but I keep the box full as I can.


Warm Birthday Card

I made a quick card for my brother in law who celebrates a birthday this week.

I chose a warm ginger colored card base. 

I added some polka dot designer paper top and bottom aligned to card edges.

I cut greeting with the Memory Box Jumbled Happy Birthday thin lit.  I cut 2 happys and 1 birthday.  The light ginger ones were mounted over the designer paper and the dark brown one was adhered in the center of the card.    I used Scotch Quick Dry Adhesive to adhered these as the bottle has a fine tip which makes applied the glue where I want it easy.  In the mail this afternoon with warm wishes.

Monday, April 15, 2019

Recent Photos

I finished another Kate Morton book this week. Loved it!

Another great read.  Based on her formula of book writing we go between 1940s, 1960s and 2011.

Laurel`s 90 year old mother Dorothy Nicolson is nearing the end of her life and the children come home to be close.  Laurel comes from London to rural England back to her childhood home of Greenacres.  This is where she witnessed shocking violence when she was a teenager.  She has kept the secret but now she wants to find out who the stranger was who came up the lane that fateful day.

Realizing that this is her last chance to discover the truth about that long-ago day, Laurel searches for answers that can only be found in Dorothy’s past. Clue by clue, she traces a secret history of three strangers from vastly different worlds thrown together in war-torn London—Dorothy, Vivien, and Jimmy—whose lives are forever after entwined. A gripping story of deception and passion, The Secret Keeper will keep you enthralled to the last page.   There is a twist at the very end.
I captured this Canada Goose playing coy the other day.

She was trying very hard to not to let me know she was paying attention but as you can see her eye was clearly on me.

I love the way the dry cattails in the foreground support her detached look.

It is so nice to see the big birds back.  The pelicans should be back soon as well. Good times walking and taking pictures.


I found pussy willows in all stages at the wetlands.  Some were grey and fluffy as they emerge from their capsules.  Then they start to show some yellow pollen.  Then they are in full bloom with these wonderful bright pink red ends.

Sharing with Angie who hosts Mosaic Monday 23 at Letting Go of the Bay Leaf and Mersad at Through my Lens 187.

Saturday, April 13, 2019

"Save the Bees" Textile Project

This is the project I am submitting to the AAC "Uncommon Threads" show.   I am delivering it today.  It is a piece which speaks to the need to save our bees.  We would have nothing to eat if we did not have bees as pollinators.

Plant Flowers
Provide Water
Build Beehouses
Save the Bees

It took me over 2 weeks in January to make it.  The background is handpainted, the flowers are all hand stitched and the layers are held together with a blanket stitch edge. 

The materials are fleece and felt.  Fleece was used for the background.  The flowers and house are felt. I used sequins and e-beads to enhance the flowers.

The thread is embroidery thread split in half and the edge is all six strands.


Color Experiments

I spent some time figuring out if I could color the fleece and the felt the way I wanted. 

Some colors were not permanent and others worked really well.   I sprayed a small tab of white fleece with diluted color from each bottle.  They were allowed to dry over night.  I then rinsed each of them to see if the color was permanent.

The Rotring and Dayler Rowney FW Acrylic were permanent.  The Radiant Rain sprays were not permanent though stained the fiber.


 Colors Chosen and the Process

I chose liquid acrylic ink to color the white fleece background.  The colors are Raw Umber Hue, Sap Green, Olive Green, and Indian Yellow.
Nature has lots of shades so I tried to reproduce that with the colors I had in my stash.

I cut 2 pieces of white fleece larger than the 12x12 piece of chipboard. 

I placed the fleece on a large piece of glass. I used a spray bottle to apply the color.  It allows even color and specific placement of different colors as I needed.

I placed it over rods to allow the most exposure to air to assist in the drying of the fleece.

Again, drying overnight.


Laminating the Layers

I cut the fleece layers down to a generous 12x12 inches with a rotary cutter.

I placed a piece of interfacing in the zigzag stitching to prevent stretching of the fleece.

I stitched the 2 layers of fleece together before I stitched the elements to the front.  I did put a zigzag border all the way around and then I chose to apply organic lines in the center rather than evenly spaced lines.  Most will not show.

I love the color!

Elements

I created the BeeHouse from black felt.  I stitched pieces of wood for the roof along the angled top edges.   I used round donut beads which mimic pieces of bamboo which creates holes for the bees to live in.  These houses provide shelter solitary bees which do not in hives.

The bees on the piece are buttons.  They are a great color and just the right size.

I cut rain drops to which I added blue sequins and beads to represent providing water for the bees. 

The water should be moving or regularly changed.

The flowers were cut with dies.

1) Sizzix Flower Layers & Leaves
2) Flower Layers #10
3) Flower Layers #7

I chose turquoise, purple, pink, grey, yellow, white felt for the flowers. 

Flower sequins in small pink and medium sized in silver.  Round sequins in several colors.  E-Beads in blue, white, pink and black to coordinate. 

The thread was chosen to coordinate with the felt in the flowers.  The flowers were stitched to the background with many stitches to ensure they stayed in place and did not droop.


Finishing the Edges & Hanging the Textile Art

I chose a coordinating piece of fabric in purple for the back which covers the knots and stitching done the front (flowers, raindrops, bees, and house).  I cut it 13x13 and folded the edges over. 

I sewed 2 tabs at the top of the piece to allow a skewer to be placed into them which will provide support when the piece is hung. 

I then used green embroidery thread to place a blanket stitch around the edge of the piece. This was very difficult as there was 3 layers of fabric and the interfacing to be punched through.  I used a thimble but my fingers and hand on my right hand were very sore when I was done.

I printed details and the small instructions on a piece of fabric and stitched that to the piece.

I added the instructions card stock hanging below the bee house so they will be visible when on display. I added a turquoise glass bead below the details.

This was an extreme reach from my regular paper crafting experience.  I learned a lot and some of the tools from paper crafting came in handy.  

I hope it strikes a cord with the folks who visit the gallery.

Tuesday, April 9, 2019

Custom HB Card - Hexagons

I made this card for a friend you requested a special birthday card for a son who is celebrating the big "50" this year.

I chose a taupe, grey and black elegant striped designer paper.  I added it to a large taupe card base in the half sheet size (8.5x5.5"). 

I wrapped a length of silk ribbon along the right hand edge and taped the ends to the back. I added a short length and tied it onto the other. The layer was then adhered to the card front.

I cut 4 hexagons in black and 1 in red which I arranged onto the card front. They were adhered with 3D foam tape.

I printed the greetings on taupe card stock and cut them with the smaller die. The dies are Spellbinder Nestabilities - Hexagons. These were adhere to the larger hexagons with double sided tape.

Birthday Lunch

I made this birthday card for a friend who celebrated her birthday in the last few days.  She has been out on several occasions over the last week, lucky girl. I am taking her out for Vietnamese food for lunch today.

The card base is yellow Bazzil textured card stock in the portrait orientation in the half sheet size (8.5x5.5 inches). 

I added this bright designer paper with spring blooms in yellow and various shades of pink.  I added a raspberry colored ribbon along the right hand side with the ends taped to the back.  The layer was adhered to the card front.  I then created the accent with Spellbinder Oval Nestabilities.  The yellow with the scallop edge, then the designer paper with the corresponding smooth oval.  I added some handmade paper flowers held in place with tiny black brads. I then added a birthday greeting in black on a Stampin Up Modern Label punchie.  The accent was adhered to the card front with 3D foam tape.


She is a faithful card giver and I am a card maker so she gets All Occasion cards every year.

I have included a small tin of Jasmine Green Tea from my stash as I recently discovered she enjoys it.

Looking forward to a great visit and lunch.


Monday, April 8, 2019

Recent Photos

We still have frost in the mornings.  I found this leaf quite covered with water crystals one morning this week when I was out with the camera to catch sun rise. 

I love the contrast in colors with the warm golden background with the darker grey of the leaf. 

Nice to have the stem out of focus but the frost in the center and edges in focus.

But a sure sign of spring is to see the Canada Geese near the wetlands at Lois Hole Centennial Park. 


Unfortunately, not much open water for them yet. We have to admire the tenacity of nature because if there was no open water when I arrived I would be saying to my mate let's head south for a few more days.  Thanks anyway.

The pond in Spruce Grove had some open water when I was there later in the week.

I loved the light that morning.  I noticed that the white patch on the smaller is darker which I presume is the female.  There were 2 set of geese at the wetlands and this was the case in both. I have not noticed that before.


I made a stack of fold top bags for sale at a fundraiser for my grand neice's trip this summer.

The majority of those I made are snack size.

These are larger because the piece of fabric was just nice to split in half.  I paired it with some warm turquoise fabric.  You can check here for sewing instructions.  This smaller bag on the right was just right to hold feminine pads.  A nice pretty bag for storing these in a purse or back pack.  Great for the girls and moms who will be attending this fundraising event.

The Flickr Macro Monday challenge this week was Look Up.  We were to look up in our environments and take a picture with our lens pointing to the sky or ceiling. 

I took this photo of the tassels on my mini blinds. 

You can check out what others took photos of at this Macro Mondays link.

You can check out my photo stream at SMDPics.

I have finally resolved my log in issues now that the process was updated not to require a Yahoo account.

Sharing with Mosaic Monday #22 hosted by Angie at Letting Go of the Bay Leaf.
Mersad who hosts Through my Lens #186.

Fundraiser - Fold Top Snack Bags

I continue my effort to reduce my stash of fabric and contribute to my grand niece's funds for her trip this summer.

I had a discussion with my sister the other day about making reusable bags.  She was considering making bags for girls to carry their feminine hygiene products discreetly in their purses and or back packs.  Great idea.

After that discussion I thought I had a great simple idea to make fold top bags.  I mostly made snack sized ones but the sky is the limit for size.  The fold top concept is familiar to most of us and likely to school aged children who take lunches to school.

These bags have no zippers are Velcro.  With a total of 4 seams they are quick to make. I basically let the size of my fabric dictate the size of the bag in order to make efficient use of my resources. 

Basically you need 2 pieces of fabric the same size.  I chose bright colorful patterned fabric for the outside and light colored solids for the inside so you can easily see the food inside.

1. Cut the fabric 7x12 inches.
2. Sew all the way around leaving a two inch gap on one of the short sides.
3. Trim the excess fabric in the corners and turn inside out.
4. Iron flat.
5. Sew the gap closed.
6. Lay the rectangle tall in front of you on the table. Bring up the bottom to be 2" away from the top.  Fold the 2" flap down over the piece you brought up. 
7. Sew all the layers together on the right and left sides with narrow seams. I back stitched a bit where the flap connects with the other layer as that will be the stressed connection as the child opens and closes the bag.

Based on these measurements your finished bag will be 6.00"W & 4.75"T.

The bags can be placed in the laundry for cleaning then be ready for another day. 

Having a stack of these on hand will ensure plastic baggies do not end up in our landfills and oceans.  Saves you money because think of how many you use in a typical school year!

These are not waterproof so are not suitable for snacks with liquids.

Great for pretzels, popcorn, any cereal, fresh fruit like apples or grapes, or crackers.


Easy to open for small hands.  I hope that they sell well.

Saturday, April 6, 2019

Pocket Washcloths - Yellow

Check my previous post for more background information on this project.

Set 6 - Having run out of blue microfiber I switched to a yellow texture one.  This one is quite light and paired with the white terry cloth it makes a light wash cloth.

The hang towels had a white satin ribbon hanging loop in their center and I decided to just go with that style.  I added this nice striped cotton strip which again does not make it too girly.

I prefer the hang loop at the side but diversity makes the world go round. 


Set 7 - I put the hang loops on the side for this set. 

A strip of warm yellow, green polka dots across the top edge. 

White terry cloth on the back.


With the last few pieces I decided I would like to try this idea out so I made myself one.

It is cut larger for adult at 6.5 inches by 9 inches tall.

I put the hang loop on the side which is what I prefer.

Fundraising Project - Pocket Washcloths

I volunteered to make these for a fundraiser my niece is participating in on May 1st as a Girl Guide Leader.  Her daughter needs to raise fund for a trip with GG this summer so these hopefully will sell well and put a few bucks in the trip fund.   It was my niece who suggested Pocket Washcloths for kids.  They had small hands and a pocket makes it easier to manage.  She suggested microfiber and terry cloth. 

I purchased a couple of microfiber towels from dollar stores.


The left one is the blue one and I have just scraps left and at a cost $1.30, that was good value.  The yellow towel was one of the 3 this the red packaging set so that is less than $1.00 for each.   I selected terrycloth from my stash and reused the white ones I made to go with my aprons.

Set 1 - This is the first set I made based on some samples I had seen on line.  I cut fabric 5x8 inches.  I made .25 inch seams.  I sewed a strip of cotton butterfly fabric across the microfiber layer first. Then I sewed the front (microfiber) piece and the back yellow terrycloth piece together right sides together.  I added a yellow grosgrain ribbon aligned with the cotton strip in this step.  It is aligned along the cut edge and sits in between the 2 layers.  I trimmed the corners then turned the pocket inside out.  For this set I hem the top edge. I then top stitched the pocket on all three sides.  For sets going forward I took full advantage of the finished edges on the microfiber and terry cloth and placed the finished edges on these pieces at the top.  The other edges will all be covered during the top stitching.
Set 2 - Finding the first set a bit small I chose to make this set cut at 6 inches square.  I found that it may be a bit short for my liking.   I must remember this is for small hands.  All the fabric used in this set is the same as the first set.  Now you can see the finished edge of the microfiber at the top of the pocket.
Set 3 - For this set I cut the fabric 6.00 x 7.5 inches. Now they are a big rectangular.  I chose bug fabric for this set.  Still using the yellow grosgrain ribbon and the yellow terrycloth fabric.
Set 4 - I decided to choose a more masculine fabric for this set.  A nice graphic design in light and dark green.   In this set, I started using the white terry cloth from the hanging towels I made for the aprons.  As these did not sell they were up for reusing.  I also chose to use turquoise satin ribbon for these to coordinate with the microfiber towel.  This white terry cloth is a bit lighter than the yellow stuff I had.  Just makes a bit lighter cloth.
Set 5 - This set continues with the last piece of blue microfiber fabric.  The turquoise satin ribbon and a bit of again masculine wavy square colorful fabric.  This allowed me to use small pieces of fabric as the strip is cut 2" tall and 6 inches wide. Turn over a .25 inch top and bottom and top stitch in place. 
I hope these are a good seller. 

Monday, April 1, 2019

Recent Photos!

My Mom lent me this book.  It was very interesting to see a peek into the life of girls in London in the 1930-40's.  The poverty, the slums, the violence, prison time and the desperate measures taken to survive.

The sisters are Kathleen, Peggy and Eva.  All very smart but used their intelligence in much different ways.


I was intrigued about what the place the lived in looked like.  The grimy streets of Lambeth, nestled beside the river Thames. A couple of photos from the internet.

The war time was very terrifying.  Shelters, black out curtains, the sounds and smells of bombs and warfare.


In the end, stuck together and were still a close family after the war. 

I was over to my aunt's for supper after my art reception on Saturday. 

She is a great cook and obviously has a green thumb.  Check out that Christmas Cactus.

The cyclamen was a gift which has flourished in the last year.

The amarylis is wonderful.  My Mom and sister also have these wonderful flowering plants.

It was a great visit with a couple of my aunts and uncle.  We crossed over with her kids which were over for a birthday party earlier in the day.

Family and exercise are important to  this lady.

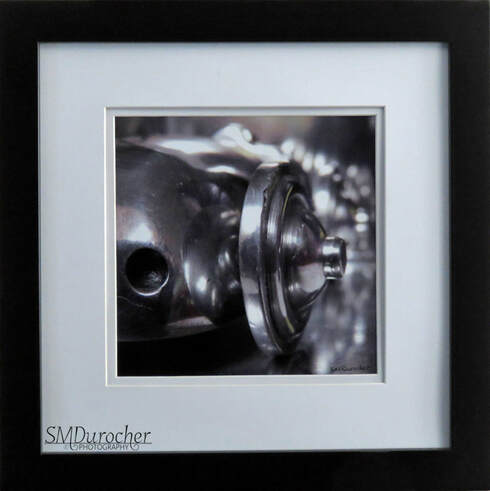
I won a prize in the Juried Members Show.

I placed 3rd out of 49 entries.  Not bad me thinks.

This  is is the winning photograph.

It was taken at an antique mall here in town earlier this year.


This was my entry into Flickr Macro Monday this week.  The theme was April's Fools. 

I put a sticker to cover the optical sensor on the computer mouse which made it not very functional. 

You can check my photo stream at SMDPics.

I am sharing with Thru My Lens  #185 hosted by Mersad