

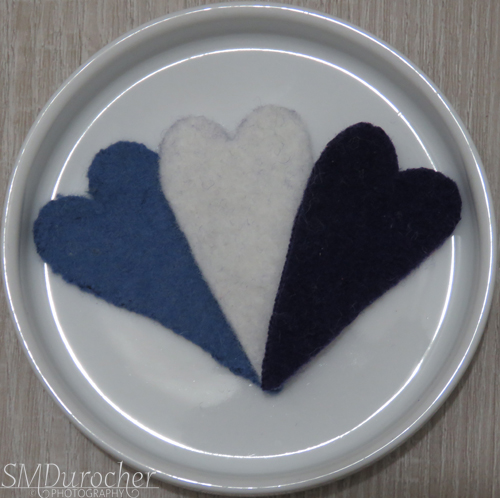
The first Sunday of Advent. The season of waiting, preparing, anticipating.
This is my Advent Wreath set up with purple glass beads below the 4 candles with white under the candle in the center which is lit on Christmas Day.
I love glass and this is a sparkly wreath that helps me to have a happy heart while I wait.

The first candle is represents hope. The promise of the coming of Jesus through the many years before He arrived.
So many people waited, hoped for the light to come to the world.
Fervently anticipated the coming of the one who would bring salvation to the world.

As I read for the first few days of Advent here are some of the points that stand out.
He begs us to spend the the attention of Advent on
the little,
the least,
the lonely,
the lost.
Do you fit into the adjectives?
Do you have someone close who does?
Do you see someone in your daily life who does?
Pay attention to those who have been placed in your sphere of awareness and influence.
The Three Persons of the Trinity - Father God, Jesus and the Holy Spirit gathered close together to imagine you and me.
 Lakeside Cottage by Susan Wiggs is a book I finished recently.
 My wheat bag sprung a leak. It's not surprising as I have touched most winter days for years.
And God in three persons, uncontainable affection, knelt down and kissed warm life into you with the breath of His love.
Amazing to me which fills me with gratitude of my life despite the uncontrollable circumstances that living on this earth brings with it.

The main character Kate Livingstone return's to her family's lakeside cottage, a place of simple living and happy times. She hopes that her shy son Aaron will blossom here with the quiet life at the lake. No TV, no internet, warm weather and plenty of fresh water in this remote part of the Northwest.
The neighbor JD has escape to the remote place to find peace from the media frenzy following his actions preventing a terrible tragedy in Washington, DC. He wants his life back where he can work, play and enjoy life without cameras, reporters and curious strangers.
Callie is a teenager who has been in the foster system for too long an wants out. She is "adopted" for the summer by Kate who gives her a glimpse into life with a family. with Aaron a younger brother, Kate a substitute mom and JD as a father figure she grows into her teenage years supported, loved and respected.
Of course, they all have been living in an idyllic world which healed wounds then the end of the summer brings reality but they are all able to handle it better.

When I have sore muscles, aches and pains, the heat brings comfort and healing.
Sometimes I just need a bit of warmth to fall asleep.
It had been repaired many times and now the inside bag just needed to be replaced. It had to be 100% cotton but I found a white pillow case that would do the job. The thread has to be 100% cotton as well. The seam in the middle was a change I made during one of my repairs but I decide to keep it.
It is back in service!

This way all scraps go into the bowl then I can empty it into the garbage pail once.
I like the idea.
For now I have relegated one of my medium bowls to this use. We shall see if something else comes along which would work better either color wise or size wise.
Another good idea.

This was a great book. Not the boy meets girl, fall in love and a happy ending type of simple romance stories.
This story is starts in the Italian Alps at the turn of the twentieth century when Enza (girl) and Ciro (boy) meet in her tiny village on the occasion of her youngest sisters funeral. Ciro was hired to dig the grave. They have an immediate connection but life gets in the way.
There are trips to America for both of them before they meet again. He comes to America to apprentice as a shoemaker. He learns his trade well, innovates ways to increase the income of the business but sees no benefit as his mentor's wife pockets the profits. He goes to war and meets his future business partner.
Meanwhile, on the mountain things become difficult for Enza's family and she convinces her father to travel to America so they can earn good money to build a house on the small piece of land they own. She works as a seamstress in a factory in Hoboken for a while, then she meets a girl Laura at the factory who will be her best friend for ever. After a scary incident at the factory they decide to take the leap to New York to find better jobs and better accommodations. Just in time they are invited to join the team at the Metropolitan Opera House. They do well.
When Ciro returns from World War I he finds Enza waiting outside a church on her wedding day. He speaks to her and pleads his case, fortunately for him, he has always had her heart and she says yes.
They move to Minnesota to set up a shoe making business with his army buddy Luigi. The set up 2 shops a few miles apart. Life moves on, children are born, Christmases are celebrated, wonderful summers are enjoyed. Visits from Laura and Enza's father take place.
Life changes again, some return to Italy, some stay in Minnesota, children graduate from college and then a big trip is planned to visit the house house in Italy which was built by the hard earned money Enza and her father sent home for years.
A truly wonderful story and it read very easily. I was up late into the night a couple of times.

It plays CDs and music on USB which is great. It also will record from the CD to the USB. I spent a morning a few days ago organizing all my CDs into categories and boxes. They have all been labeled so it will be easy to find what I want.


