Showing posts with label Adventure Bound. Show all posts

Wednesday, April 16, 2025

Cards - I Win - Glitter Butterflies

I continued with the glitter butterflies today.

I chose a Stampin Up Glorious Green A2 card base.

I added 3 blocks of striped glitter designer paper and adhered them with double sided tape.

I added ribbon antennae and mounted it with 3D foam tape. 

I mounted the circle greeting just below the butterfly creating a cohesive focal element.

Added a white quarter sheet insert.


I created this card with similar supplies as the card above.

I adhered a strip of glitter striped designer paper to the top of the landscape (wide) orientated A2 card.

The glitter butterfly received its antennae of satin ribbon then was mounted with 3D foam tape along the bottom edge of the striped paper.

I punched a Stamping Up Decorative Label punchie from the striped paper then cut it in half to mounted the halves offset on the left and right.  Those were glued to the greeting punchie then the full element was mounted to the card front with 3D foam tape.

A white insert was added.

I chose SU Island Indigo as the card base for this set of cards.  Cut to A2 sized card.

I mounted a SU designer paper from the Adventure Bound DSP pad.  Trimmed to leave a small border and mounted to the card front.

I put a strip of Whisper White card stock through the Big Shot with the Swiss Dots folder and mounted that to the DSP.

The butterfly got white cotton thread antennae and was mounted with 3D foam tape.

The SU Small Oval punchie greeting was adhered with DS tape.

A white insert was added.
Another Island Indigo card base with the Adventure Bound designer paper in beautiful blue tones.

I used a SU script folder with the writing going horizontally for this card as it was in the landscape (wide) orientation.

I glitter butterfly has white cotton thread antennae and is mounted with 3D foam tape.

The SU Small Oval punchie greeting coordinating color was adhered with double sided tape.  A white insert was added.

This will be headed to my sister's this weekend and will be in then next batch of cards for IWin charity.

Tuesday, April 15, 2025

Cards - I Win - Glitter Butterflies

I made a few more cards for the I Win charity today.

I used some glitter paper I made a while ago in tones of blues with some green and purple for the butterflies.

I chose Stampin Up Gorgeous Grape card stock in the A2 size as a base.

I embossed a mint green layer of heavy paper with a leaf folder which I adhered to the card front.

I added a die cut butterfly made with the SU Beautiful Butterflies Bigz die. I added a black cotton thread antennae then mounted it with 3D foam tape.

I added a SU Modern Label greeting adhered with 3D foam tape and a white quarter sheet insert.

Another Gorgeous Grape card base.

The mint green layer was embossed with a SU floral folder.

I mounted the die cut butterfly with it's thread antennae with 3D foam tape.

A SU Small Oval punchie greeting adhered with 3D foam tape.

A white insert was added.

They are pressing overnight.


For this set of cards I chose a Taken with Teal card stock and cut it in half to create two A2 card bases.  Scored at 4.25 inches and folded in half.

I chose a sheet of designer pape from the Adventure Bound small sheet pad. Love the subtle pattern.

I added a wide coordination ribbon from my stash. It has silver metallic thread along the edges. 

I added a silver ribbon for antennae on the butterfly and mounted it with 3D foam tape.

The greeting is a Modern Label punchie in silver foil with a Word Window greeting layered onto it.  White quarter sheet insert.

I made this card in the wide (landscape) orientation.  

Used the same wide silver and blue ribbon from my stash.

I mounted the butterfly cut with the Beautiful Butterflies die with 3D foam tape once I added it silver ribbon antennae.

Punched another SU Modern Label punchie from silver foil card stock.  The is reflection of my shirt.  Added a Word Window greeting.

White insert and I was done.

Thursday, June 1, 2023

Card - Trees

This card is for my brother who celebrates a birthday soon.

I chose an Always Artichoke card base. 

The designer paper is from the Adventure Bound set in the 4x6 pack. I trimmed it a little to fit on the A2 card.

I made a slot in the fold with the SU slot punch and pulled a length of wide white grosgrain ribbon through and taped one end and placed a black brad on the other end.

I created a greeting with a Always Artichoke Modern Label punchie layered with a Word Window punchie.  It is adhered to the card front with 3D foam tape on the grosgrain ribbon.

I added a quarter sheet insert.

It is off to make sure it gets to him on time.

Monday, June 6, 2016

Sail Boat in Blues

I started with a Stampin Up Sahara Sand card.  I substituted Pool Party for Mint Macaron. I cut a piece of non SU shiny card stock which matches Pool Party to leave a small border. I placed a piece of Night of Navy seam binding on the diagonal on the Pool Party layer and taped the ends to the back.  I knotted a shorter piece onto it in the top right hand corner. I adhered this layer to the Sahara Sand card.

I created the accent with a piece of Night of Navy, a piece of Chevron pattern paper in Sahara Sand from the Adventure Bound designer paper pack.

I chose the Sail Away stamp set in Night of Navy onto Sahara Sand card stock.  These layers were adhere together aligned in the top left corner.
I tied some navy thread into the holes of the Pool Party button and adhered it to the bottom left hand corner with a Zot.

I'm submitting to the following challenges.


Monday, April 11, 2016

Wood Board Birthday

I started with a sheet from the Stampin Up Adventure Bound DSP stack 4.5x6.5 inches.  I chose this wood board one from the great selection.  I then picked a piece of Pumpkin Pie card stock.  Based on the challenge sketch I cut the DSP into several strips of various sizes.  I wrapped a piece of Pumpkin Pie Tafetta Ribbon around the largest piece leaving room for the greeting. I then knotted a shorter piece onto it to make a bow.  I then adhered the five pieces of DSP onto the card front keeping the design of the paper intact but leaving space between each one.  I chose a color printed greeting in Early Espresso cut with a framelit from the Apothecary set.  I added coordinating snap eyelets on both ends.  I adhered some Early Espresso accents to the back of the greeting then adhered it above the ribbon with 3D foam tape.

I am submitting this card to the following challenges:
SU TGIF - #50 - Sketch


Wednesday, July 29, 2015

Majestic Tree

I created this card for someone celebrating a birthday this week.  I started with a Stampin Up Crumb Cake card stock piece.  I selected a piece of DSP from the Adventure Bound  Paper Stack and cut it to 3" square.  I stamped onto it a tree from the Lovely as a Tree stamp set in black. I added a layer of Basic Black card stock cut to 3.25" square.  I stamped the greeting from the Itty Bitty Banner stamp set in black on the same colored card stock. I then die cut it with the corresponding framelit.  I cut another one from black, cut it in half crosswise and adhered it to the back offset on both ends. I stamped a bit of washi tape from the Tape It stamp set in black on the card front before I adhered the tree layer.
I think I was too tentative with my stamping and they should have stuck out more but such is life.  I adhered the greeting to the card front below the tree layer with 3D foam tape.

Submitting this card to the following challenges:
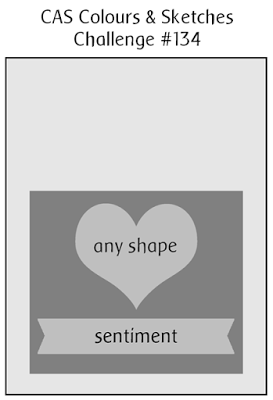
CAS Colours & Sketches #134
City Crafters Challenge - Masculine Card