Showing posts with label aqua. Show all posts

Wednesday, January 14, 2026

2026 Slow Stitching Project - Page 2 - A2 Arrowhead Stitch

This is my second piece of K3N Cloth Tales Slow Stitch Project for 2026. I invisible basted my linen and cotton together that measure 7 in T x 8 in W.

I chose the Arrowhead Stitch for my second "A" page.  The two A pages will be stitched together to make the first page in my stitch book. The pin on the right hand side indicates the binding edge.

The bottom line was my first line of Arrowhead Stitch done with aqua floss. Then going up I made them very close together which is the Stacked Arrowhead Stitch. It could be used as a fill in stitch. I love the pyramid of the stitch that migrates into the center of the square. The only example I found in my stitch book - Elegant Stitches by Judith Baker Montano pg 25. I mixed 2 shades of the blue green thread.

I moved onto the top line of the square with making arrowheads then just a small cross stitch coming down the left hand side.

I cut 4 diamond shaped pieces of fabric and placed them in an Argyll pattern and appliqued them with running stitch then added the thin diamond with aqua thread. 

I chose a green thread for the Algerian Eye Stitch placed at the center bottom of the square.  The bit above that is supposed to be a leaf done with Stacked Arrowhead Stitch but it did not worked out so well.

Friday, July 26, 2024

Slow Stitching - No. 030 - Cloth Folding

This week's prompt for K3N Cloth Tale's slow stitching challenge is cloth folding.

I took a much different approach.  I found a rayon garment at the thrift store for a very good price.  It was soft and draped very nicely.  Now to the ReUse center for a piece of cotton.  I found a peachy piece of cotton.  Yes!

All washed up, I kept the hem on the piece of fabric and just cut it down to create a lovely draped piece. Think a curtain, a shirt, a skirt and much more.

I hemmed the piece of cotton first. I then placed my draped fabric and stitched it down.  I used a piece of black felt as a finish for the top raw edge of the drape. I stitched all the way around with black thread, now for decoration I added some daisy stitches in the deep burgundy and seed stitches in the aqua. 

It is a very different piece for me.  I am caught up and look forward to Monday's video.

Saturday, February 24, 2024

Card - Slow Stitching - Pojagi Butterfly

I created the pojagi cloth element from thin fabrics I found at the ReUse Center.

The green butterfly was on one of them so I chose to keep it. I found some fabrics which worked with the color of the blue fabric.

All handstitched then backed with another fabric to finish off the edges.

A great organic element.  I added the small orange button for a bit of interest and dimension.

Mounted to a Stampin Up Baja Breeze card base. 

With a quarter sheet insert and a white envelope it is pressing before it hits my card box.

Thursday, November 16, 2023

1 of a Kind - Tree Scent Oranments - Set 4

It has been very enjoyable to pick up needle and thread while I watch TV in the evenings.

I pulled out another 5 wooden spools from my stash and started another set of One of a Kind Christmas Tree Scent Ornaments.

Here we have red wool with black blanket stitch around the top and bottom edges.

I added open circled around the center of the essential oil diffuser.

A black felt circle cut with the smallest die in the large smooth circle set for both ends.

The buttons matched the wool very nicely.


I did find a few new small pieces of felted wool at the ReUse Center again last week.

This is one is charcoal grey.  

I added plum blanket stitch on the top and bottom edges.

A turquoise daisy flowers with a yellow center in the middle.

Turquoise felt circles on both ends topped with warm golden yellow buttons.

The hanger is the same turquoise thread as the flowers.


This Tree Scent ornament starts with felted wool with a herringbone pattern.

I used ivory thread on the blanket stitch as well as the arrow pattern around the middle.

Black felt circles on top and bottom with tan buttons which coordinate with the wood in the spool.

This is a more masculine pattern as every one can use aromatherapy.  Essential oils diffuse completely which allows for a change of scent the next time. 

Most do not stain the fabric but the black is for sure not going to show.


This is the felted wool has aqua stitching accents.  

I followed suit and used aqua for the blanket stitching around the top and bottom edges.

The short and long stitch pattern around the middle in the same thread color.

Dark felt circles and aqua buttons on the top and bottom with stitching pattern around the outside edge.


The tree scent ornament mimics the warm green tones of a real live tree.

The felted wool is multi colored in warm tones.

I added a coordinating tiny button on the front with arrow pattern around the middle with brown thread.

The felt circles were cut from the same wool and I added warm green button on both ends.

I really anticipate a good response to these precious hand made gems.

They are all unique - One of a Kind - and will be a special ornament even if not used as a diffuser.

I really love this one!

Saturday, February 4, 2023

Sewing Project - ReUsable Shopping Bag - Single Layer

Here's the second bag I created with one of the pieces I cut earlier from the beautiful navy microfiber fabric.

Fabric is cut 18 inches wide and 44 inches tall. The seams are encased to ensure no open fabric edges. 

I generally followed this video tutorial by Fabric Patch. Easiest Shopping Bag.

I will shorten the handles on the next bag which will give me more depth in the bag.  I should be able to make 2 bags with one package of bias tape. Works for me!

I was super happy to use some of my hoarded bias tape on the handles. Yellow on the outside and narrow navy in the middle.  

I had to scour my elastic collection to find some narrow elastic which worked for this project.  I will have to keep an eye out for more.

The bag measures from top of handles to the bottom edge - 21 inches.  The bag part measures 12 inches high by 16 inches wide. I used 7 inches of narrow elastic.

To store the bag you fold it in thirds making sure your button is under the folds.  Roll the handles down to the button and roll up the bag to the button and just wrap the elastic around the roll.  Excellent!

I will work on a few more of these bags. 


Turns out I need a full package of bias tape to make one bag.  That's okay I have plenty of them and they need to be gone.


Navy and orange I guess that's Oiler's colors.  I am really happy with these bags.  Not really small enough for purse I think but easy to manage. The colors defines the edges, are bright to help find them in the depths of the car trunk. 

I reduced the length of the handles by 2 inches which I don't think will make any difference to the handling and will make the bag part bigger.  It should hold more stuff.

I centered the pattern on my fabric which has been folded in half top to bottom and side to side.

I will have a few of these curvy leftovers as the left and right sides of the handles end up as scraps.


I made this one with aqua colored bias tape. I ran out of the black narrow elastic and thought I would use some gold elastic cord leftover from Christmas.  Bad Idea!

It is very hard and I broke my sewing machine needle trying to sew it in place.  I ended up hand sewing it on and well as the button.

With the process all worked it I figure I can make a bag in about 40 minutes. I think that is pretty good.

I still have enough fabric to make 4 more bags then I will have to keep an eye for another wonderful microfiber sheet so I can make a few more.

The double sheet I had would make 10 single layered bags.

I think that is very good value for fabric.  I will likely donate these to the group that my sister is volunteering for if they are going to be giving away bags.

It would hold a decent amount.


Update:
I removed the gold elastic and replaced it with a white one.  It was stitched with the machine which is stronger. Then I sewed the button back on.

Happier with that result.


Sunday, December 4, 2022

Christmas Tree Scent Ornaments - Batch 2

I sold all 3 from the first batch so I made up a few more today and delivered them.

Felt is the best material for passive diffusers so the oil should be put onto the darkest of the balls so in this case the black or grey ones would be best.  

I had these ready the other day but I did not know I had sold so many Christmas Tree Scent ornaments so I packaged these up and delivered these as well. The gallery was open today which was really great!
Stuffed little quilted hearts.  The left one is cotton fabric in kraft striped and ivory snowflake fabric. Added a wooden button on the front and a bead on the hanger cord.  A loose stitch of teal thread around the edge.

The second one is kraft plaid with teal and heart wool fabric.  It sports the same wooden accents and teal stitching. 

The oil on these should be put on the back or directly on the wooden elements if you are careful. 

Friday, December 2, 2022

Small Gifts - Oil Diffusers/Fresheners - Felt Balls Version 2 Batch Two

I received an email from the gallery that it was time to restock these little oil diffusers/fresheners so I put together another batch today.  I dug out beads, felt balls, buttons, wood clothespins and some cotton thread and got started.

I will deliver these tomorrow and see what other members have brought. Maybe do a bit of shopping.  When I was there last Friday I was the first one so there was no browsing then. 

Wednesday, October 26, 2022

Small Gifts - Oil Diffusers/Fresheners - Felt Balls Version 2

I decided to redesign these oil diffusers / fresheners.

They were longer than I thought they should be and when they are in your car air vents you would like to have less disturbing the air flow.

I tried this small one in the car and it would very well so I decided to do them all to be smaller with only one felt ball per diffuser.

I changed the attachment to the clothespin as well to have 2 stands of thread come up from a single accent on the bottom.  Then one goes through the hole in the pin one way and the other in the opposite direction.  Then a set of simple knots hidden between the ends.


Here I found a small blue shanked button for the bottom and a concave button in a similar color for the top.  Here it is clipped to the lamp behind the couch in the living room where I sit to read or watch TV.

I have redone all of the ones I made earlier.  I have tied a tag with a description.

I am using a clear plastic chocolate box where I have taped the pieces back to back.

I placed a piece of designer paper in the box so I could hide the chocolate logo still on the box.

I think the colors coordinated well with the colors of the diffusers.

Another task done!

Sunday, October 16, 2022

Christmas Tree Scent Ornaments


For those of us who put up artificial Christmas trees wouldn't it be nice to still have the smell of a real tree during the holidays?

I love the smell of a real tree.  I received one of these last year for my tree and I was on the search for the right scent.  I discovered that it can be tricky.  I believe we always had spruce trees at Christmas when I grew up.  Others will have different types of trees in their tradition therefore a different scent.

There are quite a few Christmas tree blends available as well.

I bought Pine Needles last year which was not quite right.  I will add Spruce this year in a blend and see how that goes.

I have hung these on a tree ornament stand.


I started with traditional green triangle trees for the first set.  I cut them 3.5 inches high and 3 inches wide at the base.  Triangle trees are very efficient in materials.  I cut 2 exactly the same size. I embelished the front triangles. On the left with red embroidered garland with gold e bead ornaments. On the right with small round felt button ornaments tied on with gold thread.  Of course the need a star and a trunk. 

Once the fronts were done, I layered them together, put my trunk and my hanging thread in between and sewed very close to the the edge all the way around.  The stars were added on last with a bit of hand stitching.

I made 3 felt ball wreaths with these non traditional colors of white, black and aqua.  I strung them onto string cotton thread and tied them really tight.

I added a white thread hanging loop.

For these ornaments I would recommend put the oil on the black balls so no discoloration will show.  For the other ornaments I would put the oil on the back so again if the oil causes some discoloration it will not be on the front.

I made some round ornaments featuring reindeer die cuts.  The white one is sporting the red nose of Rudolph. 

The reindeer were layered on a medium circle then onto the 3.25 inch circles.  The reindeer and the medium circle were attached to the front large circle then they were sewn together very close together in coordinating thread with the hanging thread in between.  

The one on right I tried making my own grey hanger and on the second I just put a small circle of felt in between the large circles and stitched it in. 

I made one with a white snowflake die cut on red medium circle on dark green large circles. Then used a small felt circle for the hanger. 

On the right, I made a non traditional colored one with purple, white and some blues.  The focal element are white and blue layered hearts to which I stitched some silver ebeads. I added an tiny felt button with silver ebeads again on the right hand side. These were stitched together with a small purple felt circle hanger with white thread loop. 


I ended up finding some die cuts in my stash which I used to make a couple more.

The pink and white dove has a pearly ebead for a eye and again is in not traditional colors. The wings are stitched on both sides and it has a felt hanger.

The gingerbread man was cut from ginger looking felt and blanket stitched around both layers with a piece of red fabric put in between for the hearts and a bit of white for the eyes.  The mouth was outlined with black permanent marker.  Just a simple thread loop to hang.

These can just be ornaments on your tree with out having scent added to them.  If you are going to add essential oil to them be sure to put it on the back in order to avoid discoloration on the front of the ornament.

Thursday, September 29, 2022

Small Gifts - Oil Diffusers - Felt Balls


I made these oil diffusers with the popular 1.25 inch felt balls. They are strung on cotton cord with additional embellishments such as fancy beads, metal filigree, and faceted beads. As you can see they vary in length from 4.5 to 6 inches.  Some have wood clothes pins and some plastic for hanging. 

These work well in the car as air fresheners with your favorite essential oil.  As the air blows through your vents the scent is distributed into your space.  It can hang from your review mirror as well. 

The oil used could be for deodorizing for fresheness, calming for the commute, or energizing for the long road trips. 

I'm putting on in my car.


Sunday, May 1, 2022

Exchange Card - May

These cards are for my card exchange partners. 

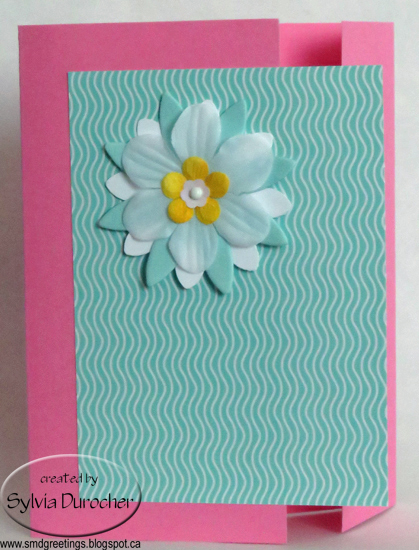
I started with the aqua handmade paper flowers then chose the Stampin Up Fresh Prints designer paper then the pink card base.  

This card has a Stampin Up Pretty in Pink card base with a designer paper layer featuring the color of Coastal Cabana which matches super well.

I layered a white flower sequin, a yellow handmade paper flower by Prima, then a white silk flower, the large handmade paper flower and lastly a large white card stock daisy punchie onto a white tiny brad.  Once aligned I pressed it into the DSP and press the prongs apart on the back.

The card base was scored at 1.5 inches then 5.75 inches and folded to the front to create an offset fold.  

The flower accent layer was adhered to the card front with double sided tape just on the left hand side so the Coastal Cabana DSP would overlap the small flap.

The card on the right has the same accent layer of die cut flowers and DSP in Coastal Cabana as the one above.

The card base for this one is Pink Passion which is a deeper version of the one above.

These are headed off to my card exchange buddies.

I added a white quarter sheet insert and a white envelope.


Sunday, August 15, 2021

Sympathy Card Digital

 I created this digital card for my cousin and his wife who lost their daughter in a tragic accident last week.

I started with a re-inker background which I made while trying to take an abstract photo for the upcoming art show.   The resulting photos were not what I wanted and not to waste the ink I captured the color onto a 4x6 piece of photo paper.  I tried several color variations

This morning I cut the piece of arty photo paper to 3.75 x 5 inches and started doodling.  I drew the flower and the ground and added texture with a black marker.  I then mounted it to a piece of coordinating card stock.  I scanned the card and added the sentiment.

The colors were bolder than I wanted so in my photo editing software I soften and manipulated the colors a bit.

I am really happy with the final result.  I was able to send my sympathies by email.

Thursday, April 9, 2020

Easter Cards - Going to be late

I was slow out of the gate to get Easter Cards made for family.

I started with a warm teal A2 card base.

I cut the pink layer to 4.00 W x 5.25 T and adhered it to the card front.

I cut the striped glitter paper with the Stampin Up Sunburst Thinlit die, then another from the blue green polka dot paper.  They need to be cut so they align.

I cut off some of the rays from the blue green one to leave me a cross.  The striped one was adhered first, then the blue green cross on top of the striped one.  I placed the cross offset so all the rays of the striped one are visible.  I think it makes it stand out more.

I added a greeting in the center made up of a Scalloped Circle punchie in gold paper and a 1.25 inch circle color printed greeting on white.  This accent was adhered with 3D foam tape in the center of the sun burst.

The one on the left features different papers.


A blue card base. A polka dot background, patterned sunburst layer and a blue cross.  The designer paper is Authentique - Easter Time.

The greeting was white card stock so I just chalked with a bit of yellow to make it fit into the color scheme of the rest of the pieces.

These will be mailed after the long weekend so they will be late.


Tuesday, January 21, 2020

2020 Cardmaking - CH - Class 1

I am back to doing card making session at Compassion House.

I have availed myself of a couple of stack kits but I needed a few more kits because I have more than average number of ladies registered.

I started with designer paper by Fancy Pants Designs - Sidewalk.  I cut it to 4.00 x 5.25 inches then cut again at 3.5 inches.  Flipped the small piece over and taped the pieces back together.

Added an aqua grosgrain ribbon across the join  of the designer paper and taped the ends to the back.  This layer was adhered to the front of a pink card.

I added am accent made with a white silk flower, an aqua handmade paper flower, a white sequin and an aqua brad.  I created a hole in through the card front with a push pin and push the prongs through and spread the prongs apart on the inside of the card.

I added a full half sheet blank insert.  The paper with it's great colors allowed for a variety of card base colors.

The card on the right uses designer paper by My Mind's Eye - Kate & Co - Cambridge Court - Medallion Paper.

This one was paired with hot pink grosgrain ribbon and a medium teal card base.

The same flower accent.  With no greeting makes an all occasion card.

Friday, June 28, 2019

Sewing Project - Quilt 2 - Teal Turquoise Leaves

I have finished another quilt.  I wanted to improve the sashing process and cut down on the about of stitching to make it softer.

I chose this blue ivory leaf patterned fabric.  I paired it with an aqua and teal solids.  These are cotton polyester fibers and seem thinner than 100% cotton.  As these were large pieces I just could not cut it into small pieces.

I cut 9.5 inch squares with my quilting ruler from the blue leaves patterned and the aqua solids.  I cut 10 from each for a total of 20 squares which were placed in a grid of 4 across and 5 rows.

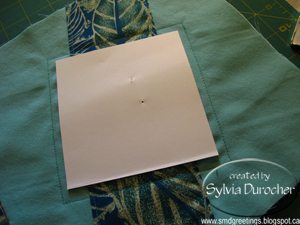
I needed to decorate the squares somehow. I decided to add a contrasting strip which will be top stiched to the square.  I cut a strip of fabric at 4" wide and the length of the fabric. Using a 3" card stock (pink) template I ironed the .5 inch sides over.

I laid the strip across the square leaving 1" margin at the top and bottom so it would not interfere wit the corners. 

I pinned and trimmed to the square edge.  The angle was right for the next square so it was very efficient use of the strips.  I put the aqua solid on the patterned and the opposite for the other squares.

It was top stitched very near edges.  I was able to sew all 10 square in a chain process then just cut them apart.  Another efficient process.


The 20 back squares are dark teal and cut again with the same 9.5 inch square quilting ruler.

I used a white cotton flannelette sheet for the "batting" in this quilt.  These 20 were cut to 9.5 inches square.

I needed a pattern to hold the 3 layers together.  I decided to cut a 4" square of card stock and then pin it to the square sandwich aligned along the decorative strip.  I just followed the edge with my sewing machine foot.  Repeated for all 20 squares.

In hindsight I could have quilted the squares when top stitching the decorative strip.  Remember that for next time.

The sashing between the squares is also dark teal.  I found this video produced by Teresa from Down Under. Quilt as You Go with Narrow Sashing. I followed the instructions and the quilt worked out really well.   The sashing between the squares was cut to 10 inches in length then trimmed once assembled.  She suggested hand stitching the back sashing but that was not going to work for me.  I selected a decorative stitch with thread that matched the teal really well to close the back sashing.

The sashing between the rows was cut to 40 inches in length.  The process for putting the rows into the quilt was the same as the assembling of the squares into rows but just wider.


That left the binding.  Again it is in the dark teal fabric.  I needed 170.5 inches of binding.  I cut strips of 3" until I had what I needed.  You can check this video The Ultimate Quilt Binding Tutorial with Jenny Doan of Missouri Star which gave me all the information I needed.  Even how to finish your binding so there is no sign of where you ended.  Worked perfectly.  I used the same decorative stitch to machine bind the edge of the quilt.

I am really happy with the overall look of the quilt, the weight is lighter, and the assembly really came together really well.

Tuesday, October 23, 2018

Apron - Reversible Gathered Half Apron

This time it is a reversible gathered half apron. 

I chose a colorful print I bought at the SEESA Sale on Saturday and an aqua solid100% cotton to make this half apron. 

I placed a 6 inch patch pocket on the print side in the aqua fabric. I`m still have problems with my right and left reversed so the pocket is on the left hand side. I hope it works for the new owner.

Thirty inch ties are great to knot this apron in the back.  Long enough to accommodate various sized middles.

The edge has been top stitched on the sides and bottom.


The waist band is 24 inches wide by 2 inches tall.  The ties are 2 in tall by 30 inches long.  They fit into the ends of  the waist band then the skirt is inserted into it and the inside this tacked down with the top stitching.

The skirt is 29 inches wide by 17 inches tall plus the 2 inch waistband for an overall height of 19 inches.  This provides 5 inches of easement which I think is quite adequate and easily accommodated with the double front design.

All the edges are finished in this apron. 

I love this one.