Showing posts with label pattern. Show all posts

Sunday, February 25, 2024

Card - Slow Stitching - Tapestry

I found this fabric at the ReUse Center and decided add stitching to it.

I selected a few shapes that would be fairly easy to high light I started.

I tried matching the thread to the original color on the fabric as best I could.

Once stitched I adhered the panel to the front of a SU Hello Honey card base with 3D tape.  The red shapes which I satin stitched were very bulky on the back so double side tape was not going to do.

A quarter sheet insert and a white envelope and another card for the card box.

Loving the stitching


Tuesday, October 31, 2023

Art Project - Inktober 2023

#9

I decided to participate in the Inktober 2023 challenge.  They published a daily prompt list which I did not have time to follow.

I have been inclined to try this medium for a while and when the I was made aware that there was a Flickr Group I could join, I did.

I have some permanent fine tip markers. I used 90lb watercolor paper for my first few pieces because that is what I had on hand.  I pulled out what supplies I had and got started. 

#1

I used a Ultra Fine Point Sharpie marker for this piece on the light weight watercolor paper.

I was always inclined to want to paint afterwards which why I used watercolor paper.

I laid out my wavy river lines then marked up the vertical and horizontal lines on either side.

I added dimension with the color.


I knew I had tools I had used in the 1980s for calligraphy so I pulled those out. Turns out I had Speedball holders and quite a few calligraphy nibs most of which had a reservoir. I had picked up a small metal box of dip nibs recently so I pulled those out and cleaned them.   There were a couple of straight dip nibs so I put one in a holder and tried it out.  I did have several bottles of Daley Rowney FW Acrylic Inks in my stash as well.

#2

This is my next piece which was a straight steel dip pen nib and DR FW Purple Lake acrylic ink.

I was able to achieve quite fine lines, tiny dots and marks. Filling in the darker spaces was a bit challenging and the paper was not smooth enough.

The watercolor paper tended to lose bits of paper fiber that would get stuck in the nib.

Composition quickly becomes a challenge and I was just making marks at this point.  I had check out a few videos on line.


#3
This one used blue acrylic ink. 

I used smooth 110lb white card stock I use for card making for this piece.  That worked better with next to no issues with the paper surface.

Still using the Macleans Best Ever No.2 steel dip nib and a black dip pen holder. 

It was not a very good composition.    I chose just a small corner that I thought worked out pretty well.

#4
The pen and nib were getting more comfortable and I dug more colors to play with.

This is a dark green in the same brand as before and the red is a calligraphy ink.

The grasses I managed to make some very thin and other a bit thicker.

The composition when drawing something actual instead of abstract worked out better.


#5
Here the drawing was a bit challenging.  I did make a light pencil to start with which I erased once the piece was dry.

More new colors was kind of fun.  

I was wanting to fill a shape with patterns - not realistic but artsy.

Other than the wing I am happy with this one.


After doing some checking on line for direction on a good nib for a dip pen I decided to visit my local art supply store - Delta Art and Drafting Supplies.  
The Zebra G nib was recommended on line so I purchased one of those at under $3. I was looking for a black ink which I could then watercolor on top. 

The Daler Rowney FW Acrylic ink was recommended on sale about $7. I had to leave it dry completely before watercoloring over it.

Now, I wanted a paper I could use.  After considering that I am a beginner and a $70 pad of paper was out of the question I settled on a Canson pad for fluid mixed media.  The pad was also on sale for just about $9.  I went home with supplies for about twenty dollars which I hoped would help advance my art pursuits.

I also found on line a video that recommended a container of alcohol to clean your nib as you were drawing. I chose an old film container as it seals tight.  I use put in enough to the depth of my nib.

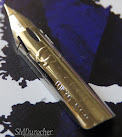
I selected one of the dip pen holders I had in my stash.  I have no idea when I acquired this vintage Eagle Pencil Company - made in Canada holder.  It has been well used but still in good shape. 

That is the Zebra G Nib installed ready to go.


#6
Here's my first piece with the new tools and supplies.  The paper is very nice.  

I divided the page into 4 pieces with score lines which would make a manageable amount of space to fill.

I looked at several owl line drawings on line and composed one of my own using aspects of the ones I had found.

I am happy with this drawing.


And here it is watercolored.

I painted a light wash over the whole piece then added color to the owl.

I love the yellow eyes and dark wings.  Of course, the color is just out of my head.

I mixed all my colors mostly and used some black gouache to darken some of my colors.


#7

Here's my next composition.  I drew a meadow with a tree, flowers and a little mushroom.  The original was rectangular but with more flowers on the right hand side so I just cropped it to square.  I had to lose a bit of the tree to keep the mushroom which of course was necessary.

It was then painted. Again an overall light wash so I don't have a white background. Blue to the top and green to the bottom.

#8
Here's just an abstract where I drew lines then filled in the spaces with pattern.

I found this one quite dark as all the patterns are quite heavy.

It has been fun to work on these projects, learn something new, be inspired to draw and get the right tools and supplies to have some success at it.

I will make more projects and look forward to Inktober in 2024.


You will find number 9 at the top of the post. This is a smaller version of the owl for the Macro Monday challenge I do every week.  The theme was spooky but the limitations are that the piece photographed can only be 3 inches.  I scaled down my first one which was about 4 inches tall down to 3 inches.  I did not capture the ink drawing before I painted it.  I was on a deadline and missed a step.  That is how it goes.  Then photographed the painting with dramatic light and I think it did Spooky really well.

Tuesday, April 28, 2020

Sewing Project - Coin Purse V2

I created my Coin Purse V2 today.  Based on the first one I did in Sept 2019 I decided some improvements could be implemented.  You can check  Coin Purse V1

The changes were:
1) More durable fabric
2) Stiffer backer
3) Different closure

I lost the original pattern and there was no documentation in my Project Binder so I had to redraw the pattern.  Thank goodness for my blog where I had a photo of the measurements. 


I decided to use the dark green of my jacket for this project as it will be durable.  I chose a white satin for the inside so that I can see what coins I have. For the backer I used a 3" piece of stiff pellon as well as this thin 3" circle of plastic I found in my stash of old stencils.  The measurements include the .25 inch seam allowance.
I used Velcro instead of snaps as the closure.  That was able to be added with machine stitching which was faster.  I added a pull tab in the seam for the top which gives better leverage with Velcro closure.  

I ended up with the pieces of batik fabric on the inside of the purse because I miscalculated when putting my layers together so I just added another small piece to the front.  It will fray as I use the purse and become more organic in the process. I have made great use of the 2 small pieces of batik I got for free at the ReUse center.
The pouch part is created by hand stitching the corners together. You have to figure out how far to go based on how the folds meet in the middle. I just lucked out on mine.

Tuesday, January 30, 2018

Recent Photos

I am looking for summery images with this cold weather hanging in here.

So, tea this morning was served with true blue and yellow color scheme. The tea was Mango Passion Fruit served in my Steeped Tea True Blue heart shaped tea cup and saucer.

I love how my new small tea pot works so well with my regular dishes.  A delicious piece date square from our lunch on Sunday and a trio orange slices brightened up the table.


I chose my heart shaped tea cup and saucer with the gold edges.  The gold mercury glass bottle repeats this punch of metallic gold.


I placed some bright yellow poppies in the mercury glass bottle. 

Three slices from a large navel orange on the true blue plate again provides a bright punch of color on the table.  It offers some vitamin C to ward off those unhealthy bugs floating in the air.


This was the January book for the Tea Book Club hosted by Angela at Tea with Friends.

I did not finish this book.  It is book documenting the history of Darjeeling tea so some of the pages were not very compelling to me. 

I did learn a bit about the tea and would be interested to trying it next time I hit the loose tea store.

Love the cover!


I received this large jar candle scented Pumpkin Pie from a friend many years ago.  I decided it was time to liquidate it and thought that the jar may have decorator value.  So, I set out to melt the remaining wax in the jar which took several hours.  My place smell quite nice at the beginning but it became quite strong over time.


Once the wax as fully melted I washed the jar and removed the label.  Behind the label the jar was not textured as the top and bottom so it is not as reflective as those areas.  I've decided to keep for a bit to see if I can use it.

I am working on a sewing project for pot protectors.  I have been working on this pattern for a month. 

I have finally come up with something I am happy with it so I will be cutting and sewing to see the fabric project lives up to the vision.

I will keep you posted on the final project.

Sharing with
Tuesday Cuppa Tea hosted by Ruth

Tea with Friends hosted by Bernideen

Share Your Cup hosted by Jann at Daily Cup with Mrs. Olson.


Thursday, January 19, 2017

Tea Cup Coaster - Pattern

I see that Stephanie's blog is no longer available so I have put together my pattern for the Tea Cup Coaster. 

It is printed on an 8.5 x 11 sheet.

I have updated the broken links as well.


Sunday, September 1, 2013

Gift - Sewing Note Cards

I made these note cards for my niece.  I found these wonderful envelopes with sewing patterns on them and decided to make cards to go with them.  I searched on line for vintage sewing patterns. The art work on these patterns is quite remarkable. I selected 4 that coordinated with the greetings I had selected. Then I added the "sew" greetings to them.  The cards are smaller than A2 so I cut down my card stock then color printed them on the white cards.  I think they look fabulous.  She sews so I hope she likes them.

Monday, October 22, 2012

Card Club - October - Pinwheel

Tonight is Card Club and we are making another set of occasion cards.
I selected my papers for the pinwheel then decided on a black card.  I used a pattern created by my sister for the pinwheel. You will find the pattern here. I punched my squares with a punch which made them 1 3/8". I printed the pattern ensuring that the squares were that size.  This pattern works very well! Thanks Therese.  Once I had the pinwheel assembled I embossed a white layer with the Cuttlebug Swiss Dots embossing folder. I then glued the pinwheel to the top and I wrapped a piece of 1/4" black gross grain ribbon around below it.  I glued this assembled piece to the card front.  I added the button to the centre of the pinwheel with a Zot.  I glued the Word Window greeting to the Modern Label then adhered it over the ribbon with 3D foam tape.r