I am planning a bit of camping soon and last year I did not get around purchasing to a stove for cooking.
I was not comfortable storing propane or butane in my car where I was sleeping. So, I decided to do some research.
I discovered several you tube videos documenting the making of an IKEA Hobo Stove using an Ordning Utensil holder. It is made of stainless steel and very available at thrift stores. It serves as the fire box for the stove. I think overall the supplies for the stove ran about $10.
Mark Young in Nova Scotia has several good videos.

I needed a base which raised the hot box to allow air to flow from the bottom and prevent coals and ashes which may fall through to the ground.
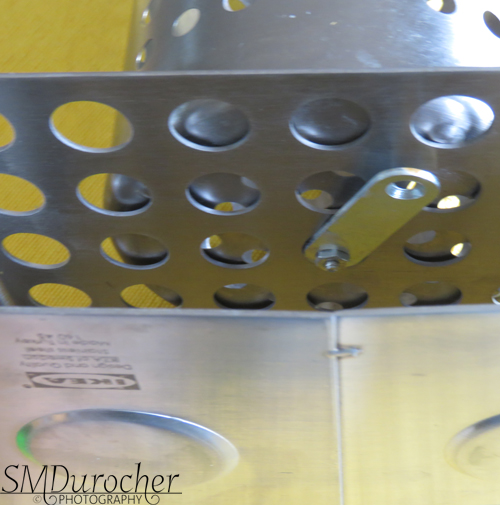
This is an IKEA Ordning food warmer which is designed to work with tealights. It raises the fire box about 1.5 inches and provides protection from falling coals and ashes.
With holes in both pieces I just needed to connect both pieces.
I used a short bolt and nut with washers on both sides. I small washer on the inside the fire box and a metal plate on the bottom in the ventilation space of the warmer.
Now I needed away to elevate my cooking vessels above the top of the fire box which provide ventilation at the top and a way to add wood to the fire box.
One of the videos by Charles documented the process of a
triangular support for his veggie steamer stove. After trying several options which did not turn out I decided to give this a try.
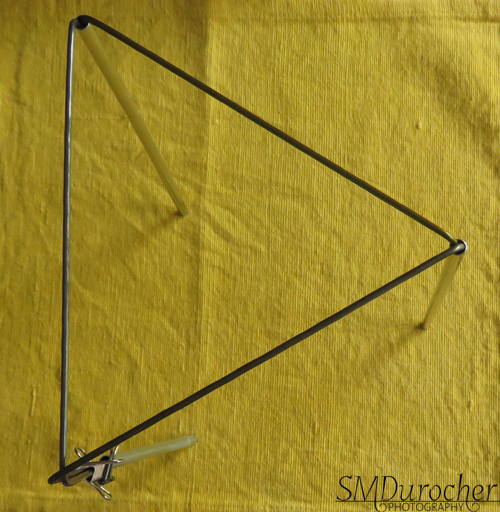
I had bought 2 stainless steel drinking straws so I combined those with lengths of wire hangers cut with my home pliers and a little persistence.
I straightened the wire then put it in the straw and made the first bend. I made the triangle about 6 inches on each side then put the other end in the next steel straw and cut the end of wire to the bottom of the straw.
Repeated this 2 more times but I need another straw. I was lucky to find an aluminum tube yesterday that will do the job.
It supports my cast iron fry pan, my stainless steel water kettle and my camping pots.
It is great because it folds down flat and is easy to store.
You can see the 2 pieces in the image above.
I needed a bag to store the stove and chose a black bag because the stove will get dirty with soot in the process of making the fire.
It holds the stove, the tongs, the cooking triangular support folded, the pellet holder and maybe even the saw. I used a couple of the leftovers from the wire hangers to make skewers which will allow a support for alcohol fuel as well. I saw several fondue burners at the second hand store the other day which would likely work well. More immediate than wood.
This stove can burn wood pellets as well. I bought a stainless steel sieve with a handle which fit perfectly in the fire box. The handle prevents the pellets sitting on the sieve from dropping down too far in the firebox and makes removal easy. Pellets can be purchased at several stores.
The triangular cooking vessel support works well with this option too.
Now I need a bit of wood and fire starter.
On my regular walks in the river valley I collected small pieces of dead fall wood. They have been sitting on the balcony to dry out and letting any bugs around time to leave. The firebox is 7 inches tall so today I just broke the pieces that length. I found a plastic bucket which will store pieces that tall.
I bought a small saw in case I need to trim longer pieces into shorter lengths. Of the wood I collected I was able to break most of them with my hands. There were 2 that needed the saw.
I have no idea how many fires this much wood will make. In campgrounds I will likely be able to gather more wood if I need it.
I gathered a few supplies to make fire starters.
Dryer lint, shredded paper, toilet paper roll strips, and some wax.

I stuffed the rings of toilet paper roll with paper and lint. Dripped melted wax on top of the stuff all contained within the small roll. I hope they work well. There were several recipes recommended. I will keep you posted about how it goes!

 A robin having a bath and a lot of fun in a rain puddle morning.