Showing posts with label stash busting. Show all posts

Tuesday, September 30, 2025

Sewing Project - Fabric Scraps - Scrappy Fabric

This fabric will amp up the look of the fold over card wallets. 

I picked a bunch of small fabric scraps in yellows, browns, and oranges.

I set my sewing machine to zigzag pattern #5 and the stitch length to just below 0 and stitch width to 4. It creates a blanket stitched look with the sewing machine.

I cut a foundation piece of thin polycotton broadcloth to 12 x 16 inches. I just placed one piece and stitched around and kept adding pieces. To have the looks the raw edge of the fabric needs to face left as I am stitching. I have started using up my spools of thread as mostly I use cones these days.  I emptied 3 bobbins during this project. Excellent. 

This piece is not trimmed.  My plan is to cut this piece into 3 pieces of 5 x 11 inches for fold over card wallets.   The process creates a new piece of scrappy fabric from fabric scraps.  Stash busting!!!

Here's a close up of the over stitching I did along the raw edges of the small pieces of fabric I used to make this new fabric.

It somewhat mimicks blanket stitch.  Choice of thread will determine whether it shows up a lot or just blends into the overall color scheme of the fabric.

I think I should have overlapped the fabric a bit more than I did.  When I made it into a wallet depending on where the fold was it was possible to have the background fabric show.

Monday, August 10, 2020

Sylvia's Simple Shots

I have had to remind myself recently to Not Give Up!  I have had challenges with the car, the house, creatively with cards and photography and then there is the pandemic! 

I took a picture of a park bench at a church yard in my neighbourhood. Plastic ends with 5 pieces of painted 2 x4 and lickadee split you have a bench. I was inspired to use it as a quote back drop.   Here it is!

Things are hard and hopefully we are not all down at the same time.  When you feel better be sure to encourage those around you!  You don't know who may need it so just give it when you can.


I have had quite a few flying creatures appear on my balcony recently which is quite unusual.  I have had a couple of sparrows just sit on the rail for a few minutes just where I can see them.  They never stay long enough for me to get the camera but I enjoyed them anyway.

This large dragonfly staying for quite a while and I was able to get the camera. I wondered what it was doing.  Upon checking the photo on the computer you can see a set of wings right next to the corner.  I checked on line for what they eat and they are carnivores!  I expect it was eating a fly.  Wow!  I did not see that coming.  

I think of them as pretty and mild kind of creatures!

I  have been filling my face full of ripe chokecherries on my walks in the last few mornings.  They are always better after a freeze which I hope is not near. 

Canada Red Chokecherry trees are full of them and I can pick the bottom ones and leave the high ones for the birds.

I finished "The Paris Orphan" by Natasha Lester this week.  It was a great read. 

Set in the 1940's during World War II and then in modern times.  The main character Jessica May goes from model to photojournalist covering the war in Italy, France and Germany.  Victorine is the orphan that Dan Hallworth, an American soldier has rescued and "adopted" as she has no one else.  Dan is a good man and a great leader so is being promoted during this conflict.  He is working hard to motivate his men, protect the women (journalists and nurses) and children. There are many twists and turns in the story so keeping it all straight is a challenge.  Great characters which are honorable, trustworthy, prepared to do the hard stuff and love with all their hearts!

After talking with my sister yesterday about the papers I posted here I decided to give it one more try.


I made this one this morning and it comes much closer to what I had in mind.

I used liquid acrylic ink in teal, chrome yellow and silver metallic on this grey patterned designer paper.  I was looking for ink splotches.  I achieved this by knocking my wet paintbrush against another directly above the card stock from about 2 feet.

Really happy with this one.


I have found several window paintings during my walks around town.  These are reflections on windows of building where the glass creates a distorted image of the reflections.  The panes around it are flat and reflect the objects quite realistically but these are different.   I don't know what accounts for one pane being less flat than those near it but it does create nice images!

Flickr Macro Monday's challenge this week was "water". That should be easy!  Again, I don't know if it is my head space or what but it was another challenging week with hundreds of photos taken and not really meeting the concept in my mind.

On the left is a bubble showing off all it's color. You can check my Flicker SMDPics photo stream to see which one I submitted.

I am sharing with Angie who hosts Mosaic Monday #92 and with Mersad who hosts Through my Lens #252.  You can check out my Instagram SMDPics100 for a photo a day!

Friday, August 7, 2020

How To: 12x12 Splattered Decorated Paper

I'm finding it harder to use scrapbooking 12x12 paper for my card making.  I want original and unique paper.  I have so many sheets of designer paper so why wouldn't I use some of that to make something new rather than using plain white card stock to start with?  I went into my stash and chose patterns that I have lots of or that I am not too thrilled about. 

I chose the tools of the trade which are a collection of various paint brushes and tooth brushes.  

Some acrylic paint with a couple of plates to use as palettes.  A spray bottle to thin the acrylic paint.

I chose several sheets of designer paper.  I covered my kitchen area with a blue plastic sheet to prevent splattering the nearby surfaces.   You can see the before and after pictures below.  I just loaded my paint brushes with color and flicked the brushes toward the paper.


To the left are the 4 sheets that I decorated.  I think the light sheets have been very effective.  The orange and yellow ones I am not sure they are as effective. 


This new interface for blogger - I had to make sure that I chose a placement then I could have my text go beside my images.

Resizing is better and more adjustable.

Labels are a nightmare!  It is very slow and eventually it did not find labels which I know are there.


Friday, May 29, 2020

HB Paper Strips Card - Stash Busting

I made this card for my brother that is celebrating a birthday next week.

Still stash busting paper strips of designer paper.  I chose colors to coordinate with the terracotta colored card. I just laid the first one starting in the top left corner the placed the others perpendicular to those.

The greeting is a Stampin Up Decorative label punchie with color printed words.  Adhered to card front with 3D foam tape.  I chalked the edges to match the card.

It will be on it's way today.

Tuesday, April 21, 2020

Birthday Card - Paper Strips

With using a lot of 12x12 inch designer paper I generally end up with a strip at the end with about an inch and the credits.  I have a lot of paper strips in my scrap drawer.  I decided to try in find a design to use them in a card layer.


I pulled from my stash, paper that fit within a certain color scheme.  I then used my small paper cutter to cut the paper into strips about .75 inches wide.  I cut a piece of card stock just under the 4.00x 5.25 inches I need for the layer.
I started with the single strip that goes from top to bottom. The next strips I layed perpendicular to that first one on the left side and created 2 sections on the right hand side. I dontinued to add strips until the cardstock was completely covered. I turned it over and trimmed the strips to a bit away from the edge.  I reused bit I cut off to stay within the color scheme.

I chose a deep teal card base.  I adhered the stash busting background to the front.

I added a piece of large rick rack in white along the left hand side.  It was wrapped around the full card front and the ends were taped down which falls under the greeting.

To add the greeting I punched a scallop circle from one of the prominent designer card stocks.  I then added a dark grey 1 3/8 circle punchie then the color printed greeting at 1 1/4 inch.  These were layered and adhered then glued to the card front with 3D foam tape. 

Wednesday, April 15, 2020

Exchange Cards - Paper Strips

I have tons of strips of paper cut off from 12x12 designer paper.  I was looking for a way to use these so onto the internet to find solutions.

This is a technique I found.

I cut the designer paper strips to half inch and sorted them into similar colors schemes.  Selecting designer card stock that I am not inspired by I cut it into 4.25 x 5.5 pieces.

I applied glue stick to the quarter sheet and laid my first long strip.  I then applied the other piece perpendicular to the first one.  I continued till I had covered the whole piece of ugly card stock.

I trimmed the strips close to the card edge and pressed them under books to let the wet glue to set up and dry.   After several hours I trimmed this background to 4.00 x 5.25 inches.

I then chose a warm dark blue card base onto which I adhered my paper strip background.
Then I added a piece of white rick rack wrapped around the card front.   I taped the ends under the accent.  The accent is a scallop punchie, a 1 3/8 inch circle then a white color printed greeting.  These were adhered into an embellishment.  It was adhered over the join of the rick rack with 3D foam tape.

In the tiny gaps between strips I applied chalk to lessen their impact. I chalked the edges as well.

The pink background was adhered to a bright pink card base.  It also received a scallop greeting.

These are headed to my card exchange partners.

Sunday, January 28, 2018

Card Gift Set - Bridal Shower

I made a set of cards for the bride to be as the shower is this week. They will make great thank you cards.

I chose a Stampin Up simply scrappin' kit named Love Sparkles which had the right theme for this set.  The colors in the set are Whisper White, So Saffron, Regal Rose and Chocolate Chip.  The kit had the card stock, the designer paper and the embellishments so making 16 cards took about 1.5 hours. Excellent!

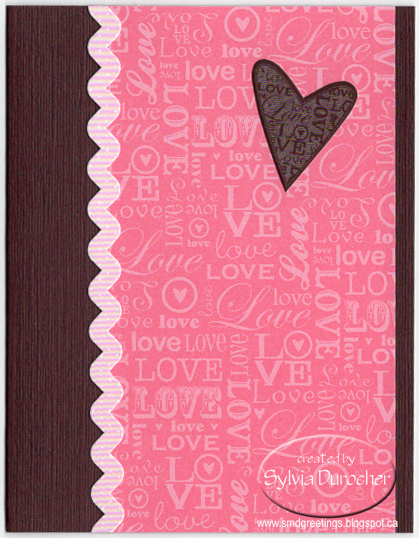
I made 4 cards in each color.  I chose this Regal Rose Love Words designer paper and cut it to 5.5 x 3 inches.  I adhered it to the right side of the card leaving a small border of card stock color.  I added a strip embellishment which is adhesive and well as a Pretty in Pink heart die cut.

 I followed a sketch from a card challenge at Fab Friday.


Fab Friday mostly features Stampin Up products offers regular card challenges.

This is the sketch FabFri129 for this week. 


This kit features textured card stock, adhesive die cut embellishments, and various adhesive strips. With most of the kit used in these cards it means a bit more stuff out the door.

On the Chocolate Chip one I used the same Regal Rose Love Words designer paper and added a Pretty in Pink zigzag strip with a words heart.

On the Regal Rose one again the same Love Words DSP with a pretty polka dot border and circle heart die cut.

On the So Saffron cards I chose the striped designer paper with a narrow border in Chocolate Chip with a Regal Rose heart die cut.

Monday, June 26, 2017

Card Making with Seniors - Postage Stamp

This is a stash busting card.  Many years ago I collected postage stamps from letters sent to the place I worked.  I have sorted, culled, and sorted again several times over the years.

I decided on this bright postage in honor of the 125th Anniversary of the Universal Postal Union issued in 1999.  It was soaked off the paper it was glued to and then allowed to dry.

I mounted it to a piece of card stock slightly smaller to stiffen it.

I created a background with script and cancellation stamp images from The Graphics Fairy which goes with the concept of a postage stamp.  Digitally, I added a box for the stamp then printed the background on a quarter sheet. It was trimmed to leave a small border.  It was adhered to the front of the bright green card.

I applied 3D foam tape to the back of the stiff postage stamp and adhered it in the window.

Here's another version with the Rural Mail Boxes stamps issued in 2000.

Sending these to my card exchange buddies. 

Saturday, June 3, 2017

Note Cards - Victorian Paintings

 I made another gift set of  No8 note cards.  This time I used a set of images left over from a Paper Tole kit I found these at the ReUse center the other day.  When I saw them I thought their proportions would be great for these type of cards.  As you can see they were perfect.  

The images were created by Anton Pieck - a Dutch artist who painted the Victorian images who lived from 1895 - 1987.  The the sheets of images have the copyright notice of 1973 The Donald Art Co. NY Printed in Holland on them and there is these three per sheet.  The name of the images are The Inspector (l), The Smoker (c) and the Ship Painter(r). I chose an olive green textured card stock in 12x12.  This layer was cut 2 7/8 x 5 inches. The cards are cut at 3 3/8 wide and then scored at 6 1/4 inches.  I added a 1/2 inch strip to the bottom of the card front, taped it on the back then added this scallop washi tape across the join and brought the ends to the inside of the card.  It finishing off the front nicely.     Again, I created a structure to house the 12 cards from left over strips of the 12x12 card stock I used for the cards.  These were scored the width of 3 5/8 centered on the 12 inches.  I used 2 - one for the bottom and another on the top.  I created a small piece of paper to stick to the top of let people know what the package contains.  I again added a label on one of the sides with my contact information.
You can refer to this post of the stash busting concept for these cards. 

Stash busting - No.8 Cards

I have no idea when I acquired a box of 500 of No.8 envelopes so this is a stash busting exercise.

When my sister visited on the long weekend we brainstormed the options for making cards to fit these envelopes.

It measures 3 5/8 x 6 1/2 inches. They cost a lot less than A2 Invitation envelopes. 

The idea I came up with was using 12x12 card stock to create three 6 1/4 X 3 3/8 inches cards. When scored at 6.25 inches you need to add an additional piece to the other side.


1. Single Side Designer Paper
You can just add a .5 inch strip of coordinating solid card stock.  This gives you an element you can repeat on the accent you add to the card front.
2. Double Sided Designer Paper
When using double sided designer card stock you can leave that color show through below the shaped bottom edge.
3. Either Type of Designer Paper
You can make a landscape card which folds in the center with the solid piece being anywhere along the card front.

Doing some calculations on cost it was determined that over all the cost is higher to make these cards but being in the place that the supplies in my craft space have been there for a long time and it is now a stash busting project.  For that reason, it makes sense to try to make the envelopes and 12x12 card stock leave the house.
It requires me to stretch my brain to design for a new size because I have been making A2 (4.25x5.5 inch) cards for years.  

Tuesday, September 22, 2015

Blessing Note Card

I needed a quick card to include in a bag of craft supplies I am contributing to a friend's budding crafting adventure.  I chose a small lavender envelope and cut a scrap of antique white linen card stock to fit inside.  I stamped the Ornate Pear by Rubber Stampede with purple for the pear and green for the stem and leaf.
I dug through my stash of ribbon and pulled out narrow, medium and wide ribbon in a variety of colors as well as texture including satin and grosgrain.


She is working on large letter decorator items as well as Scrabble Tile tree ornaments.
Stash busting is always a good thing.