
I decided that I needed a bag to carry my purse, my small everyday bag and my camera which I pretty much carry every time I leave the house. It needed to be much shallower than the one I currently use. Just big enough to put these things in with a bit of extra. The items would stay in place and be easy to access. In the bag I use now the purse and camera bag straps get all tangled, its deep so I can't see everything which does not work well. The inside is also black which does not help.
Despite wanting to keep the sewing area tidy I decided to tackle this project. Originally, I thought I would create a lining which was sectioned to add more definition but I have decided not to go that route for now. It took 2 days.

The fabric is light denim and a beautiful yellow and white pattern piece of 100% cotton fabric.
 It's quite floppy when not full but that is okay.
The bag as a boxed bottom with large pockets on both ends.
The fabric cost me $5.00 at the thrift store. The denim was a large pillow sham and the yellow has a baby dream tag but was flat and was about a yard of fabric.
I did fill the bobbin a couple of times.
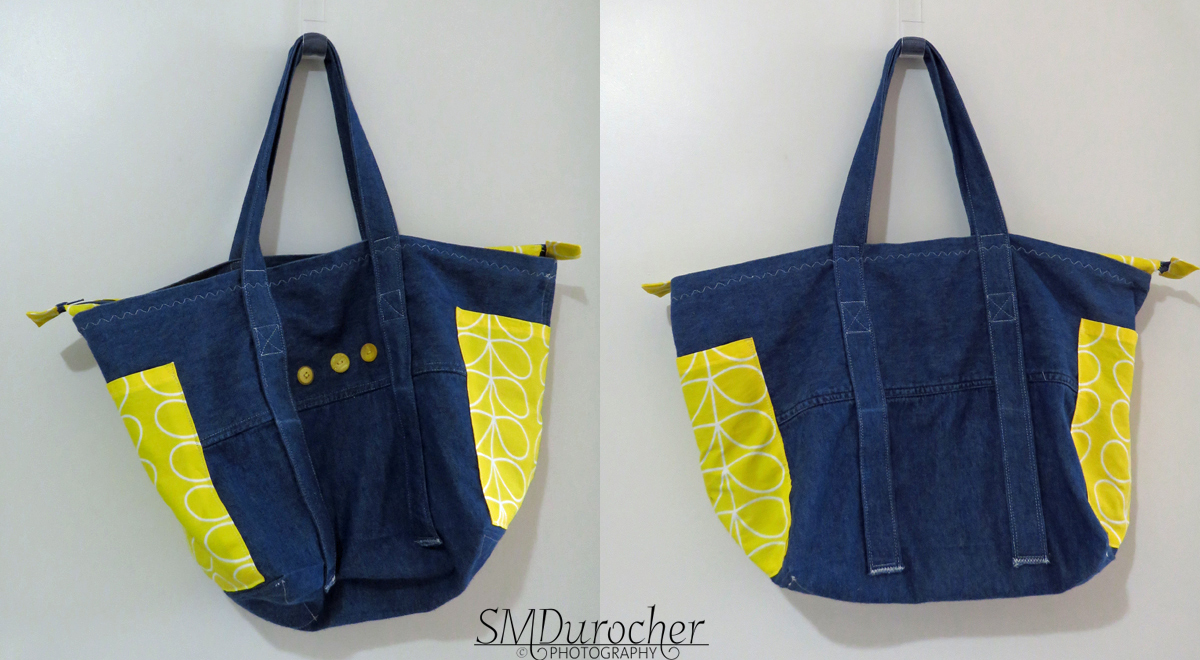
I wanted the straps to run the full length of the height of the bag to distribute the weight. I see that I twisted the front strap but it will stay that way as it is very well attached.
The buttons indicate the front and is helpful for using the zipper.

These are about 8" square and provide a quick place to put something I need to take with me. They hold my travel mug of tea for sure.
A nice hem at the top and the edges ironed over and then just sewn on to the denim. They are quite flat.
They are large enough for a book, or cards that need to be mailed.
I used white thread through out the project. It is quite unnoticeable on the yellow and more so on the blue denim.
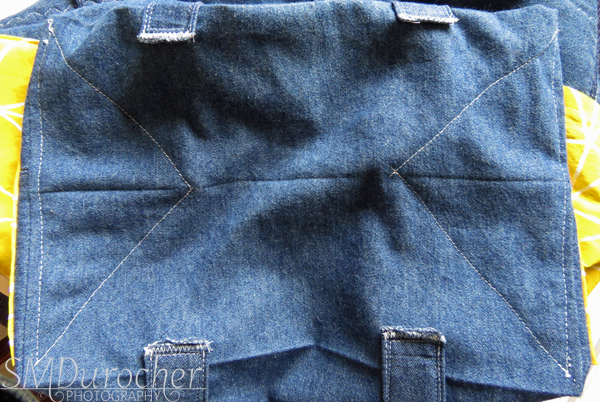
I brought the ends of the straps to the underside but not really enough to work well. I just did not have enough denim to make them longer. On hindsight I should have just brought them down to the bottom edge.
Live and learn they say.

I chose the yellow to be very visible. Upon checking my stash of second hand zippers there was blue one that was long enough. The zipper insert measures 23" tab to tab.

I chose 3 different ones and sewed them on with yellow thread.
They help to make sure I am coming from the right direction to open or close the zipper.
 Yes, my decorative stitches are back now that the sewing machine has been serviced.

This is just a curvy stitch that is adjusted by the stitch length and the zigzag measurement. This is quite tight and I like it a lot.
I used this to attached the recessed zipper insert to the bag. It goes right around the bag so provides a decorative element at the same time.

The purse, the every day bag and the camera bag. You can check this post for the details on the small every day bag I made. It is still perfect, a couple years on.
There is nothing like a bespoke item that fits the exact purpose you need.
I encourage you to get a perfect rather than settling for "it is just okay".
No comments:
Post a Comment
Thanks for visiting. I love to read your comments.