 I made this card for a guy at work who had surgery last week. I found a card with the general idea on Splitcoast Stampers. I made it a half sheet card so there was space for people from work to sign. The squares are 2.5 square in 6 different green patterned paper. They are layered onto a black layer which provides frames for the squares. This was mounted on a pea green card. I placed a beige then a striped gross grain ribbon over the left hand side split. The sentiment was color printed as well as the greeting inside. I had a visit with him today and things are coming along well.
Friday, May 28, 2010
Card - Get Well
I made this card for a guy at work who had surgery last week. I found a card with the general idea on Splitcoast Stampers. I made it a half sheet card so there was space for people from work to sign. The squares are 2.5 square in 6 different green patterned paper. They are layered onto a black layer which provides frames for the squares. This was mounted on a pea green card. I placed a beige then a striped gross grain ribbon over the left hand side split. The sentiment was color printed as well as the greeting inside. I had a visit with him today and things are coming along well.Monday, May 24, 2010
Holiday Challenge - Choc Vanilla Red & Kraft
 I made these cards in response to Tracy's Holiday Challenge. It is a color challenge to include chocolate, vanilla, red and kraft. I made 6 cards alternating red and chocolate panels on the kraft card front. I stamped the snowflake greeting on vanilla with chocolate chip ink. Punched them out with the scallop punch and mounted onto the card with foam dimensionals. I added a vanilla ribbon over the join of the panels. I added texture to the wider panel with the Cuttlebug Victorian embossing folder.
I made 6 cards.
Total Christmas Cards = 39
Friday, May 21, 2010
Scrapbook Layout - F of S - Kindness
 I'm working on a scrapbooking bible study for the fall. Here's my first sample page. The right hand page has four quadrants - Family, Work, Church and Strangers. What can I do to be kind to the people in each group. The circles on each quadrant merge in the centre. The small circle represents my life which is fuller when the life of those in each quadrant merges with my life. The left page has a scripture verse, a story from the bible and a prayer.
Sunday, May 16, 2010
Card Kits - Christmas - Gingerbread Man

These card kits were prepared for someone who runs classes in a shelter. They were designed to be put together with few tools.
This gingerbread is great. I used 12x12 cardstock. It was cut down to three 4 x 11 inches cards which puts the fold at the top. The cardstock creates the feel of a textured fabric. The gingerbread was cut in a color that matched one of the stripes in the background. The gingerbread's white icing on the arms and legs was created with a white marker. A piece of red cardstock was taped behind the hearts on his tummy. The gingerbread was glued to the card front then the black was added to the eyes and smile. The oval greeting was cut with a Cuttlebug die and the greeting was stamped with green ink. The greeting was threaded onto the ribbon. The ribbon ends are scotch taped on the inside of the card.
Card Kits - Christmas - Joy to the World
 The raspberry foil paper was trimmed to the card front. The greeting was ripped on the top and bottom. Then it was glued to the lower third of the card. The star is cut from silver cardstock with a Sizzix star die. It was glued above the greeting.
Card Kits - Christmas - Poinsettia
 The olive green decorative paper was trimmed and glued to the card. The color printed greeting was cut short on the right hand side and glued to the card. The poinsettia was created with 2 Stampin Up! five petal punches from copper foil paper. I added a small rust five petal punch. It was all held together with a copper snap. I curled the top petals to give the flower some dimension. The poinsettia was held in place with double sided tape.
Card Kits - Christmas - Snowflake
 The decorative paper was trimmed and ripped on the bottom and glued to the card. The 1/4" gross grain ribbon was passed through a slit in the fold and tied on the front. The greeting was color printed and punched with the Stampin Up! window slot punch. The greeting was placed above the ribbon.
The snowflake was cut with the Cricut. I layered a small five petal punch and held it all to the card with a lavendar brad.
Card Kits - Christmas - Red Heart
 The greeting was color printed on the bottom on the card. A green glittered handmade paper frame was cut with a Sizzix die and mounted on the top of the card. The heart was cut from red cardstock then embossed with the Victorian Cuttlebug folder then placed in the centre of the frame.
Wednesday, May 5, 2010
Card - Sending you Smiles
 Here's a bright little card. I found the inspiration in one of my Take Ten magazines. It's a great mag for quick card ideas.
I used a EK Success border punch on the black layer which was placed on a white card. I stamped several happy faces on yellow cardstock with black dye ink. The stamp is from a kid's set I've owned for 20 years. I punched them out with 1" circle punch and loaded them into a glassine envelope. I color printed the greeting and layered it onto red gingham strip. Added the extra smile over the sentiment and it was done! In the mail for my card exchange.
Tuesday, May 4, 2010
Photo - Spring in Alberta
 You have to be prepared for surprises when you live in Alberta. This is what it looked like going to work this morning. Heavy wet snow has been falling for half a day with little sign of letting up. Can you believe that 2 weeks ago I was in shirt sleeves and sandals? We are grateful because we really need the moisture for all the growing things and keep the threat of fires at bay.
Saturday, May 1, 2010
Cmas Card Challenge - May - Candles
 Candles are part of the Christmas season representing light in the darkness. You could create candles with stripes of cardstock in seasonal colors with handcut flames, die cut them, press emboss and chalk them, stamp them, and of course much more! What technique are you going to use?
I chose gold embossing a stamped image which I watercolored. The image is by Hampton Art Stamps. I used several different colors and a couple of layouts. I applied a light wash over most of the cardstock then chose coordinating colors to highlight some of the elements in the image. Once dried and pressed I ripped the edges to reveal a white edge next to the light wash.
Left: I layered the stamped image on gold paper to coordinate with the gold embossing then added them to a coordinating card. I smudged the edges with a coordinating ink pad.
Right: I chose 3 pieces of cardstock in the same color family. Layered the white image on a light layer and punched the right edge with the MS Arches border punch. Then onto the middle layer and onto the dark card.
Made 7 of these.
Total Cards made: 33
Charmaines's Card: Good Job!
http://tweedcurtain.blogspot.com/2010/05/mojo-monday-137.html
Friday, April 30, 2010
Holiday Challenge - Poinsettia cards
I created this card for Tracy's holiday challenge. It needed to have designer paper as the main image and 2 other elements.

I used some great Memories Magenta Style poinsettia paper. I added a layer of gold textured paper under it and a strip of gold across the bottom half. Then I added a gold embossed 5  petal flower which was punched out and layered onto a green 5 petal punchie. The accent is held in place with a gold brad.
 petal flower which was punched out and layered onto a green 5 petal punchie. The accent is held in place with a gold brad.
 I made 5 cards pictured below as required.
Cards made: 6
Total Christmas cards: 26

Tuesday, April 27, 2010
Card Club - April - Reused Book Pages

I have to say that I resist tearing apart books but sometimes they are beyond functional and reusing the pages is a good earth friendly idea.
The tag was cut from an old book page with the Sizzix large cresent tag die. I stamped the large U then embossed it with black detail powder. Really makes it pop. The greeting was printed on the same paper that was used behind the tag. The word was trimmed and tucked above the U. I added some black yarn. Remember to put the fiber on the tag before gluing it down to the card.
Card Club - April - Recycled Paper
 This petal paper is paper I made with recycled white paper and grass and flower petals. I just ripped the edges of the paper to just smaller than the top of the card. I prefer to have a rough edge. I put the lower half of the card through a Cuttlebug embossing folder. Hot glue is a good choice to adhere handmade paper to the card. I found paper and ribbon to match. I created the flower with the Stampin Up! five petal punch onto which I layered elliptical shapes from the Stampin Up! lattice die. Held onto the card with a large white brad. With a slit in the fold the ribbon is placed over the joint between the handmade paper and embossing.
Card Club - April - Reused Foil

I bet you don't recognize the foil from a yogurt container? Yep.
I used spray adhesive to glue the foil to thin cardstock. The foil was then cut with the Sizzix circle die. The white and turquoise circles cut with the Creative Memories cutter. The foil and white circles were then put through different Cuttlebug folders. The cardstock was 4x12" with a score at 5.5 then at 11 which leaves a one inch flap over the top front. I tacked the circled together with a bit of glue then the brad through the daisy confetti, 3 circles and the card front. The accent was placed so that it keeps the top flap closed.
White daisy confetti is no longer available on the shelves at Michaels. I was very surprised that basic white was no longer available.
Card Club - April - Recycled Denim
 Earth Day was April 22. I chose to give these cards an earth friendly focus where items were reused or recycled.
 The flower is a creative use of old denim jeans. I used Sizzix dies for the flower, centre and leaf. The yellow and green fabrics are left overs from other projects. The gingham scrapbook paper was just what I needed. The denim colored yarn matched well and was stapled on. I added a color printed greeting cut with my Creative Memories oval cutter. I used a navy ink pad to smudge the edges of the card and greeting.
Sunday, April 18, 2010
Photo - Beautiful Glass Tea Pot
 I know this posting is not paper related. I include it because it feeds my spirit. During a shopping trip this weekend I found a glass tea pot for a song. I've wanted one for a long time but they are quite pricey. I now have a beautiful object that feeds me in two ways every time I use it. We had great weather this weekend and I know summer is very near. So I made a pot of iced Ginger Peach Tea and enjoyed some in a tall glass.
Sunday, April 11, 2010
All Occasion Stack Class - Daisy Squares
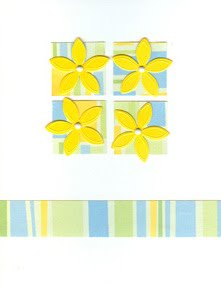 I used several different SCB papers that included the yellow to match the wedding confetti daisies. The squares were punched with a Marvy punch. The squares were glued to the card. They could be arranged in several patterns. I placed the daisies over the squares and create holes in the daisies/square/card with a push pin. Insert a tiny white brad. Trim the SCB paper strip and glue in relation to the layout of the squares.
All Occasion Stack Class - Circle Buckle
 I started with the ribbon on this card as well. I used chocolate brown, pink and rosy red cardstock for the card to provide a variety in the design. The white layer was embossed with a Cuttlebug embossing folder and glued to the card. The buckles were all cut in dark brown with a QuicKutz die and threaded onto the ribbon. The ribbon was taped to the inside of the card on top and bottom. The greeting was stamped in brown onto taupe cardstock, trimmed and layered onto pink cardstock and then trimmed again. This accent was then adhered to the card.
All Occasion Stack Class - Circle Collection
 The inspiration for the card comes from the Go to Sketches magazine. The SCB paper collection is a retired StUp! set. It is a double sided paper which provided the variety of pattern needed for this design. I created the greeting in Corel Draw which allows me to print it in any color I want then I punched it out with the 1" punch. I cut the SCB paper circles with the smallest one on the Sizzix circle die. Simple but effective design.
Subscribe to:
Posts (Atom)