We held a Boxed Lunch Auction at work last week to raise funds for overseas missions. We has 11 entries this which up from the last time. We raised lots of money in a quick 30 minutes. It was a blast and everyone had great food to eat. You can find the one we held last time here.
I put M&M frozen rice bowl, an M&M apple blossom dessert, a green Granny Smith apple, a granola bar, a chocolate bar and some tea bags. Forgot to take a picture.
This picture is a little late.
Monday, March 24, 2014
Wednesday, March 19, 2014
R2G Card Kit - Easter Felt Bunny
I made one kit of these, they are so cute.
I selected a purple card and mounted a piece of Designer paper onto it, leaving a small border. I punched a Stampin Up Modern Label punchie in the same color and then added a color printed greeting punched with the SU Word Window. This assembled greeting is then adhered to the card front with 3D foam tape.
The felt bunny is held in place with 3 tiny white brads strategically placed on his body. Use a push pin to create the holes before inserting the brad.
I selected a purple card and mounted a piece of Designer paper onto it, leaving a small border. I punched a Stampin Up Modern Label punchie in the same color and then added a color printed greeting punched with the SU Word Window. This assembled greeting is then adhered to the card front with 3D foam tape.
The felt bunny is held in place with 3 tiny white brads strategically placed on his body. Use a push pin to create the holes before inserting the brad.
Labels:
3D foam tape,
bunny,
color printed,
Easter,
felt,
Modern Label punch,
purple,
white,
word window punch
R2G Card Kit - Scallop Oval - Joy to the World
Another kit for my upcoming class. These are leftover from this class.
I chose a oval greeting from Graphics Fairy which was all ready red. There were several color choices. I printed those on white card stock and cut them out with one of the Spell Binder smooth oval nestabilities. I glued that to the large scallop oval. I glued the snowflake designer paper background to the moss green card. I added 3D foam tape behind the scallop oval and mounted it to the card front. Just a nice quick easy card.
Labels:
3D foam tape,
card kit,
Christmas cards,
color printed,
green,
joy to the world,
large greeting,
nestabilities,
R2G,
red,
SB,
scallop oval,
snowflake,
white
Sunday, March 16, 2014
R2G Card Kit - For You Scallop - Orange & Purple
Another card kit for my upcoming class. This is similar to this one. I chose Pumpkin Pie and Elegant Eggplant for this kit. The For You flowers are color printed and punched with the 1 1/4" punch. A layer of Kiwi Kiss at 1 3/8" then the scallop punch in the card color. I used the SU Pretty Print embossing folder on the bottom 2/3 of the white layer. Put the 1/4' ribbon across the top and taped the ends to the back. Adhered it to the card front.
Assembled my greeting accent by gluing the small circle to the medium circle then to the scallop circle. This greeting accent is then adhered to the card front over the ribbon with 3D foam tape.
This one on right is Ruby Red and Elegant Eggplant with Kiwi Kiss .5 inch ribbon.
Assembled my greeting accent by gluing the small circle to the medium circle then to the scallop circle. This greeting accent is then adhered to the card front over the ribbon with 3D foam tape.
This one on right is Ruby Red and Elegant Eggplant with Kiwi Kiss .5 inch ribbon.
Tuesday, March 11, 2014
R2G Card Kit - Split Top Note - Blue Green
Another couple kits for my April class.
I have coordinated Stampin Up! Tempting Turquoise and Green Galore sides of the Rainbow Sherbert DSP into this kit. I cut both colors at the same time with the SU Top Note die and then split them down the right hand side. These were switched then reassembled and taped together on the back. It was then adhered to the card front. The SU Modern Label punchie coordinates with the card color and the greeting with the other. I punched out a SU Five Petal punchie in Whisper White and then embossed it with the SU Vintage Wallpaper folder. I glued that over the join between the papers and the greeting is glued to the Modern Label then it is adhered to the card front with 3D foam tape.
Labels:
3D foam tape,
blue,
card kits,
five petal punch,
green,
Modern Label punch,
R2G,
SU,
top note,
turquoise,
white,
word window punch
Monday, March 10, 2014
Photo - Words and Letters
I created this collage for a photo challenge but I missed the deadline so I'm posting it here anyway. It is designed with letter tiles and the unwanted letters are darkened with smoky tiles. I added the tea cup from a graphic on the web.
Sunday, March 9, 2014
R2G Card Kits - Polar Bear
Another card kit for my April class.
I chose the polar bear from the Cricut Joy of the Season cartridge.
I cut it from white and then cut a purple scarf. I added a nose, eye and ear with a black marker. I cut a snowbank with my Creative Memories wavy cutter. I punched a pearl white star. I cut a piece of sparkly decorative paper for my night sky and adhered that to a black card. I then added the snowbank first, then the bear then the star in the upper right hand corner. Love the decorative paper.
I chose the polar bear from the Cricut Joy of the Season cartridge.
I cut it from white and then cut a purple scarf. I added a nose, eye and ear with a black marker. I cut a snowbank with my Creative Memories wavy cutter. I punched a pearl white star. I cut a piece of sparkly decorative paper for my night sky and adhered that to a black card. I then added the snowbank first, then the bear then the star in the upper right hand corner. Love the decorative paper.
Labels:
card kits,
Cricut,
decorative paper,
Joy of the Season,
polar bear,
purple,
R2G,
scarf,
sparkly paper
R2G Card Kit - Large Flowers
Another Ready 2 Go kit. Make from the left over card kits from February Card Club. I cut the Sizzix Tim Holtz Cameo frame from warm mottled green
background card stock. I added it to a warm deep yellow card. I then
layered a large yellow silk flower then an orange one then a medium
yellow with a small orange one. I layered the large one onto the card to
align the hole made with a push pin.I placed the small to the largest on the large yellow brad and then put the brad through the hole.
Pressed apart the prongs of the brad on the inside of the card. The bees were buttons but I used a pair of sharp cutting pliers to remove the shank then a utility knife to smooth down the back. I then adhered it to the card front with a Zot. I added a dotted flight path with a black marker.
Labels:
bee,
card kits,
large flowers,
purple,
R2G,
TH,
TH Cameo Frame die,
yellow
R2G Card Kit - Layered Floral Ovals
Another Ready 2 Go card kit for my class in April. I chose the Stampin Up! Holiday Lounge DSP in White, Ruby Red, and Sahara Sand. I cut the DSP with the Top Note die then I cut the smooth ovals with SB Nestabilities but SU sells the Ovals Collection Framelits! I color printed the flowers from the SU digital stamp from the PUNCH BUNCH STAMP BRUSH SET on white in Ruby Red and Sahara Sand for the stems. The top note is adhered to the card front then the 2 ovals are adhered together layered one on top of the other. This element is then adhered to the card front with 3D foam tape. The back of the card was stamped with the SU credit stamp.
Challenge - Favorite Cricut Image - Polar Bear
I chose the polar bear from the Cricut Joy of the Season cartridge as my favorite image and Christmas is my favorite holiday.
I cut it from white and then cut a blue scarf. I added a nose, eye and ear with a black marker. I cut a snowbank with my Creative Memories wavy cutter. I punched a pearl white star. I cut a piece of sparkly decorative paper for my night sky and adhered that to a black card. I then added the snowbank first, then the bear then the star in the upper right hand corner. Love the decorative paper.
Entering this card in the challenge at Bitten by the Bug2 - favorite cartridge or image. and Fantabulous Cricut Challenge - Pick a Holiday. and Crafty Hazels Christmas Challenge - Anything Goes
I cut it from white and then cut a blue scarf. I added a nose, eye and ear with a black marker. I cut a snowbank with my Creative Memories wavy cutter. I punched a pearl white star. I cut a piece of sparkly decorative paper for my night sky and adhered that to a black card. I then added the snowbank first, then the bear then the star in the upper right hand corner. Love the decorative paper.
Entering this card in the challenge at Bitten by the Bug2 - favorite cartridge or image. and Fantabulous Cricut Challenge - Pick a Holiday. and Crafty Hazels Christmas Challenge - Anything Goes
Labels:
black,
blue,
Christmas cards,
Cricut,
decorative paper,
Joy of the Season,
pearl,
polar bear,
sparkly paper,
star,
white
Wednesday, March 5, 2014
Card - Stencil Background
I made this card for a challenge to use a stencil. I've not bought any stencils recently and I have a pile of ones I bought years ago but none were suitable for a background. So I decided to make my own. I cut some clear plastic with the Stampin Up Lattice Die. I laid the stencil down on a piece of card stock and applied Tim Holtz Distress stains in the following colors: Antique Linen, Mustard Seed, Spiced Marmalade and Aged Mahogany. I made it larger than a quarter sheet because I knew I would cut it down. I cut it down with one of the SU Window Frames Collection Framelits. I rubbed the edges with the Aged Mahogany ink. I chose an orange card and applied a layer of yellow on top of it before I added my background die cut. I cut a Lattice Die from a piece of mahogany card stock. I played around with it until I ended up with just a flower looking piece. I added an orange silk flower to the center and held it all in place with a golden yellow mini brad. I added some of the off cuts from the die to each of the four corners. I then sprayed the whole card with some copper mist spray.
Card - Stampin Up! Thank Yous
Here are the thank you cards for those who placed orders at my Stampin Up! book party.
I chose one of the papers from the Sweet Sorbet DSP series. I layered it onto black card stock then I wrapped a piece of black thread around it and tied a knot. I added the sentiment in Soft Sky to the You're Lovely stamp and printed it to fit one of the Deco Labels Collection Framelits. It then cut. I added a bit of color to the flowers with chalk. I adhered the DSP layer to a Soft Sky card then adhered the label to the card front with 3D foam tape.
Labels:
black,
blue,
color printed,
Deco Label,
framelit,
SAB,
Soft Sky,
thanks,
thread,
white,
You're Lovely Set
Card - Soft Aqua Thanks
I made this card for a crafting friend who shared some supplies with recently.
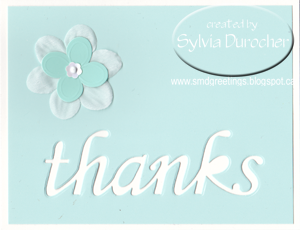
The card is white then I added this layer of coated paper in a soft aqua color. I ran it through the Big Shot with the Memory Box greeting die. I made sure to save the little piece from the A so I could glue it in place. I mounted the piece on the card which allows the greeting to be the color of the card. I added a white and aqua accent of silk and card stock flowers all held in place with a small sequin on a tiny white brad.
Labels:
aqua,
brad,
card,
coated paper,
daisy confetti,
MBox,
silk flowers,
Soft Sky,
thanks,
white
Tuesday, March 4, 2014
Card - Retirement - Flower Trio
Another retirement card for a very nice lady who took the plunge recently.
I used my large greeting sentiment that I designed and adjusted it for the occasion. I color printed it in Stampin Up! Ruby Red on white, once trimmed I mounted it onto the same colored card. I added 2 warm colored silk flowers in red, yellow and orange. I layered to their centers smaller yellow flowers and held them in place with copper brads.
Labels:
brads,
copper,
large greeting,
orange,
red,
retirement,
Ruby Red,
silk flowers,
SU,
yellow
Card - Retirement - Hunting and Fishing
I made this card for a friend who retired recently. He is an outdoorsman so I expect these pursuits will be part of this new chapter.
I started with a picture of the lake in the morning I took last summer at Pine Lake Camp. I adjusted the color to be sepia and added the sentiment in a color to match the accent. The accent is a picture I found on line of an old tin sign which I printed in the size I needed. It expressed the sentiment I wanted. Once the card was printed I added a grosgrain ribbon with just a bit of the same blue as in the tin just below the greeting. I mounted the accent on the right hand side of the greeting with 3D foam tape.
Labels:
color printed,
green,
grosgrain ribbon,
hunting,
lake scene,
PLC,
retirement,
sepia,
teal,
tin sign
Saturday, March 1, 2014
Card - Earth Day - Chipboard Eiffel Tower
Next card in my Earth Day collection.
I cut the Eiffel Tower from cereal box cardboard with the Tim Holtz Eiffel Tower die. I applied TH Distress Stain in Antique Linen but it does not show much. I rubbed the edges with a black ink pad. I embossed the ivory linen card stock layer with the TH Postale embossing folder. I wrapped the layer with caramel seam binding and tied it to the left card front. This was glued to the card front. The Eiffel tower is adhered to the card front with 3D Foam tape.
Labels:
black,
caramel,
diecut,
Earth Day,
ink pad,
ivory,
seam binding,
TH,
TH Eiffel Tower,
THDS Antique Linen
Christmas Card Challenge - March - Vellum Poinsettia
The challenge is using vellum on your Christmas cards. This opens the challenge up to almost anything.
I brushed the back of the 8.5x11 vellum with Tim Holtz Distress Stain in Bundled Sage and Tattered Rose. Then I cut the poinsettias with the Tim Holtz Tattered Poinsettia die which has 3 different sized flowers. I place 2 green ones at the back then the rose ones in front in two different sizes. I wanted to keep the feel muted and soft so I used brushed gold brads in the centre. I chose a warm white card and then embossed another piece of the same card stock with the Cuttlebug D'vine Swirl folder. I wrapped the embossed layer with 2 pieces of green seam binding which the ends were taped to the back. I mounted the poinsettia to the card front with 3D foam tape. Super happy with this one!
Friday, February 28, 2014
Card - Grad Cap
I made this card for someone at work. We know someone who attended her convocation recently.
I chose the university colors - red,black and gold. I started with a red card. Then cut a piece of gold card stock and embossed it with the Cuttlebug Typeset embossing folder. I layered that to a piece of black card stock. I added a gold splattered strip over the join on the right hand side. I created a gradation cap with a piece of black, layered with gold, layered again with black. I added a bit of texture on the small black with my score pal. I created a tassel with gold thread. It is held in place with a large black brad. The cap is adhered to the card front with 3D foam tape.
Labels:
black,
brad,
Cuttlebug,
embossing folders,
gold,
graduation,
red,
square,
SS,
tassel
Wednesday, February 26, 2014
Card - Pond Hockey
Here's another Earth Day card re-using cancelled postage stamps. We all some of these hanging around. This one is from the 50th National Hockey League® All-Star Game published in the year 2000.
I found a pond hockey photo on-line which is the classic idea of scrapping the snow off a pond and creating a skating rink. I wanted a little bit of red to off set the stamp so I put a red maple leaf in the left bottom corner. I printed it on vellum and let it dry. I trimmed the vellum and put it on a pale blue card which matches the background on the stamp. It is held in place by 4 tiny black brads in all four corners. I then adhered the stamp to a piece of card stock to give it a bit of stiffness and then stuck that to the vellum in the top right hand corner. After the golds in hockey at the Olympics this is a great card to honors those medals.
Labels:
All Star Game,
cancelled,
color printed,
Earth Day,
hockey,
maple leaf,
pond hockey,
postage stamp,
vellum
Tuesday, February 25, 2014
How To: Serendipity Paper with Paper Strips
This is a great way to use scraps of designer paper and make paper you can you in card making, scrap booking, mixed media projects.
Collect a bunch of scraps of designer paper. I chose similar colored pieces but just think about the result. Red, green and gold for Christmas. Easter paper with yellow, purple and green. You get the idea. I cut my paper down to .75" strips. Start by laying out the strips and making sure the same colored pieces are not too close together and your joins between strips are not too close. Once you are happy with your lay out start gluing the strips down. I started in the top left hand corner and glued strips on the diagonal. Let your strips fall off the edges of the card stock. Once all well glued, press until good and dry. Turn the paper over and you will see the jagged edges. Trim the paper strips to edge of the card stock. Use as you will. I made these cards with mine.
This is a great scrap buster technique.
Collect a bunch of scraps of designer paper. I chose similar colored pieces but just think about the result. Red, green and gold for Christmas. Easter paper with yellow, purple and green. You get the idea. I cut my paper down to .75" strips. Start by laying out the strips and making sure the same colored pieces are not too close together and your joins between strips are not too close. Once you are happy with your lay out start gluing the strips down. I started in the top left hand corner and glued strips on the diagonal. Let your strips fall off the edges of the card stock. Once all well glued, press until good and dry. Turn the paper over and you will see the jagged edges. Trim the paper strips to edge of the card stock. Use as you will. I made these cards with mine.
This is a great scrap buster technique.
Labels:
card stock,
Designer Paper,
How To,
paper strips,
scrap buster,
serendipity,
technique
Subscribe to:
Posts (Atom)