Monday, July 30, 2018

Recent Pics

I took this photo yesterday morning.

As I was driving the sky was blue, pink and yellow but about 5 minutes later the colors are gone and I got the yellow shot.

I love the pronounced circle of the sun.

It was very early in the morning and the coolness was very much appreciated.

I was off to water my row of flowers as well as friend's garden and flower pots.


This is the first summer I cannot pick raspberries at Mom's since they moved to senior housing last August.  I really want to have enough for Raspberry Bavarian.  I got enough I am sure.  Will be making that this week.

Watering the plants was nice when doing it in the early morning.

Love the water drops on rose leaves.


I have read a couple of books recently.

The one on the left I think is the first for Maeve Binchy.  It was a wonderful story about a girl from England who is sent to Ireland during the war.  She lived with a family known by her mother for 5 years.  The Irish girl became her best friend.

Interesting relationships in this book.

The Last Lecture is a touching true story by the author who wrote a last lecture for his children.

This book holds many truths and lessons to live a great life.

Very insightful thoughts and very much appreciated.

Sharing with Mosaic Monday #94 hosted by Maggie at Normandy Life.

Sunday, July 29, 2018

Tea House Visit

I recently visited the Tea House in a couple of towns away from where I live.  I was out of town and it was near by.  It is only open on the weekends and likely managed by volunteers. It is housed in a summer cabin which was built in 1922.  It was moved to this site in 2000 and opened as a tea house in 2003.


Here's the baker's rack that houses all the china tea cups and you get to choose the one you would like to use.  I selected a roses and yellow pennant one by Paragon. 
Based on this mark it was likley made in the early 1920's.

I selected Earl Grey tea which was served in as small tea pot.


I ordered Hamburger Soup and the Raspberry Rhubarb Crisp which was served once I finished my soup. The hamburger soup was home made and very good.  I was able to just relax and enjoy my meal as the lunch rush was over and there were just a few of us in the tea house.


I managed 3 cups fulls of tea from the teapot which hit the spot.  I loved the scalloped shape of the bowl of the tea cup.  The roses had a black background but it was not overpowering.  The yellow triangle pattern in between was very charming. 

You can see the subtle pattern in the china itself in this saucer as well.
Dessert was again homemade.  I was not expecting the ice cream but it was excellent with the Raspberry sauce on top. 

It was an overall excellent experience and I will be back.

Check out the Pioneer Tea House if you are in Stony Plain.

Sharing with Share Your Cup #300 hosted by Jann at Daily Cup Mrs. Olson.

Saturday, July 28, 2018

R2Go All Occasion Stack Kit - Set 05

I cut the flowers from black card stock.

I selected designer paper and coordinating card stock for the base.  It was cut to leave a small border.  I adhered the DSP to the card front.

I then aligned the flower and and stem onto the card front. Once happy, I adhered the flower then the stem and trimmed it to the edge of the card.

I made a hole in the center of the flower with a push pin.  I placed the flower sequin then the handmade flower by Prima onto the tiny black brad and placed the prongs through the hole and press them apart on the inside of the card.


 This set features black and white printed elements.  The images were downloaded from Pixabay. They were printed onto white card stock then they were punched with a 2" circle punch.

I chose designer paper which would coordinated with the elements and then cards in black, white or kraft.

Once the desinger paper was adhered to the card front I wrapped a piece of black knitting ribbon around the card front and knotted it.

The element is created when the white circle is adhered to the black Stampin Up Deco Label die cut.  The label is then adhered over the ribbon with 3D foam tape.


 This card features a large metallic copper diecut daisy done with the Sizzix Daisy #4 die.

I chose designer paper and card stock combinations that worked well together.  The DSP is cut to leave a small border then adhered to the card front.

I tack the copper daisy lightly with adhesive.  This time because I have no greeting I swung the stem to the center.  I used a push pin to create a hole in the center of the flower.  I placed the teal and copper flowers onto the tiny copper brad and pressed it through the hole I made. Spread the prongs on the inside.

Check the kit tab for availability.

R2Go All Occasion Stack Kit - Set 04

I cut the flowers from black card stock.

I selected designer paper and coordinating card stock for the base.  It was cut to leave a small border.  I adhered the DSP to the card front.

I then aligned the flower and and stem onto the card front. Once happy, I adhered the flower then the stem and trimmed it to the edge of the card.

I made a hole in the center of the flower with a push pin.  I placed the flower sequin then the handmade flower by Prima onto the tiny black brad and placed the prongs through the hole and press them apart on the inside of the card.


This set features black and white printed elements.  The images were downloaded from Pixabay. They were printed onto white card stock then they were punched with a 2" circle punch.

I chose designer paper which would coordinated with the elements and then cards in black, white or kraft.

Once the desinger paper was adhered to the card front I wrapped a piece of black knitting ribbon around the card front and knotted it.

The element is created when the white circle is adhered to the black Stampin Up Deco Label die cut.  The label is then adhered over the ribbon with 3D foam tape.

This card features a large metallic copper diecut daisy done with the Sizzix Daisy #4 die.

I chose designer paper and card stock combinations that worked well together.  The DSP is cut to leave a small border then adhered to the card front.

I tack the copper daisy lightly with adhesive.  This time because I have a greeting I swung the stem to the right.  I used a push pin to create a hole in the center of the flower.  I placed the teal and copper flowers onto the tiny copper brad and pressed it through the hole I made. Spread the prongs on the inside.

The greeting was printed in teal on ivory card stock and punched out with the Stampin Up Artisan label.
Check the kit tab for availability.

Thursday, July 26, 2018

Birthday Card - Olive and Chocolate

I made a couple of masculine cards.  This is coordinated designer paper in chocolate brown and olive green.   It features red, orange, vanilla triangles.

I cut the brown layer to 2.25 inches by 5.25 inches tall.  It was adhered to the left on the olive card base.  I added green piece measuring 3.75 inches square.  I layered it toward the top of the card.

I mounted a small oval greeting in the bottom right hand corner. 

I punched balloons with the Martha Stewart Balloon punch from the brown paper.  I added black thread strings to the balloons.  I adhered the balloons with 3D foam tape.


I made this card as a DSP Split.  I cut the green to 3.25 x 5.25 inches. The green is cut to 3.00 x 5.25 inches. These were taped into a single piece at the back with tape.

I adhered the designer paper layer onto the olive green card. I placed a piece of brown grosgrain ribbon across the joint and taped the ends to the inside of the card.

I added an oval greeting on the right hand side with 3D foam tape.  A couple more for my depleted stash.


Cards - Teal Paisley

I chose this paisley designer paper featuring some cool colors.  It has some pink, fucshia, teal, green, and mustard.  I chose a deep teal card base.

I added a piece of designer paper leaving a small border on the card front.

I added a strip of vellum on the left hand side and it is held in place with a dark pink, light pink flowers with a teal brad in the top left hand side.

I added a Stampin Up Decorative Label stamped with a birthday greeting from the SU Sincere Salutations in Marina Mist ink.  The punchie is mounted with 3D foam tape.

I added another handmade paper flowers combo in the bottom right hand corner.


This card has no greeting.  I have added a grey Knitting Ribbon in a bow at the top third of the card.

I added a ripped piece of vellum on left side.

An accent of handmade paper flowers held in place with a teal brad.

I ripped the designer paper leaving a strip of the card base showing.

I added a blank card insert.

Birthday Cards - Trio Squares

I made a couple of birthday cards.

I chose designer paper by Blue Fern Studios - Paisley and Vine - Bohemian.  Love the rich colors in this paper.  I punched 3 large squares from the designer paper with my Creative Memories Double Square Punch.

I cut a strip of deep teal green card stock and adhered it to the deep red card base on the left hand side. 

I adhered the squares along the teal strip with 3D foam tape. 

I added the strip banner greeting in deep red.  I adhered it aligned on the left edge with the bottom square and cut the flag end by hand with scissors.  I have added a piece of 3D foam tape at the end of the banner greeting.

As you can see the card layout can be modified to the landscape (wide) or the portrait (tall) orientation. 

On this second card, I placed the greeting on the teal card stock strip and added a teal mini brad on the left hand side.

I added a piece of chocolate grosgrain ribbon under the 3 punched squares.  The ends are taped to the inside of the card.

I added a blank insert.

Tuesday, July 24, 2018

Botanic Garden Visit

I took advantage of a Photographer Drop In morning at the U of A Botanic Garden on Saturday.  We could arrive at 7:30 am and get 2.5 hours of shooting before the general public was allowed in.  It meant getting great shoot with no people in them.  The flowers were wonderful.

The top left is Chicory, a beautiful pink rose on the top right. A yellow Rudbeckia on the left and a water drops touched white daisy on the right.

I arrived just after 7:30 am and left about 2:00 pm.  There is so much to see that one has to spend a good amount of time to see it all.  I was happy with my experience.

The garden features a Japanese Garden, a Muslim Garden, an Alpine Garden and several show houses.

The Red Poppy in the left hand corner with a very large Hibiscus in the tropical show house on the right. 

The Muslim garden has many pools and several featured water lilies.  When I was at the garden early in the day I did not notice the unopened bud but several hours later the flower was open.  A sunflower facing into the sun and enjoying every bit.

Sharing with Mosaic Monday #93 hosted by Maggie at Normandy Life.

Friday, July 20, 2018

The Craft Kingdom - Project 2 - Decorating Rocks

This is my second project from the book - The Craft Kingdom.  Check out my second post.  Find a link to the book here.


I hope that you are inspired to do art today. Check out the book at your local book store.
 
I chose Decorating Pebbles on page 32 of the book.
 
First I picked my rocks.

I chose smooth rocks with flat surfaces where I could paint.

I wanted to make one a Thank You one and others to just paint something interesting.

Pick shapes that appeal to you and sizes that fit with the art you are planning to paint onto it.


I chose a turquoise color named Laguna, a green called Yellow Citron, my favorite Cadmium Yellow and Kelly Green.

I chose acrylic paint in a variety of colors and brands.  Make sure you have an opaque paint.  I have glazes and semi transparent colors.

I did not prime the rocks with white but it may have been a good idea.

I  did make a couple coats of color so that turned out okay.


I chose a plastic lid for a palette for the dollops of paint.  The middle rock is a mixture of the dollops once I was done with the others.

I chose a medium sized paint brush.

You have to plan because you will have unpainted spots where you are holding it.  Two times by 2 coats.  The acrylic paint dries very quickly.


Check out page 32 in the book titled decorated pebbles.

As you can see a pile of rocks was included in the book.  Lots of color and pattern was used.


Here are my rocks.  Spattering paint with a toothbrush is always a easy process for anyone to try.

I used a smaller brush to paint my flowers.  I love the shape and color in the turquoise one!

Tuesday, July 17, 2018

Recent Photos

I found these napkin rings at the thrift store the other day.  I just could not leave them there.  The price was good as well.  The box contained 10 of them.

Silver wire Bee Napkin Rings.  The bottom ring is flat so they will sit nicely on the table.  I used a black napkin so that they would contrast nicely.


A stop at the Community Garden yielded some nice shots.


Lovely red poppy was terrific. 

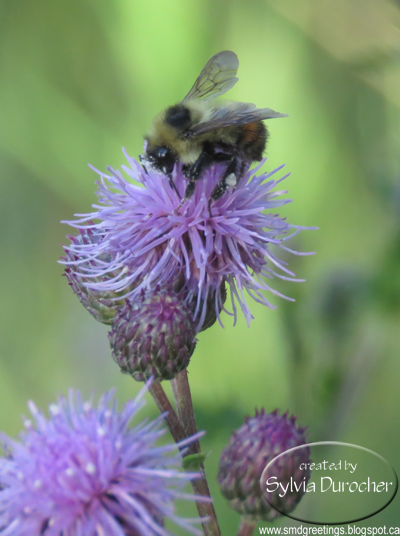
Now thistles are not necessarily welcome at the garden but the bees were checking them out.


I found purple in the Sweet Peas, the delicate Alium in a purple shade, and burgundy crab apples.


On the right is a nice red, very large rose hip.


Sharing with Maggie at Normandy Life who hosts Mosaic Monday #92.

Saturday, July 14, 2018

Blank Card Set

I made a set of cards for my aunt.  A funeral is a time where friends, service personnel and family are pitching in to make the arrangements.  Having cards handy makes it easy to express appreciation for the help.

In this set of cards I used a grey green card bases with a subtle floral designer paper in shades of green and grey.  The ribbon I used is called Knitting Ribbon.  It is beautiful soft ribbon about 3/8 inch wide. Love it.

I have use Prima Handmade Paper flowers as well with coordinating brads.


The flowers were peach, green, and shades of pink.  I have created a variety of designs with the flowers.

The other card has heart punchies in pink and white with small plastic pink flowers held in place with Bling Zots.

Sympathy Card - Aunt

This card is for my aunt. My uncle Henry's funeral is today.

I started with a grey green card base.  The designer paper is from a pad.  I loved the subdued and tone on tone pattern.  It is a floral with leaves.  It was cut to leave a small border.

I cut a Sunburst with the Stampin Up thin die from silver textured paper.  I cut it larger than the quarter sheet so I could position my center.  I adhered it to the designer paper then trimmed off the excess with scissors.

I added the greeting in the center of the sunburst. It is a color printed greeting layered onto a circle green layer. 

 They included these small candy bars at the reception for my uncle's funeral.  His name was Henry and he had a sweet tooth.  I thought it was so fitting. 

Excellent.

Exchange Cards

I made a couple of cards for my exchange partners.

I started with a rust colored card base.  I added some designer paper from an autumn pad.  It features geometric designer with chocolate, orange, yellow and olive green colored triangles with wavy lines. 

I cut the bottom piece 4 x 3.25 inches and the top 4 x 2 inches.  I taped them together on the back to make a single layer.  I adhered it to the card front. 
I added a chocolate band of card stock along the join. 

I added Prima handmade paper flowers in warm tones.  Peach, kraft and rust.  They were placed along the piece of card stock and held in place with rust colored brads.

The card layout is very versatile and allows for both portrait and landscape card orientations.

These are off to my partners today.

Monday, July 9, 2018

My Recent Photos

Last week I took a trip to Drumheller for a photography job.  I spent the day before doing some sight seeing and visiting some of my favorite places there.

A visit to the Royal Tyrrell Museum was a must. It is a world renown museum for dinosaurs.  It is situated in a provincial park which has yield fossils.

This is an ammonite on display in the museum.  Gorgeous color and a wonderful shape.

This is a beautiful stone I purchased in the gift shop.  I think it might be quartz but I will have do more research. 


The dinosaur below is a Dimetrodon. It is an extinct genus of synapsids that lived during the Cisuralian, around 295–272 million years ago. It is a member of the family Sphenacodontidae.


Flowers are always objects for my camera.  The top one is Ninebark - Summer Wine.  The middle one is Echinacea Tiki Torch, a hybrid orange coneflower with large showy pumpkin-orange colored flowers.  The bottom is a beautiful sample of clover.


This is a pottery button about 2.5 inches across.  I bought it at the Pottery Guild's gift shop.  My aunt and I visited the shop before my reception on June 30th. It's nice to support other artists.


Blackberry tea with a few dried cranberries and a beautiful rose.  I took advantage of a Goodwill special recently of 3 vases for $1.00.  This square cube vase has a hole in one corner and a slant on the opposite corner.  I chose my Tea Lover's Teacup by Steeped Tea which is the same light clear glass to repeat the blown glass theme.  I served the cranberries in a small crystal glass.

Sharing with Mosaic Monday #91 hosted by Maggie at Normandy Life.

Sunday, July 1, 2018

Christmas Card Challenge - July - Copper Wisemen

I am catching up on my card challenge.

I started with a warm light blue card. 
I added a piece of designer paper by Imaginations - Sky.  It was cut to leave a small border.

I used the Stampin Up Come to Bethlehem set onto vellum and embossed it with copper powder.  It was trimmed to the edge of the DSP. I tacked in in place with a bit of ds tape behind the wisemen.

I then cut a piece of white card stock to complement the sand dune on the vellum.  I hand cut that and glued it onto the card front and then trimmed it to the bottom of the card. I then used a push pin for the holes for the copper brads. Two round ones in the corners and a star one in the middle of the star.