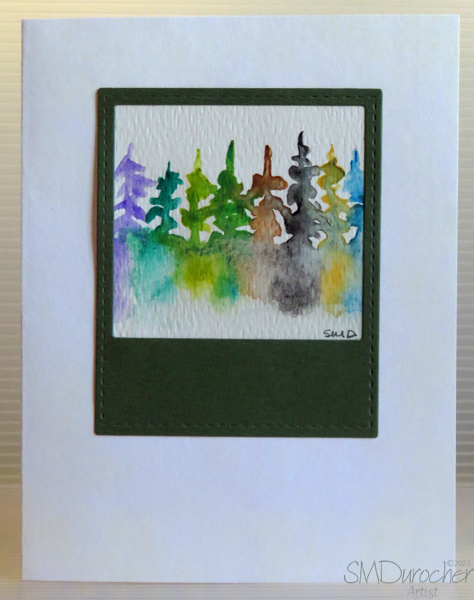
I brought home a small watercolor palette from the ReUse Center last week. I saw a video in the last month that the artist makes the practice of doing this tree line with a new palette so she has documented the colors in the palette. I thought I would give it a try. Wet on the bottom and dry on top. Just go along the colors and this is the result.
I wanted to do something with the art.
I have a set stitched squares dies which makes a nice frame. The large one which I have used on cards was too large for the small strip of 3" tall watercolor paper I had. I used the middle one. The easiest was to make the watercolor this size of the cut out. This gives less of a look of framed art.
I debated what color the frame should be. I used a grey here. Could it be black?
The next challenge was that the card seemed too plain so adding some embossing worked really well.
On this card I used Stampin Up Summer Sun card base, a Cuttlebug folder with a diamond pattern for the back ground. Diamond in the Rough folder.
On this card I used SU Daffodil Delight card base with again a grey frame. I think it works a little better on this card.
The embossing folder is Sizzix Softly Falling.
I remembered that I had an instant camera die so I dug that out. Sure glad it made the cut during the destashing.
On this card the white card seemed to white so I brushed it with Very Vanilla chalk. Forgot to emboss this one.
A dark green die cut works.
With this die I could cut my watercolor strip just under 2.75 inches wide and it fit behind the frame. I like this better.
On this card, I chose SU Baja Breeze as the card base.
The cool grey for the frame die cut.
I used Quick Dry glue along the back of the die cut and just layed the watercolor on to it. Hold it down for half a minute and it is well adhered.
Again, I think the card front could have used some texture.
I finally remembered to emboss the card front.
I think this SU Gable Green card base with a Sizzix Tim Holtz Alterations Star embossing folder.
I like the contrast of these colors.