Showing posts with label green. Show all posts

Friday, August 15, 2025

Thank You Cards - Finally Set 2

The card base is SU Taken with Teal in the A2 size in portrait orientation.

Trimmed the rough edges off this piece and ripped the bottom edge.

I saw flowers in the salt marks in this piece so I took my fine black marker and drew them in.

Added stems and leaves reaching to the bottom of the paper with additional grassy strokes.


It pays to save bits of ephemera.  The green yarn came in really handy.

The A2 card base is SU Pumpkin Pie with a watecolor panel marked with saran wrap on wet color and left to dry.

I punched 4 holes with the 1/8 inch punch. Two on the right and 2 on the left.  I taped the end of the green yarn found in the stash and was able string it through the holes and knot both ends.

I added a SU Artisan Label punchie colored with pencils and held on the yarn with a orange clip.


With the yarn still on my table I used in this card.

I trimmed the waterolor to crisp straight edges.

I layed a strip of double sided tape to the back of the watercolor piece.  Layed my pieces of green yarn then added another piece of ds tape and adhered it to the SU Dusty Durango card base.

Once adhered, I picked apart the strands of the yarn to create this wavy row of goodness.

I added an 2 inch oval punchie greeting below the yarn frill.

The A2 card base is SU Island Indigo.

I added a piece of SU ribbon in So Saffron and flagged the bottom end.  Trimmed the top edge to the top of the card.

I mounted the piece of rough edge watercolor panel over the ribbon aligned along the top.

Each card has a white quarter sheet insert with a white envelope.

Thursday, August 14, 2025

Thank You Cards - Finally!

I finally have most of my craft room set up so I could get some cards made. With seeing family tomorrow I pushed through to get quite a few done.

I created watercolor abstract art on a sheet of 12x18 inch Strathmore Cold Press 140lb paper.  I added salt in some areas.  I ripped my masking tape which held down my edges which gave wonderful irregular edges to my watercolor art.  Great idea. 

Left: SU Pear Pizazz green card stock in A2 size because I know where those envelopes are.

I ripped the bottom edge and added a sequin star in the top right hand corner with half of the one piece of 3D foam tape I could find.

Still stuff to unpack.

I chose blues - Prussian Blue, Ultramarine, and Turquoise along with some Sap Green and Cadmiium Yellow Hue.

Of course not all pieces have the same colors.

The card base is SU Night of Navy with a landscape orientation.  The right hand side ripped with an oval punchie greeting overlapping the ripped edge.


The A2 card base is SU Bermuda Bay.

I ripped the top edge of the watercolor and aligned the right hand edge to the card edge.

I chose to create a flower with watercolor and metallic watercolor around the dot of color left by a grain of coarse salt.

I added a line of pearl watercolor along the top and mounted a greeting over it.

Greeting is SU Modern Label punchie with a Word Window greeting.

Wednesday, June 18, 2025

Slow Stitching - June 2025 - Week 3

I continue with my Homes theme for June in this slow stitching project hosted my K3N Cloth Tales

I used the running stitch in blue thread along the western coast line to represent the Pacific Ocean. It would have been nice to have waves represented for the water but I found that was too complicated for me.

I added more trees in the north of the westerly province.

I added the log cabin in which I lived the first 4 years of my life. Dad worked in a sawmill and my Mom chose to be with him. Several kids were born during that time.

I am enjoying this piece.

Wednesday, June 11, 2025

Slow Stitching - June 2025 - Week 2

I added the green triangle stitches for the forest in the north.  

I used the sheaf stitch with a dark yellow floss for the wheat fields my current province is known for. Lower down I used a brighter yellow floss and the button hole stitch layered very close together to represent canola fields in our province.

In the central city of this province I have lived in several homes. I created a zoom in circle in the base of the province to the west where I can add representations for these homes. This was done in blue thread.

I added purple peaks to represent the Rocky Mountains which span both provinces.

Wednesday, April 30, 2025

Slow Stitching - April 2025 - Week 5

My April piece of slow stitching following K3N Cloth Tales - Comfort Coverlet 2025.

I added a few finishing details to this piece.

Brown seed stitch in the tea bag to represent the tea.

I added grass with green floss in a variety of long stitches to ground my tea house.

This piece has turned out so well.


Wednesday, April 16, 2025

Cards - I Win - Glitter Butterflies

I continued with the glitter butterflies today.

I chose a Stampin Up Glorious Green A2 card base.

I added 3 blocks of striped glitter designer paper and adhered them with double sided tape.

I added ribbon antennae and mounted it with 3D foam tape. 

I mounted the circle greeting just below the butterfly creating a cohesive focal element.

Added a white quarter sheet insert.


I created this card with similar supplies as the card above.

I adhered a strip of glitter striped designer paper to the top of the landscape (wide) orientated A2 card.

The glitter butterfly received its antennae of satin ribbon then was mounted with 3D foam tape along the bottom edge of the striped paper.

I punched a Stamping Up Decorative Label punchie from the striped paper then cut it in half to mounted the halves offset on the left and right.  Those were glued to the greeting punchie then the full element was mounted to the card front with 3D foam tape.

A white insert was added.

I chose SU Island Indigo as the card base for this set of cards.  Cut to A2 sized card.

I mounted a SU designer paper from the Adventure Bound DSP pad.  Trimmed to leave a small border and mounted to the card front.

I put a strip of Whisper White card stock through the Big Shot with the Swiss Dots folder and mounted that to the DSP.

The butterfly got white cotton thread antennae and was mounted with 3D foam tape.

The SU Small Oval punchie greeting was adhered with DS tape.

A white insert was added.
Another Island Indigo card base with the Adventure Bound designer paper in beautiful blue tones.

I used a SU script folder with the writing going horizontally for this card as it was in the landscape (wide) orientation.

I glitter butterfly has white cotton thread antennae and is mounted with 3D foam tape.

The SU Small Oval punchie greeting coordinating color was adhered with double sided tape.  A white insert was added.

This will be headed to my sister's this weekend and will be in then next batch of cards for IWin charity.

Sunday, April 6, 2025

Cards - I Win - Acetate Butterflies

I make some cards for the I Win charity.

 I was at ReUse Center yesterday and found a 12x12" sheet of acetate with pink butterflies on it.

I cut the sheet into 4 pieces I could use. The one corner had butterflies too big for my A2 cards.

Then I dug in my stash to find paintable 12x12 card stock.  I used some of my alcohol inks to stain the paper in 4 different colors.

On this card I chose a scallop patterned paintable card stock and added green alcohol ink diluted with rubbing alcohol applied with a sponge.

I mounted the acetate and green paper to the Kiwi Kiss card base.  Greeting and white insert was added.

For this card I chose a heavy 110lb white card base.

I trimmed the acetate to be a bit smaller than the purple paintable card stock layer.  These are held together with black tiny brads. Then this layer was adhered to the card base with double sided tape.

I added a SU Word Window punchie greeting in black to coordinate with the brads.  It is mounted to the acetate with 3D foam tape.

A white insert was added.


Love this one!

The A2 card base is SU Crushed Curry.

I added a paintable card stock layer which has script on it.  It has been painted with yellow alcohol ink diluted with rubbing alcohol and applied with a sponge.

The paintable layer and the acetate had held together with yellow mini brads in each corner.  This is adhered with double sided tape.

I added a SU Word Window punchie greeting in pink.

A white insert and we are good do go.

I will press these over night.

The card base for this cards is Stampin Up Taken with Teal.  

The paintable layer has a script pattern. It was colored with alcohol ink diluted with rubbing alchol and applied with a sponge.

I attached the acetate and the blue painted layer with white tiny brads in each corner.   This was then adhered to the card base with double sided tape.

I added a blue SU Word Window punchie greeting in the top left hand corner.  It is attached with 3D foam tape.

A white insert and we are good to go.

Sunday, March 16, 2025

Cards - Watercolor Abstract

I wanted to add some cards to my stash so I chose to reuse the bright watercolors I created in this post.

I cut the watercolor art into pieces.  In this card 4x5.25 inches.  I then used a Micron fine black marker and outlined the shapes in the watercolor.

I followed the idea of neurographic art and rounded the intersections of the black lines.  I added a border all the way around. Added circles to some of the white dots.

I used a black marker to darken the edge of the watercolor paper.

Mounted on Stampin Up Island Indigo card stock with a quarter sheet insert on the inside paired with a white envelopee.

For this card I cut the watercolor art to 3.5 inches square.

Again, added black marker lines around the shapes in the watercolor.  Soften the intersections and circled some of the dots in the art.

Added a black border all the way around.

I mounted it leaving even edges around 2 side onto a SU Gumball Green A2 card base.

Added a white insert and envelope.


This one had a good variety of colors so there was a good choice of colors for card base.

In this card, I chose SU Pacific Point in the A2 size.  These I did mount all in the portrait orientation but they could be landscape (wide) as well.

I love the bright spot of pink in this piece of watercolor. 

Again, black marker to outline the shapes in the watercolor with a border all the way around.

A white quarter sheet insert and envelope.


The card base on this card is an A2 in the SU Kiwi Kiss color.

The watercolor was cut to 3.5 inches square.

Mounted to the card front with double sided tape.  I added white quarter sheet insert and an envelope.

Pressed under books over night and is now sitting in the box.

These were fun to do and allowed my art to shine again.


Tree Scent Ornaments - A few more

Colonial Candle Co. Angel Candle Hugger Vintage Made in Taiwan in the 1950s. Made of porcelain and measures 2.5" tall.

It holds an ivory felt candle which I fashion myself with a yellow flame at the top. It hangs from a warm toned ribbon gathered around her wings.

She is an oil diffuser where pure essential oil is placed on the felt and the scent is dispersed into the space.

Can be used with tree scented oils to provide a Christmas Tree scent to your artificial tree. She also stands so can be used in other spaces.

Use in any personal space to disperse a calming scent as you drink your favorite beverage and relax.

A wonderful clear glass heart ornament that features a frosted cupid playing its flute.

The felt diffuser is a small pink heart whose edge has been blanket stitched all the way around.  

A small E bead has been added to the front where it has been stitched to the pink satin ribbon hanger.

I can be given to a loved one as a token of affection and is practical.  It allows one to diffuse scent in a personal space and on the Christmas tree during the holiday season.

It measures 3.5 inches tall

The diffuser features a wooden kitty cat.  It has eyes and black whiskers.

Its tummy holds a black felt ball which is the diffuser.

Place a few drops of  pure essential oil of your choice onto the felt ball and the scent will fill your personal space.

It makes your morning tea or your afternoon snack break a time to relax.

It can be hung but it also stands on it own making it move with you as needed.


Another small frame turned into a tree scent ornament.

I chose a seasonal theme for this diffuser by stitching a bright green Christmas tree on green felt. I added a yellow star at the top and brown trunk at the bottom.

I used French Knots for the red ornaments along the branches.

I crocheted a hanger from cotton floss in the same red as the ornaments.  It was stitched directly to the felt oval to ensure it is secure.

The gold frame features enameled green decoration around the edge.

Wednesday, February 19, 2025

Cards - Charity

I set out this morning to make cards for IWin which is a charity which helps vulnerable women.  When they finish their program they get a card in their backpack to remind them that someone is thinking of them.

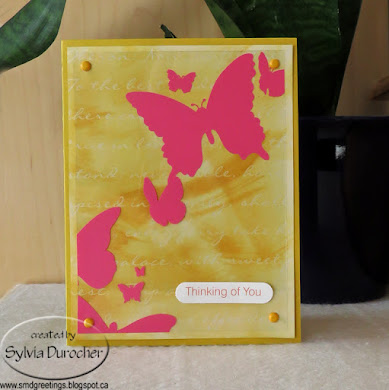
Each card needs a Thinking of you greeting and a butterfly.

I found a bag of wooden butterflies at the thrift shop the other day and brought them home.

I have been at a disadvantage to making cards for this project because of my home situation.  Back home and feeling like crafting again.  Not all is unpacked but I move forward.

I chose this designer paper with flowers printed in green. I trimmed it to leave a small border and adhered it to the front of a A2 card in SU Summer Sun.

I punched a Stampin Up Artisan punchie in Always Artichoke and adhered the butterfly with a Zot. I placed the short length of SU chevron ribbon under it and followed the pattern to trim it.  I added the greeting in the bottom right hand with a shadow of a green oval punchie.

For this yellow card base I trimmed a piece of floral designer paper to leave a small border. Wrapped the red ribbon along the bottom edge and taped the ends to the back.  It was adhered to the card front with DS tape. 

I added the yellow SU Decorative Label punchie, topped with the SU Small Oval greeting then topped with the wood butterfly accent held in place with a Zot.

Love the bright colors in this card.


Carrying on with the green floral designer paper I added it to an SU Always Artichoke card base.

I added a card stock strip on the left hand side and adhered with double sided tape.

I made the wood butterfly and the SU Small Oval greeting punchie touch and attached with a Zot and tape.


This card features a water colored piece of the green floral designer paper.  It was not very thick so I had to be really careful with the amount of water. I adhered it to the card front.

I combined the wood butterfly and the greeting in the bottom right hand corner.  

A Zot for the butterfly and DS tape for the SU Small Oval greeting punchie.


Friday, January 17, 2025

Slow Stitching 2025 - Week 3

This is week 3 of the Comfort Coverlet Slow Stitching 2025 project hosted by K3N Cloth Tales

I continued to work on this January piece by adding the frame.  I used 2 strands of green embroidery floss with a running stitch.

I stayed 1 inch away from the outside edge to allow for assembly later on.

I added the seed stitching in the four corners with ecru pearl cotton. 


Sunday, November 17, 2024

Watercolor Painting - Green Leaves

I created this green leaves piece last night prompted by a photo challenge of green.

I used my rag tag watercolor pencils and the pencil sharpener to get some pencil shavings onto my watercolor palette.

With 2 greens, 2 yellows and a grey I managed to get a variety of colors for this collage.

Once it was dry I added the lines between the squares with a marker.

I then used a fine marker to draw leaves in the spaces. All kinds and shapes with a bit of help from the internet.

It's nature wonderful.

This morning looking at it I'm not sure that I will do for a photo challenge.

I will scour the place to find something green to shoot. I do have plants if worse comes to worse.

Tuesday, November 12, 2024

Slow Stitching - No. 046 - Kantha Motifs

K3N Cloth Tales Slow Stitching Challenge 2024.

This week's prompt Nakshi Kantha Motifs which is part 2 of last week's Kantha Stitches.

I chose the fish as my motif.  I drew a circle which I stitched in black stem stitch. Then added my 2 fishes going around in it.  The central element is a lotus flower reflected.

I chose two different shades of green threads and alternated them on each fish.  

I used blue thread and seed stitches for inside the circle.

I used the Double Running Stitch in blues for the background quilting stitches. Alternating with single running stitches in darker blue. 

Tuesday, October 29, 2024

Slow Stitching - No. 044 - Stitching Blind

K3N Cloth Tales Slow Stitching Challenge 2024

Week 44 - Stitching Blind

This was a challenge and uncomfortable. 

Prep - threaded 3 needles - green, yellow and navy. My base piece looks like wool but it is not. 

I put an applique pin to let me know what I thought was bottom.

I gathered green cotton, white lace, navy ribbon, and yellow yarn as layers on this piece.

I sewed the green cotton on first.  I see that I did not pull my thread taut which left me with loose thread on the front.  I thought this one had gone fairly well. 

Next, I did the lace which I thought was pretty straight but not really. I was using yellow thread but you can see I pulled the thread out of the needle and I just abandoned it halfway through.

The navy ribbon went pretty well.  I had lost one of my needles so I cut the navy thread, knotted it and used the rest of the navy to couch the yellow yarn which went very well. 

I will finish the few stitches so that I have a finished piece.

Monday, October 28, 2024

Tree Scent Ornaments - Spools

A few additions to the collection of 1 of a Kind Tree Scent ornaments.

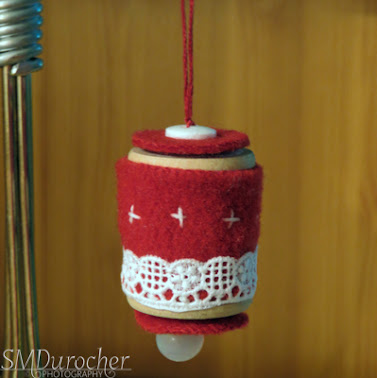
Vintage wooden spool wrapped with red felt. I stitched a length of white lace to the bottom and added a bit of white stitch above it.

Cut two 1 inch circles of red felt to put on each end. 

The bottom features a white pearl drop bead and the top a small white button. All hung with red wool yarn.


A wooden spool wrapped with lime green fleece.  

Once that was stitched on I wrapped the spool with dark green embroidery floss onto which I placed matte gold EBeads along the way.

I cut 1" circles for the bottom and top of the spool.

I added a gold button with a shank on the bottom and a gold bead at the top above the green felt circle.
 
All hung on variegated green yarn.


I stitched a length of plum wool ftlt with a few stitches in green, white and yellow.

This was wrapped around a vintage wooden spool . 

I cut two 1" circles in mustard felt for the top and bottom.

I added a plum colored button with a shank on the bottom and a tiny green button on the top over the felt circle.

All hung with plum embroidery thread.


I used a traditional red and green color theme on this Tree Scent ornament. 

A red felt piece was stitched with white and green thread then stitched onto the wooden spool.

I selected 2 red buttons to go on the bottom and top of the ornament.

I cut two 1" circles of dark green felt for the top and bottom of the spool.

I ran red wool yarn to hold all the peices together and knotted at the top with several knots along the way.

These can be used as personal passive oil diffusers as you relax.

Sunday, October 27, 2024

Inktober 2024 - 27 Sunflower

Inktober 2024 Challenge

27 Sunflower

I penciled the sunflower then went over it with Micron Black Marker 03.

Three layers of watercolor on the flower. All over yellow then some Cadmium Yellow then some mixed orange toward the center.

Deep brown for the center.

Sap green for the stem and leaves. 

I was nervous about the background but I prepared some colors and it turned out better than I expected. 

Tuesday, October 22, 2024

Inktober 22 Abstract Leaves

Inktober 2024 Challenge

22 Abstract Leaves

I penciled my sketch then traced it with a Micron permanent black marker.

I create several shades and tones of green watercolor on my palette.

Placed the background light patches.

Painted the leaves with my greens.

Spattered the final piece with some light and dark watercolor. 

Wednesday, October 9, 2024

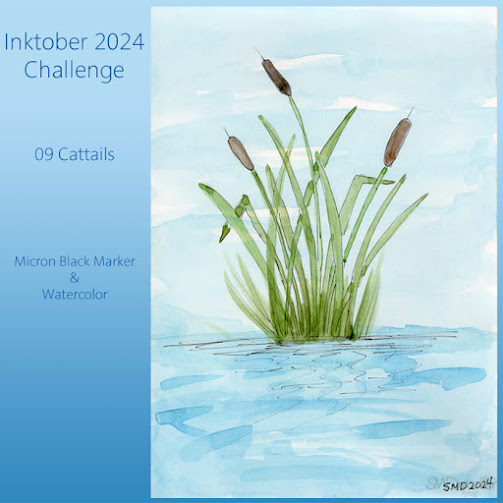
Inktober 2024 - 09 Cattails

Inktober 2024 Challenge

09 Cattails

Micron Fine Black Marker & Watercolor


I got up this morning with no idea what I was going to sketch.

With my photography I see cattails/bulrushes all the time. I know these quite well.

I chose a fine marker .005 today. I did a pencil drawing in grid paper in my sketch book, then transferred that to my 5x7 Fluid Mixed Media 154lb paper.

I washed the whole surface in a very light rough wash.

I then watercolored the cattails and added some extra color and then some extra lines with the marker. I then added more watercolor in the background as needed.

Tuesday, October 8, 2024

Slow Stitching - No. 041 - Scrapplique - Odd circles

 K3N Cloth Tales Slow Stitching Challenge.

Week 41 - Scrapplique

I did an odd number of circles which were cut by hand with no template.

I dug in the stash and found my background fabric and selected a foundation layer. 

Then I chose 5 cloths and made the circle to match the size of the scrap. Folded in quarters and just cut from edge to edge. I did a bit of extra trimming as needed.

I love the colors. 

Now, Kathryn had indiciated we should cut out the back of the image to reduced bulk but I just was on rote and had blind basted before I knew it. I was not prepared to undo that. It did make stitching a bit tough towards the end.

Just thinking about it just this morning I could have cut out the middle before I stitched the next circle. It is what it is.

Monday, October 7, 2024

Oil Diffusers - Travel Case - Set 2

 This is the next set of One of a Kind Oil Diffusers in a travel case.

Just Bee - I made a bee by appliqueing 3 yellow pieces onto a black base piece of felt. I added a circle for the head which I stitched to the body. I used a piece of thin gauzy polyester fabric and cut out the wings. I satin stitched all the way around the outer edge of the wings then put some texture stitching in the wings. I stitched the wings to the body. I then stitched the bee to a piece of turquoise felt which measured about 4x4 inches.  

The back is a piece of cotton fabric which looks marbled.  I added my loop for the hanger and the yellow drop.  The 2 layers were stitched together with blanket stitch all the way around.


Follow your Heart - I cut 3 hearts in different sizes getting smaller as I went. I stitched these together with running stitch then added the 3 flowers at the top of the white one. I then stitched the whole heart to the front of a white background piece of felt measuring approximately 4x4 inches. I stitch the follow stitching in pink around the heart.

The back piece of this diffuser is cotton in a bright fuchsia color with a hanging loop and a pink drop. I chose white thread for the blanket stitch all the way around.  It comes with a travel case.

Note: The background fabric should have been a light color so it would not have darkened the white felt on the front.


Tea Time - This oil diffuser features a yellow teappot ( my favorite) which I drew then cut out of yellow felt. I place a strip of white lace along the edge of the front layer to serve as a tablecloth. I stitched the teapot onto the navy layer over the lace adding accents to it as I went.

The back of this diffuser is white felt with a navy loop and drop.  It comes with the hanger in a travel case.


Just One More Chapter - I created a small book to put on the front of this diffuser.  I chose a patterned piece of cotton and a white cotton for the inside.  I hand stitched these together, trimmed the corners and turned the piece inside out.  The book is stitched to the green backer along the spine of the book so that it opens. I put a little quote on the inside. 

The backer is yellow felt with a loop and drop.  I blanket stitched all the way around with green thread.  It comes with a hanger and a travel case.