Showing posts with label commercial cards. Show all posts

Wednesday, April 28, 2021

Seniors Week - June 7-13 2021 - Card Donations

I have put together a stack of cards for a local scrapbook store - Scrap and Bean who put out the word that they were accepting donations of cards for seniors. The cards will be distributed to Senior Care Homes in the area. Seniors Week is celebrated June 7-13, 2021.

Can you do something for a senior in your sphere of influence? There are several suggestions for safely celebrating this week.

These cards are upcycling a commercial card into a new life.  It was a large card and has been transformed into 3 cards. 

For the card on the left I trimmed an area of the card to leave a good border around it.  I then punched some slots with the Stampin Up Slot punch and tied a piece of warm blue seam binding between them.  This layer was adhered to a dark purple card base.  I added a SU Modern Label punchie and Word Window greeting in the top right hand corner adhered with 3D foam tape.


For this card and trimmed the card in the same way as above.  This time I wrapped a piece of gold metallic ribbon around the decorative layer and tied a knot and trimmed the ends.  I put together another greeting with the same tools as earlier.  I matched the Modern Label punch to the card color.  Again mounted with 3D foam tape.


This 3rd card I adhered the upcycled layer to the front of a navy blue card base.  I added a Stampin Up Decorative Label punchie greeting with 3D foam tape. 

I will collect from my sister the ones she made before I deliver them.

Friday, April 9, 2021

2021 Christmas Card Challenge - Refurbished Cards - Session 2

I continue my clean up of old cards and they need to be use or otherwise disposed of.

A beautiful manger scene which is simple and elegant.

I just added a brown texture card stock layer to the golden rod card base.

The manger layer was then adhered to the brown layer.

I added a greeting with a Stampin Up Modern Label in the the card color and a brown Word Window punchie.  This was adhered to the card front with 3D foam tape.

While shepherds kept their watching
Over silent flocks by night,
Behold throughout the heavens,
There shone a holy light:

I love the beautiful greens in this stain glass window of the shepherds in the fields.

I trimmed the window from the commercial card front.  It was not wide enough so I added a strip of purple to the right hand side.

The stained glass layer was adhered to the card front with 3D foam tape.


A well lit church scene inside a Christmas tree shape with gold foil stars all around.

I trimmed it and then layered it on a piece of white card stock.  Then added to a medium blue card base.

I added a Stampin Up Modern Label punichie greeting in blue. This was adhered to the card with 3D foam tape.


The name above all names "Jesus".  The reason for the season.  Gorgeous trio of candles with holly around the base. I added a green layer to the golden rod card base. Adhered the focal element with 3D foam tape.


The trip to Bethlehem on a donkey.  Mary pregnant with Jesus and Joseph leading the family to their destiny. 

Love the blues and purples in this card.  Adhered with 3D foam tape to a purple card.

I am really happy with these cards. 

Five more cards for the Christmas box.

Tuesday, April 6, 2021

2021 Christmas Card Challenge - Refurbished Cards

With the power off most of the day I had to keep my hands busy.

I decided to refurbish some commercial Christmas cards.  Use the A2 size is a bit challenging because the commercial cards are so much bigger.  It means finding a focal element and trimming to keep in the center of the element.

Here I chose the star and Rejoice as the focus.  The width was not full so I added a strip of gold on the warm deep teal card base.  The focal element was adhered with 3D foam tape.


This snowman seems to enjoying the Christmas season.  

I chose a card base that matched the twig arms which is a warm taupe color.

I just trimmed the snowman to leave an even border all the way around.  It was adhered with 3D foam tape.


I trimmed the candles then trimmed the scripture verse so that I could overlap these elements.

I chose a warm blue green card base.  This is in the portrait or tall orientation.

The candles were adhered with double sided tape then the scripture was adhered with 3D foam tape.


A sleigh ride is always fun at Christmas time.

I chose a deep red card base.  Once again choosing the focal point of the sleigh and trimmed accordingly. 

Mounted with 3D foam tape leaving a tiny border.


I am imagining headed off the a Christmas Eve service by horse and sleigh.

I chose a lavender card base.

The focal element was adhered with 3D foam tape. 

Each card had a seasonal insert adhered inside and a new envelope was matched to it.

A few more cards for my Christmas Card box!

I had to make do with not electric tools today so a paper cutter and tape worked really well.

Saturday, January 4, 2020

Upcycled Cmas Card

I upcycled this Christmas card with a cute puppy on the front. 

My friend wanted it turned into a Granddaughter card. I chose a Garden Green card base and cut it to an A6 size.  I added an ivory strip of card stock and placed it left of center and adhered it to the card front.

I trimmed the commercial card front to leave a small border. It was adhered to the card front over the strip.

I printed the word onto ivory card stock and punched it with the Word Window punch.  It was adhered to the card front with 3D foam tape.

I added a seasonal sentiment on the inside.

Tuesday, December 24, 2019

Up Cycled Cards

A friend asked me to up cycle some commercial cards she received and meant something to her.

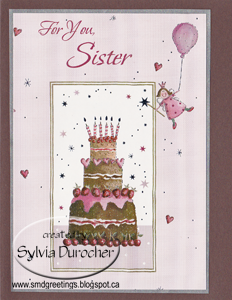
This is a sisters' Happy Birthday card.  It was a shaped card so I trimmed the folded edge then trimmed the blue to match the rest of the edges.

I chose a pink card in the half sheet size (5.5 x 8.5 inches) and added a strip of purple textured card stock.  I ripped both sides of the 2 inch strip.  It was adhered to the card front aligned to the left of center.

I then adhered the sisters layer with 3D foam tape aligned along the bottom of the card.

A custom insert was included with purple lettering.


This card is one of my designs which I turned into a wedding card.

I added a light blue card base leaving a small border of color.

I printed a custom insert in light blue lettering to match the card base.

The hearts are Stampin Up Sweet Heart punchies cut from non shed silver glitter. Mounted on a vellum circle.

I added a silver thread across the bottom tied around the embossed layer.


This card is a Christmas card for sending wishes across the miles.  She has received it from family in the Maritimes but next year she will no doubt be mailing back to Alberta with Christmas wishes. 

She is moving to be close to her son in Nova Scotia.

I love the little rabbit reaching to post his card in the mail box.

I trimmed the original card a bit and adhered it to the front of a red card to coordinate with the letters.

I added a custom insert in this card to go with the sentiment started on the front of the card.


This card spoke to me of the Maritimes.  It was in my stash so I up cycled it for my friend.

The gulls are waiting for lunch as the fishermen arrive from the sea with the boats loaded with fish.  Bound to be some tasty bits for them.

I chose a blue layer to place behind the trimmed card.

I chose a kraft colored card and added a narrow grosgrain ribbon across the top.  I then adhered the boat layer to the card front with double sided tape. 

Wednesday, June 18, 2014

2B Green - Re-purposed Cards


Some people feel badly about throwing out the cards and sentiments they received throughout the year and Christmas. As a card maker, some people give their old cards because they know I can re-purpose them into something useful.   Here's a set of cards I made from such cards.  Maybe I've discovered a new line of cards!!


Since most commercial card are larger than the A2 I make I have enough in the card to make several elements.  Like the turquoise one I punched the label from a piece of the card I cut off so the color matches perfectly.