The bias tape on the center is a nice lavenderish color and the twill tape I used was a good color match but narrower than the bias tape. The button was a great match as well. I used grey thread on this bag.
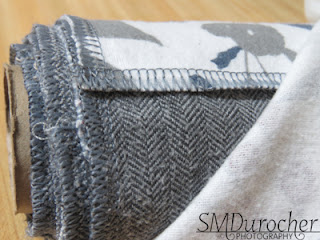
 I made another reusable bag. This time with a different starting point.When I was at the thrift store the other day they had pillowcases in a bin for $1 each. Some I got for $.50 each. I chose a few microfiber ones and brought them home. I liked this one because of the pattern in the fabric.
The advantage is that the side seams and the folded bottom are already done for you. The side seams were nicely serged so totally ready to go. I just checked to make sure they were still intact. I cut the band at the top of pillowcase off. I placed the cutting pattern near the top edge where I had cut opposite the folded bottom edge. I did add an inch because now I will have to stitch the seam at the top of my handles. Again, I created finished seams. I chose a camouflage twill tape for the center of the bag and chocolate brown twill tape around the sides of the handles.
This makes a bigger bag because the width of the pillowcase is wider than
the ones I made earlier. The overall height of the bag from top of handles to bottom is 23.5". The width is 20.5 inches and the measurement from the bottom of the handles to the bottom of bag is 16 inches.
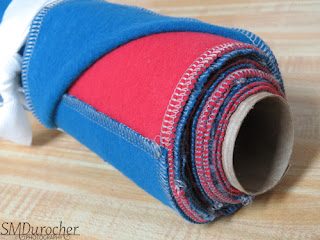
I added a beige button with some narrow black elastic to keep it rolled up.
As you can see it folded up it is still quite big but it will hold more stuff.
It takes all kinds to make the world go round so I am happy with the result because it is less work and time.
The microfiber fabric in this pillowcase is pure luxurious feeling. Because I am using opened packages of bias tape sometimes I miscalculate if I have enough. On this one I thought I did not have enough wide stuff so I put narrow twill tape on the outside of the handles and later realized I would have had enough. Not undoing the seams.
I used a white elastic from a face mask but I am not sure how long it will last. The elastic is quite soft and may need to be shorten over time. Glad I did not buy any of this elastic.
I offset the button and elastic because the bag was wider than the previous ones. It needs more folds to get it narrow enough to be held in place by the elastic. It means though that it will hold more stuff.
The seams again on this one are at the top of the handles and are completely finished with no raw edges showing.
The fold on the bottom means you will not have seams wearing out on the bottom.Really like this one.
Measurements: Total height is 24" T x bag is 16" T x 21" W
This microfiber fabric is thinner than the previous one. A bit of a darker grey. This was by Utopia Bedding. It was nice to keep the thread the same for this bag.
I chose this jade green color of bias tape but it was very narrow. I had to iron it in half before I sewed it in. I had to be very careful that I caught both sides the margin for error was very small.
I will be glad to use up the stash of bias tape but the irregularity of the stuff I have creates challenges.
Having tape in the neutral color would be helpful but it likely would make for a more boring bag. Would that be a bad thing? It is really a utilitarian object. Pretty is nice.
I think this button was a decent match to the bias tape and the black narrow elastic was better than white.
Again this one is quite big and needs extra folds to get it into a decent size for the elastic.
Measurement from top of handles to bottom is 24 inches, the bag itself is 15.5" tall and the bag is 20 inches wide.
With the less sewing because of the sides and bottoms already done these went pretty fast to make. To donate, less time is better.

 This is the last of the 7 inch cotton poly squares in the Navy and Taupe which I received for free. I paired it with some navy microfiber cloth to have enough fabric to complete the project. I created two 6 square panels then serged all the seam edges. I then sewed the 2 panels together with a French Seam hiding all the raw edges which created the bottom of the bag.