Showing posts with label acrylic background. Show all posts

Thursday, May 23, 2019

Thank You Cards - Compassion House


During my clean up last week I found a bunch of old card kits. 

I decided to make some of these up for Thank You cards for Compassion House.

During my visit with my friend on Tuesday we both worked on these kits over a cup of green tea.

This card features a handmade paper heart which has been layered onto a piece of lavender Japanese Mulberry paper.

The card base is pink.  I added a greeting in pink punched with the Stampin Up Decorative Label mounted with 3D foam tape.


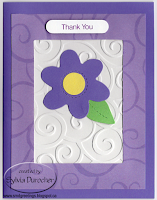
These cards feature a die cut frame of designer paper layered over a white embossed layer.  It was embossed with the Cuttlebug D`vine Swirl folder.  I die cut Sizzix flowers and leaves  to place in the center.  Greetings were added in coordinating colors.


This card starts with a yellow base. I created acrylic paint paper on an orange base with red and gold paint.  This layer was cut to leave a small border and ripped on the right hand side and adhered to the card front.

The flowers are pages from a 365 day calendar.  The image was trimmed then adhered to a gold paper layer.  This was adhered on the decorative paper aligned on the left. 

I added a circle greeting on the right.


I am dropping these off today.

Saturday, September 10, 2016

Birthday Card for Special Lady

I made this card for my niece and god daughter who is celebrating a big birthday.  She is a busy mom of 2 and wife to a great guy. Fall colors are her favorite.  I will have supper with the family.

I created a painted background on a half sheet of cream card stock.  I pulled several colors of acrylic from the box - Dark Burnt Umber, Dark Brown, Cherry Royale, Cadmium Yellow and Yellow Citron.   I started with a mix of the browns at the bottom then added the red. Mixed red and yellow for the next layer then added yellow at the top. The card stock was dried and pressed to make it flat. The background trimmed to leave a small border and was adhered to a warm green large half sheet card.

For the leaves, I chose dark brown, yellow, and orange and painted it with the same colors. I cut the leaves with the Tim Holtz Tattered Leaves die. They were scored with an embossing tool to create some texture along the centre and veins.  They were adhered to the card with Quick Dry Adhesive.

The greeting was printed in warm pink on cream card stock, punched with the SU Decorative label punch and adhered to the card front with 3D foam tape.

I then spattered the whole card with a thin mixture of Dark Burnt Umber and Metallic Kim Gold which softened the look of the card.

I made several backgrounds so they will show up in cards later.

Monday, August 29, 2016

Sunflower HB

I made this card for an aunt who is celebrating a birthday this month.  She is a painter so I thought part of the card should be painted so I created a painted background.  I chose Cobalt Blue, Cadmium Yellow and Sap Green in the Folk Art brand to paint the background onto yellow parchment card stock.  I wanted to create the illusion of sunflower fields.
I cut the Spellbinder Sunflower die from bright yellow and golden yellow and the centre from warm brown.  I chose a card from the same card stock as the centre of the sunflower.  I cut a leaf from green card stock.  I cut the greeting from the same golden yellow card stock as one of the layers of the sunflower with the Memory Box Grand Happy Birthday die.  This was trimmed to leave a small border on 3 sides and adhered to the bottom of the background layer.  I then layered the flowers and the leaf which were adhered with Quick Dry adhesive.  I embossed the brown center with a polka dot embossing folder from Cuttlebug.  This was adhered to the center of the flower.  I adhered this layer to the card front.  I needed something above the sunflower so I added 3 birds in the sky with a black marker.  Really happy with the way it turned out.