Showing posts with label chipboard. Show all posts

Sunday, December 2, 2018

Photo Coasters


With the poor results from my last sale I decided that I needed to expand my products with my photography as cards and calendars are not as sought out as they once were.  After a lot of thought, tossing and turning in the middle of the night the idea of photo coasters came to mind.

With a bit of research on-line and digging through old craft supplies which I kept through the de-stashing this summer I found Chipboard Coasters.  Being square they pair up really nicely with the 4x4 photos I have designed for photo calendars.

Digging through what I had on hand a put together several sets.  It was a long process as 3 times one has to wait while things dry and press.   I am very happy with the end result.


I backed the coasters with fleece because that is what I had on hand, it does not ravel and is easily cut with scissors or a rotary cutter.

Monday, September 19, 2016

Simple Squares Calendar

Update:  I have decided to add a Zutter binding instead of a clip.  I'm thinking these will be popular with seniors so a clip may be difficult to handle and all the pages will come apart very easily.  I chose to put a card stock back to provide a bit of color. 


I have been asked at crafts sales in previous years whether I had a plain calendar with large squares so they could write information on the calendar so I decided to make one this year.  I printed the calendar pages on heavy bond paper and provided a chipboard backer to keep it stiff.  It is all held together with a silver clip that allows you to hang it on a nail or a magnet.

Wednesday, August 19, 2015

Chipboard Calendars

I'm working on product for my sale next month.  I have designed a 6x4 calendar featuring clear embossed vellum sentiments with a 2.5 x 3.5 inch calendar which I designed myself.  These elements are held in place with tiny black brad which repeats the black in the vellum.  I chose a piece of chipboard as the based onto which I adhered a piece of designer paper.  It is well presented in a black metal frame which will look terrific on a desk, file cabinet, or book shelf.
Check my calendars page for more detail.


Saturday, August 1, 2015

Christmas Card Challenge - Aug - Joy Embossing Chipboard

Have you started your Christmas cards? Today is a perfect day.  I make cards every month to be sure I have what I need by December 1st.

This is the card for my blog Christmas Card Challenge.  The theme is Joy/Embossing/Chipboard.

I cut my warm white Joy from thick card stock which is serving as my chipboard.  I then cut the Tim Holtz Stylized Label with the Joy Mover & Shaper in it's center from green card stock.  I glued the chipboard onto the green die cut aligning the word.  I embossed the white card stock with the Stampin Up Northern Flurry snowflake folder.  I wrapped the white embossed layer with a length of gold metallic ribbon which I taped to the back.  This layer was then adhered to the red card front.  I added an oval of gold metallic card stock behind the green die cut to hid the gold ribbon.  I added 2 glitter stars on both sides of the greeting.  This layer was then adhered to the top third of the wide card with 3D foam tape. 

Tuesday, April 14, 2015

Card - Deer in Neutrals

I took a sheet from a Spanish dictionary and applied Tim Holtz Distress Stain in Antique Linen and Gathered Twigs.  I dried it with the heat tool and then used TH Distress Stain in Walnut Stain with a brush to paint the landscape and the trees.  I ripped all the edges.  I stamped the greeting in the top right hand corner with Versafine Vintage Sepia with a clear stamp. I chose a Bazzill Pinecone card stock for the card. This layer was adhered to the card front with glue stick which helped to smooth out the wrinkled paper. I punched a 1" circle from Champagne pearl card stock for the moon and adhered it with 3D foam tape.  The chipboard deer is left over from this card project. I applied a bit of bronze shimmer on them with a dry brush but it does not show up in the photo.

I'm submitting this card to the following challenges.
52 Christmas Card Throw Down - Coffee and Cream
Hazels Christmas Card Challenge - Anything Goes

Thursday, August 7, 2014

R2G Card Kit - Noel

Another card kit, this time with Stampin Up elements.  I watercolored with a paint brush, chipboard coasters with reinkers in Glorious Green and Real Red. Once dry, I cut the letters with the Typeset Alphabet Bigz Dies. I embossed the bottom of the card with the Petals a Plenty embossing folder.  I added a .75" strip of Whisper White with red and white zigzag washi tape on it.  I added a piece of Glorious Green 1/4"gross grain ribbon across and taped the ends to the inside of the card.  I tied on a shorter piece with a knot. I adhered the NOEL chipboard letters above the strip.

Monday, November 25, 2013

Card Club - November - Glittered Deer

Christmas cards are the order of the day today!  We are making 8 cards - 2 of each design.
I did several things ahead.  The chipboard deer were colored with Tim Holtz Gathered Twigs Distress Stain.  Once dry I applied Deco Art Twinkle Gold Glitter paint.  Thank goodness I did this early in September.  I also spattered black card stock with gold acrylic paint.  Once dry I cut into pieces of 3.5" wide then cut them with the TH Cabinet die. This gives me only 1 notch on each side.  I punched a 1.75" circle from High Gloss Gold Paper with my Stampin Up circle punch, also a Modern Label from the same card stock.  I printed my greeting in black on ivory card stock and punched it with the SU word window. I selected an ivory card.  I adhered the black/gold background die cut to the card front. I glued the gold "moon" circle aligned with the curve on the black die cut.  I glued the greeting to the label and mounted to the bottom of the card with 3D foam tape.  I then adhered the glittered chipboard deer above the greeting placing his head over the gold "moon" circle.

Saturday, August 24, 2013

Calendar - 4x6 Photo Pocket Frame

I've reworked the easel pocket frame for my 4x6 calendar.  Last year all the easels I had cut with the Tim Holtz small easel die split and I had to take them out of my inventory.  I went searching this year to see if others had problems and found some one who suggested that she ran the die sideways instead of lengthwise and has not had a problem.  I tried it this morning and that seems to be working.  I'm moving forward with it.


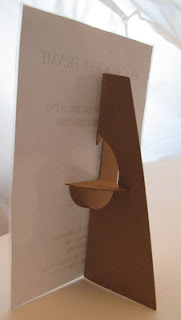
The frame is a clear pocket which holds all 13 pages of the photo calendar so you don't have to remember where you put the others through out the year.  Just bring the current month forward. The easel is cut from sturdy chip board and held in place with red tacky tape.  It is stable and does not easily fall over. 

Check out my calendar page for prices and options.

Wednesday, July 3, 2013

Challenges - Reindeer

I started with a ivory card.  I added the 2 pieces of washi tape on the top left and bottom right and trimmed them at an angle. I colored a chipboard deer with Tim Holtz Fired Brick.  I created a background from script paper from left over cards from a recent project. I found some card stock that coordinated with the red in the washi tape.  I punched it with the new Stampin Up Artisan Label punch.  I added a blue SU Modern Label punchie with a red SU Word Window punchie.  I stamped the sentiment in black with a small clear stamp with a VersaFine ink pad. 
I'm submitting this card in the Holly Jolly - Something New and Clean & Simple FLT247 Sketch.  

Saturday, June 22, 2013

Christmas Stack Class - Winter Deer

 Here's a nice peaceful card for the last set. I bought the chipboard deer during the last Christmas season.  The background paper is Little Yellow Bicycle - Winterings on the beige background.  I printed the narrow frame onto the card stock. The blue background I found here.  I colored the deer with Tim Holtz Distress Stain - Gathered Twig on the beige background and Walnut on the blue background.  The deer is  adhered to the right hand side with his feet placed very near the border. The snowflake is created with a Martha Steward snowflake punch with the same card stock as the card and held in place with a tiny white brad.  I color printed the greetings in a coordinating color and cut into a snow bank with my Creative Memories wavy cutter. It is mounted to the background being trimmed to be inside the frame.  It is adhered with 3D foam tape to accommodate the legs of the deer.

Saturday, March 31, 2012

How To: More Embossing Needed

I had cut the elements of this ornament.  The central scallop circle was not well embossed as it should be.  I devised this way to get the nice detail I wanted.
Added a piece of chipboard over the area where the scallop circle was on the die.  Taped the piece to the back of the die. I used a white gel marker to remember where the piece goes the next time. You can see the increased definition on the foam of the die.  The result is a great embossed die cut.

Thursday, February 3, 2011

Card Kits - Large silk flower

I wanted big flowers, they are nearly 4" in diameter. I really like them. I trimmed my decorative paper to 3.5 inches tall and the width of the card. Glued that down. I would recommend hot glue to adhere the silk flower. I colored the chipboard daisy with coordinating ink. I adhered the chip board daisy to the centre of the flower with a Zot. I think it looks great.
The flowers were all the same but I managed to find 3 or 4 designer paper that worked then added coordinating cardstock.