Showing posts with label Baja Breeze. Show all posts

Wednesday, September 10, 2025

Card Making - Sets Continue

I switched to the "In Full Bloom" Simply Scrapping Kit for these cards.

I picked the Sage Shadow card stock from the 12x12 kit and trimmed it down to make two A2 cards with a few left over pieces.

On the left, I cut the desinger paper to 4.00x5.25 inches and then wrapped a wide piece of Baja Breeze gros grain ribbon around it and taped the ends to the back. I adhered the layer to the card front. I created an accent by punching a bee from the DSP with the .75 inch circle punch then added a 1" punched circle in Barely Banana card stock. Layered these and adhered over the ribbon.  On the right is the other designer paper in the kit. I ripped the right hand edge of the DSP layer leaving to show the white core of the paper. I added a strip of white card stock on the left and then added another circle bee accent like in the previous card.

Contiued with the same scrapping kit. 
Cut each of the designer papers to the leave a small border. The A2 card bases are Barely Banana card stock 12x12 cut to 8.5 x 11 cut in two for these cards. 

On the left, I created an accent with a strip of Sage Shadow with Barely Banana  squares and bling brads. The strip was mounted with 3D foam tape to accommodate the brad backs which are quick thick.  On the right, I made slits in the designer paper to accommodate a strip of Barely Banana card stock making sure I did  not cover the yellow elements. I taped that strip down on the back with scotch tape. I added a narrow strip of Lavendar Lace cardstock over the yellow and adhered with double sided tape. 

Each card gets a white quarter sheet insert and a white envelope.

Friday, April 4, 2025

Cards - A2 - Scraps on my desk

The card base is dark brown textured cardstock.  

I cut a piece from a scrap of this gold and kraft polka dot card stock to leave a small border and adhered it to the card front.

I glued a strip of the card base card stock across the front aligned to the top.

I cut a bird on a branch with the Tim Holtz die and adhered it on with Scotch Quick Glue.

I used a gold sharpie marker to add an eye to the bird and some marks on the cardstock strip and branch.

A white insert and an off white envelope.  Yeah!

I chose a Stampin Up Kiwi Kiss card base for this card.

I cut a piece of SU designer paper which was just begging to be colored.  I used some Prismacolor pencils to color the main flower and the surrounding leaves.  I left the lilies white.

This layer was adhered to the card front with double sided tape.

Really simple but effective.

A white insert and envelope and another hits the stash.


Another Kiwi Kiss card base with a totally different card front.

The designer paper is a leftover.  I cut the layer leaving a small border then I cut it again and turned over the small piece to show the script back side.  I taped these together with clear tape.  It was adhered to the card front.

I added a narrow strip of dark brown cardstock over the join.  

I cut a bird on the branch again this time in Baja Breeze and used quick dry glue attached him along the strip.

A white quarter sheet insert and a matching envelope.


A cute baby card.  I painted this little bear a few weeks ago for my Macro Monday challenge on Flickr. 

I turned it into a card.  I trimmed it to the 3x3 size which is the limit for MM.

I layered it onto dark brown cardstock leaving a nice border.

I mounted it onto a Baja Breeze card base.

Dug into my stash of greetings and added this 2" oval punchie mounted with 3D foam tape.

Added a quarter sheet insert and an envelope.


Tuesday, April 1, 2025

Cards - A7 - Bands and Ribbon

Another set of A7 cards.

I started this one with a pack of origami paper 3x3 inches with travel and writing theme.

I just selected a few and glued them down to the front of my ivory card base.

I chose a light green card stock strip to overlay on the front and embossed it with a Stampin Up Script folder.  I then used SU Tea Stain ink to highlight the writing.  I added a length of Always Artichoke seam binding which I touched with the same ink to help it fit in.  I knotted onto the strip. I adhered it to the card front with double sided tape. 

Added a white insert and an off white envelope from my stash of free ones from years ago.

This designer paper is leftover from a previous card making session.

I love the colors.  I chose a Lost Lagoon card base and adhered the designer paper cut to leave a small border.

I chose a piece of Cherry Cobbler card stock and embossed it with a Cuttlebug folder.  I knotted a length of Baja Breeze seam binding around it and trimmed the ends.

The strip was adhered to the card front in the landscape (wide) orientation.  This seems to have a bit of a Christmas vibe.

Added a white insert and off white envelope.


I started with a designer paper leftover.

I added a Stampin Up Island Indigo card base.  I trimmed the patterned paper to leave a small border and adhered it to the front.

I added a card stock strip in Pumpkin Pie and embossed it with the D'vine Swirl folder.  I rubbed the swirls with a More Mustard ink pad. 

I added a coordinating knot of satin ribbon and adhered the strip to the card front.

I finished the card with a white insert and an off white envelope.


Friday, September 13, 2024

Cards - Christmas - Self Closing

 I am carrying on making Christmas cards.  Again, these are the self closing kind which require no envelope and use up some of the 12x12 card stock I have in my stash.

For this card I used a warm green for the card base.  Cut 6 inches high and left 12 inches wide.  I then scored it at 5.5 inches then just short of 1" on the other edge for the flap.

I used the Tim Holtz Tattered Poinsettia die with heavy red card stock.  I used scrap green card stock to cut 3 leaves. 

I adhered a strip of the same red as the flower along the right hand side. Then a piece of gold gift wrap paper on the left hand side with a ripped edge overlapping the red strip. 

A white insert and some double sided tape with carrier on the flap and it's ready to go.  

I used a teal card stock for the base of this card. 

The decorative paper is from Stampin Up. I trimmed a bit off the bottom and top to have the pattern evenly placed on the card.

I spattered a strip of red with pearl metallic watercolor from my recent purchase. it was adhered on the right hand side.

I cut a star with the Sizzix Primitive #2 die and embossed it with it's folder.

I wrapped a length of red cotton ribbon over the DSP, taped the ends to the back, and adhered it to the left hand side.

The embossed star is adhered with 3D foam tape.  A white insert on the right with double sided tape with carrier on the flap.

This is the second piece of warm green card stock.

I added a piece of gold gift wrap on the left hand side an then added a strip of Soft Sky card stock with ripped edge to the right hand side.

I punched a branch with a border punch by Martha Stewart.  It was adhered with QuickDry glue carefully placed along the stem and leaves.

I cut an ornament with the largest of the 2011 Nestabilities Ornaments from a winter botanical DSP. I cut the hanger from warm green scrap and adhered with QuickDry glue. I punched a snowflake in the center from the same light blue card stock and held it in place with a tiny gold star brad. After punching a hole in the top of the hanger I added a length of Baja Breeze seam binding to it.  The ornament is adhered with several pieces of 3D foam tape.  A white insert and a bit of double sided tape with carrier on the flap and it is ready to go.

Tuesday, August 27, 2024

Cards - Christmas Trees - Watercolor

I am going to need a lot more Christmas Cards so I decided today to start.

I found a tutorial video on line for these 5 trees last week.

Masked the bottom of the trees then drew 5 triangles with pencil. Painted them with watercolor, drew designs on them, and added metallic accents.  Then spattered the watercolor piece by loading brush with color and tapping it against another brush to produce the blue spots.

I traced the greeting.

Trimmed the watercolor paper to fit on an A2 card. Mounted it onto a SU Baja Breeze card base.

Add a seasonal insert and white envelope.

This one is in non-tradional colors.

Purples and warm tones of yellow / orange.

On the last 2 I worked out how to print a greeting on the printer.  Took quite a bit of time but now I can repeat it when I want.

I did add a black line to ground the trees.

The card base is SU Pumpkin Pie with a seasonal insert and white envelope.


This card is all in blue tones with silver metallic accents.

Mounted on a SU Taken with Teal card base in the A2 set in portrait orientation.

Seasonal insert and white envelope.


Tuesday, June 25, 2024

Cards - All Occasion - Block Print Paper

I found this Indian Block Print Handmade Paper at the ReUse Center recently and loved it.  I knew that it would work with Stampin Up cardstock colors wonderfully.  The piece was about 9x12 inches so just a few cards.

I chose Baja Breeze and Ruby Red for the card bases in the A2 quarter sheet size.

I cut the decorative paper to leave just a small border.  

I chose a strip of matching card stock to go across the card and then a white scallop circle, with a grey coordinating smooth circle, a bird accent made with the Stampin Up Bird Builder Punch. I added a bit of black which helps to ground the design. A bit stitching around the circle with a fine black marker.

Quarter sheet insert and a white envelope and it is ready to go.

The next layout I used a daisy flower punch which I did one in each color. Then a smaller one in black.  A large white sequin and a coordinating mini brad to hold things together.

I added a strip of white card stock across the landscape card and glued it to the decorative paper leaving the ends hang over. 

I used a push pin to create a hole in each of the layers and mounted the flower accent through to the decorative paper.  Then adhered the whole layer to the card front.

I added black stitching to the white strip with a fine tip marker.

Added a quarter sheet insert and a white envelope.

This card has a Ruby Red card base with a layer of decorative paper adhered with double sided tape.

I created the bird accent with the above mentioned punch in the 3 colors.

With a marker I added the eye and lines to the beak and the stitching around the grey circle.

The accent was then adhered to the card front with double sided tape. 

A white quarter sheet insert and white envelope to finish things off.


Another flower accent card with the alternate color combo from the first one.

The daisy punch accent was assembled the same way with a coordinating warm red mini brad.

A fine black marker for the stitching and the flower adhered to the decorative paper.

This entire layer was then adhered to the landscape card front.

White insert and envelope.  These are now pressing under books overnight to allowing the glue to take a good hold.

I am almost ready to liquidate my designer paper as I very rarely use it and I could use the space for something else. 

Saturday, February 24, 2024

Card - Slow Stitching - Pojagi Butterfly

I created the pojagi cloth element from thin fabrics I found at the ReUse Center.

The green butterfly was on one of them so I chose to keep it. I found some fabrics which worked with the color of the blue fabric.

All handstitched then backed with another fabric to finish off the edges.

A great organic element.  I added the small orange button for a bit of interest and dimension.

Mounted to a Stampin Up Baja Breeze card base. 

With a quarter sheet insert and a white envelope it is pressing before it hits my card box.

Wednesday, December 27, 2023

Watercolor - Tree Line


I brought home a small watercolor palette from the ReUse Center last week. I saw a video in the last month that the artist makes the practice of doing this tree line with a new palette so she has documented the colors in the palette.  I thought I would give it a try.  Wet on the bottom and dry on top.  Just go along the colors and this is the result.  

I wanted to do something with the art.

I have a set stitched squares dies which makes a nice frame. The large one which I have used on cards was too large for the small strip of 3" tall watercolor paper I had.  I used the middle one. The easiest was to make the watercolor this size of the cut out.  This gives less of a look of framed art.

I debated what color the frame should be.  I used a grey here. Could it be black?

The next challenge was that the card seemed too plain so adding some embossing worked really well. 

On this card I used Stampin Up Summer Sun card base,  a Cuttlebug folder with a diamond pattern for the back ground. Diamond in the Rough folder.


On this card I used SU Daffodil Delight card base with again a grey frame.  I think it works a little better on this card.

The embossing folder is Sizzix Softly Falling.  


I remembered that I had an instant camera die so I dug that out. Sure glad it made the cut during the destashing.  

On this card the white card seemed to white so I brushed it with Very Vanilla chalk.  Forgot to emboss this one.

A dark green die cut works.

With this die I could cut my watercolor strip just under 2.75 inches wide and it fit behind the frame.  I like this better.


On this card, I chose SU Baja Breeze as the card base.

The cool grey for the frame die cut.

I used Quick Dry glue along the back of the die cut and just layed the watercolor on to it.  Hold it down for half a minute and it is well adhered.

Again, I think the card front could have used some texture.


I finally remembered to emboss the card front.

I think this SU Gable Green card base with a Sizzix Tim Holtz Alterations Star embossing folder.

I like the contrast of these colors.


Saturday, January 7, 2023

Set of Cards and Greetings

I made a set of cards for my niece as a gift.  I chose designer paper and coordinating card bases.

The first 2 are the paisley paper with Kiwi Kiss, Soft Sky and Chocolate Chip bases with strips of Early Espresso and Choc Chip.

The bottom left and right are Basic Gray card bases with a coordinating designer papers. Featuring punched white card stock panels.  The punch is the Martha Steward Arche Lattice.


The top right is Old Olive card base with a coordinating designer paper with a ripped white card stock panel.  

The right is Groovy Guava card base with designer paper in soft warm blues and a ripped panel matching the card.

The bottom left took a while to figure out but found the card base needed to be Summer Starfruit. The designer paper is the same with the left strip turned to the other side. 

Middle right is a burgundy card base with a coordinating designer paper with a ripped white card stock panel.

The bottom right is Old Olive card base with striped designer paper with a ripped navy card stock panel.

The greetings included birthday, thinking of you in the colors of the cards I had made.

I added a pack of 3D foam tape to adhere them where ever on the card front she decided to use them.

The shapes included tags, circles and banners.

I hope she and her family will enjoy giving these cards throughout the year when special occasions arise and time is short.

This allows for a handmade card on a quick turn around.


Monday, October 31, 2022

Card Exchange - Oct - Blue and Orange

I put together some cards for my exchange partners.

The paper sure looks like SU but it was not marked so I guess not.

It matches Groovy Guava, Baja Breeze and Early Espresso.

I cut the designer paper to leave a small border of card color.  

Then I taped a length of Early Espresso Taffeta Ribbon and taped the ends to the back of the designer paper layer.

This layer was then adhered to the card front.  The card above is orange in Groovy Guava card base in wide orientation.

I then put together an accent with a SU Scallop circle of Early Espresso with a white silk flower layered on top followed by a large copper sequin which is all held together with an orange mini brad.

The flower accent is adhered to the card front with a piece of 3D foam tape.  A quarter sheet white insert was glued to the inside.

The second card is blue with Baja Breeze card base and has a tall orientation. 

These will be off to my partners shortly.

Sunday, August 1, 2021

Card Exchange Cards - Tangerine Tango & Baja Breeze

I started with an orange card base which I think is Tangerine Tango.

I added a layer of Baja Breeze polka dot designer paper from the Palette o' Prints collection.  I ripped the right hand edge and aligned it along the fold. 

I added a length of Tangerine Tango Scallop Polka Dot ribbon to the designer paper layer and taped the ends to the back.  I adhered it to the card front.

I cut one of the labels from the Apothecary Framelits set from Baja Breeze card stock. I added a greeting from the Teeny Tiny Wishes set color printed on white card stock punched with the Large Oval.  I added tiny orange brads on either side of the greeting then adhered it to the card front with 3D foam tape.

I added 2 small buttons in coordinating color on the bottom right hand corner with small Zots.

The same basic supplies for this card but I switched up the orientation to landscape.

I turned the Baja Breeze designer paper over to the other side to show the floral design.

I put quarter sheet inserts on the inside and added a white envelope.

These are headed out to my card buddies. 


Saturday, July 31, 2021

Birthday Cards - Big Cards for Big Birthdays

This is a half sheet card meaning it measures 5.5 x 8.5 inches.

I started with a Very Vanilla card base.

I chose a sheet of designer paper from Springtime Vintage Series.  A lovely blue and ivory small floral print.  I cut it to leave a small border.

I added a piece of Baja Breeze Stitched Grosgrain ribbon to the top third of the card and taped the ends to the back.  It was then adhered to the card front.

I color printed a greeting on Very Vanilla card stock and cut it with one of the the Deco Label Framelits.  I then cut a textured Baja Breeze one as well.  I cut that in half and adhered them to the back of the greeting offset for the color to show.  It was adhered with 3D foam tape.

I added 3 pearl buttons in the bottom right hand corner adhered with small Zots.  A nod to the seamstress that my Mom is.


I started with felt finish printed card stock from Authentique - Remberance Collection - Remberance One.

It is printed in burgundy on warm white so I decided to just watercolor the flowers on the piece I had cut leaving a small border.  I chose More Mustard for the flowers and Always Artichoke for the leaves. This was great fun!

I added a twill ribbon of Bravo Burgundy topped with a grosgrain ribbon in More Mustard.  These were adhered to the back of the layer then adhered to the Bravo Burgundy card front.   I printed the greeting on Very Vanilla card stock and ripped the top and bottom.  I adhered it with 2 More Mustard mini brads.  This one is for my Aunt who celebrates a special birthday later this summer.

Friday, January 15, 2021

Christmas Card Challenge - Jan - Handmade Paper

I started on my 2021 Christmas Cards. I was inspired by a photo shoot I am planning.  

I used small sheets of handmade paper in light warm blue color.  I chose a deep warm blue card base.

I color printed a star and a greeting from the Stampin Up Bright and Beautiful set in Baja Breeze.  I heated embossed them with clear powder.  I cut the stars by hand and ripped the top and bottom edges of the greeting.

I used tiny blue brads to attach the star and greeting to the sheet of handmade paper.  I added a small sequin to the star and a snowflake sequin behind the greeting.


I have four cards in the card box.

I have not used handmade paper sheets in forever.  It was nice to get some onto cards.

Sunday, October 1, 2017

Christmas Card Challenge - Oct - Banner Turquoise

My blog`s Christmas Card challenge for October is Banner and Turquoise.  I`m sorry this is late.

I chose a warm turquoise card and found some Christmas designer paper from Best Creation Inc. It features a warm snowflake background with purple glittered snowflakes.  It was cut to leave a small border.

I created a banner with the Stampin Up Banner Triple punch.  The blue banner is cut to 2 inches wide then the white is 1.5 inches wide.  I stamped the greeting with a stamp from Stampin Up - Four the Holidays stamp set.  I used the Baja Breeze stamp pad.  The two banners were layered and then trimmed to 5 inches long.  I adhered it to the card front. 

I adhered a 1 inch circle punchie in deep purple to the left of the greeting.  I then added a white metal dove brad by making a hole with a push pin for the prongs. 

Monday, November 9, 2015

Ready2Go Card Kits - SU - Candy Cane Buttons

Another set of R2G card kits.
This set features the Candy Cane Designer Paper.  I cut the DSP into 4" squares.  I selected Not Quite Navy card bases.  The greeting is from the Teeny Tiny Wishes stamp set in Real Red on Whisper White.  I taped the greeting to the DSP square to create a full piece for the card front.  I wrapped a piece of RR grosgrain ribbon over the join and taped the ends to the back.  This layer was then adhered to the card front.  I chose buttons from the Candy Cane set which came in Garden Green, Real Red, Blushing Bride and Baja Breeze. I put red/green thread through the button then adhered the buttons to the right side of the greeting. 

Tuesday, October 20, 2015

Sympathy Cards - Family

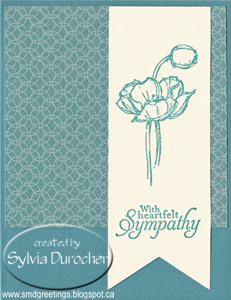
These are the cards I made for her sisters and niece.  I continued with the same 4" squares of Stampin Up Elegant Soiree DSP.  This time I used the other side of the paper onto Baja Breeze card stock.  I chose the flower from the Simply Sketched stamp set for this card stamped in BB on VV card stock. I flagged the end of the strip with the Banner Triple punch.
For this next card I used the bird in Basic Grey on VV card stock. Again flagged end of the sentiment layer.  The multi colored side of the Elegant Soiree DSP.
Back to Baja Breeze card with the blue side of the DSP.  This time I stamped the sentiment with Basic Grey Suede then I trimmed around the sentiment.  Mounted it on the right hand side.

They are a large and very close family so it will be a difficult day.

Sympathy Card - Simply Sketched with Elegant Soiree

A dear lady named Linda passed away late last week and today is her funeral.  This is the card I made for her husband.

I started with a sheet of double sided designer paper from Stampin Up Elegant Soiree collection.  The colors in this paper are Very Vanilla, Baja Breeze, Soft Suede, and Basic Grey.  I used the Simply Sketched stamp set with the sympathy option.  This one is stamped in BG on VV then the bottom is flagged with the Triple Banner punch.  I cut the sheet of 12x12 into 9 4x4 inch squares.

I made a set of five cards for her husband to use as he needs.  I ripped the square at about two thirds and ripped again a small strip to remove the white edge.  I cut the butterflies with the Sizzix Winged Beauties framelit set from VV card stock.  I added wax paper between the die and card stock to assist the removal from the die.  Works very well.  The good variety of colors in the DSP allowed three different card colors which made it a quick card making session.

Wednesday, May 6, 2015

Card - Simply Sketched Sympathy

I made this card for a friend who lost his dad recently.
I started with a Crushed Curry card.  The stamps I used are from the Simply Sketched stamp set.  I chose the bird to make the card more masculine and stamped it in Crushed Curry and the sentiment in Baja Breeze as I don't have a Pool Party pad. I watercolored some background on upper and lower portions of the Whisper White card stock with an Aqua Painter and the same colors.  I put the bottom edge of the Pool Party layer through the Big Shot with the edge of the Scallop Square Bigz Clear die.  I dyed a bit of white cotton thread with some Crushed Curry ink to add a bit of repetition and fill in the space below the white layer.

Submitting this to the following challenges:
TGIF Challenges - 01 Color challenge
I skipped the Calypso Coral because it was a card for a guy.