Showing posts with label purple. Show all posts

Wednesday, September 10, 2025

Card Making - Sets Continue

I switched to the "In Full Bloom" Simply Scrapping Kit for these cards.

I picked the Sage Shadow card stock from the 12x12 kit and trimmed it down to make two A2 cards with a few left over pieces.

On the left, I cut the desinger paper to 4.00x5.25 inches and then wrapped a wide piece of Baja Breeze gros grain ribbon around it and taped the ends to the back. I adhered the layer to the card front. I created an accent by punching a bee from the DSP with the .75 inch circle punch then added a 1" punched circle in Barely Banana card stock. Layered these and adhered over the ribbon.  On the right is the other designer paper in the kit. I ripped the right hand edge of the DSP layer leaving to show the white core of the paper. I added a strip of white card stock on the left and then added another circle bee accent like in the previous card.

Contiued with the same scrapping kit. 
Cut each of the designer papers to the leave a small border. The A2 card bases are Barely Banana card stock 12x12 cut to 8.5 x 11 cut in two for these cards. 

On the left, I created an accent with a strip of Sage Shadow with Barely Banana  squares and bling brads. The strip was mounted with 3D foam tape to accommodate the brad backs which are quick thick.  On the right, I made slits in the designer paper to accommodate a strip of Barely Banana card stock making sure I did  not cover the yellow elements. I taped that strip down on the back with scotch tape. I added a narrow strip of Lavendar Lace cardstock over the yellow and adhered with double sided tape. 

Each card gets a white quarter sheet insert and a white envelope.

Wednesday, April 30, 2025

Cards - Butterflies - Charity

Another few cards for I Win charity.

These are the last of the clear butterfly stickers I bought yesterday.

I chose Stampin Up Glorious Grape cardbase in A2 size and added a layer of watercolor background cardstock.  Not sure when I created this but it works well.

Added a strip of gold non shed glitter card stock across the top third.  Mounted the sticker onto the glitter.

I added a SU Small Oval greeting in coordinating colors and added a bit of purple around the edge to tone down the white.  Mounted with 3D foam tape.

Blank white quarter sheet insert.

I used the left over scrap of the watercolor background card stock on this Glorious Grape card base set in the wide or landscape orientation.

I added a non shed gold glitter corner on the right hand side of the watercolor layer adhered with double sided tape.

I mounted the butterfly sticker in the opposite corner.

The banner greeting was perfect for the space left by the shorter background layer.  It is mounted with 3D foam tape.

A white quarter sheet insert was added.

The final butterflies were warm toned so I turned to my favorite Stampin Up color - Summer Sun.

I dug in the origami paper envelope and found a burnt orange piece, cut it to size and mounted it to the card front.

I chose a scrap of paste paper in blue and cut to 2.5 inch square and mounted the butterfly to it. I added a strip of gold glitter to the bottom.

A SU Modern Label punchie in the same blue paste paper with a Word Window greeting in orange glued to the front.

A white quarter sheet insert was added.

I chose Summer Sun card base again with a bit brighter orange origami paper for this card.

I added a Pacific Point strip of card stock then mounted the butterfly onto it.  I like that the tips of the wings show off their bright colors.

I added a bit of non shed gold glitter card stock on the blue strip.

The greeting is the same blue card stock punched with the SU Modern Label punchie  with an orange Word Window greeting.  Mounted with 3D foam tape.

A white quarter sheet insert.

Another 4 cards for this charity.

Sunday, April 6, 2025

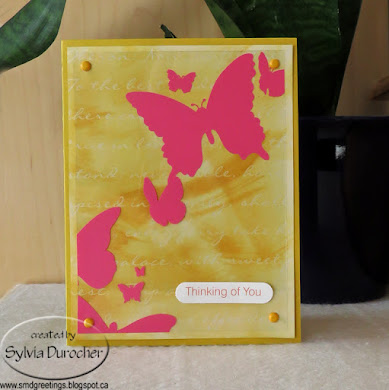
Cards - I Win - Acetate Butterflies

I make some cards for the I Win charity.

 I was at ReUse Center yesterday and found a 12x12" sheet of acetate with pink butterflies on it.

I cut the sheet into 4 pieces I could use. The one corner had butterflies too big for my A2 cards.

Then I dug in my stash to find paintable 12x12 card stock.  I used some of my alcohol inks to stain the paper in 4 different colors.

On this card I chose a scallop patterned paintable card stock and added green alcohol ink diluted with rubbing alcohol applied with a sponge.

I mounted the acetate and green paper to the Kiwi Kiss card base.  Greeting and white insert was added.

For this card I chose a heavy 110lb white card base.

I trimmed the acetate to be a bit smaller than the purple paintable card stock layer.  These are held together with black tiny brads. Then this layer was adhered to the card base with double sided tape.

I added a SU Word Window punchie greeting in black to coordinate with the brads.  It is mounted to the acetate with 3D foam tape.

A white insert was added.


Love this one!

The A2 card base is SU Crushed Curry.

I added a paintable card stock layer which has script on it.  It has been painted with yellow alcohol ink diluted with rubbing alcohol and applied with a sponge.

The paintable layer and the acetate had held together with yellow mini brads in each corner.  This is adhered with double sided tape.

I added a SU Word Window punchie greeting in pink.

A white insert and we are good do go.

I will press these over night.

The card base for this cards is Stampin Up Taken with Teal.  

The paintable layer has a script pattern. It was colored with alcohol ink diluted with rubbing alchol and applied with a sponge.

I attached the acetate and the blue painted layer with white tiny brads in each corner.   This was then adhered to the card base with double sided tape.

I added a blue SU Word Window punchie greeting in the top left hand corner.  It is attached with 3D foam tape.

A white insert and we are good to go.

Tuesday, December 10, 2024

Purple Dove Stitching

I was donated some batik fabric from one of the girls at Sewing Group a couple of weeks ago.

The pieces were large enough to create an accent panel for a bag.

I tucked the 4 triangles in each corner then couched the seams to the foundation layer.

I used a white piece of linen as the background of my focal element.  I cut the bird from a coordinating fabric from my stash. I made the wing from the same purple batik. Some heavy stitching for the eye.

Not sure when it will end up as a bag.  

Saturday, November 23, 2024

Slow Stitching - Extra Squares

Another extra square of slow stitching. I have used up the supplies I had packed for being away so I will have to dig out some more.

White cotton top layer on a foundation piece.  I did not learn my lesson about now covering the front with fabric as well which makes for a thick piece.  In all fairness, I did not have a plan when I started.

I chose strips of purple fabric in various patterns. I stitched the horizontal lines first in running stitch with purple thread from the ORTS tin.

Then I did the vertical ones with bright pink thread. Along the way I had found the lace flower I had dyed a while back and decided to use it.

I tacked it in place then added a purple circle which I over cast stitched to the piece. Then I added a lot of French Knots in yellow in the middle of that.  That was very thick with 4 layers of fabric.  Turned out nice.

Tuesday, October 15, 2024

Inktober 2024 - 15 Be Free

Inktober 2024 Challenge

15 - Be Free

Micron Black Marker on Mixed Media 154lb paper with Watercolor.

I created a textured background that worked out well.

Three different butterflies, some with defined parts and the last one is just dropped watercolor into it.  That one worked out really well.


Sunday, October 13, 2024

Inktober 2024 - 13 Snow Scene

Inktober 2024 Challenge

13 - Snow Scene

I drew my pencil sketch with a 4H pencil then went over it with a Micron 005 Black Permanent marker.

I applied an overall wash in blue.

I painted my tree, grass, fence and snowbanks.

I added color to the snowflakes.


Saturday, October 5, 2024

Inktober 2024 - 05 Hot Air Balloon

 Inktober 2024 Challenge

05 Hot Air Balloon

I drew a hot air balloon for piece #5.  The outline is black permanent marker. 

I washed the top third of the painting with blue watercolor then pull out the clouds with a tissue. 

I painted the silk part of the balloon in purple and yellow with a green stripe across in watercolor. I did a bit of shading with a very fine black marker. 

I painted the hills below in a couple of shades of green.

I know it would help to have people in the composition but I was too afraid to ruin it by adding them. 

Sunday, September 22, 2024

Cards - SC - All Occasion Flowers

 I was brainstorming ideas of what Celebration paper would look like for art in the December show.

I created some decorative paper by blowing liquid acrylic ink on paper with a straw. I used yellow, purple, red, and orange ink.

It did not work out quite the way I thought so I decided to use the paper for card making instead.

The card base is yellow linen card stock in linen finish. 

I chose a piece of dark green white core card stock, ripped in half and adhered the piece to the right hand side trimming it to the card edge with scissors.

I cut the flowers with the QuicKutz Large Flower die from the decorative paper, red, yellow and purple card stock then just swapped out the pieces. The flowers are held together with scotch tape.

I used the red flower with the decorative paper ring and a purple center.  The stem and leaves were cut from the decorative paper. The leaves are from the Sizzix Flower Layers and Leaves die. Stem is just cut with the paper cutter and adhered with QuickDry Adhesive.

A white insert and ds tape with carrier on the flap.

Here I started with a dark purple linen card base measuring 6x12 inches and scored at 5.5" and just short of 1" for the flap.

This time I chose a light green white core card stock on the left.  This flower is mostly decorative paper and is very punchy in color.


Here we have a solid yellow flower with decorative bits in the center ring and the stem and leaves.

The other half of the light green card stock on the right.


Another mostly decorative paper flower with dark green panel.


Super happy with how these turned out.


Friday, September 6, 2024

Cards - Self Closing Cards - Christmas & Poppies

I made this card the other day but did not have double sided tape to complete the cards.

This is a card that does not need an envelope because the tape on the small flap will close the card once you have written in it.

This card has a turquoise base that measures 5.5" W x 6" T and a 1" flap to close.

I place a piece of lavender origami paper which was spattered with watercolor.  The white frame was cut with the Stampin Up Clear Oval Accent die with the matching mover shaper die. Spattered with same watercolor.

I cut the flowers with the Row of Poppies die by Memory Box in the same card stock as base. 

They were adhered to a watercolor background with Scotch Quick Dry Glue but they are difficult to glue down.  An insert was glued to the right hand side. Finally, tape with carrier for the flap.

I have not used this type of double sided tape for a long while because I don't run classes anymore and I am always crafting at home.

I needed it for the flap so that I could put it on when making the card.  I could have waited till I prepared them in December but having to cut tape then would have been a pain.

My sister let me know I could buy it at Dollar Tree.  This roll should do it.


I folded the card so that the pattern was on the inside to keep the solid side for addressing.

I cut the arch with the TH Arch Frame die out of deep red card stock.
I cut the Nativity with the QuicKutz Nativity long die.  I just cut my So Saffron cardstock to 5.5 inches and took the characters I could get with was the Shepherd and lamb. I adhered the manger section onto the deep red arch.

I added gold stars with a paint brush and metallic watercolor.  I painted the large star onto of the stable too.

I added a plain insert which I will just hand write when I prepare them in December.

Tape on the flap.

This card base is royal blue linen finish card stock cut 6x12 inches scored at 5.5" and then 1" for the flap.

I cut the ornament with Sizzix Ornaments #4 die in blue, then cut just the hanger from silver card stock. I used a decorative paper background from my stash as the background. The ornament is held in place with a silver glitter swirl brad. I added a few more around the card.

I added blue vellum on the left hand side to add some interest adhered with vellum adhesive.

White insert and d/s tape on the flap.


I created 2 Snowman cards.  One with a royal blue card base and the other with a grey card base. I cut the snowman with the Sizzix Snowman and Hat die.  On this card there enough space for the hat! I added a ripped snowbank. Painted buttons on this front and a face, added a ribbon scarf.  I watercolored the hats which turned out great. Added a snowflake die cut/punchie in the top right hand corner. Really happy with these.  The white insert on the right hand side and tape on the flap.  I can always stamp a sentiment later on the insert.

Sunday, August 18, 2024

Card - HB watercolor - Purple

A large purple watercolor card for my aunt who is celebrating a birthday soon.

There is several layers and colors of watercolor brushed across then dried.

Later, I just let color drip down the paper while it was standing.  Catching the drips at the bottom on the desk.

It was then pressed flat.

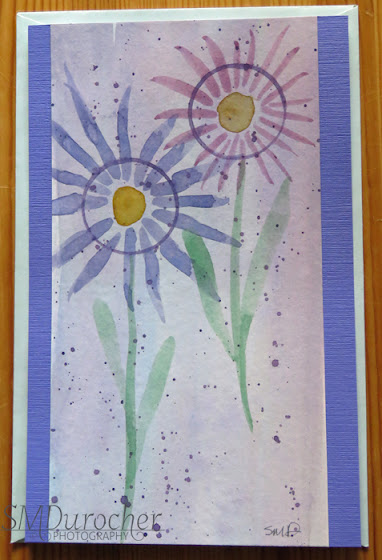
A simple flower where I punched the flower and painted it with the bits left on the palette. Added a stem and a center.

Half sheet sized card on SU Lavendar Lace cardstock.

I added some clear  rhinestones held in place with Bling Zots. Full sheet insert to hide the brad in the center of the flower. White envelope and it's done.   

Found a new place to take my card pictures where I did not have to move stuff all the time.  See how it goes.

Saturday, August 17, 2024

Slow Stitching - No. 031 - Shisha and Kutch Area in India

I have caught up on my slow stitching.  This piece is for week 31 of K3N Cloth Tales Slow Stitching Challenge.

The shisha are the small decorative mirrors on Indian clothing.  I chose a plastic sequin since I anticipate this piece being put into a possible quilt. This is washable.

I decided to use a piece of salmon colored linen on a cotton foundation cloth.  I also decided to make a paisley pattern with the shisha at the round end.  I traced with a white marker.

I managed the stitching on the shisha. The proceeded with satin stitch.  I had a really hard time when I  stitched through a single strand.  

I added the a blanket stitch around the outer edge of the paisley then closed it with a row of back stitch. After my problems with the satin stitch I took the easy way out.

I used 3 strand embroidery thread in several colors. I made several circles around the shisha.  Then I followed the inside edge of the with a couple of rows of satin stitch. Then I added the daisy flower and filled the field around it with satin stitch.  I used gold, teal, purple, yellow, and pink thread in various places.

I put a border in blue at the bottom and an upper in gold. 

Saturday, August 3, 2024

Flooring Project - Thank You cards

I made a few Thank You cards for those who helped in this big flooring project. 

This was for the sister and her husband who came to the city to help me remove the carpet from the living room and dining room and expose the cement floor on a very hot and sweaty day.

I chose Stampin Up Rich Razzleberry card base in A2 size. I dipped into my commercially made handmade paper and cut a piece of this wax resist in teals, rich purples with swishes of gold.

I left the beautiful deckle edge on the bottom and taped it to the card front.

I stitched 3 small gold beads in the top right hand corner.

A white insert and envelope.


This card has an Old Olive card base.

I chose an origami paper front layer which was taped on.

I added a gold star sequin in the left hand corner.  To balance I added 2 square brads in the bottom right hand corner with a green one in the middle.

This paper has beautiful gold details.

This card is for the folks from whom I bought the flooring which answered all my questions during the process.


I chose a SU Kraft A2 card base for this card.

The front of the this card is a piece of botanical pressed wax paper.  A nice little flower and a piece of green leaf.  It needed to be mechanically adhered as it resisted taping.  

I wrapped a length of gold thread around the top a few times and then knotted it.  I then place the gold mini brad over the knot and pressed it through the card front. I added a gold bulb pin in the bottom right hand corner which went through the wax paper and card stock front.

A white half sheet insert to hide the metal pieces which have gone through the card stock.

A white envelope to finish it off.

This is for the flooring company which recommended the underlay which saved the project.

This card is for my niece who dropped everything on the Monday morning to pick up the 2 large rolls of underlay and deliver them to my brother in law who was going to install the floor.  Saved me a round trip to the south.

The card base is SU Always Artichoke.  I found this piece of lacy handmade paper in the stash.  Lightly glued to a piece of white card stock.  Trimmed to fit across the card front and taped in place.

I added a coordinating button with gold thread held in place with a Zot. White insert and envelope.
Started with a piece of Not Quite Navy card stock.  

Layered a piece of marbled paper in blue tones with copper accents on the card front.  I added a copper star sequin held in place with a Zot.  Then I added a coordinating bead held in place with a star copper tiny brad.

White insert and envelope. 

This is for my brother in law who installed the floor and my sister who hosted me at her house.  We did a few fun things while he was working at my place. There was a bottle of scotch delivered with the card.


I am loving the lacy curtains casting a wonderful shadow on the vinyl floor!

Wednesday, July 24, 2024

Slow Stitching - No. 029 - Mandala

Getting caught up on my slow stitching challenge.

K3N Cloth Tales slow stitch challenge - week 29 - Mandala.

With many things packed away due to renovations I chose felt for this challenge. I added a white cotton foundation piece behind a 5" square of white felt.

I cut a turquoise circle then a yellow medium sized one and then a smaller green one. Felt allowed me not to worry about raw edges.

I started with the yellow lines on the green, then the white blanket stitch around its edge. The turquoise points on the yellow followed then the triple bird foot stitches in pink and purple thread on the yellow. The green back stitch outline along the outside edge of the turquoise circle. Followed with the long white stitches on the turquoise then the French Knots in the green wedges. Finally, the purple short and long stitches around the outside edge. 

Saturday, May 25, 2024

Card - Watercolor - Belated Birthday

A large watercolor card for a teen who is heading into her last year of school in the fall.

The birthday was back in April but I got to deliver this card in person and it included a bit of mad money.  There is a big trip coming up in July so it will come in handy.

I used left overs from my senior show entries and cut a piece tall and narrow.

I added circles with a small glass vase dipped the same color that was still sitting o my palette.  How handy!

I then added petals, stems and leaves.

Then a bit of spattering.

I mounted it on a single layer of card stock in Stampin Up Lovely Lilac. 

I added a single sheet of insert on the back and tucked the moola behind it.

Loved the visit with this family.


Monday, April 29, 2024

Sewing Project - Picnic Placemats - Yellow Purple

I started working out my process for making picnic placements with a zipper pocket to hold a napkin and the cutlery. 

I cut the fabric 12 x 18 inches for both the yellow front fabric and the grey back fabric.

I created the pocket like my zipper inserts with the addition of tabs at each end of the zipper so there is no holes for things to fall out.  I inserted the pocket between the 2 layers with rights sides together.  I made some white ties which I placed at the opposite end of the pocket in between the layers.  I then ran a 1/4 inch seam all the way around leaving a space to turn the piece inside out.  

Once turned inside out, I ran a line of decorative wavy stitch to close off the left hand side of the pocket and then added 2 more lines of wavy stitching to hold the layers together.  I added purple tabs to the ends of  the ties to finish off the ends. 

The pocket can hold your cutlery and a napkin.

Notes: 

My ties could be thinner and longer. 

I like that this method does not introduce a third color to the mat.

It is quite thin but would do the job to give you a clean place to eat your lunch at the park.

My tab on the left of the zipper could be narrower.

Monday, April 22, 2024

Sewing Project - Wine Bottle Bag - Japanese 1

 I found a couple small pieces of this Japanese print fabric by Schwartz Liebmen Textiles Inc. in my stash. I believe it to be 100% cotton.

I chose to make the front of the bag be a panel of the gorgeous fabric.  I found some red that my sister gave to supplement to the size I needed. I sewed a piece to the one side but that made it tricky to figure out where to place the the handles.

I placed a row of brown twill tape along the top edge aligned so it would be centered for the purple accent. That was stitched with the wavy decorative stitch then several lines down vertically to quilt the flannel to the outer layer.

Now I would not have a back seam. I did manage the handles correctly but totally forgot about it for the box corners.  I did have to undo the box corners on the outer and lining pieces and then iron the piece well so I would know what was the front.  It had to be done.

With the bottom seams and the box corners now in the right place I could do my 2 rows top stitching at the top of the bag.  

I hand stitched the purple crochet element at the top of panel on twill then added a red button in the center.

I chose red thread and an off white polycotton lining.

Information on "My Bag" Line 

Wednesday, February 14, 2024

Card - Butterfly Sympathy

I created a simple sympathy card for my aunt who lost my uncle recently.

I chose a deep burgundy card in the A2 landscape orientation.

I added a piece of warm purple paste paper trimmed to leave a bit of border top and bottom.

I cut a large butterfly with the Sizzix Winged Beauties thin die set from gold on deep purple cardstock.

I added a gold foil body to the butterfly and adhered it with double sided tape.

Tuesday, January 23, 2024

Sewing Project - ReUsable Bags


I made 3 ReUsable Bags to donate to the ReUse Center this week.  I had some polyester fabric in great colors which does not work as well as microfiber.  I bought these because I was looking for a variety of colors.  They are very pretty.

Polyester fabric frays like crazy so these needed french seams to enclose all the edges. 

I folded the tops over double at 2.5 inches to provide a reinforced edge where the handles were going to be attached.

I did not have much for handle material.  I used grosgrain ribbon on the 2 striped ones.  I made handles with white microfiber fabric left overs for the purple one.   

These measure about 20 inches tall by 16 inches wide.  

The center provides a bin of bags and a table of boxes for customers so these will be used for sure.

Wednesday, November 8, 2023

Christmas Cards - Joyeux Noel - Purple

I made some French cards for my aunts and uncles who are still with us.  Joyeux Noel means Merry Christmas.

I started with the purple paste paper my sister and I made many years ago.  It has been paper that I though too special to use just willy nilly and so it has not been used.  I have to get out of the scarcity mentality and use stuff I think beautiful knowing that more will come when it needs to.

I cut the paste paper to 3.5 inches wide and about 4.75 inches tall.  The die is a thinlit by Memory Box.  I used my magnetic spacer to keep the die in place while cutting.  I cut the paste paper then pulled it off the paper. This requires gentleness because those letters up top are very delicate. I did mark the die with an up this way arrow this time because I did lay it upside down and of course had the greeting the wrong way.

I chose Stampin Up Lavender Lace for the card bases for these cards.  I added a layer of Whisper White cut to leave a small border all the way around. I used double sided tape on the bottom and side and Scotch Quick Dry Adhesive around the noel letters. The bottle has a very fine tip so it was easy to put just where I wanted it.  

Once that was adhered to the white layer, I added my accent pieces. The tree is by Hampton Art and cut from Elegant Eggplant. I added decorations with my white opaque marker. I added silver star and sequin on the top of the J. The snowflake is a large Martha Stewart punch. I adhered to the layer with a dusty purple mini brad and a silver sequin and a tiny sequin on the J.