Showing posts with label gift. Show all posts

Tuesday, February 27, 2024

Sewing Project - Pojagi Wrap Beige and Blue

I've been thinking about doing a big Pojagi project so I decided I needed some practice before tackling it.

It does need a change in thinking to do this with the sewing machine - especially if you are using one or two single sided fabric.

I was given a gift of a box of fabric by Michelle at ReImagined Fabrics.  Thanks so much!

I have sorted all the precut squares and many are cotton polyester or all polyester.  To gain the benefit of Pojagi thinner fabrics are best. There are some cotton ones as well but I was focusing on the thin ones.

The beige in this piece is a very thin cotton poly blend and has no right side.  You can see in the photo where the texture of the curtain shows right through the beige. The squares were cut to 9.5 inches. 

The patterned pieces are very polyestery but a bit thicker and does have a right and wrong side.  Gorgeous pattern and jewel toned colors.  The squares were cut at just under 7".  I found this video about sewing Pojagi on a sewing machine.

I decided that I wanted all my double seams on same side or "top" of my wrap.  This video "Rules" of Pojagi Seams by the same person does a good job of explaining this.  I did get one of my squares right side to the back but decided to leave as that was early on and this was just practice. Later, I did undo 2 seams to get one square right side to the front. 

It is very difficult to plan and decide on sizes of fabric needed.  I just started sewing and then aimed to create rectangles and cut the excess fabric away to achieve that.

I just made a turned over hem around the edge with the double lines on top.  This measures 24 wide x 26 inches tall.  It will wrap a gift or can be used as a topper on a table cloth. I did lose track of time but this project took at least 4 hours to complete.

I think my goal would be to create a piece of reversible fabric then make a sewing project from it. Tackling the pajogi and sewing project at the same time would be too much for me.

Thursday, December 28, 2023

Celestial Stuffies


I made a set of stuffies for a little girl celebrating a birthday soon.  Sun, Moot and Star.

The Sun: I cut orange and yellow felt with rays layered on top of each other then turned the yellow one over. I cut a circle of warm yellow and stitched it to the center and stuffed before closing it up with over stitches. I add longer stitched to connect the rays to each other.  I added some orange stitches to the center.

The Moon.  I cut 2 large circles from white felt then cut out smaller circles from one of them. I layered some grey flannel fabric under it and used stab stitches to connect the two. Once the 3 craters were done I stitched the 2 white circles together with the blanket stitch around the outside. Once I was close I stuffed the moon with fiber fill and then closed the opening.

The Star: The 2 star shapes were cut with Stampin Up Star thinlit dies from yellow felt.  I embroidered the front shape with variegated thread.  The shapes are held together with blanket stitching.  It was stuffed with fiber fill. 

Saturday, April 29, 2023

ReUsable Make Up Remover Pads - Gift

I put together this gift of ReUsable Make Up Remove pads for my grand niece. 

It is always good to reuse and reduce and this way the pads came be washed and reused for a long time.

They are made from 2 layers of flannel with serged edges.  I will link to the detailed post here. 

The mesh bag included is for laundering this small pieces of flannel.

I made a card in Elegant Eggplant card base with a watercolor layer topped with stars and a greeting.

The greeting is punched with the Modern Label punch and off set with a piece which matches the card base.

I used turquoise stars with a grey one to coordinate with the watercolor piece.


Sewing Project - ReUsable Make Up Remover Pads

In my research to make these ReUsable Make Up Remover pads it was recommended that they should be made in different colors.  

Some make up will stain the pads and so the person using them should have the opportunity to select the color that would work best of the make up being removed.

These were cut to 2.75" square to custom fit the container I selected to put them in.

I chose square because cutting circles wastes fabric and does not provide a good start and ending point.

The colors selected for the medium toned ones was based on the recipient of these.

Her favorite color is purple.  Each of these are backed with the same fabric as the the front.

It can be fun to mix and match fabrics if you want to create pads with funky prints.

The serger thread is grey on one side and ivory on the other with the needle threads being grey which mostly goes with all colors.

I don't really want to rethread this machine too often.

I did find a good video on how to turn the corners with the serger.

One reviewer suggested black for the removal of mascara because it stains for sure.

I made a stack of each variety.  Several reviewers were suggesting 14 which does 2 weeks for 1 week if 2 are used each day for different removals.

Here's a stack of black flannel ones.


I bought is box to store the pads. I liked the fact that there were 3 different compartments for the three colors of pads.

The compartments are a bit taller than wide which allows for some place for your fingers to access the pads, especially when the stack is lower down in the box.

The lid will keep them clean and dust free.


Most of the postings on line suggested that laundry bag should be used to ensure these small fabric pads don't disappear in the laundry machine.

I recycled a mesh product from IKEA into this laundry bag.

Love the color.

I added a cord as a tie and the turquoise disc as a closure was made with my sister during my visit.

You can see the details in this post here.


Serging the edges of 2.75" inches of fabric become quite tedious and it takes a lot of thread so I am not sure I will be making too many more of these. But as a custom gift it was the perfect thing.

Friday, September 2, 2022

Sylvia's Simple Shots

It is coming to the end of summer. Fall colors are starting to appear and I am not ready.

This little chipmunk is getting ready for winter. 

His cheeks were so full of seeds from this large rose hip. They create food storage areas called larders to give them food for the cold weather.

They eat seeds, fruit, nuts (acorns being one of their favorites). Worms can be in their diets but that must be only a summer food.  Hard to store food that walks away.


I was over visiting my aunt recently and she offered me some cosmos flowers.  I said yes please.

These make such nice cut flowers for the table. My Mom grew them every year. I did have a couple of vases which were not packed.  I love this cube vase.

I so want a flower cutting garden when I get a new place. Cosmos flowers are very easy to grow, come in a lot of different colors, last a long time in the house with fresh water, and make my heart full.


I am discovering that I really like books set in Ireland.  This book Four Letters of Love by Niall Williams was a pleasure to read.  The 2 main characters are Nicholas Coughlan and Isabel Gore. They are destined to meet but have many life experiences before that happens.

Nicholas has a tough life because his father quit his regular job because he felt that God wanted him to be a painter. The father spent a lot of time away from home painting then when he was home he was in his home studio. Painting did not generate a lot of money. Things from from bad to worse until he has lost both parents.

Isabel grew up in a good family but she felt responsible for an accident her brother had so that colored her world view. They live on a small island in the Galway bay.

When she finishes school she travels to Galway to attend higher education and grow up a bit away from Mom and Dad. She ends up with a job in a wool/tweed store and dating the son of the owner. 

Nicholas is on the hunt for one of his father's paintings which was given to Isabel's father for a poem he had written. He arrives in Galway and meets Isabel (who was home for a visit) and her parents. 

The ending was very good and worth the heartaches that these two young people went through to find each other.

I was out shopping with my sister this week when she came into town with my brother in law on errands. 

She was looking for art supplies. Earlier, I had a conversation with one of my aunts and she recommended Payne's Gray for outlining watercolor if the black marker was too harsh.

I also needed a very small brush to make thin lines and I found this set of brushes at the thrift store for a great price. 

We both found what we needed between Staples and Michaels. First time I used the coupon on my phone. Worked great.

I am working on watercolor Christmas cards again but inspiration is hard to find.

I picked up this small book a while ago.  A simple blessing by Michael W. Smith.

He describes when he started offering a blessing to the audience at his end of his concerts.

He wrote a blessing to cover certain things he wanted to share and pour out to the world at large.

It was well received and many of his fans communicated with him about what changed in their lives as a result.  Of course, it is very hard to give a blessing without it having some of it fall on yourself.

The practice changes Michael's live as well.

Just a nice positive and encouraging book.

Monday, December 27, 2021

Gift - Table Runner Trivet

A table runner trivet is a quilted piece one can place in the center of a table or other serving area to protect the surface from hot dishes.  It replaces the use of several trivets and looks pretty.  Upon doing some on-line research I found a place that recommended layers of terry cloth as good insulation.

I wanted to make this runner reversible so I took my fabric to my sisters a while back and we checked out her collection of fabric and found several pieces that would compliment the fabrics I had chosen.  In the end, I rejected some of the ones I had selected so that both side would work together.

I had just purchased the printed sunshine yellow piece of fabric.

The solid fabric was a left over from a quilt I made a couple of years ago.  The color name I would use is Soft Suede which is a green brown color.  

The cork fabric and the circle fabric came from my sister.  I have now swapped her some from my stash.  

All the fabric is 100% cotton.  

The layers involved are
  • cotton quilted layer
  • terry towel fabric
  • 100% cotton quilted batting piece
  • terry towel fabric
  • cotton quilted layer

I chose to put the quilted piece in the center of the trivet, the terry cloth goes the full width of the runner.

The front and back pretty quilted layers were stitched to the terry cloth layers.  The front and back are different designs and therefore quilted differently.  I needed to come up with a way to hold the quilted piece to the center of the runner. 

The final measurements of the piece is 14x40 inches and the center is 12 x 37.5 inches. 

The seam in the yellow is the one which goes through all the layers and holds the center batting piece in place. Each side had a yellow in this space.  The sunshine yellow piece on the cork side and a more lemony yellow on the circle side.  Allowed me to have yellow thread in the top and bobbin of the machine.

It would have been really nice to have my walking foot fo rthis project but the order is still on hold awaiting a shipment from over seas.

I decided based on my fabric to make the warm sunshine yellow side in a ladder pattern.  I cut strips of varying heights and 10 inches wide.  The Soft Suede, the cork fabric, some solid burgundy make up the pattern on this side.  

The other side features the circle fabric and this piece was larger and I did not want to cut it up into smaller pieces.  It was also getting late in the day and I wanted to get the project finished. I added some teal from my scrap stash which worked out well. 

I wanted Soft Suede to be on the edges of both side so they would make it the same color no matter which side was showing.

I stitched all the way around with the good sides together leaving an opening then turned the trivet runner inside out.  I top stitched very close to the edge where there was only the terry towel layers.  

The last seam was the one in the yellow that holds it all together.

I hope my niece likes it and it comes in handy for serving from the kitchen island or the middle of her dining room table. 

Wednesday, February 24, 2021

Christmas Card Challenge - Feb - Watercolor Cards

I decided to try watercolor cards for my February challenge.

I watched several Youtube videos from Maremi Small Art.

She has several at the beginner level.  It seemed pretty easy so I gave it a try.  I chose to tape down my Cotman 140lb Watercolor paper to a piece of glass before I started.  I painted my color then allowed them to dry still taped down.

I cut them down into individual art pieces measuring 3.75 x 5.00 inches and added the black lines with a permanent fine tip marker. I stamped the Christmas Greeting from the Stampin Up Good Greetings set.

I adhered the watercolor piece with double sided tape to a coordinating colored card base.

I chose various color to spatter the small pieces of art. 

For the first one I chose a lavender card base with black spatter.

I did draw a rough outline with watercolor pencils before I started applying watercolor with a brush.  I picked up this tip from another video I watched and it was a great idea.

For the card on the right I chose a ultramarine blue card base for the yellow star watercolor image. 

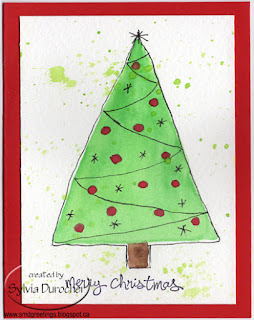
On the tree card I used gouache (opaque watercolor) for the red balls because mixing red with green watercolor would have yielded brown ornaments.  

I used the same green for the spatter then a nice red card base. 

On this next card I painted a round ball which I turned into an ornament.  

I added the hanger and string with the black marker. Then patterns onto the ornament itself.

I added copper accents to the patterns I had drawn with the marker.

I added quarter sheet inserts with a seasonal sentiment.

I have made another set of four but they have not been turned into cards yet.

This was a lot of fun but harder than the videos make it look.

Tuesday, April 9, 2019

Birthday Lunch

I made this birthday card for a friend who celebrated her birthday in the last few days.  She has been out on several occasions over the last week, lucky girl. I am taking her out for Vietnamese food for lunch today.

The card base is yellow Bazzil textured card stock in the portrait orientation in the half sheet size (8.5x5.5 inches). 

I added this bright designer paper with spring blooms in yellow and various shades of pink.  I added a raspberry colored ribbon along the right hand side with the ends taped to the back.  The layer was adhered to the card front.  I then created the accent with Spellbinder Oval Nestabilities.  The yellow with the scallop edge, then the designer paper with the corresponding smooth oval.  I added some handmade paper flowers held in place with tiny black brads. I then added a birthday greeting in black on a Stampin Up Modern Label punchie.  The accent was adhered to the card front with 3D foam tape.


She is a faithful card giver and I am a card maker so she gets All Occasion cards every year.

I have included a small tin of Jasmine Green Tea from my stash as I recently discovered she enjoys it.

Looking forward to a great visit and lunch.


Friday, April 6, 2018

Birthday Gift and Lunch

I prepared a gift of greeting cards for a friend who celebrates her birthday this week.  There are so few people who still do cards.

I am taking her out to lunch as well so we can get caught up on our Easters.

As you can see I chose a card which connected with her love of strong coffee instead of a birthday greeting.

I was disappointed to see that Coffee Loving Card Makers have not hosted their Spring Blog Hop yet.  Is it coming?

Maybe this long winter has affected their timing.  It sure has affected mine.  When it is -17C in the morning on April 06th that means it is still winter in my books. 

Saturday, March 31, 2018

Baby Boy - Hayes

I chose books for this baby boy as well but these are for younger one as he only as one sibling.

The art in this book is wonderful.  I am a sucker for watercolor.

Jake is up when he should be asleep.


The colors book is very basic and his brother can read it for a bit before Hayes is ready for it.

The art is interesting and each color has several everyday objects that fit into the category.

I'm not sure if these children will learn to love books the way I did as a young person.

They may only have a digital device will only provide resources available on the internet.  Not everything is on the internet.  And there may be some good things missed.


Sunday, December 25, 2016

Felt Ornament - Blue, Espresso & White

As part of our Christmas gift exchange in our family we needed to give a handmade ornament.

I started with white, blue and deep brown espresso felt.  I cut the ornament shape in white & brown, the large circle in blue and the ornament hanger in brown with the Sizzix Bigz Die - Ornament #2 die.  The flower in white and the small circle deep brown with the Sizzix Bigz Die - 657690 Flower Layers & Leaves die.
First, I put a blue sequin and a clear plastic snowflake bead in the centre of the brown circle.  I stitched it with white cotton thread.  I added a iridescent E-bead in the center. 
I used a warm blue thread on the white flower stitching from the center to the outer edge defining the petals.
I used the same warm blue thread with a back stitch to attach it to the white ornament shape as well as make a border around the blue circle shape.


I added the brown ornament hanger onto the white ornament stitching the lines between the parts of the hanger and attaching it to the white ornament at the same time.
I added detail to bottom end of the ornament again with the same warm blue thread.  
I then used a running stitch to attach the white and espresso ornaments together with white thread.  This ensures all the other stitching is not visible.


I selected a thin thread to add the year on the back with a back stitch.

You can see the running stitch on the back of the ornament.

I added a blue grosgrain ribbon in the hanger to allow it to be hung on the tree.

This is one of my few attempts at working with felt or fabric.  I`m much more comfortable with paper and glue but a felt ornament will be more resilient for years to come.


Monday, November 28, 2016

Card Club - November - Gift Trio

I started with the green glitter polka dot square of handmade paper.  These were left over from this Christmas card which was in the centre of the frame.

I designed the greeting layer with 3 gifts on the bottom and a large greeting on the top. I used digital bow image I designed a while ago. This layer was adhered to the front of a Christmas green card.

The red bow was cut with the Lil' Inkers Gift Bow Topper from red card stock.  This is then adhered to the green glitter square and trimmed as needed.

Now adhere the gift to the large square frame on the greeting layer.

Saturday, June 25, 2016

Wedding Gift Frame

I created this frame as a wedding gift.  I started with a 7" black matte metal frame of good quality.  I painted a gradient watercolor background with FW Acrylic Artist Ink in 437 Purple Lake.  I added some Dr. Ph. Martin's Irridescent Silver Calligraphy ink.  These were painted onto a piece of watercolor paper. While I was at it, I applied some of these inks to a piece of textured card stock as I anticipated hearts for this project.
Once dry, I laid out the words in coordinating colors & fonts and printed it onto the background.  It contains the bride & groom's names and the date of the wedding.  I punched a heart from the textured card stock with the Stampin Up Sweetheart punch.  I punched another heart from silver non shed glitter paper.  This was all designed to fit in the 3x3 inch square opening in the middle of the 7 inch white mat.   I mounted the purple heart with 3D foam tape and the glitter one behind it.  I placed credits on purple card stock and inserted it at the back of the frame.  The glass was cleaned on both sides, the pieces were layered and inserted into the frame.

Sunday, May 1, 2016

Christmas Card Challenge - May - Red / Sleigh

It's time for a Christmas card.  The challenge was red / sleigh.  I decided I did not want to go with the traditional Santa Sleigh. 

After doing an internet search I decided on a vintage Christmas card.  I downloaded a few and finally decided on this one.  It's a bit retro with a red sleigh filled with brightly wrapped gifts and a skinny tree in the back there.  The colors are red, true blue, silver grey and white.  I sized the image to the ratio I wanted and printed 4 per half sheet.  I layered it onto a true blue from the Nautical collection leaving a narrow border.  I then layered it onto a piece of red again leaving a narrow border. I printed the red greeting onto a grey card in the bottom right hand corner.  I added a silver satin ribbon on the left hand side and taped the ends to the inside of the card.  I adhered the sleigh accent to to the top left hand corner with 3D foam tape. 

Wednesday, March 16, 2016

Gift Card

Here's another card.  I created the gift rectangles of solid card stock in blue and white with accents of Designer Paper. The designer paper is from Michaels Recollection paper.  The green card stock is from a value pack, interesting how they coordinate.  I cut narrow strips of DSP paper to add to the gift as ribbon.  The Gift Bow Topper die is from Lil Inkers which I cut in white. I placed the vellum greeting between the bow and the gift and trimmed it to the card edge on the right. Being a gift it can be customized to many occasions and seasons by changing the designer paper.  Versatile design. Love those.  Might work well as a gift card holder.

Saturday, March 12, 2016

Greeting Card Gift Sets - Portfolio 2 more sets

This set of card features a cross stencil I created myself. I applied ink with a sponge in a diagonal direction in green. The purple butterfly stamped.  The doll is added to the a handmade paper card.  I added fiber for wings and thread for hair.  I printed trout graphic then colored it with chalk.  The gifts in the last one are my own design.  I printed them on the card stock then water colored them.


This set has one of my lily color prints onto card stock. It was mounted onto green card stock.  The Thinking of You features a small square piece of water color decorative paper.  The purple daisy is hand painted onto purple handmade paper.  The trio of birthday gifts are hand watercolored with a wide brush.


Thursday, March 10, 2016

Spring Gift

I made a bright spring card.  The stamp is Gift by Magenta Stamps (a Canadian Company).  I embossed it with bright pink powder and fussy cut around the image with scissors.  I layered it onto a piece of turquoise cardstock onto which I printed my own background design of stars.  I punched 2 holes near to middle of the bow and pulled through a length of grosgrain ribbon in yellow and tied a bow.  Trimmed the ribbon ends.  This layer was adhered to a yellow layer repeating the yellow color then onto a bright pink card.  It creates a wonderful spring card.

The stamp I have owned for 20 years or so and have not used in forever. The bright pink embossing powder I don't think I have ever used.
Never-Before-Used-Schtuff (Stamps, Dies, EFs, etc.)
The cards are going to the girls on my card exchange group list for March.


Submitting this to:
NBUS Challenge hosted by Darnell at DJKardKreations
CST Home Page Challenge - something from our stash we have not used in a while

Monday, September 28, 2015

Card Club - Incentive

I made Gift Card Holders for my incentive for Card Club. Each lady received 2 of these great items along with a thank you card from me. 

I used 12x12 double sided card stock.  Scored at 4.25" then just under 3.5" from the other end to ensure the the back was just a smidge smaller than the front so it can not be seen from the front.  I tied on this wonderful felt gift to the card front with coordinating ribbon. I added a quarter sheet insert and an envelope to hold the gift card, coupons or cash.  A clip keeps the card close but allows quick access.

You can check out the original design here.