Showing posts with label Always Artichoke. Show all posts

Thursday, September 11, 2025

Watercolor Card - Landscape

I whipped up some waterolor paper this morning.  I used 140lb cold press paper measuring 11x15 inches.  Fortunately, I unpacked my glass shelf and a couple of plastic craft work sheet and taped the paper down.

I decided to use some Stampin Up reinker in water based dye ink which works the same as watercolor but will match the card stock I have.  I chose Always Artichoke, Only Orange, Baroque Burgundy. 

I used regular salt on one sheet, coarse salt on another and cling wrap on other.

I trimmed the watercolor paper after I decided what my bottom layers were going to be. I chose deep green card stock, deep red card stock and More Mustard card stock.  Ripped the top edges and layered them front to back and then taped the back with clear tape. I trimmed the watercolor paper to fit just below the top edge of the accent. I adhered it to a More Mustard card base in the A7 size. I adhered the ripped paper accent to the bottom of the card. With the scrap of green I cut a Sizzix Pine Small which I inked the edges with Always Artichoke ink pad. I then glued it in place ont the right hand side. I punched a 1 inch circle from Summer Sun card stock and adhered it on the left hand side. I then used the watercolor I had used this morning and painted with like colors to help it blend in the sky. I added 3 birds with my black Micron marker.

I put it to press for several hours. I gave it a white insert and a warm yellow envelope. I will see her tomorrow! Yeah!

Tuesday, April 1, 2025

Cards - A7 - Bands and Ribbon

Another set of A7 cards.

I started this one with a pack of origami paper 3x3 inches with travel and writing theme.

I just selected a few and glued them down to the front of my ivory card base.

I chose a light green card stock strip to overlay on the front and embossed it with a Stampin Up Script folder.  I then used SU Tea Stain ink to highlight the writing.  I added a length of Always Artichoke seam binding which I touched with the same ink to help it fit in.  I knotted onto the strip. I adhered it to the card front with double sided tape. 

Added a white insert and an off white envelope from my stash of free ones from years ago.

This designer paper is leftover from a previous card making session.

I love the colors.  I chose a Lost Lagoon card base and adhered the designer paper cut to leave a small border.

I chose a piece of Cherry Cobbler card stock and embossed it with a Cuttlebug folder.  I knotted a length of Baja Breeze seam binding around it and trimmed the ends.

The strip was adhered to the card front in the landscape (wide) orientation.  This seems to have a bit of a Christmas vibe.

Added a white insert and off white envelope.


I started with a designer paper leftover.

I added a Stampin Up Island Indigo card base.  I trimmed the patterned paper to leave a small border and adhered it to the front.

I added a card stock strip in Pumpkin Pie and embossed it with the D'vine Swirl folder.  I rubbed the swirls with a More Mustard ink pad. 

I added a coordinating knot of satin ribbon and adhered the strip to the card front.

I finished the card with a white insert and an off white envelope.


Monday, February 24, 2025

Cards - Charity

Three more cards for IWin.

The designer paper is Stampin Up Painted Blooms. Nice watercolor design.

I chose SU Lucky Limeade A2 card base for this card.  I added a piece of DSP trimmed to leave a small border.

I adhered the glitter butterfly to 100lb card stock then cut the oval with the Creative Memories cutter.  I added a border of Thalo Blue watercolor pencil then brushed it with water brush.

I created a greeting accent with a Modern Label in blue and taped a Word Window greeting to it.  

I adhered the oval accent to the card front then added the greeting with 3D foam tape.

This card base is SU Summer Sun in the A2 size.

A layer of floral designer paper adhered to the card front.

I adhered the silver glitter butterfly sticker to a piece of vellum trimmed to leave a large border.

I added a Not Quite Navy card stock strip along the top attached with 3 silver brads. 

I added the round greeting in the top right hand corner with 3D foam tape.


On this card the A2 card base is Always Artichoke.

Trimmed another piece of designer paper to leave a small border.

I adhered the butterfly sticker to a piece of Regal Rose card stock then trimmed it with the CM oval cutter.

I added an Always Artichoke mini brad to the head of the butterfly.

The greeting is a combination of a Modern Label Punchie and a Wordl Window greeting.


Wednesday, February 19, 2025

Cards - Charity

I set out this morning to make cards for IWin which is a charity which helps vulnerable women.  When they finish their program they get a card in their backpack to remind them that someone is thinking of them.

Each card needs a Thinking of you greeting and a butterfly.

I found a bag of wooden butterflies at the thrift shop the other day and brought them home.

I have been at a disadvantage to making cards for this project because of my home situation.  Back home and feeling like crafting again.  Not all is unpacked but I move forward.

I chose this designer paper with flowers printed in green. I trimmed it to leave a small border and adhered it to the front of a A2 card in SU Summer Sun.

I punched a Stampin Up Artisan punchie in Always Artichoke and adhered the butterfly with a Zot. I placed the short length of SU chevron ribbon under it and followed the pattern to trim it.  I added the greeting in the bottom right hand with a shadow of a green oval punchie.

For this yellow card base I trimmed a piece of floral designer paper to leave a small border. Wrapped the red ribbon along the bottom edge and taped the ends to the back.  It was adhered to the card front with DS tape. 

I added the yellow SU Decorative Label punchie, topped with the SU Small Oval greeting then topped with the wood butterfly accent held in place with a Zot.

Love the bright colors in this card.


Carrying on with the green floral designer paper I added it to an SU Always Artichoke card base.

I added a card stock strip on the left hand side and adhered with double sided tape.

I made the wood butterfly and the SU Small Oval greeting punchie touch and attached with a Zot and tape.


This card features a water colored piece of the green floral designer paper.  It was not very thick so I had to be really careful with the amount of water. I adhered it to the card front.

I combined the wood butterfly and the greeting in the bottom right hand corner.  

A Zot for the butterfly and DS tape for the SU Small Oval greeting punchie.


Saturday, August 3, 2024

Flooring Project - Thank You cards

I made a few Thank You cards for those who helped in this big flooring project. 

This was for the sister and her husband who came to the city to help me remove the carpet from the living room and dining room and expose the cement floor on a very hot and sweaty day.

I chose Stampin Up Rich Razzleberry card base in A2 size. I dipped into my commercially made handmade paper and cut a piece of this wax resist in teals, rich purples with swishes of gold.

I left the beautiful deckle edge on the bottom and taped it to the card front.

I stitched 3 small gold beads in the top right hand corner.

A white insert and envelope.


This card has an Old Olive card base.

I chose an origami paper front layer which was taped on.

I added a gold star sequin in the left hand corner.  To balance I added 2 square brads in the bottom right hand corner with a green one in the middle.

This paper has beautiful gold details.

This card is for the folks from whom I bought the flooring which answered all my questions during the process.


I chose a SU Kraft A2 card base for this card.

The front of the this card is a piece of botanical pressed wax paper.  A nice little flower and a piece of green leaf.  It needed to be mechanically adhered as it resisted taping.  

I wrapped a length of gold thread around the top a few times and then knotted it.  I then place the gold mini brad over the knot and pressed it through the card front. I added a gold bulb pin in the bottom right hand corner which went through the wax paper and card stock front.

A white half sheet insert to hide the metal pieces which have gone through the card stock.

A white envelope to finish it off.

This is for the flooring company which recommended the underlay which saved the project.

This card is for my niece who dropped everything on the Monday morning to pick up the 2 large rolls of underlay and deliver them to my brother in law who was going to install the floor.  Saved me a round trip to the south.

The card base is SU Always Artichoke.  I found this piece of lacy handmade paper in the stash.  Lightly glued to a piece of white card stock.  Trimmed to fit across the card front and taped in place.

I added a coordinating button with gold thread held in place with a Zot. White insert and envelope.
Started with a piece of Not Quite Navy card stock.  

Layered a piece of marbled paper in blue tones with copper accents on the card front.  I added a copper star sequin held in place with a Zot.  Then I added a coordinating bead held in place with a star copper tiny brad.

White insert and envelope. 

This is for my brother in law who installed the floor and my sister who hosted me at her house.  We did a few fun things while he was working at my place. There was a bottle of scotch delivered with the card.


I am loving the lacy curtains casting a wonderful shadow on the vinyl floor!

Thursday, June 27, 2024

Cards - Christmas - Red and Green Holly

I took time to make a few more Christmas cards before the craft room gets packed up to replace the flooring.

This paper is from the Season of Cheer collection.

I chose a Cherry Cobbler A2 card base and wrapped a length of Always Artichoke wide grosgrain ribbon across the paper widthwise.  Taped the ends to the back.

Adhered the DSP to the card front in the portrait orientation then mounted an oval greeting punchie over the ribbon with 3D foam tape.

A seasonal quarter sheet insert and white envelope.

My photo taking space was already put away so I had to improvise hence the lacy curtain.  Plants are usually on this space but they were temporarily displaced.

This is a DSP Split card with the same Cherry Cobbler card base.  I cut the DSP layer at 3.5 inches and flipped the bottom piece and taped them back together. I placed a red band of card stock over the join and taped it to the card front.

I added a scallop circle and color printed greeting over the ribbon with 3D foam tape.

A season sentiment on a quarter sheet insert and a white envelope.


The green color in this collection is Mossy Meadow but since I don't have card stock in that color I substituted Always Artichoke which worked well.

I wrapped the dark green grosgrain ribbon across the designer paper and taped the ends to the back.  It was then adhered to the card front with double sided tape.

I created a poinsettia accent using the 5 Petal Punch with Real Red card stock, a non shed gold glitter punchie, a red sequin all held with a gold tiny brad.

It was adhered to the card front with 3D foam tape.  Seasonal quarter sheet insert and an envelope.  Pressing over night and they are done!

Tuesday, June 25, 2024

Cards - Christmas - Snowflake

I need to make more Christmas cards.

I browse my designer paper and chose this 1 sheet from the Season of Cheer DSP set by Stampin Up. I believe this is mistletoe.

The color in this set is Mossy Meadow but I had Always Artichoke instead, also Soft Sky as card bases in the A2 size. 

 I added a length of Mellow Moss seam binding topped with Cool Caribbean narrow rick rack with all ends taped the the back of the designer paper. It was then adhered to the card front.

For the snowflake I punched a MS Snowflake and a Stampin Up one and layered them. I added a large white sequin in the center all held in place with a tiny blue brad.  This was adhered to the card front with a medium Zot.

I added 3 white sequins adhered with Bling Zots. A seasonal insert with a white envelope completes it.

The next card is a DSP Split where I cut the one piece at 3.5 inches and flipped the small piece over and tape them back together.  I taped it to the front of a Soft Sky card base.

I then punched a border with the Stampin Up Dotted Scallop Ribbon border punch in the same Soft Sky card stock.  It was adhered over the join in the DSP.

I found a large oval greeting with a color to match and adhered it over the border punch with 3D tape.


For this card I adhered the designer paper cut to 4.00 x 5.25 inches to the front of an Always Artichoke card base.

I added a strip of light blue across the card and trimmed the ends.

I added a snowflake accent make with the Martha Stewart large snowflake punch in 2 colors - white and blue.  All held with a tiny silver star brad with a silver sequin.

I added a greeting with a Word Window greeting in a similar blue color and mounted to a Modern Label punch in a similar green color.


This card is the opposite coloring to number 2.

Always Artichoke card base with a DSP Split piece of designer paper from the Season of Cheer set.

I used a border punchie in green this time to match with the card base.

I again chose a large oval greeting held in place with 3D foam tape.

A seasonal sentiment on a white insert and a white envelope.


A mirror copy of number 3 card with the alternate combination of colors.

This is Soft Sky card base with the same snowflake accent.

The greeting again is the same with the colors swapped.

A seasonal insert and white envelope.

Press overnight to ensure the tape sticks well

Great to have a few more cards in the box.


Wednesday, February 14, 2024

Card - Velvet Daisy Paper

I quick card for a belated birthday.

I used an Always Artichoke card base in A2.

I added a piece of velvet daisy paper cut to leave a small border.

I punched a daisy accent from green card stock and then gold foil card stock.  A small daisy vellum flower in the center all held in place with a green mini brad.

I added a white insert and envelope.

It's off in the mail today!


Tuesday, September 12, 2023

Card - Watercolor - Yellow Cosmos

I painted this yellow cosmos for my niece's birthday card.   

I found an image on line just to give me an idea about their foliage.  I did a bit of a pencil drawing to start.

I used my Stampin Up Watercolor Wonder Crayons. I did a light wash of blue with Tempting Turquoise and a light wash on the bottom half with Old Olive. Once I had my first light color on the flower and the stem then I erased about 50% to leave just a very light line.

I used Daffodil Delight for my first light layer on the flower and Pear Pizzaz on the stem. I then added definition on the cosmos with More Mustard and Always Artichoke on the stem.

I added some very light stems on the bottom just so the flower was more grounded. 

I mounted the watercolor with double sided tape to a 5x7 card of Hello Honey.  I was a little short on the bottom so I added a length of  Washi Tape in More Mustard.  It rips very easily so I need to use this up so that its gone!

Friday, June 16, 2023

Card - Watercolor - Echinacea

I watercolored another flower for a birthday card.

I wanted to find another flower so I searched for an image.  This is an Echinacea or Cone Flower.  After making a light pencil tracing I used my Stampin Up Watercolor Wonder Crayons.  

I wet the paper very well then dabbed a bit of Night of Navy and Not Quite Navy at the top of the paper and Always Artichoke and Old Olive on the bottom half.

I used Rich Razzleberry in several different intensities from light to more intense at the bottom of the petals. The petals have 3 to five layers on them. The centers are Daffodil Delight and More Mustard with a brown created.  Then, I used Always Artichoke and some Old Olive on the stems. I used an ultra fine Micron 005 black permanent marker to outline the flowers and stems.

Once it was dry, I adhered it to a A2 Rich Razzleberry card base with the fold at the top. I added a narrow strip of Always Artichoke card stock across the stems on the bottom. I then added a circle greeting with pink words and brushed the edges with the Always Artichoke ink pad.  It was placed just off center. I used a wet brush and clear water to soften the color.   I added a quarter sheet insert. 

Card - Watercolor Pansies

This is a card for my sister.  She celebrates her birthday soon and I wanted it in the mail so it arrives on time.

I found a coloring book page on line to help me with the line drawing of these flowers.

I used Stampin Up Wonder Watercolor Crayons so it would match with the card stock I selected.

The colors are Night of Navy, Elegant Eggplant, Daffodil Delight, More Mustard, and Always Artichoke. Once painted and dry I outlined the image with a fine Micron permanent black marker.  It pressed overnight under several heavy books.

The back petals are a mix of Navy and Eggplant, the center ones are EE and the front one is Daffodil with darker marks with More Mustard. Put a pale background with Night of Navy on the top and Always Artichoke on the bottom.

I chose to trim the watercolor piece to 3.75 x 5 inches. I taped a couple of lengths of grosgrain ribbon in the AA and EE to the back of the watercolor. Brought them forward and held in place with double sided tape and trimmed the ends on an angle. This was adhered to an Eggplant layer leave a small border.  Then that was adhered to the Always Artichoke A2 card base.

Thursday, June 1, 2023

Card - Trees

This card is for my brother who celebrates a birthday soon.

I chose an Always Artichoke card base. 

The designer paper is from the Adventure Bound set in the 4x6 pack. I trimmed it a little to fit on the A2 card.

I made a slot in the fold with the SU slot punch and pulled a length of wide white grosgrain ribbon through and taped one end and placed a black brad on the other end.

I created a greeting with a Always Artichoke Modern Label punchie layered with a Word Window punchie.  It is adhered to the card front with 3D foam tape on the grosgrain ribbon.

I added a quarter sheet insert.

It is off to make sure it gets to him on time.

Monday, April 24, 2023

Card - Retirement and Moving


I made a card for my friend who is moving away to be close to her daughter. She has had health challenges in the last few years.  Her husband has now retired and they are looking forward to a new life in this new chapter.  

I found a landscape graphic on line and a drew this composition from it.  I wanted to have a road into the distance with a prairie landscape as they move one province to the east.  They will be close to grandchildren and family. 

I drafted the composition with pencil and I used my Stampin Up Watercolor Wonder Crayons.  I started with a light wash of light blue all over the piece of paper. I then painted the horizon line of trees. I laid a light layer of Always Artichoke. Of course, I needed it to have a yellow field which can be wheat, canola, barley, etc. I created a brown color for the road and painted it.  I had to be patient and used my heat gun to dry the layers before I moved to add dark elements to the sky, trees, road and yellow field. I love the pink flowers along the edge of the field.  Here in Alberta they would be roses but they don't bloom when the fields are yellow but it's my picture so I put them in.  It needed to have a gorgeous sun and a blue sky. 

Once I had my painting I scored a sheet of Baja Breeze card stock into a half sheet card.  I trimmed the edges to make sure it fit into my envelope.  It needed an anchor so I chose a length of Taken with Teal velvet ribbon and a wrapped on the inside of the card and brought the ends to the card front and taped them down.  I adhered the painting with 3D foam tape to allow space for the ribbon.  I pressed the card under heavy books for a few hours.  I added a white half sheet insert onto which I wished them both a happy new chapter in their lives.

Tuesday, November 1, 2022

Christmas Card Challenge - Watercolor - Doves

I created watercolor backgrounds with the intention of using these dove brads for this set of cards. The watercolor has a bit of salt technique.

The doves come in right and left facing styles. I used a Sakura GellyRoll Stardust - Clear Star gel marker for the olive branch.

The circle behind the dove is a 13/8 inch circle punchie.

The greeting is a color printed double flag end banner I designed.

This card is Stampin Up Elegant Eggplant which is a deep rich purple color.  This card is in the landscape orientation.

On this card I used Stampin Up Primose Petal for the card base as I did not have any Rose Red card stock.

The circle is Rose Red.

The greeting is also Rose Red and I chose Peace on Earth in various fonts.

You can see the Sakura Gelly Roll Stardust - Clear Star gel marker on the image on the right. 

It just adds mostly sparkle with little colors so it works well in many situations.


These watercolor backgrounds were created with the Stampin Up Watercolor Wonder Crayons which makes it easy to match to the card stock.  

This card had lots of salt action on the color.

The card base, the circle punchie and greeting are all Marina Mist on the left and Always Artichoke on the right.

Sunday, September 11, 2022

Fall Leaves Birthday Card

Another watercolor card.  This lady is a warm colors lovers so I decided on fall leaves for the image on the card.

I found several fall leaves line drawings on line then created an image which I drew in pencil.

I then used my Stampin Up Watercolor Wonder Crayons to produce some colors for these leaves. Bravo Burgundy, More Mustard, Cajun Craze, Always Artichoke featured in the colors.

I placed a wash of color from the reds to greens to yellows on the 140lb watercolor paper.

The leaves are red with a mixture of some of the other colors.

I mixed some Payne's Gray and some left over color to do the lines in the leaves and tracing the outline of the leaves.

Once the watercolor was dry, I chose a Soft Suede card base in A7 size (5x7) and adhered it to the card front with 3D foam tape.

The greeting is SU Artisan Label punchie color printed and backed with a More Mustard punchie cut in half and glued offset on the back.  It was then adhered to the card front with 3D foam tape.

Friday, July 1, 2022

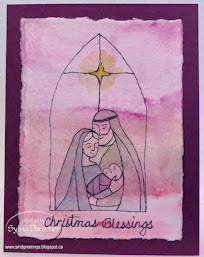
Christmas Card Challenge - Watercolor - July - Holy Family

I chose the Holy Family for my July Christmas cards.

I selected certain elements from the Gentle Peace digital stamp set.  The set is stained glass but I just used the arch background, the star and the family. 

I first trimmed the 140lb watercolor paper to 3.5 wide and just applied watercolor from the Stampin Up Watercolor Wonder Crayons.

I let that dry overnight so that it would remain flat.  I trimmed the long strip into pieces 4.75 inches tall.

I placed the watercolor paper over the black printed image and traced the pieces I wanted.  Let the black ink dry then watercolored the pieces I wanted.  Mary, Joseph and baby Jesus with the star. The background changed some of the colors but that is okay.

I traced the greeting as well which I printed in black.  Card one is Not Quite Navy card base, card two is Baked Brown Sugar base, card three is Always Artichoke and card four is Rich Razzleberry. I mixed and matched greens for Joseph`s garment, blues for Mary`s and purple for royal Jesus.


I adhered the watercolor accent to the card front with double sided tape and pressed them under a stack of books over night.

I added a quarter sheet insert with a seasonal appropriate sentiment and a white A2 envelope.

 
I  have lost count of the number but I am happy with my progres

Friday, June 17, 2022

Watercolor Cards - All Occasion

I needed a  few cards for upcoming birthdays so I decided to follow the trend of my Christmas cards and make them with watercolor.

I searched the internet for simple floral images - bouquets so that I could see how the stems interacted, etc.

I trimmed my 140lb water color paper to 3.5 x 3.5 inch squares.  Loosely following the compositions I found on line I drew flowers with a pencil.  Once I was happy with it I traced the pencil lines with black permanent marker again making adjustments if needed.

Once the ink was allowed to dry a bit I erased the pencil lines and was left with the black lines.  I used my Stampin Up Watercolor Wonder Crayons to match my card bases.

I chose flowers which were non specific so I could paint them any color, rather than recognizing the flower and saying that must be pink or whatever.  I also added some spatter of each color to tone down the white of the paper.

For the first card the flowers are a pale version of Rich Razzleberry and Garden Green for the leaves on a Pixie Pink card base.

Card number 2 is Elegant Eggplant card base with Old Olive for the stems.

Card number 3 is Marina Mist card base with Always Artichoke leaves and foliage.

I chose Mellow Moss grosgrain ribbon wrapped around the front of the card with the ends taped under the watercolor accent.

The floral watercolor is adhered to the card front with 3D foam tape. 

I decided to go with no greeting so I can use it for any occasion. 

Quarter sheet insert on the inside with A2 white envelope and 3 more cards ready to give.  One for my aunt, one for my sister and one for Mom.  I still have a couple of sisters who have birthdays this summer.  Another session to follow soon.

Sunday, May 8, 2022

Mom's Day Card

I painted a blue daisy flower for my Mom's mother's day card.

Her favorite color is blue.

I used a piece of 140lb rough water color paper measuring approximately 4.25 x 5.5 inches.  I sketched it lightly with a pencil and then painted it with my Stampin Up Wonder Watercolor  Crayons.  Using Marina Mist as the main color with some Night of Navy and some Not Quite Navy.   The leaf colors were Always Artichoke and More Mustard.  The center is More Mustard.

Once completely dry I traced around the flower and leaves with a black permanent marker. 

I mounted the flower onto a half sheet card of Marina Mist card stock.   I added white and medium blue seam binding below the flower by punching a slit in the fold then wrapping them around the card front and knotting in the front.

A white insert was added to the inside.


Friday, April 1, 2022

Christmas Card Challenge - Watercolor - Dot Wreath

I chose to use my Stampin Up Watercolor Wonder Crayons for this month's Christmas Cards as that is the card stock that has not been packed.

I used Arches Watercolor Cold Press Paper.

I started with a light pencil circle mark.  I sprayed my crayons. I mixed Always Artichoke and Garden Green for the green dots, Cherry Cobbler and Real Red for the red ones and Not Quite Navy and Night of Navy for the blue ones.  I applied the dots with the end of a cotton swab which I wet then dabbed into the colors. 

I drew a bow towards the bottom of the wreath with a Micron black permanent marker then filled it in with a bit of the red paint.

The greeting was traced with the black marker using the window as a light box.  I just printed several greetings on a quarter sheet of white paper.


I added a few stars with the black marker to balance out the shape.

The piece was then spattered with colors used in the card front but somewhat diluted.

I chose a Not Quite Navy card base.  I adhered the wreath watercolor to the card with double sided tape, added a quarter sheet insert and pressed them to ensure all the pieces stick together.

I am taking advantage of some down time now to get ahead  with this project so when the move comes I don't have to worry as these will be scheduled to arrive on time.

Monday, July 26, 2021

Sympathy Cards

I made a few sympathy cards to include in a set of cards for my Mom's birthday.

I chose Whisper White layer trimmed to leave a small border. I stamped the Berry Branch from the Simply Sketched stamp set with black permanent ink so I could watercolor the images.

The greeting is from the same set. 

I chose Old Olive and a bit of Always Artichoke for the leaves and Marina Mist for the berries.  My sister shared from her stash of Stampin Up Watercolor Wonder Crayons a set of the bright colors.  Thanks so much. 

I adhered the layer to the front of an Old Olive card base.  

Spattered a bit of green watercolor by flicking my brush just to soften the wide open white space.

For this card I switched up the orientation to landscape and used 2 stamps from the Simply Sketched set. The Poppy and the sentiment.

I used Real Red and some Regal Rose for the poppy.

Again, a bit of spattering with a flick of my brush.  Trimmed to 4.00 x 5.25 inches to leave a small border.

The card base is Pink Pirouette.

These have had white inserts with appropriate sentiments added to the inside of the card.


The Perched Bird from the Simply Sketched set with the sympathy sentiment.

I chose to make a brown with red and green and added a breast of More Mustard.  The reeds are Always Artichoke.  I added some water below with Marina Mist.

This was cut to 2.75 x 4.25 inches.  I layered it onto a piece of brown card stock and then onto a textured card base in Ballet Blue.

Again, a bit of spattering with my brush.

I am adding these to a variety of others cards to make a set of 10 cards.  Mom who is in her eighties still makes cards but it's nice to a stash ready when she is not up to making a card.

I am looking forward to seeing her.