Showing posts with label reuse. Show all posts

Sunday, March 16, 2025

Cards - Watercolor Abstract

I wanted to add some cards to my stash so I chose to reuse the bright watercolors I created in this post.

I cut the watercolor art into pieces.  In this card 4x5.25 inches.  I then used a Micron fine black marker and outlined the shapes in the watercolor.

I followed the idea of neurographic art and rounded the intersections of the black lines.  I added a border all the way around. Added circles to some of the white dots.

I used a black marker to darken the edge of the watercolor paper.

Mounted on Stampin Up Island Indigo card stock with a quarter sheet insert on the inside paired with a white envelopee.

For this card I cut the watercolor art to 3.5 inches square.

Again, added black marker lines around the shapes in the watercolor.  Soften the intersections and circled some of the dots in the art.

Added a black border all the way around.

I mounted it leaving even edges around 2 side onto a SU Gumball Green A2 card base.

Added a white insert and envelope.


This one had a good variety of colors so there was a good choice of colors for card base.

In this card, I chose SU Pacific Point in the A2 size.  These I did mount all in the portrait orientation but they could be landscape (wide) as well.

I love the bright spot of pink in this piece of watercolor. 

Again, black marker to outline the shapes in the watercolor with a border all the way around.

A white quarter sheet insert and envelope.


The card base on this card is an A2 in the SU Kiwi Kiss color.

The watercolor was cut to 3.5 inches square.

Mounted to the card front with double sided tape.  I added white quarter sheet insert and an envelope.

Pressed under books over night and is now sitting in the box.

These were fun to do and allowed my art to shine again.


Saturday, September 21, 2024

Sylvia's Simple Shots

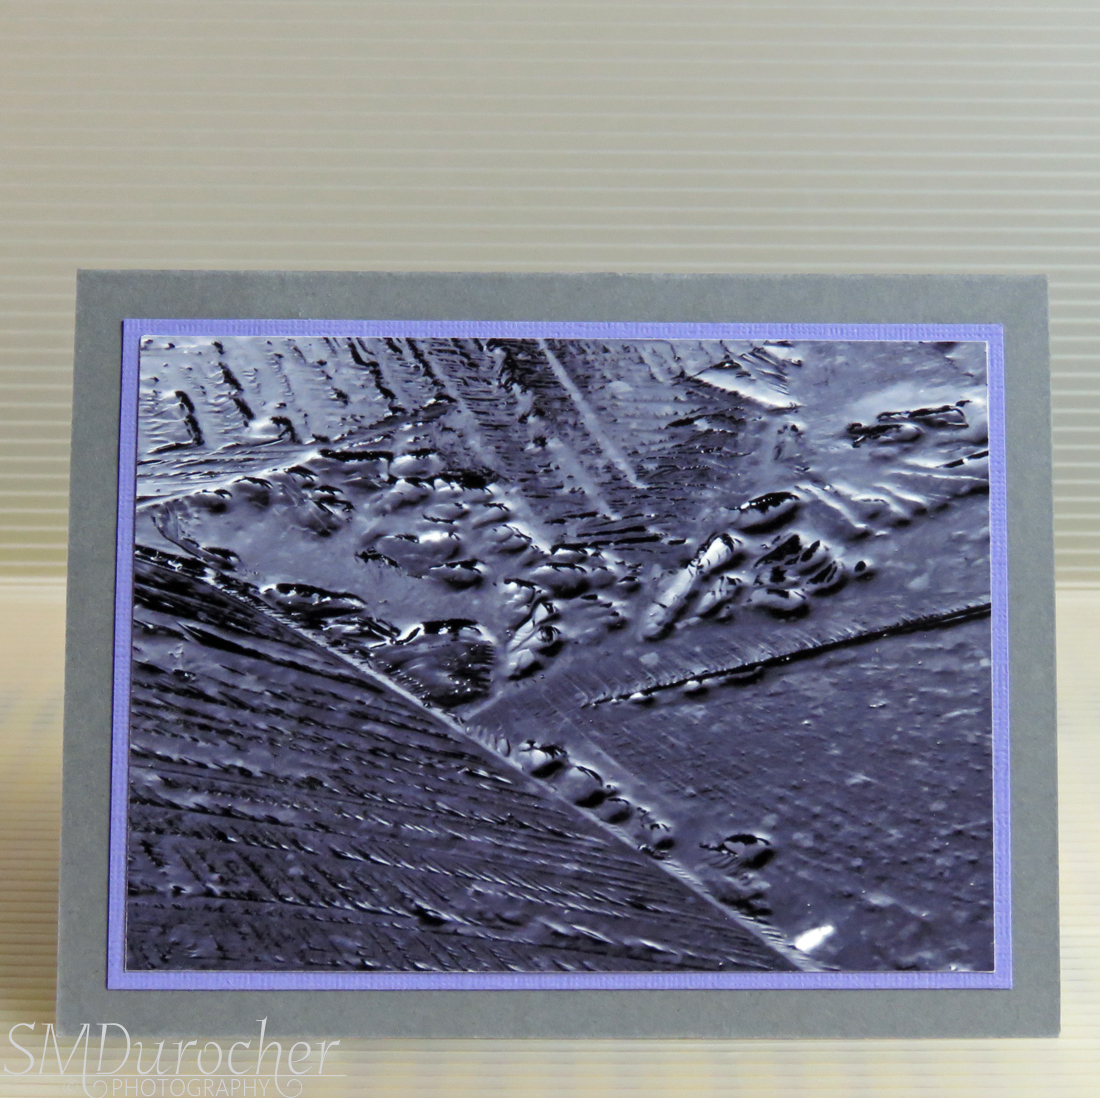
 I took this at the St. Albert Botanic Park.  I just adjusted the contrast on this shot but I think it looks painterly.

The dahlias were in fine form with many, many blooms to photograph.


I took a visit to the Little Blue Fiber Studio that I learned about from my niece who heard about it from my sister.

I understand my sister took a needle felting class at the studio some time back.

It has yarn, roving, classes, knitting needles, felting needles, Sashiko thread, and books as well.

I did restrain myself and walked away with no purchase but I will return for roving when I solidify my idea for a future project.

My neice brought the matching chair for the yellow one I've had for quite a while.

I am happy to have a conversation corner in my living room with comfortable chairs.

A bit of light to read by if I choose and a table to hold my cup tea.

Thanks for bring the chair!


I have enjoyed African Violets all summer long.

Being in the east window has agreed with this plant.  I should get another one - just thought of that.

It also gets a grow light for a few hours in the morning.


This is the fountain pen I found at the ReUse Center last week.  It is by Creeks n Creeks and has "Les feminnins de Creeks" written on it's side. 

My research on line seems to indicate it is a  a small French school fountain pen from the late 1980s and early 1990s.

It averages about $50 on line so I am very happy with this find. It is a cartridge pen so I will have to check out where to find those.

I checked on line and found out it takes an international standard fountain pen ink cartridge.

Staples only sells these on line so I could order through the store have some brought in.  I checked with Delta Arts - they had no stock and have been working to get some in from Shaeffer but not been successful yet.  I will check back. 38mm or about 1.5 inches long.

I discovered that I could refill the empty cartridge so that is what I did.  I cleaned the cartridge and the nib thoroughly.  I had a bottle of ink I bought last year for my dip pens so I used that.  The syringe is leftover from dental surgery.  It all worked very well.

Love it!

I needed to put my metallic watercolors into a water proof container.  I found this chocolate box in my stash so I repurposed it.  I discovered that they live in full watercolor pans which is great.

They fit nicely in this box.  The domed lid makes it a bit bulky but for the time being it will do.

I used some large glue dots in the bottom of the box to keep the pans in place.

I have documented the colors here since I will recycle the cardboard box.

I don't think I will ever concern myself with the actual color names.


Seven Blessings by Ruchama King

Story of romantic relationships in the Jewish culture.  Follows several couples and their matchmakers.

Beth is the central character who is 39 years old and really wants to marry but is not finding a mate.

She is recommended several men and dating taking place but there are problems.

I confess that I don't know much about the Jewish culture.  I found the culture was very complicated and there are many rules.

Not a great read.  In the end there is still no marriage. Disappointing.


Friday, September 20, 2024

Slow Stitching - Zokin

I needed to do some slow stitching so I dug some cloth from the stash and started.

This is 100% cotton dishtowel well used with holes.  I ripped it down and folded in half.  I added a few felt patches over the holes. This little heart is one.

I stitched with some thread from ORTS tin which give me a bunch of different colors.  I stitched in both directions.


A long sashiko needle came in handy with project.

It measures 2.5 inches and I could put a lot of stitches at one time and just pull that thread through.

Added this cleaning cloth in the bin in the laundry closet.  Ready to clean up messes and then washed and used again.

Another piece of cloth to be useful again.


Sunday, July 14, 2024

Slow Stitching - 2 more Zokin

With everything mostly packed in preparation for the installation of the flooring I have no access to my fabric stash.

So I dug into my rag bin again and decided to stitch more Zochin - Japanese Cleaning Cloths.   

Generally, I have a hard time throwing away cloths, especially if they are cotton.

Here I just stitched together a pink face cloth which must have some polyester as the center is very thin and a green dishcloth.  They were the same size and the edges were serged so I just went along in both directions.  I used some green and some pink thread.

A cute cleaning cloth.

This is a corner of a cotton tea towel.  I paired it with a brown terry towel.

I used brown thread and stitch the 3 unfinished sides first and turned it good side out.  Then I stitched all the way around starting with the finished edges at the bottom.

I was careful to not  detract from the owl stitching as I went across the cloth.

Another for the cleaning cloth bin. 

Yes, those are my cement floors which I am now waiting for permission to cover. Yeah!


Saturday, June 29, 2024

Sewing Project - Linen Napkins

I've decided to use cloth napkins instead of paper. I had bought flannel a few days ago for this.  

When I pulled the stuff out to make them I went What?  I am hoarding linen so why am I not using that. 

I pulled out the linen I dyed last year June 22,2023 with my sister.  It was meant to be a table runner but there is plenty.  I just ripped off a strip and started.  The gold is fabric I made a gift for my niece last year.

I made 6 napkins - three navy and three gold.

I made them small.  I started with a 13.75 inch square turned over a .5 inch hem.  I created mitered corners.  I followed this video.

I finally got the idea and the last few went really well.  


Here's the pile of paper napkins I am sending off to the ReUse Center.

I just had to rip the bandaid off because I thought - maybe I should save a few for photographing tablescapes and just said NO!

I have just way too much stuff and it has to go.

I do have a bit of a stash of cloth napkins which I am sure will accommodate any shots I will be taking in the future.

Friday, May 31, 2024

Photo Cards - Abstract

I created these 2 cards with a print I produced for a art show earlier this year which just did not work.

It was a 4x10 photo print of ice broken in a puddle in the spring.

I decided to trim it to a size I could place on cards.  I then layered it with a piece of Lovely Lilac card stock.

Then this was adhered to a black A2 card base.

A white quarter sheet insert and white envelope finished the card.

It is pressing under books overnight.


This is the other half of the print.

I used the same light purple card stock layer.

I mounted this one on a Basic Grey A2 card base.

A white quarter sheet insert and white envelope finished the card.

Glad to have another 2 cards into the card box.


Tuesday, April 23, 2024

Art Show - AAC - Redux Show 2024 - Slow Stitch Scroll

The Form Redux Show at the Spruce Grove Gallery opens today.  I have submitted 2 pieces to this show.  I started my pieces after discussions with a couple of people at the December reception for the Christmas Store. At the time it was being referred to as the 3D show.  When the official call came out in mid March it had morphed a little and offered a wider range of options. 

It is meant to reuse materials from one state into a new one.  

The fabric used for the scroll is a white tie dyed cotton sheet which I dyed again with green acrylic ink. All the elements are created with bits of leftover scraps of fabric, felt, thrifted embroidery thread and lace, even the flower on the tie is recycled from old earrings. The beads come from my stash.  The spool was originally purchased with decorative ribbon and saved for 10 years until its time came to shine. 

Title: Summer

Size: 4.00 T x 58.00 W inches

Medium: Slow Stitch Fabric Scroll with embellishments

Support: Wooden Spool


It is a slow stitch fabric scroll titled "Summer".  I chose to stitch the new green leaves of May in early summer to the rain and tulips blooming moving along to the insects coming to life represented by the ladybug, the robin represents the birds and their song then we move to the ponds being full of life represented by the dragonfly in the cattails, then we move to the flowers which start to bloom in the beautiful days of middle summer, there are mushrooms and snails and butterflies, the chickadee has been here and will stay all year as summer winds down and finally we have the beautiful sunflowers of late September. 

The elements are all original designs I made up as I went along.  The stitching alone took all of January 2024 then I had to back the piece, prepared the wood spool with several coats of Tung Oil. I braided the string used for the tie and the hanger on the spool.  I chose a large shell button for the closure and a silver flower for the end of the tie.  There is a clear bead at the bottom of the spool which keeps the hanger in place. 

It is on display at the gallery and is for sale.  The reception is Saturday April 27th at 1-3pm.

Monday, March 13, 2023

UnPaper Towels - Improved

Here's the second set of UnPaper Towels I've made.  

It was great to use the serger to finish the edges very professionally. 

I paired the 100% cotton grey flannel with this winter pattern which also included some grey along with teal and cranberry.

I included 10 towels in the set - 5 of each fabric.

They measure 10x10 inches square.

There are many ways to store and use these.


They can be rolled onto the roll from your paper towels.  They cling to each other nicely and would roll off just like the paper towels used to.

Whether you have a paper towel holder that sits on the counter or one that hangs under the cupboard this roll should work the same as before.

Once used, they can be handled just the way wet towels would.  A container under the sink until they head to the laundry should be just fine.


I thought I would try recycling a tissue paper box to hold them and I think that works quite well.  This box was too shallow to hold all of them but there are deeper ones.

If they were folded in such a way that one would pull the next one out  that would be cool but maybe more hassle than its worth.

A basket, a box, a bag would all be options.

This set is 100% cotton fabric and in bright primary colors.

I paired a deep turquoise color and red.  Beautifully soft.

Again, 10 in the set with 5 in each color.  

I have tied the set with a large twill tape and added a tag to explain what they are and how to use them.


These rolls will be donated to the fundraiser to be held later this year.

Saturday, January 21, 2023

Sylvia's Simple Shots

My niece came up this week so we can take a trip to visit Mom in hospital.

My main nativity set is a White Matte Bisque Porcelain one by Avon.  I have a large stable to house them but of course all that is packed. She is always on the look out for additional pieces so she brought this 2nd Wiseman to me and the Angel Gabriel.  

Unfortunately, the did not come with their boxes so I will have to design a storage solution.  

I am still missing another wiseman, animals of every kind, and shepherds.

My sister called over the holidays as she had found some pieces but she thought they were Mary and Joseph so we let those go.

Another gift from my niece.  She bought a couple of these a long while ago when I was anticipating moving into a new place.  That did not happen and since I have gotten rid of the sofa (which I miss a lot!) she brought one of the chairs up.

Beautiful mid century lounge chair in a great yellow color.  It is vinyl upholstery in superb condition.  Dark wood frame in excellent shape. Comfortable.

It offers me a change from my glider chair so I am grateful she had room to bring it with her.


I finished this book - Katheryn's Secret by Linda Hall.  The story is set in Maine about a family cottage willed by Katheryn to her niece Sharon. 

Sharon is a writer facing a book deadline and taking time to visit Maine and the cottage is more important. Right?  She takes a couple of weeks with her teenage daughter tagging along. Her husband will join them a bit later.

Her aunt Katheryn Sullivan had not married and lived in this cottage with her sisters for many years.  She was eccentric, a dreamer, romantic and a storyteller.   Sharon finds a mysterious disappearance of a child and through the search for her resting place uncovers deep secrets. 

She finds folks who knew and did not tell but fortunately she was able to uncover the family history and bring closure to the events. 

I made a visit to the local ReUse Center as well.  I am working another version of essential oil diffusers/tree scent ornaments which features sewing thread spools. 

I was hoping to use wooden ones but only found a few.  Of course, the plastic ones are everywhere.  I will have to see whether I can achieve a look I am happy with using the plastic ones.

There were bits of velvet which should work wonderfully. Some colorful yarn and some wool skeins.

I will post when I have made a version I am happy with.


Another book completed - Iris and Ruby by Rosie Thomas.  This is my second book by this author and it was wonderful story based in Cairo Egypt this time.  The other was the Kashmir Shawl.

Her granddaughter Ruby from England appears on Iris's doorstep unannounced. She has run away and needs a place to stay. Can she?

Her quiet household with the houseman Mamdooh and Auntie the house keeper is disrupted by this young person and the friends she is making in the area. 

The novel moves between the years Iris was a young woman living in Cairo during the Second World War and her now at 82 years of age still living in Cairo but starting to lose her memories.  Ruby wants to help her grandmother preserve her beloved history so they start to set time aside to reminisce and capture the past.

It is a wonderful story which reunites 3 generations of women and helps Iris, Lesley her estranged daughter and Ruby the willful granddaughter see each other's point of view and life history.

Friday, September 20, 2019

Upcycled Card - HB - Vellum and Glitter

A friend had a card she wanted to upcycle into a new card.

I had to trim the card and the vellum overlay. 

I chose a warm green card in half sheet size to coordinate with the green lettering on the front.

Since the card was glittery double sided tape did nothing to keep the vellum aligned that that they had been separated.  I used tiny gold brads in all four corners to hold everything in place.

I added the sentiment on the inside printed in color.

It is a wonderful sentiment and it is great when we have such friends.


Monday, July 15, 2019

Recent Photos

This is a flax flower at the community garden.  

Love the gorgeous color and delicate various shades.

This is a name tag provided at a family event this weekend.  The person in charge wanted to make a tag that would not end up in the garbage. 

A piece of white fabric sewn to bright fabric.  I cut pieces of lycra fabric in super colors strung through the holes. 

The names were written with permanent markers.  This one just fit on my wrist and made it totally visible.


This is the seed head of the Yellow Salsify plant. 

It looks like a giant dandelion.

The seed head measures about 4.5 - 5 inches across.  They are gorgeous and wonderful when intact.

I saw the flowers in the river valley a couple of weeks so I know to keep an eye out for the seed heads.   They showed up a bit battered with all the rain we are getting.  I say flowers out again so I will have to wait a bit for new seed heads.
This is one seed from the seed head of the Yellow Salsify plant.

The seed was set against a white background and lit with a warm light.  I wanted to capture the ring of light around the center of the seed.

This is an alternative image for the Flickr Macro Monday challenge - Patterns in Nature


You can check my Flickr Photostream for my recent photos.

Saturday, September 2, 2017

Simple Sentiments Gift Box - Retro

I made a set of Simple Sentiment cards which feature images from my Retro Calendar.

These designs were created with a filter in photo editing software.

I have a wide selection of images from flowers, plants, tea related images, nature and insects.

Some have no greeting and some have Thanks as the sentiment.


Several designs have duplicates in the set.


Monday, January 23, 2017

Card Club - January - Copper Flowers

The decorative paper features copper outlined flowers.  I trimmed it to about 3" wide and 5 inches tall. 

I chose a taupe layer of card stock based on the colors in the feature wood grain flower.  It is trimmed to 4.00 x 5.25 inches and I embossed the right hand edge with a flower border folder by Cuttlebug from the With Love set. 

The decorative layer was adhered to the embossed layer then this was glued to the white card.  I then punched 2 holes at the top of the decorative layer and inserted a length of copper metallic ribbon to make a inny outy bow. 

Innie Outie Bow: Push the ends of the ribbon through the holes from the front to the inside of the card.  Then put the ends back to the front through the opposite hole. Cut the ends with flag ends. 

This copper ribbon has been a challenge to use but this decorative paper was a perfect match. 

Monday, January 16, 2017

Glitter Card Mosaic Bird

The Christmas cards I receive each year a few include some with glitter.  Gorgeous cards that sparkle and glitter.  When it's time to take them down what to do with them? For this card the bird was cut from the glitter card mosaic. The wing was cut with the Cricut and the Create a Critter cartridge then I embossed it with the Cuttlebug D'vine Swirl folder.  I added a definition to the beak with a marker and used a white brad for the eye.  I punched the branch with the Stampin Up Build Up Bird punch from white card stock.  I chose a piece of aqua polka dot designer paper and adhered it to the black card front.  I adhered the mosaic bird to the card front then adhered the wing and the branch.  I added a greeting with a black SU Modern Label punchie and a Word Window greeting. These are adhered together then mounted to the card front with 3D foam tape.  Sending these to my card exchange buddies.

Glitter Card Mosaic Technique

I spent some time with my sister Therese on the weekend and she came up with the idea of a glitter card mosaic.  Check her cards out.
1. Collect the cards.
2. Cut the card fronts into squares.  We chose .75" which is the width of the spacer on the paper cutter.
3. Layout the squares on a contrasting card stock until you have something appealing.
4. Glue the square down and press overnight is best.
5. We cut several holes with die cut machine to assess the placement on our mosaic.
6. I traced the shape of this post it bird on the back of the card stock.
7. Create a project with the cut out.  I made a card.


Sharing this post with Mosaic Monday #23 hosted by Maggie at Normandy Life.

Thursday, October 20, 2016

Card Fronts Relayered #3

This is another church card.  The frame with the clear centre is one from Photo Elements.  I placed the music sheet with O Little Town of Bethlehem behind it and created a graphic I could use in my layout software.
I added the greeting in red at the top of the card front and a script font.  The leaves for the red flower were added too.
The card front was color printed.
The red silk flower was added to the bottom right hand corner with a gold sequin and a gold tiny brad.
This card front was trimmed and layered onto a red new card base.


This is a card I designed from an advent class several years ago.

I trimmed the card front and layered it onto a new navy blue card base which matched the navy scallop oval in the centre of the card.


Another church card.
I designed the large greeting with fonts.
I added the faded green oval background and printed it on white card stock.
The flower is made of 2 confetti daisies held in place with a white tiny brad.

This card front was trimmed and layered onto a new red card base.  A new insert was added and it's ready to give again.


Not all the cards donated come to me in good shape. Sometimes the card back has been punched with holes because the recipient put it on their bulletin board, so the front is salvaged and re-layered.  Sometime only the card front arrives, again it likely can be re-layered.  Sometimes the card front was not assembled very well, the elements may not be glued on straight, maybe there is glue residue where it should not be, or some other aspect that makes the card front not able to be re-used.  It happens.  I give a second life to as many as I can.

As I reviews cards and kits I have made years ago I am amazed at how many I have done.  Christmas is my favorite time of year and I don't need a big excuse to participate in it at any level.  Cards have been a natural go to for me for a long time. Sending paper cards is in decline.  I'm working on digital Christmas cards.  I made some last year and have to design new ones for this year.