Showing posts with label pearl. Show all posts

Thursday, October 31, 2024

Self Closing Cards - Dots & Christmas

Another set of self closing cards before everything gets packed away.

This is a pretty dots one made from wall paper actually. They are macaron snacks.

There was coordinating paper so the piece of pink is wall paper too.

All adhered to a olive green card base cut 6 inches x 12 inches. Scored at 5.5 and then just less than 1" for the flap.

Double sided tape on the flap and a generous insert.


This is a Christmas Card for which I borrowed the Tim Holtz Winter Wonder die from my niece. 
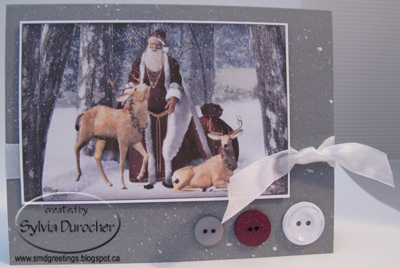
I used this wonderful sparkly decorative paper as a background and cut a snowbank and punched a star from a piece of warm pearl paper.

I added the snowflake which is part of the die and place it on his belly. 

All adhered to the teal card base of 6x12 inches with a score at 5.5 inches and just less than 1" for the flap.

Double sided tape on the flap with a generous insert.


More of the sparkly paper on royal blue card base which measures 6 x 12 inches.  It is scored at 5.5 and just less than 1" for the flap.

I cut a Sizzix Snowflake #2 from silver foil card stock and layered a MS Snowflake punch on top.  It was cut from Pale Plum card stock as well as the SU Modern Lake punchie under the greeting.

There is a silver sequin in the middle and this element is adhered to the card with 3D foam tape.

Double sided tape on the flap with a generous insert.

More sparkly paper with the Sizzix Snowman and Hat die. The snowman was embossed with the coordinating folder.

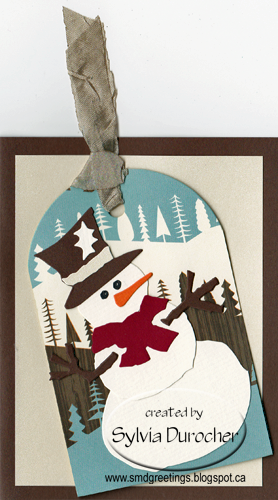
I cut the hat from black card stock and added some sparkle with a gel pen.

The color on the snowman was done with Sharpies to be sure it did not rub off.

Another pearl snowbank which the same card stock as the snowman.

The card base is navy linen texture cut 6x12 inches. Scored at 5.5 and then just less than 1" for the flap.

Double sided tape on the flap with a generous insert.


Friday, September 13, 2024

Cards - Christmas - Self Closing

 I am carrying on making Christmas cards.  Again, these are the self closing kind which require no envelope and use up some of the 12x12 card stock I have in my stash.

For this card I used a warm green for the card base.  Cut 6 inches high and left 12 inches wide.  I then scored it at 5.5 inches then just short of 1" on the other edge for the flap.

I used the Tim Holtz Tattered Poinsettia die with heavy red card stock.  I used scrap green card stock to cut 3 leaves. 

I adhered a strip of the same red as the flower along the right hand side. Then a piece of gold gift wrap paper on the left hand side with a ripped edge overlapping the red strip. 

A white insert and some double sided tape with carrier on the flap and it's ready to go.  

I used a teal card stock for the base of this card. 

The decorative paper is from Stampin Up. I trimmed a bit off the bottom and top to have the pattern evenly placed on the card.

I spattered a strip of red with pearl metallic watercolor from my recent purchase. it was adhered on the right hand side.

I cut a star with the Sizzix Primitive #2 die and embossed it with it's folder.

I wrapped a length of red cotton ribbon over the DSP, taped the ends to the back, and adhered it to the left hand side.

The embossed star is adhered with 3D foam tape.  A white insert on the right with double sided tape with carrier on the flap.

This is the second piece of warm green card stock.

I added a piece of gold gift wrap on the left hand side an then added a strip of Soft Sky card stock with ripped edge to the right hand side.

I punched a branch with a border punch by Martha Stewart.  It was adhered with QuickDry glue carefully placed along the stem and leaves.

I cut an ornament with the largest of the 2011 Nestabilities Ornaments from a winter botanical DSP. I cut the hanger from warm green scrap and adhered with QuickDry glue. I punched a snowflake in the center from the same light blue card stock and held it in place with a tiny gold star brad. After punching a hole in the top of the hanger I added a length of Baja Breeze seam binding to it.  The ornament is adhered with several pieces of 3D foam tape.  A white insert and a bit of double sided tape with carrier on the flap and it is ready to go.

Friday, December 2, 2022

Small Gifts - Oil Diffusers/Fresheners - Felt Balls Version 2 Batch Two

I received an email from the gallery that it was time to restock these little oil diffusers/fresheners so I put together another batch today.  I dug out beads, felt balls, buttons, wood clothespins and some cotton thread and got started.

I will deliver these tomorrow and see what other members have brought. Maybe do a bit of shopping.  When I was there last Friday I was the first one so there was no browsing then. 

Monday, November 21, 2016

Christmas Card - DSP Split - BoBunny

This card features the designer paper by BoBunny called Rejoice Collection.

I chose a snowflake and strip to create a DSP split.  The stripe was cut to 3.5x4.00 inches and the snowflake at 1.75x4.00. These were taped together and handled as one piece. 
I placed the chocolate & vanilla grosgrain ribbon across the split and taped the ends to the back.  This layer was then adhered to the front of a Christmas green card.
I cut the snowflake with one of the Marianne Design Creatables - Snowflakes Style 1 dies.  I cut it from cream pearl card stock.  
It was placed over the ribbon and a push pin was used to make the hole for the chocolate brad which holds a red round sequin and the snowflake.


Monday, March 28, 2016

Mosaic Monday - New Stuff

I've been refining things in my home.  You will recall from the Tea Cupboard DIY post I wanted to hang my mugs. I was able to find cup hooks large enough to accommodate my cup handles.  So quick as a bunny, I evenly inserted them into the bottom of the upper cupboard.  You can see in the photo on the right I needed a spacer so that the tip of the hook would not punch through the shelf on the inside.  A look through my bead collection produced these small copper spacer beads. Worked like a charm. Thanks for the advise on the weekend from my sisters.  Now the teapot fits in the corner. Yeah!!
The next photo is a container for hair gel in my bathroom.  I have used a Tupperware pump container for years. Recently my hair gel seems to be getting thicker in the container so upon investigation I discovered that it had developed a crack in the lid therefore air was getting in and my hair gel liquid was evaporating.  As the pump has been discontinued I needed a solution in quick order. This ivory pearl clam shaped bottle is likely a temporary measure but fits into the neutral scheme in the bathroom. 
I have decided to change the color scheme on the couch so I have moved from pink to yellow and green. The green needs a zipper inserted so that I can wash the cover when I want.

I'm sharing on Mosaic Monday hosted by Judith at Lavender Cottage.

Monday, September 28, 2015

Get Well - Pine Branches

I made this card for a guy that was under the weather last week. I hope he is feeling better this week.
Green card with dark green strips of card stock punched with the Fiskars Upper Crest border punch.  I glued the strip of pine branch designer paper in the center of the card, then the dark green strips on top and bottom overlapping the designer paper.  I added an embossed metallic star with a SU Modern Label Punch with a Word Window sentiment on the right.

Tuesday, August 11, 2015

Sympathy - Butterflies

I made this card for the mother of a former co-worker Kim who succumbed to cancer recently at a much too young age.

I started with a kraft card and stamped it with SU Itty Bitty Background in Starfruit.  I cut my 12x12 Karen Foster Lime Twist scrapbook paper into nine 4 inch squares.  I ripped the square into uneven pieces ensuring that I did not have a white ripped edge.  I adhered them to the right and left edges of the wide card.  I cut a butterfly with one of the Sizzix Winged Beauties dies which I adhered over the gap between the SCP pieces.  I then added an oval color printed greeting which I ran the same ink pad around the edge to create a bit of contrast.  I mounted the greeting with 3D foam tape.


I made some cards for her because this is a time when folks are helping and pitching in and it's always nice to respond with a token of appreciation but shopping is not the priority.  I made these tall with the basic same layout as the sympathy card.  With no greeting, they can be used as needed.  I selected 2 colors from the scrapbook paper in the deep red orange and the deep blue green. The butterflies were cut from textured pearl card stock.

Wednesday, July 1, 2015

Christmas Card Challenge - July - St. Nick Spatter Buttons

It's time for the Christmas Card Challenge again.  This month it is Santa/St. Nick / Spattering / Buttons.  Santa could be die cut, stamped, color printed. Spattering could be paint, ink or some other color medium.  Buttons could be chipboard, real, die cut. All kinds of options. Be inspired!


I chose a St. Nick I found on-line which has a rich colored tunic, a snowy grey background and majestic stags.  I color printed it in the size I needed.  I trimmed it leaving a white border.  I dug through my button collection to see what I had that matched either the tunic or the stags.  I chose a grey card which matched well with the background in the picture. I spattered white pearl acrylic paint on the front of the card with a spatter tool then sent them aside to dry.  Once dry, I wrapped a piece of white seam binding around the card front and knotted it on the right hand side.  I repeated the colors in buttons - white, burgundy and grey.  These are held in place with Zots.
Submitted to the following challenges:
Sparkles Christmas Card Challenges - Anything Goes 

Friday, May 1, 2015

Christmas Card Challenge - May - Snowman - Paper Piecing - Tag

Here's my card for the Christmas Card Challenge for May which is Snowman, Paper Piecing and Tag.  

I chose the Tim Holtz Assembly Snowman Bigz die which made the paper piecing very easy.  I selected the background designer paper first.  It's American Crafts - Campy Trails.  I got a real winter feel from this paper so thought it went well with the snowman.  As a background to the tag I placed a piece of cream pearl card stock, cut to leave a large border all the way around. I decided to use the Jumbo Crescent Tag from Sizzix and cut it from the designer paper.  The paper has a warm white in it so I chose a warm white card stock to cut my snowman. The band on the hat is the same cream pearl card stock. Brown for his arms, a deep red for his scarf and orange for his carrot nose. I drew the eyes in with a black marker. I was tempted to put something on his belly but resisted.   I used quick dry glue from Scotch to assemble the pieces of my snowman.  I glued him to the large tag.  I added a soft seam binding in a complimentary color.  The tag was adhered to the card front with 3D foam tape.

Have you started your Christmas Card stash?  Today may be a good day.  I hope this card provides some inspiration for you to start or continue.  Leave me a comment if you have started!

Tuesday, April 14, 2015

Card - Deer in Neutrals

I took a sheet from a Spanish dictionary and applied Tim Holtz Distress Stain in Antique Linen and Gathered Twigs.  I dried it with the heat tool and then used TH Distress Stain in Walnut Stain with a brush to paint the landscape and the trees.  I ripped all the edges.  I stamped the greeting in the top right hand corner with Versafine Vintage Sepia with a clear stamp. I chose a Bazzill Pinecone card stock for the card. This layer was adhered to the card front with glue stick which helped to smooth out the wrinkled paper. I punched a 1" circle from Champagne pearl card stock for the moon and adhered it with 3D foam tape.  The chipboard deer is left over from this card project. I applied a bit of bronze shimmer on them with a dry brush but it does not show up in the photo.

I'm submitting this card to the following challenges.
52 Christmas Card Throw Down - Coffee and Cream
Hazels Christmas Card Challenge - Anything Goes

Sunday, March 22, 2015

Card - Christmas Dove

I started with a dove cut with the Cricut and the Folk Art Cartridge.  I cut the shadow in pearl paper and the filigree top layer from blue patterned paper. It was cut at 3.25 inches. I adhered the blue layer onto the pearl layer.  I found a coordinating blue card and some Recollections snowflake paper which was cut to leave a small border and adhered to the card front.  I added some white seam binding tied across the card front in the bottom third.  I added a small 1 inch circle greeting tied to the knot in the seam binding.  I mounted the dove layer to the card front with 3D foam tape.

I'm submitting this card to the following challenges:
Come and Get It Card Challenges - Winging It

Fantabulous Cricut Challenges - Bye Bye Birdie

Sparkles Christmas Card Challenges - Anything Goes

Thursday, March 12, 2015

Card - Shower Baby or Bridal

These were made from pieces cut trying out options for my umbrella card club at the end of the month.
The umbrella was cut with the Cricut and the Tie the Knot cartridge.  I cut the solid piece from metallic card stock then cut the open cut work one from grey card stock. I added a pearl white thread bow on the handle just below the canopy. The greeting layer was color printed in grey with a fine border. The layer was trimmed close to the border.  I added a layer of the same metallic paper to the 4.00 x 5.25" size then layered these onto a top fold grey card.
I'm thinking either would for baby or bridal.  What do you think?  Leave me a comment.

Sunday, February 1, 2015

Christmas Card Challenge - Feb - Star Layers Ribbon

The Christmas Card Challenge for February ( is it really here already?) is Star Layers Ribbon.  Are you going to join me?  Leave me a comment with a link to your card.

Here's my card for the challenge.  I started with the designer paper.  I wanted something with a small enough design to be okay with the size of the star.  I chose Celebrate Family Flowers - Confetti - Kaleidoscope Collection by My Mind's Eye. I chose the Sizzix 3 Stars die.  I then found a warm dark blue card stock to match the DSP.  I had decided that I would chose solid card stock, DSP and silver metallic, cut them all three of them at once and then just swap the stars into 3 groups. I need a light background for my dark stars so I selected a silver pearl card stock which I embossed with the Sizzix Stars and Swirls folder.  I trimmed it to leave a small border.  I added a red cotton ribbon bow that was just cinched in the middle with a piece of matching thread.  This creates less bulk for mailing.  I adhered a piece of the same thread to the back of the pearl layer in the top center before I stuck the layer to the card front.  I brought it down the card front and taped it down, which will be covered by the star.  I layered the 3 stars and pierced the centre with push pin and inserted the tiny red star brad.  I mounted the stars to the card front with 3D foam tape.   I decided to leave out any type of greeting. Repeating the star in the background worked well.

Sunday, March 9, 2014

Challenge - Favorite Cricut Image - Polar Bear

I chose the polar bear from the Cricut Joy of the Season cartridge as my favorite image and Christmas is my favorite holiday.
I cut it from white and then cut a blue scarf.  I added a nose, eye and ear with a black marker.  I cut a snowbank with my Creative Memories wavy cutter.  I punched a pearl white star.  I cut a piece of sparkly decorative paper for my night sky and adhered that to a black card.  I then added the snowbank first, then the bear then the star in the upper right hand corner.  Love the decorative paper.
Entering this card in the challenge at Bitten by the Bug2 - favorite cartridge or image. and Fantabulous Cricut Challenge - Pick a Holiday. and Crafty Hazels Christmas Challenge - Anything Goes

Monday, February 3, 2014

Challenge - Non Traditional Valentines

I made this card for a non traditional Valentine challenge.  I chose a deep brown card.  I embossed a ivory piece of card stock with the Sizzix Christmas Words & Dots Set by Hero Arts.  I selected a shiny thread which I wrapped around the ivory piece and tied into the button.  I cut the hearts with the Sizzix Tipsy Hearts die - one in brown like the card and one in pearl white.  The brown is embossed with Cuttlebug Script folder and the pearl with the Sizzix Tropical Paisley folder.  The background was adhered to the card then I mounted the hearts with 3D foam tape.  I adhered the button with a Zot.

Monday, January 6, 2014

Gift Card Holder - Black & White Hearts

This is a wedding gift card holder.  I started with a piece of 5.5" x 12" piece of card stock.  I scored it at 3.5", 6", then 8.5" from each end.  I placed the 2.5" mountain fold in the center which fills the middle of the card.  This fold is glued together at the edges on the 3 open sides.  This will hold the gift card so put adhesive only along the outer edges. I then used the Stampin Up! word window punch to create a slit along the fold.  It takes almost 2 lengths of the punch to make the slit wide enough for a gift card which is usually 3.5" wide.  I used the SU! Tab punch to create the part circle dip below the slit.  This will allow the recipient to easily pull out the gift card.  I placed 2 pieces of white bond measuring 5.25"x 2.87" on the front flap and back flap which give the giver a place to write their sentiments to the one receiving the gift.  I used the SU! Slot punch to create the holes in the centre edge where the ribbon holding the holder closed is slipped through and knotted.  A knot is better than a bow because I find most people will avoid a bow every time. The finished size is 5.5" tall by 3.5" wide and fits in a standard A2 envelope.

For the front: I cut a piece of black and white DP which says Congratulations over and over.  I punched 2 hearts, one from pearl white and one from silver.  I embossed the white a bit.  I added piece of white 1/8" satin ribbon across the width of the designer paper then adhered it to the card front.  I adhered the hearts to the card with 3D foam tape. I added an embossed SU! Modern label punchie in the pearl white also raised with 3D foam tape. I cut 3 lengths of satin ribbon - silver, white and black with silver edges, pulled them through both slots and knotted them.

Saturday, December 14, 2013

Calendar - Word Of God

I created this calendar for friends.  I printed 12 popular scripture verses in color on vellum.  Trimmed them down to fit into the 4x6 openings and used vellum adhesive to stick them to the pages. I then added photo corners which I cut with the Cricut and the Picturesque cartridge from metallic and pearl card stock. 

Wednesday, September 11, 2013

Calendar - Damask Gift Calendar for Christmas Giving

I up-cycled this Damask calendar with all you need to quickly finish the calendar.  I added decorative photo corners cut with the Cricut and the Picturesque Cartridge.  I've cut them from metallic and pearl card stock.  I've combined
the silver and gold,
the white and blue and
the copper and black.
I then added enough mounting squares to adhere the photos and the corners.  Ready to go!  Just add your pictures.  The kids, the trip, the celebration, the anniversary, the wedding pictures or anything else you can think of or what to remember!  See my calendar page for further details.

Sunday, August 11, 2013

Challenge - Red and Gold

I made the card for the Challenge at 52 Christmas Card Throwdown which is Red and Gold. We are allowed a neutral. 
I selected a red card which I cut 4.25x11 and created the fold at the top.  I added a layer of gold foil paper with Merry Christmas all over it.  I cut a Cuttlebug ornament from the same red paper.  I added a Prima gold flower and a pearl daisy confetti flower to the centre and held it all in place with a mini gold brad. I placed 3D foam tape behind the hanger and the center of the ornament and adhered it to the card front. I placed a piece of gold thread through the ornament hanger and then pulled the ends through a hole I made in the card with a push pin.  I strategically placed the hole to fall under the bough.  I cut the bough from pearl card stock with the Impression Obsession die of a branch/bough (DEI021-N).  This die requires the metal plate adapter plate to get a clean cut.  I glued it down with quick dry adhesive from a bottle with a very fine tip.

Saturday, June 22, 2013

Christmas Stack Class - Candle

I put black, blue, green and burgundy cards in this set.  The cream script background with a flocked bow came from a set of note cards I bought a while back.  To create the candle I embossed some pearl card stock. The embossing folders I used are the Cuttlebug D'vine Swirl and Season's Greetings.  I backed the rectangle with a piece of card stock which matched the card color leaving a tiny border.  To get the candle behind the bow I made a slit just along the top edge with an e-xacto knife.  Then I slipped the end of the candle through the slit. Now, I know where the flame needs to go. The outside frame is adhered first then the yellow center is glued in the middle of the frame  The flame is created with a QuicKutz die. I washed some of the same pearl card stock with yellow liquid acrylic paint.  Now I positioned the candle to overlap the wick.  I adhered the candle in place and taped the end through the slit to the back of the background.