Showing posts with label tiny brad. Show all posts

Friday, April 18, 2025

Cards - Donation - Teachers Appreciation

I made a few cards for my niece who is working on a project for Teacher's Appreciation Day which is May 7th this year.

I dipped into my decorative paper stash and found a few pieces I could work with.

Top card is black A2 card base with a wide strip of gold card stock adhered to the card front. I then glued a black/gold decorative paper and then 2 diamond gold punchies.

Next, is black and grey marbled paper which I mounted on a Stampin Up Smoky Slate card base in the wide orientation. 

I afixed a narrow strip of the same card stock along the bottom edge of the decorative paper.

I then added 5 black round sequins onto the grey strip held in place with Bling Zots.


This card is a black card base onto which I mounted a piece of handmade decorative paper from India with silver leaf motifs.

I added a black strip of card stock along the top and then a SU Decorative Label punchie topped with a silver daisy punchie, sequin and black brad.

These were all given a white quarter sheet insert and envelope.

Wednesday, June 26, 2024

Cards - Christmas - Night of Navy Snowflake

This designer paper is from the Season of Cheer collection by Stampin Up.

I cut the DSP to leave a small border. I strung these silver circles on navy crochet thread and tape the ends to the back. Then it was adhered to the card front with DS tape.

The ornaments were cut with the Gleaming Ornaments punch from silver paper and adhered behind the circles.

It makes them looks like light bulbs.

A seasonal insert and white envelope.

I was not fussy about the reverse print on this sheet of DSP so I chose the snowflake side for all these cards.

This A2 card base is Baja Breeze but it could have been Soft Sky as well.  I cut it to leave s small border all the way around.

I added an oval color printed greeting to the bottom left hand side to keep the warm blue corner visible.  It was mounted with 3 D tape.

A seasonal quarter sheet insert and white envelope completes it.


This is a similar colored layer as the previous one but on Night of Navy card base this time.


I added a Martha Stewart snowflake punchie made from 110lb card stock


I added a large blue sequin in the center. A tiny brad holds these to the DSP then that layer was adhered with DS tape to the blue card.


A seasonal quarter sheet insert and white envelope and these are done.


Glad to have a few more in the box.

Sunday, February 11, 2024

Cards - TH Cameo Frame

I brought a piece of pretty floral tissue paper home from the ReUse Center recently.  I decided to make a few cards with it. 

I chose the Tim Holtz Cameo Frame die for one of the layers.

I cut the die from a lef tover piece of ivory card stock which was less wide than the die but I just went with it.  I aligned down the center and ran it through the Big Shot.

I wrapped the gift wrap around the center of the diecut and taped the ends to the back.  I added burgundy ribbon at the top and bottom on the die again taping ends to the back. 

I punched a MS Butterfly in the same color as the card base which is a textured turquoise. I held it in place with a tiny gold brad. It was feeling like it needed a bit more so I added the deep red flowers in the top and bottom arches. These along with a gold flower sequin are held in place with tiny gold brads. 

This layer was then adhered to the card front with double sided tape.  A white quarter sheet insert and a white A2 envelope finish of the set.

This card follows the same basic layout.  I cut the Cameo Frame from pink designer paper. 

Then cut the floral tissue paper to just lay inside the embossed line on the die cut.

I punched a butterfly from gold foil card stock and held it in place with a warm pink tiny brad. 

I added small gold lower sequins in the arches at the top and bottom with the same tiny brads.

This layer was then adhered to the card front in a warm pink card stock.

Insert and envelope to complete the set.


On this card is started with a warm green A2 card base. 

I cut the frame from warm mottled designer paper.

Again, cut the tissue paper to fit inside the emboss line on the die cut.  The tissue paper had tears and tape in places so I had to be careful how I cut the paper.  The tissue has strategically place pieces of double side tape.

I added a turqoise butterfly punchie in the bottom corner and a handmade paper flower in the upper right hand corner held in place with tiny gold brads.

I put turquoise caps in the arches with my Crop-a-Dile tool.

Layer adhered to the card front with double sided tape and an insert and envelope to finish up the set.

It's nice to have a design element with a good variety of colors that allows me to create several cards which are not exactly the same.

Here I chose Stampin Up Pixie Pink card base.

I paired it with a blue watercolor frame die cut. 

A gold foil butterfly in the top left hand corner held in place with gold tiny brad.

Small flower punchies to match the card base and again tiny gold brads to keep them place.

Layer adhered to card front with double sided tape.

I stuck to the portrait orientation unintentionally.  With this tissue paper I could have easily altered the orientation.

Quarter sheet insert and white envelope.

As I change the die cut color the colors in the tissue paper change and some are highlighted.

Here is chose a warm turquoise card stock for the frame die cut.  

Then I went with a deep burgundy color for the A2 card base.

I added a strip of the same card stock along the left hand side.

I chose a burgundy silk flower with a gold flower sequin and placed it to leave the flowers in the paper visible.   This is layered with a gold flower sequin and held in place with a gold mini brad.

A white quarter sheet insert and a white envelope and another set of cards for the stash is done.


Thursday, February 8, 2024

Cards - Half Circles

I continue to make cards for friends and family.

The half circle card is a very versatile layout which I have used many times.

I chose some blue watercolor designer paper and cut the 12x12 in 4 pieces.  I cut 6" circles with my Creative Memories circle cutter.  Then those were cut in half on the paper cutter. This paper had a grid on the back that made this very easy.

I chose a grey textured A2 card base.  I adhered the half circle along the left hand side.  I added a royal blue card stock strip along the fold with double sided tape.  

I adhered a Martha Stewart Butterfly punchie in the same blue as the strip with Bling Zots.

Using a silver gel pen I added stitching marks along the circle edge, a fly path for the butterfly, and then dots on the the blue strip.

All cards get a white quarter sheet insert and white envelope.

With a sky blue A2 card stock base and dug in my designer paper stash leftovers and picked this one with paisleys and a good variety of colors.

I only had a smaller piece but by placing the circle guide along the edge half way across I was able to cut a half circle.

It was adhered with double sided tape along the left edge.  I added a dark brown grosgrain ribbon along the fold and knotted it towards the top of the card.

I created a flower accent with a large white silk flower, an aqua handmade paper flower then a small yellow one.  These are held together with a large brown brad.  Once the prongs were pushed apart I added a large Zot to adhere it to the card front.

Excellent.

I chose a leftover piece of the velvet paper with debossed flowers on it.  This feels more like fabric than paper so I decided to cut my half circle with scissors.  I traced the shape with my cutter template with a pencil then  followed the line to cut.  I them adhered it to the card front and trimmed the top and bottom edges.

I decided to pair it with a celery colored grosgrain ribbon.  I punched a hole in the fold of the card with my Stampin Up Slot punch.  I strung my ribbon through it and around the card front tying the knot on the front. 

I chose 2 gold punchies for my Stampin Up Five Petal flower.  I added a couple of silk flower bits in green and red.  

The gold flower sequin was added with a copper star tiny brad.  This accent is then adhered to the card front with a large Zot.

Again, with the other card base in the sky blue color.  

The designer paper half circle was adhered to the left hand side.  

I added a sky blue grosgrain ribbon along the left hand side. 

The flower accent was assembled with 3 different flowers - white silk, yellow silk and aqua handmade paper.  A white flower sequin and a light blue tiny brad.  Once assembled it was adhered to the card front with a large Zot.

I usually vary my card orientations but I was not paying attention and they are all portrait this session.

I chose royal blue textured cardstock for the card base for this card.

I added the blue watercolor designer paper half circle to the left hand side.

With the leftover from the 12x12 piece of dark blue card stock I cut a 1/2 inch strip and glue it to the left hand side along the fold.

I punched a large daisy flower from the blue card stock, added a blue silk flower and a white flower sequin all held together with a white star tiny brad.

Another set of cards for the box so I will have a wide varieyt of cards available when I put together a set of a friend.


Wednesday, November 8, 2023

Christmas Cards - Joyeux Noel - Purple

I made some French cards for my aunts and uncles who are still with us.  Joyeux Noel means Merry Christmas.

I started with the purple paste paper my sister and I made many years ago.  It has been paper that I though too special to use just willy nilly and so it has not been used.  I have to get out of the scarcity mentality and use stuff I think beautiful knowing that more will come when it needs to.

I cut the paste paper to 3.5 inches wide and about 4.75 inches tall.  The die is a thinlit by Memory Box.  I used my magnetic spacer to keep the die in place while cutting.  I cut the paste paper then pulled it off the paper. This requires gentleness because those letters up top are very delicate. I did mark the die with an up this way arrow this time because I did lay it upside down and of course had the greeting the wrong way.

I chose Stampin Up Lavender Lace for the card bases for these cards.  I added a layer of Whisper White cut to leave a small border all the way around. I used double sided tape on the bottom and side and Scotch Quick Dry Adhesive around the noel letters. The bottle has a very fine tip so it was easy to put just where I wanted it.  

Once that was adhered to the white layer, I added my accent pieces. The tree is by Hampton Art and cut from Elegant Eggplant. I added decorations with my white opaque marker. I added silver star and sequin on the top of the J. The snowflake is a large Martha Stewart punch. I adhered to the layer with a dusty purple mini brad and a silver sequin and a tiny sequin on the J. 


Sunday, January 1, 2023

Card Exchange - Jan - Silver Snowflakes

Some snow flake cards for January exchange.

I started with Not Quite Navy card base.

I added a blue snowflake designer paper which coordinated well but I purchased from Michaels years ago.  Cut it down to 4.00 x 5.25 inches.

I pulled out some old Satin Stitched Ribbon in the color Midnight Muse which was an in color at the time.  Works well with the warm dark blue. Wrapped around the designer paper and taped the ends to the back.

I created the accent with a silver fabric snowflake from the dollar store, then a white plastic snowflake sequin held together with a warm navy star tiny brad. Pushed through the DSP.  

The whole layer was adhered to the card front with double sided tape.

The card is in the tall or portrait orientation and the next is in the wide or landscape orientation.

This card is identical to the first one except the orientation is changed.

I added a quarter sheet white insert to the inside and a white A2 card.

These will be out to my partners very soon.


Sunday, May 1, 2022

Exchange Card - May

These cards are for my card exchange partners. 

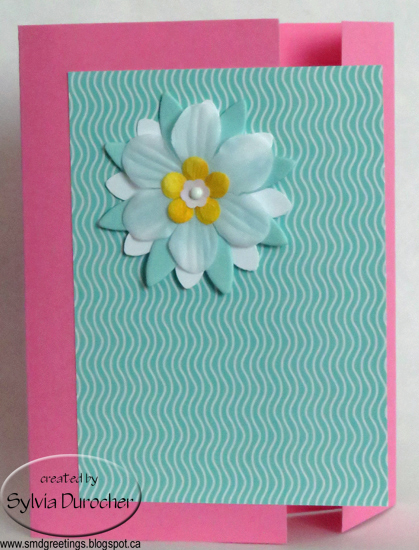
I started with the aqua handmade paper flowers then chose the Stampin Up Fresh Prints designer paper then the pink card base.  

This card has a Stampin Up Pretty in Pink card base with a designer paper layer featuring the color of Coastal Cabana which matches super well.

I layered a white flower sequin, a yellow handmade paper flower by Prima, then a white silk flower, the large handmade paper flower and lastly a large white card stock daisy punchie onto a white tiny brad.  Once aligned I pressed it into the DSP and press the prongs apart on the back.

The card base was scored at 1.5 inches then 5.75 inches and folded to the front to create an offset fold.  

The flower accent layer was adhered to the card front with double sided tape just on the left hand side so the Coastal Cabana DSP would overlap the small flap.

The card on the right has the same accent layer of die cut flowers and DSP in Coastal Cabana as the one above.

The card base for this one is Pink Passion which is a deeper version of the one above.

These are headed off to my card exchange buddies.

I added a white quarter sheet insert and a white envelope.


Tuesday, May 4, 2021

Exchange Cards - May

These are my cards for May.  Turquoise, white and silver is the color scheme.

The white card base has a designer paper layer with a plaid pattern.  

I created the focal point with SB Circle Nestablities in 3 sizes.  The large white was embossed with the Cuttlebug Script folder, then the middle circle is turquoise solid card stock then a silver foil layer embossed with the  Cuttlebug Diamond in the Rough folder. I added a white daisy confetti with a blue tiny brad.  

The greeting is color printed and punched with the Stampin Up Modern Label.  It was adhered to the card front with 3D foam tape.


I flipped the designer paper over and used the polka dot side for this card and changed the orientation to landscape.

I cut the squares layers with the Sizzix Square Thinlits in the same colors as the first one. I added a little note brad in the center.


Sunday, March 14, 2021

St. Pats Birthday Card

My friend requested a St. Patrick's Birthday card for her aunt again this year. You can check the ones I have made in past year!

I found a vintage St. Patrick's image of this lovely lass with a gorgeous green dress and a fan in hand.

I added the sentiment in the top left hand corner and printed it in color.

It was trimmed leaving a white border then adhered to a layer of green with 4 tiny lavender brads in each corner.

This was mounted onto a layer of lavender card stock then onto a white card base. I ripped the right hand side of this layer to be highlighted against the white. 

This lady is celebrating her 90th birthday.

Friday, March 12, 2021

Cards - Thanks - Cricut

I wanted to use the rest of the acrylic ink backgrounds I made for these cards so I did not have leftovers hanging about. 

I searched my Cricut cartridges to see which had "thank you" greetings.   I found this one in the Don Juan cartridge. The size of the letters were wide enough for me to put 3D foam tape behind them so I went for it. 

This was cut at 1.5" tall and 4.75" wide. I trimmed the background to fit leaving an even border all the way around on a true blue A2 card base.

Adhered the background and added a bling heart in the top left hand corner.

I chose a yellow A2 (4.25" x 5.5") card base for this card.   

I chose five small handmade paper flowers held in place with green tiny brads. 

I adhered the greeting with 3D foam tape.

It was spattered with the Chartreuse Leaf green ink.


Again, a medium blue card base in A2 size. 

Trimmed the acrylic ink background and adhered it to the card front.

I placed a small silver butterfly in the top left hand corner with a Bling Zot.

Spattered with Prussian Blue ink.

I will have to find a place to donate these. Maybe Compassion House.  Done!

Wednesday, December 30, 2020

Christmas Thank You Cards

I generally use gift wrap from my presents to make my Christmas cards.

This gorgeous geometric paper was on my gift from my niece. 

I chose to put the red glitter square in the center and trimmed the 9 squares with scissors then I made it square with the small paper trimmer.

The red velvet ribbon was only on that gift so I cut it with the paper cutter into strips and adhere it to the white card front with brads. The back is plastic and I have found no adhesive which is permanent with this type of ribbon.  In this card it was white snowflake brads.

I adhered the square on an angle and trimmed the excess to the card edge. 

I added an oval color printed sentiment punched with the 2" oval punch.  This was adhered with 3D foam tape.

On the other one I left it square on a landscape card and added a Stampin Up Modern Label sentiment.


Friday, June 19, 2020

Happy Happy Birthday

I made a card for my sister who is celebrating a birthday this week.

I used a half sheet of card stock (5.5 x 8.5") in warm green. This panel is the card back.
I selected some scrap designer paper strips from my stash in greens.  I cut them .75 inches wide and left them as long as they were.  I started gluing them onto the card stock at right angles. This was an excellent stash busting card.  I sponged this layer just unify the colors of the strips and card base panel.

I added the warm green small tent card which measures 3.5 inches wide and 11" tall folded in half to 5.5 inches.  I then cut "happy" twice - once in gold and another in bright green with the Memory Box Jumbled Happy Birthday thin lit. I cut birthday twice once the same green as the tent and another the same green as "happy".  These were chalked the same as the panel. These were glued to the front of the tent with Quick Dry Adhesive.  I layered the birthday word. I punched a Stampin Up Modern label punchie from the bright green and adhered it below the words. I then added a bow of grosgrain ribbon held in place with a gold flower sequin and a tiny gold brad.   As you can see the tent allows it to stand nicely.

I should make up a few of the panels so when I need a quick card I could just add the tent and embellishments to finish!

Thursday, May 14, 2020

Anniversary Card

Mom and Dad will celebrate 66 years of marriage this week.  I mailed a card last week.

I started with a pink card.  I added a piece of blue handmade paper adhered with quick dry adhesive.  I added a piece of satin ribbon at the top held with tiny pink brads and white flower sequins.

I added 2 light pink hearts below the ribbon adhered with 3D foam tape.  They are punchies done with the Stampin Up Sweetheart punch.

I added an oval greeting in the bottom right hand corner adhered with 3D foam tape.

Hopefully, it arrived on time.

Tuesday, January 21, 2020

2020 Cardmaking - CH - Class 1

I am back to doing card making session at Compassion House.

I have availed myself of a couple of stack kits but I needed a few more kits because I have more than average number of ladies registered.

I started with designer paper by Fancy Pants Designs - Sidewalk.  I cut it to 4.00 x 5.25 inches then cut again at 3.5 inches.  Flipped the small piece over and taped the pieces back together.

Added an aqua grosgrain ribbon across the join  of the designer paper and taped the ends to the back.  This layer was adhered to the front of a pink card.

I added am accent made with a white silk flower, an aqua handmade paper flower, a white sequin and an aqua brad.  I created a hole in through the card front with a push pin and push the prongs through and spread the prongs apart on the inside of the card.

I added a full half sheet blank insert.  The paper with it's great colors allowed for a variety of card base colors.

The card on the right uses designer paper by My Mind's Eye - Kate & Co - Cambridge Court - Medallion Paper.

This one was paired with hot pink grosgrain ribbon and a medium teal card base.

The same flower accent.  With no greeting makes an all occasion card.

Sunday, August 18, 2019

CCE and Compassion House Cards

I am getting caught up on cards I owe before the end of the summer. 

I started double sided paper - Sapphire Collection - Color Ways -  Paper House.  Not all double sided paper works for DSP Splits so I made this new designer for me. 

I chose a navy card base.

I cut the DSP to 3.75 x 5 inches.  Then cut again at 2" in both directions.  I was able to just adhere the pieces leaving a small border. 

I adhered an oval greeting with a blue oval of the same as the card color and a color printed greeting.  These were adhered together then adhered to the card with 3D foam tape.


For the card on the right I chose an all occasion theme. The accent is a white circle on the blue oval with a yellow handmade paper flower held in place with a silver flower sequin on a silver tiny brad.

These are on their way to my card partners with my apologies.

Most of this paper lent itself to tall cards but with the last piece I was able to cut it so I could make a wide card.


This card will go to Compassion House for their need of Thank You cards.

I placed a Stampin Up Modern Label with a stamped greeting on the large navy oval.

These were mounted with 3D foam tape.

Tuesday, March 19, 2019

Ready2Go Christmas Stack Kit - Blue & Cream Dove and Peace on Earth

I worked on a Christmas Stack kit in case someone wants to get a head start on those cards.

The image is a recycled Christmas card featuring navy, light blue and cream.

I added a light blue layer of card stock to repeat that color which was cut to 4 x 5.25 inches leaving a small border.

I chose a cream card in the tall orientation.

These layers were all adhered to the card front with the light blue first and the dove next.

I created a greeting with the Stampin Up Artisan Label punch.  I used the navy and light blue in teh greeting, color printed it and then punched it out.

It was adhered to the card front with 3D foram tape aligned on the dark/light line on the dove layer. 


This is another recycled Christmas card layer. 

I cut the black layer to 4 x 5.25 inches leaving a small border of card base showing.

I chose Kraft card stock to repeat the kraft colored swirls on the right hand side.

The Peace on Earth layer was adhered to the black layer then I used 3 round tiny brads in the top left, bottom left and bottom right corners.  A push pin was used to make the holes before the brad was inserted.  I selected 3 of the dots in the design for the star brads.

The 3D foam tape was cut in 4 pieces and placed on the 4 corners of the black layer.  It was then adhered to the front of the card.

A quarter sheet insert was used in these cards.

Loving how this one came together.

Friday, March 1, 2019

Christmas Card Challenge - March - Manger

The theme for my blog's March's Christmas Card Challenge is Penny Black Manger Die.

I chose some different type of paper and color.  It is a Karen Foster design called Maroon Shimmer.  It is paired with a slighter darker card base in the same color from a Michaels collection.

I cut the label from champagne pearl card stock with one of the Stampin Up Apothecary Framelits. I adhered it to the designer paper then onto the card base.

I cut the Penny Black Manger die from the same card stock as the base.  It is held in place with a tiny purple brad in the star and in the bottom point.

The greeting was created with a banner from the Stampin Up Itty Bitty Banner thinlits topped with a SU Word Window punchie with color printed words. It is adhered to the card front with 3D foam tape.

Friday, November 16, 2018

R2Go Christmas Stack - Prism Snowflakes & Trees

I started with a navy card base.

I tacked a 4" square of vellum leaving even borders top and bottom.

I added the silver metallic ribbon wrapped around the card front and taped to the front over the vellum where the accent will cover it.

The snowflake element starts with a small white sequin then a silver fiber one, then the prism one and finally the Stampin Up Snow Flurry white one cut from card stock.  Make holes as needed in each of the snowflakes. These are held together with a navy mini brad where the prongs are spread apart on the back.

Adhere the snowflake element with the 3D foam tape.

Glue the quarter sheet insert.


I started with a warm green card base.

I assembled my trees by cutting the black strip into 3 pieces then adding one to each tree with a tiny brad. The trees are adhered to the card front with double sided tape.

Remove the star & Zot from release paper and adhere to card front at the top of the tree one at a time.

Rip the white paper to create your snowbank.  Trim it to the card edge if necessary. 

Layer the white circle greeting onto the black larger circle. Add the 3D foam tape to the back and adhere to card front as shown.  Glue the quarter sheet insert to the inside.

Thursday, October 18, 2018

Son in Law Card Order

I had a friend ask for a birthday card for her son in law.

I recycled a landscape element from a commercial card.  I trimmed it close to the border.

I printed a custom greeting layer on a piece of textured card stock.  I chose a green color to match the textured card base.

These were layered then adhered to the card front.

I added a gold star sequin in the bottom left hand corner held in place with a gold tiny brad.

Wednesday, August 1, 2018

Exchange Cards - August

I cracked the seal on this die this morning.  It has been years since I purchased it on sale for a good price.

I chose a pink card for this bright and cheery embossed designer paper.  I adhered the DSP to the card front leaving a small border.

I cut the flower from black card stock.  It is designed for a larger card so I had to cut down the stem to fit my A2 card. I glued the flower then adhered the stem below then cut off the extra leaves and stem to the card edge.

I added a yellow handmade paper by Prima to the center of the flower and held it in place with a tiny black brad.

It would make a punchy birthday card.


For this card is chose a piece of designer paper by Basic Grey.  It features several colors and I chose a light blue card base for this paper.  It was cut to leave a small border and adhered to the card front.

I glued the flower and the stem to the designer paper and trimmed the stem to the edge of the card.

I placed a pink Prima handmade paper flower in the center held in place with a tiny blue brad.

These are off to my card exchange partners for August.