Showing posts with label spools. Show all posts

Saturday, February 10, 2024

Sylvia's Simple Shots

The progress on the slow stitching scroll continues.

I found this button in a .50 cent bag of buttons when I visited the thrift store in Wetaskiwin while on a visit with my sister.

It matches really well the colors in the backing fabric of the scroll.

It is a shell button and measures about 1.25 inches across.

You can see a hint of the tie I created as well.


We had a good dump of snow overnight.

I was glad I did not have any place I had to be and could just hunker down till the roads were cleared.


I have simplified my method of keeping the bobbin with the matching spool of thread.

It is a simple elastic band about 3-4 inches long. I push one end through the bobbin then pull both ends over the top end of the spool.

The expensive gadgets I bought were a total waste of money.  Several broke the first time I put a bobbin on them.

This bands are cheap as dirt and can be replaced instantly should one decide to fail.

Happy with this new system.  Easy to add to the system as well as I have box of 100s at my disposal.


The Joy Luck Club by Amy Tan.  I have read several of her books and enjoyed them a lot.

The story of 4 Chinese mother and daughters in their early years and their later years.  It was a lot of characters to keep track of.

This one was a disappointment.  The conflict between mothers and daughters was not fun to read about.  I did enjoy the beginning and the end had some wonderful bits in it.


I found a tin at the ReUse Center for my ORTs.

Orts are the leftover snips of thread that remain when you are done stitching. They may be be tiny bits clipped when you run out of thread, or longer lengths you no longer need.

I love the green shamrocks on the lid and it looks like it originally held a wonderful confectionery.

As you can see the box is full of fluffy threads.

Perfect!


Tuesday, October 17, 2023

1 of a Kind - Tree Scent Oranments - Set 3

Another set of these very cute Tree Scent Ornaments.  These can be used to give your artificial tree a scent.  Choose your favorite Christmas essential oil and apply 1 or 2 drops and enjoy.  

Here I have grey felted wool to which I have added royal blue blanket stitch on the top and bottom edge.

I had stitched white snowflakes around the middle.

The top features white felt circle and a grey button.

The hanger is the royal blue thread in 6 ply.


This felted wool makes me think of woodsy so I put small triangular trees on the middle panel of this ornament.

I chose black embroidery thread for the blanket stitch around the top and bottom edges.

The top features a black felt circle and a medium sized button.

The hanger is 6 ply embroidery thread in the same color as the tree on the wool panel.


A Bumble Bee colored ornament.

It features the ivory and black felted wool panel around the middle of the ornament. 

I use golden yellow embroidery thread for the embellishments.  The blanket stitch on the bottom and top edges.

I followed the fabric pattern with cross and dash stitches.

The top features a black felt circle with a golden yellow button.

Embroidery thread in 6 ply for the hanger.


I put white snowflakes on this woodsy felted wool panel.

I used chocolate brown thread for the blanket stitching along the top and bottom edges.

The top has an ivory felt circle cut the the SB Nestabilties smooth circle die - the smallest in the large set.

Topped with a brown button and brown embroidery thread hanger.


Another daisy on this grey houndstooth wool fabric panel.  

I did triple fold this fabric and stitched the ends to ensure no unraveling of the ends.

I chose pink thread for the daisy and the dashes in the middle.  Same for the blanket stitching along the top and bottom edges.

Charcoal grey felt circle at the top cut the the nestabilities die.

Topped with a pink medium sized button.

Pink 6 ply embroidery hanger.

This is the last set for this year.  I learned a lot in the process.  I got some feedback that they could be a popular item.  Let's hope so.

Friday, October 13, 2023

1 of a Kind - Tree Scent Ornaments - Set 2 and Stand

I made a few more 1 of a King Tree Scent Ornaments.  These ornaments can hold your favorite tree scent essential oil to give your artificial tree the right scent.

It could also be a favorite Christmas scent of your choice. The scent will dissipate and you can choose a different oil another day.

Love this bold black and white check felted wool.

I decided to pair it with red.

I put blanket stitch along both edges with black embroidery thead. 

I changed color to red and using the squares in the fabric I put X and dashes along to bottom half and just dashes long the top.

Red felt on top with a large black button on top of that.  Black embroidery hanger.

I had most of my buttons spread around my work area in separate bowls.  I found this cute small oval button which matched well with the thread I had selected so I decided to use it.

For this bright felted wool I chose bright green and blue.

I put blanket stitch in green along the top and bottom edges. 

I then stitched the button in the center front and then added dash stitches in blue above and below the button.

The top felt is green with a button button. 

True Blue embroidery floss hanger.

I decided to do one ornament in Oiler colors - blue and orange.

I used the wool denim colored felt.

I added a blanket stitch along the top and bottom edges in orange. 

The center pattern is a set of crossed dash stitches.

I cut the top felt circle from the same fabric with my smallest die from the Large Nestabilities smooth circle dies.  Fits perfectly.

Topped with orange buttons and the same orange embroidery thread for the hanger in all 6 plys.


Another Tree Scent ornament with bright colors.

The wool cuff is bright green and I chose purple embroidery thread.

I put a blanket stitch along the top and bottom edges.

I put stars patterns along the center of the wool layer.

The top has a purple felt circle and then a bright green medium sized button.

Purple 6ply embroidery thread hanger.


The fabric for this ornament was wool suiting so I folded it top to the back and bottom to the back so I had 3 layers to work with. 

I did have to stitch the ends which were stitched over with my connecting stitches.

White blanket stitches along the top and bottom edges.

I followed the plaid pattern with my white thread in dash stitches.

The top felt circle is red topped with a medium white button.

The hanger is white in 6 ply thread.


I needed another stand for Tree Scent Ornaments.  I went shopping this week and found this black folding stand. 

The Christmas stuff was out as well so I picked up a package of silver wire hangers.  I just squeezed them onto the wire frame.

I will put my sign on the back wire with the clothes pin.

I had the piece of wood in my stash which was perfect. It stabilizes the stand when there are ornaments on it. I will have to secure the legs into the slots.

Enough space on this stand for my 1 of a Kind Tree Scent Ornaments.


Monday, October 9, 2023

1 of a Kind - Tree Scent Ornaments - Wood Spools

Tree Scent Ornaments are ornaments on your artificial Christmas tree that are oil diffusers.  You place oil on the felt and it makes your tree smell like you want.  If you want it to smell like a real tree you can place essential oil that would give you that scent. I discovered last year that I no idea what kind of tree we had when we were kids.  I believe they were spruce trees.  You could also choose any scent that makes it Christmas for you.  I have made a variety of these ornaments last year and will continue this year with new styles this year.

I saw samples of these spools with embroidered wool on line over a year ago.  I really liked them.  
This was a project by Susan Lenz.  You can check out her blog post here.

Many of her wooden spools are older than mine and have the words embedded in the top and bottom ends of the spools.

She filled a small wooden bassinet of these.  It must have taken her a long time.
I had collected small pieces of wool at the ReUse center over the last 6 months.

These small spools come from Mom's stash.  She saved her spools and of course she sewed for many years when thread was sold on wooden spools instead of the plastic we have today. The wooden spool was eliminated in the 1970's.

I started with a 5 small wooden thread spools which I sealed with Modge Podge several days ago.  They measure about 1.25 inches tall and 1" around.

I gathered my bits of wool, my embroidery thread, a bucket of felt and a bucket of buttons and tackled this project.  Something good to listen to on the TV and a cup of tea.  I was there way longer than I expected. 

Raw wood works as a diffuser as well so any drops running down from the top will go down the center of the spool and be absorbed.

I am not sure that taking the time to seal the outside did much.  I was hoping to make the edges more warmed tone.  You don't see much of the spool at the end.

This wool was a left over from a sweater which may have shrunk.  I cut it 1" wide and 3" long.

There was a bit of pink on the edge which inspired me to  use pink thread on this one.

I split my embroidery thread into 3 strand lengths.  It is great to work with this material as there are not unravelling edges and it is quite thick.

I just made it up as I went which a rudimentary knowledge of some embroidery stitches.

Here I put different border stitches and daisies around the center.

The felt pieces on the top and bottom are cut about 1" across.

I chose medium sized pink buttons for this one.

On this ornament I used the pattern in the wool to guide my embroidery in the middle of the spool. 

The turquoise 100% cotton thread I used was not standard embroidery floss.  I split it as usual but I had a really hard time keeping it integral.  It would just come apart sometimes.  I will keep it in it's 2 strand version next time.

Turquoise felts on the top and bottom with tan buttons which matched well with the fabric I used.

I did not have any regular embroidery floss in the right color.  I am not sure where I collected this thread as it is packaged like the other stuff.  It was for sure at a Thrift store.

On this ornament, I embroidered white snowflakes on the navy blue portions of the fabric.

I managed to do the blanket stitch along the top and bottom edges.

White felt on top and bottoms with smallish navy button over the that layer.

I did not have any trouble when I used the regular embroidery thread, in this case white.

This fabric as other colors and patterns to it will make more spools and they will look different.


The wool on this ornament was very thick and the colors were quite mottled.  You can see that the fabric sticks out quite a bit from the wood edge.

I chose a denim blue embroidery thread and put blanket stitch along both edges.  I put diamond shapes around the middle.

The wool circles on the top were denim blue and here the buttons are a bit larger and I think it works better.

Again, I think this fabric was a shrunken wool garment and that is why it is to thick.

I think esthetically the fabric is a bit too thick as I just wanted to fill in the well on the spool.


On this last one, I chose the fabric for the color and it was cotton flannel instead of wool.  This comes with challenges. The edges are not integral.  On this one I folded the top and bottom edges to the inside and that worked well.

The biggest challenge was finishing the edges where the ends meet.  That had to be finished with a folded edge and I sewed that with regular thread.  Then when it came to connecting them at the back I used the red embroidery thread as I had been on the others.  The bigger buttons for sure look better.

I would not use flannel again, it was just too much work.  Three layers of layers fills in the space on the spool the nicest.

I do have some pieces of wool suiting which might be a better weight but may have the same edge problems as this flannel.

These are ones for now.  I have other styles I want to make.   I found the dimensional ones sold the best last year.  Stuffed hearts are easy and I can make snowmen and gingerbread men as well. 

Saturday, February 11, 2023

Sylvia's Simple Shots

I made Raspberry Bavarian to remind me of my wonderful Mom.  This was my favorite of the desserts she made with the raspberries in her garden patch. Used frozen berries.

I did grate a bit of dark chocolate on top and added a Simple Pleasures Cranberry and Citrus cookie.

You can find the recipe in this post - Raspberry Bavarian.  

I miss her a lot!


On Monday, I walked to Fabric Land while my car was at the dealership for services.  It was great to have decent weather I could walk 20 minutes.

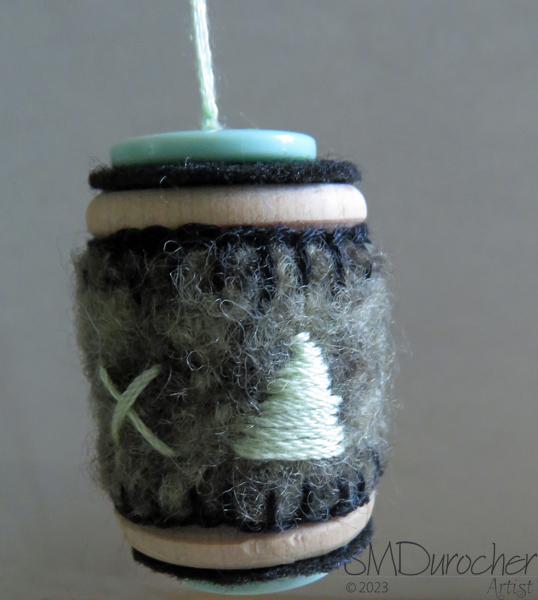
I needed sewing machine needles because I broke a couple working on my ReUsable bags.  While I was there I came across these Bobbin Mates which help to keep the spool of thread with the matching bobbin. The price was good for 12.  I would use these for my regular thread that I use often - white, black, grey, navy and brown maybe. 

They work great.

Fabric Land was having a huge sale on mask elastic.  This is perfect for the elastic on my ReUsable Bags so considering it was 70% off I bought 10 yards of each color - black and white.  

I had worked out that I could use the elastics off disposable masks which easily break and I had a few in my stash that I had not thrown away.

That elastic was for sale at the fabric store as well but I thought is narrow stuff would be more versatile and stronger in the long run.


It was a week of doctor visits, blood work, xrays, ECGs, IV lines and a ride in an ambulance with a visit to Emergency. Answering a lot of questions and trying to remember what happened when.  It's been a bit of a time since Jan 6th and I hope the worse is over.  I still have specialist appointments to come.

The results were negative and I was lucky to have my aunt give me a ride home.

Thanks so much!


I bought a few music CDs for the hospital where Mom spent her last hours.  They gave us a big room and a CD player with a couple of CDs.  They were Mom's favorites. Fortunately, my neice was able to find stuff on line.

This is more of the type of music which we chose for Mom.

I will drop them off next time I am there.


This is a small flower vase which was Mom's.  All summer she had a small vase of garden flowers on the table.  Cosmos was one of her favorites and they are a great cut flower.

She grew Pansies, Nasturtiums, African Daisies, Impatiens, Lavetera and more I am sure.  She used carrot tops for a bit of green foliage in her bouquets. 

This is a Vintage 1960's Avon urn jar for bath product - my web research tells me.  I see that it once had a stopper.  I am not sure when Mom got it but she liked it and used it every year.

Will I ever have a cut flower garden?  Sure would like that very much.

We shall see.


I finished this book this week.  Jinnie by Josephine Cox.   I think this is my third book by this author.

It is set in England in 1963 with some events having taken place 10 years earlier.  A great story of tragic events and the love of a woman for an abandoned baby.  Sister who are polar opposites and grandmothers who step into the gap for their families.

I mostly enjoyed this book.  The grandmothers one was Sarah and the other Sally so I often confused them.  The story was all concluded in the final few pages of the book which seemed incongruous with the timeline and pace of the first 90% of the story.

Always enjoy England as a setting.  The story took some pretty steep curves at the end but all things turned out well after all.


I started back with areobics this week now that the knee is improving.

This is the easiest work out I have.  When I worked a groups of us girls would close up the board room and do this 1 mile 30 minute routine then have our lunch.

I started again with the 1 mile this week. Taking it easy but at least getting back to my life before my inactivity took a toll on my body.


Saturday, January 21, 2023

Sylvia's Simple Shots

My niece came up this week so we can take a trip to visit Mom in hospital.

My main nativity set is a White Matte Bisque Porcelain one by Avon.  I have a large stable to house them but of course all that is packed. She is always on the look out for additional pieces so she brought this 2nd Wiseman to me and the Angel Gabriel.  

Unfortunately, the did not come with their boxes so I will have to design a storage solution.  

I am still missing another wiseman, animals of every kind, and shepherds.

My sister called over the holidays as she had found some pieces but she thought they were Mary and Joseph so we let those go.

Another gift from my niece.  She bought a couple of these a long while ago when I was anticipating moving into a new place.  That did not happen and since I have gotten rid of the sofa (which I miss a lot!) she brought one of the chairs up.

Beautiful mid century lounge chair in a great yellow color.  It is vinyl upholstery in superb condition.  Dark wood frame in excellent shape. Comfortable.

It offers me a change from my glider chair so I am grateful she had room to bring it with her.


I finished this book - Katheryn's Secret by Linda Hall.  The story is set in Maine about a family cottage willed by Katheryn to her niece Sharon. 

Sharon is a writer facing a book deadline and taking time to visit Maine and the cottage is more important. Right?  She takes a couple of weeks with her teenage daughter tagging along. Her husband will join them a bit later.

Her aunt Katheryn Sullivan had not married and lived in this cottage with her sisters for many years.  She was eccentric, a dreamer, romantic and a storyteller.   Sharon finds a mysterious disappearance of a child and through the search for her resting place uncovers deep secrets. 

She finds folks who knew and did not tell but fortunately she was able to uncover the family history and bring closure to the events. 

I made a visit to the local ReUse Center as well.  I am working another version of essential oil diffusers/tree scent ornaments which features sewing thread spools. 

I was hoping to use wooden ones but only found a few.  Of course, the plastic ones are everywhere.  I will have to see whether I can achieve a look I am happy with using the plastic ones.

There were bits of velvet which should work wonderfully. Some colorful yarn and some wool skeins.

I will post when I have made a version I am happy with.


Another book completed - Iris and Ruby by Rosie Thomas.  This is my second book by this author and it was wonderful story based in Cairo Egypt this time.  The other was the Kashmir Shawl.

Her granddaughter Ruby from England appears on Iris's doorstep unannounced. She has run away and needs a place to stay. Can she?

Her quiet household with the houseman Mamdooh and Auntie the house keeper is disrupted by this young person and the friends she is making in the area. 

The novel moves between the years Iris was a young woman living in Cairo during the Second World War and her now at 82 years of age still living in Cairo but starting to lose her memories.  Ruby wants to help her grandmother preserve her beloved history so they start to set time aside to reminisce and capture the past.

It is a wonderful story which reunites 3 generations of women and helps Iris, Lesley her estranged daughter and Ruby the willful granddaughter see each other's point of view and life history.

Wednesday, July 22, 2020

Bernina 830 Sewing Machine & 1st Project

The new to me 1972 Bernina 830 Sewing Machine arrived yesterday thanks to my sister and brother-in-law.   I purchased it in late February through my sister then I started making the space to house it!  Then COVID hit and life changed.  I have continued to clear, de-clutter, and get rid of stuff and last week there was space for it. 

I have placed it in front of the window so that the light will be the best most of the time.   There is enough room on the right for me to access the window to open, clean or get out if I needed to.

You can see the ironing station on the right hand side.   The cutting and pinning station of the craft table is behind the desk and on the left hand side.  That makes a very good working triangle where everything is at hand but there is enough room to work.

The desk has a lifting mechanism which allows it to be stored in the desk, then the machine level to the desk top and then higher still to access the free arm feature of the machine.  It works really well and I will get some lubricant to help it work a little better.
I created Thread Bobbin storage in a Ferraro Chocolate box. I love the clear lid so I can see the contents.  I created the channel organizer with 80lb text paper.  I cut a piece 16 T x 8.25 W inches then scored it every inch.  Then it was a matter of creating the channels to hold the bobbins. I taped the edge on the right to the bottom of the box. As you can see I have expansion room.

I decided to store the sewing machine needles in the space left. 


I used the same boxes for Thread Storage.  They are deep enough to accommodate most spools. I organized the thread by first separating the polyester from the cotton. 

The ones displayed are the polyester which I have the most of.  The spools were organized by color into separate boxes. Reds and pinks, neutrals (black, white and beige), 2 boxes of blues then a box of yellow and greens.


My niece made this Needle storage tag book for my birthday.  It is tag shapes with ribbon sewn to them then protected with a clear one on top. 

The label at the top allows me to remember what I have stored there.  Sometimes you have to switch out needles but you don't want to return it to the new ones.  This system allows me to store it here until I need it again.


These small wooden boxes were made by my brother-in-law when we needed boxes for selling cards at craft sales.  I have not used them for a couple of years because I bought a large card display.  They fix perfectly in this drawer and makes use of all the space.

Small cutting tools, my rotary cutter and blades, measuring tapes, pins straight and safety.


This is the extra hook on the pole where my African Violet lives.

The light on the right hangs over the craft table.


I refurbished it's lace cover today.  I cut the lace in half so that I will have the same fabric for the other light.
I hemmed the top edge then added a white grosgrain ribbon along top of the wide hem on the bottom.  It is a single layer which allows more light to get through.

I will be getting another hanging light for the extra hook which will give me lighting on the left hand side of the sewing desk which likely will be needed when sewing at night. 

It is very exciting to have a dedicated sewing space where everything will be close at hand.  Keep an eye out for quilts in the near future.