

The paper was cut to 4.00 x 5.50 inches then cut again at 3.5 inches. The smaller piece was turn over and taped back to make a single piece.
I wrapped a piece of dark brown grosgrain ribbon across the join and tape the ends to the back.
I then adhered the layer to the dark brown card front.
 I printed the greetings in Early
Espresso on white card stock using the Canada Goose from the Stampin Up set Wetlands. I trimmed it very close to the printed border. It was designed to fit perfectly in the square on the label die cut.
I cut the label with the Stampin Up Window Frame thinlits from Early Espresso textured card stock. The greeting was adhered to the label then the label was adhered to the card front over the ribbon with 3D foam tape.
The card on the right started with a dark brown card base as well. It is a DSP split using designer paper from Authentique - Seasons Collection - Autumn Three. Love the hounds tooth pattern.
The label is the same as above and the car is from the SU Classic Dad set in Early Espresso. The grosgrain ribbon is the same as above.
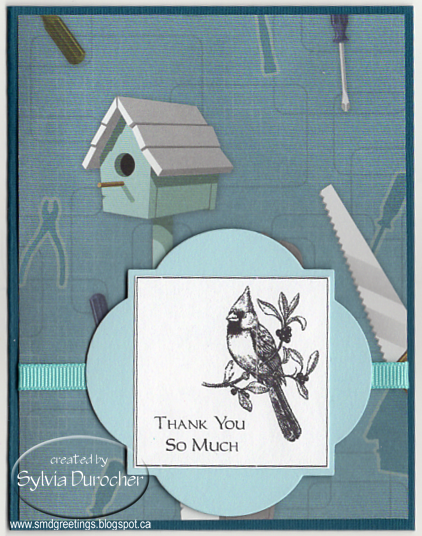
I added a piece of designer paper by Karen Foster Design - My Grandpa - My Hero Collage paper collection. Love the bird houses and tools.
I cut a label as those above in a light blue card stock. I added the Cardinal from the Stampin Up Cardinal Christmas set in black. Trimmed close to the border. Aligned with the square on the die cut label.
I added a turquoise ribbon wrapped around the designer paper layer ends taped to the back about 1/3 up from the bottom edge.
The label was adhered to the card front with 3D foam tape.

I adhered 2 strips of the designer paper to either side of a warm dark blue piece of card stock.
I added a length of vanilla grosgrain ribbon which ends were taped to the back. The warm blue layer was adhered to the card front.
The greeting was printed in grey on Vanilla card stock and punched with the Stampin Up Decorative Label punch. I offset a green punchie to the back of the greeting. It was then adhered to the card front with 3D foam tape.

To the red gingham piece of designer paper cut to a 3.75 inch square I adhered a denim flower, a yellow center held by a yellow flower brad. I used a push pin to create the hole for the prongs. I used double sided tape to adhere the green fabric leaf. This layer was adhered to the card front.
I wrapped a length of white pearl thread around the card front and knotted it on the front.
I added a large circle greeting printed in the royal blue ink and punched with a 2 inch circle punch. i was adhered over the thread with 3D foam tape.
All these cards have white quarter sheet inserts.

I added white grosgrain ribbon over the join.
Adhered to a pale aqua card.
I added a deep warm green greeting with a green label punchie adhered to the back off set. Stampin Up Decorative Label punchies. Adhered over the ribbon with 3D foam tape.

