Showing posts with label 4x4. Show all posts

Thursday, August 29, 2024

Cards - Self Closing Card - No need for envelopes

I'm working on a new card design. 

It is a self closing card where the card closes onto itself and seals for mailing all in one go.

For this one I used a 1/2 sheet of 12x12 designer paper and cut it in half.  I chose to put the plain side out and the patterned inside.  I added a TH Cameo Frame die in red to coordinate then adhered one of my 4x4 photos from past calendars in the center trimmed to fit.  Then came the bling of gold star sequins on the top and bottom held in place with red tiny brads.

An ivory insert on the right hand side with a stamped sentiment.  These cards provide a good amount of room to include a few lines of greetings to the recipient. 

Once it is ready to go the card is closed and the double sided tape on the small flap seals the card.  Turn it over and address it, add a stamp and a return address and you are ready to mail.

I will cello them so the card front and sentiment are visible.  This allows the one to choose the one that fits the occasion the best.

Each will be an original and unique design.


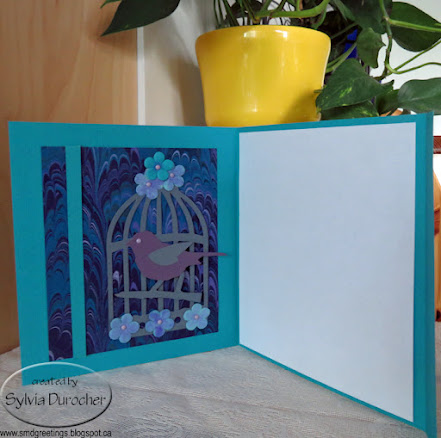
I used the TH Caged Bird die for this card.

My background is a piece of marbled paper. I chose my colors based on it, so grey for the cage and branch and dusty purple for the bird. I then watercolored some handmade paper flowers to coordinate and place them at the top and bottom of the cage. They are held in place with tiny lavender brads. 

I added a strip of the card base card stock along the left hand side of the layout. Taped the ends to the back.  Adhere the element to the card with double sided tape. 

A white insert on the right hand side.

I thought I would try a landscape orientation and watercolor.  

The wide does not work so well because you can't see the art and the sentiment at the same time.  

A quick watercolor which worked out pretty well.

I spent most of the day making these cards then trying to decide if they are a viable product for the Christmas Store.

I go through this every year and I will just do what I like and not worry about who else might like it.

I need quite a few more Christmas cards so that works.

I love Bethlehem cards and I have not included a palm tree before.

The stamp is from a Stampin Up set in royal blue ink.

Tuesday, November 14, 2023

2024 Photo Calendar - Wings


2024 Wings - Here is my nature calendar which features flyers of different descriptions.  This features birds and insects. It represents what I have seen on my trips to the Edmonton Valley Zoo, the U of A Botanic Gardens, several wetlands in the area and my regular morning walks. The holidays have been marked in red.

This calendar has 13 4x6 pages which is 12 month pages with an index/title page.

January - Snowy Owl                                July - House Sparrow

February -  Golden Dragonfly                   August - Ashy Mining Bee

March - Tundra Swan                                September - Peregrine Falcon

April - Fritillary Butterfly                             October - Honey Bee

May - Black-crowned Night-Heron            November - Spotted Sandpiper

June - Hoverfly                                          December - Fiery Skipper

2024 Photo Calendar - Flower

 My photo calendars are ready!

2024 Flower - This is my floral calendar this year.  It represents what I have seen on my morning walks, the flowers I have enjoyed at the St. Albert Botanic Park and the wonderful front yards in the neighborhood.

This calendar has 13 4x6 pages which is 12 month pages with an index/title page.  The holidays have been marked in red.

January - Hosta Bloom                      July - Blue Flax

February -  Coral Sunset Peony        August - Alium

March - False Sunflower                    September - Sunflower

April - Plum Blossom                         October - Common Spiderwort

May - Tulips                                       November - Snowdrop Anemone

June - Alberta Rose                          December - Temptation Amaryllis

Tuesday, November 7, 2023

Christmas Cards - Teddy Bears

I found 2 Teddy Bear pages in my stash of old calendar pages. Here's the original post to the calendar. 

Here's Teddy with the small Nativity set.  A gorgeous mercury glass tree in the background.

To create the card I chose Stampin Up Midnight Muse card stock for the base.

I cut a piece of Bashful Blue card stock with the Tim Holtz Cameo Frame die.  I trimmed the photo to 3 5/8 inches wide and 3 3/4 inches tall. I just love how well this works.

I added iridescent snowflakes with small white sequins held in place with navy star tiny brads at the top and bottom of the photo.

This was adhered to the card front.

I added a blank quarter sheet insert which should have had a sentiment.  I will stamp something.  A white envelope and it's done.

Here's the other Teddy photo.  Same mercury glass tree and a beautiful wire ball box which is meant to gift a memento.

The card base on this card is textured paper in a navy blue.

The layer is again Bashful Blue which was trimmed to leave a small border once the photo was trimmed to 3.75 inches square.

This layer was adhered to the front of the card.

I added an oval greeting adhered with 3D foam tape.

A quarter sheet insert and a white envelope.

Another couple added to the Christmas card box.


Sunday, November 5, 2023

Simple Sentiments - Photo - Set 5

I chose to add a banner to this fifth set of Simple Sentiment cards.

I started with a Stampin Up Lucky Limeade card base, cut, scored and folded.

I chose a SU Pale Plum card stock banner which was 2" wide and banner cut with the Banner Triple Punch by Stampin Up.  I added 2 mini brads to the banner placing them just below the photo. 

I adhered the banner to the card aligning it to the focal point on the flower. The flower is a White Geranium which is a 4x4 photo taken at the St. Albert Botanic Park.

I added a quarter sheet insert and a white envelope.


I started with  this small crab apple 4x4 inch photo.

The card base for this card is Ruby Red card stock.  Cut 8.5 W x 5.5 T inches, scored and folded in half.

I chose More Mustard for the banner which was cut with the Banner Triple punch.

I added 3 warm red mini brads aligned on the center of the banner.  It was then adhered to the card front.

The photo was then adhered on top of the banner. Nice to have the banner reach the edge of the card so the color repeats at the top.

Added an ivory envelope and a quarter sheet insert.


The photo on this card is a close up shot of the plant Mother of Thousands as each of the plantlets along the edge of the leaf can produce a new plant. Took this one at the Muttart Conservtory.

The card base is Glorious Grape.

The Banner is Green Galore. It was cut to 2 inches wide, the end cut into a banner with the Banner Triple punch.  I aligned the banner alogn the focal point of the photo.

I added 3 purple eyelets to the banner which I mounted with the Crop-a-Dile tool.  I did mark the spaces on the back to ensure they were even.

The banner and the photo were adhered to the card front.

A white quarter sheet insert and a white A2 envelope were added.

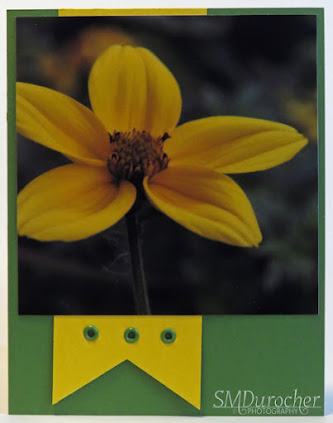
This flower is a False Sunflower.  It is a gorgeous bloom in any garden.

I chose Garden Green card stock for the card base. Considering that most of the flowers are taken in gardens makes sense. I may need to source out some more of this color.

I aligned the banner with it's green eyelets along the focal point of the 4x4 inch flower photo.

These were both adhered to the card front.

I added an A2 envelope and a quarter sheet insert.

Super pleased with these cards.

I will pair them in sets of two - one flower and the other a nature one.

Simple Sentiments - Photo - Set 4

I chose a Stampin Up Chocolate Chip A2 card base.

I cut a piece of Summer Sun with the Tim Holtz Cabinet die.  I used the Stampin Up Slot punch to make two slots in the round end of the die. 

I adhered the photo to the die cut then pulled the ribbon through then around the card front and back to the front.  This is a Pumpkin Pie colored ribbon.  

I then adhered the die cut layer to the card front. I pulled the ribbon taut making sure it was not twisted on the inside of the card. I knotted the ribbon and trimmed the ends. An insert and an envelope.

These photos are from my Gentle Glow Calendar. Love the bokeh backgrounds.

Here is a House Finch in the late fall with no leaves on the trees.  I chose Sahara Sand for the Cabinet diecut.  

The card base is Cajun Craze and the ribbon matched so well. It is a beautiful soft ribbon. I just had a short length so I don't know where it came from.  I am down to my last couple sheets of this great color.

Again, slots punched, ribbon threaded through, knots made and the diecut layer adhered to the front.  Quarter sheet insert and envelope.

This is a photo of the top of a metal bistro table taken at the Muttart Conservatory.  Turned out wonderful.  I love the texture and the highlighted edges of by being used over and over by customers.

I used a Brilliant Blue card base and a piece of Smoky Slate card stock for the Cabinet die cut. The ribbon is Night of Navy seam binding.

A quarter sheet insert and white A2 envelope.


Some sweet Common Conecap mushrooms taken at the park down the street.

I chose a Creamy Caramel card stock for the card base.  A Garden Green piece for the Cabinet die cut.  A piece of beige seam binding found in my box.

The assembly as previously described and it was done.  These were fiddly to assemble but I think it was worth it.

A quarter sheet insert and a white envelope.

Saturday, November 4, 2023

Simple Sentiments - Photo Set 3

Another set.

This card features a Barn Swallow taken at the Lois Hole Provincial Park. Check out those ruffled feathers.

I started with a Stampin Up True Thyme card base. I added 3 .75 inch wide card stock strips in Very Vanilla, Not Quite Navy, and Really Rust.  They were adhered then I cut flag ends on them.

The photo was adhered on top of them.  Just love these warm tones.

This features Grape Hyacinth taken at the St. Albert Botanic Park. 

Brilliant Blue textured card stock with three color coordinated strips of card stock with flagged ends.  

Soft Suede, Lavender Lace and Gable Green.  These were adhered to the card front, trimmed then the photo was adhered over top.

White quarter sheet insert and a white A2 envelope.


These are Grey Partridges which I found at Patricia Lake. My one and only time seeing these birds.

I chose a True Thyme card base with strips of Chocolate Chip, Dill and Dusty Durango.  The strips were adhered to the card front then cut with flag ends.

The photo was adhered over top.

A white quarter sheet insert with a white A2 envelope.


A  light pink rose softly tinted rose with hints of a darker shade. This is likely taken at the St. Albert Botanic Park.

I chose a Pixie Pink card base and card stock strips in Chocolate Chip, Lavender Lace and Gable Green.  The strip ends were given flag ends and then the photo was adhered over top.

These made great all occasion cards. Birthday, Thinking of You, Thank You or any other reason for expressing ourselves to others in a tangible way.

Quarter sheet insert and envelope.

Friday, November 3, 2023

Simple Sentiments - Photo - Set 2

Another set of photo cards. 

I chose a different presentation for this set.

I chose Stampin Up Soft Suede as the A2 card base, scored in half and folded.

The accent layer is Really Rust cardstock cut to a quarter sheet and cut with the SU Top Note die.  Once cut I then cut it in half cross wise with the paper cutter and then trimmed the center points off with scissors.

I trimmed the photo to 3.5 inches wide to perfectly align with the widest spot on the half Top Note.  This was adhered with tape on the back then process repeated for the bottom half.

I chose a green-brown grosgrain ribbon to lay over the join of the photo and the die cut.  It was pull to the back and taped down with tape.  This layer was then adhered to the front of the card.

A white insert and envelope finished off the card.

This card features a Jacob's Ladder blossom taken at the Botanic Park.

I chose SU Elegant Eggplant for the card base and Lavendar Lace for the Top Note layer.

I ran a piercing tool over the photo to mirror the stitched edge on the Top Note layer. 

The grosgrain ribbon is Certainly Celery.


This flower is called a Late Tulip.  I don't remember where to found it.

The cardbase is Daffodil Delight which is half a sheet, scored in half and folded.

The Top Note layer card stock is Old Olive.  Same process to trim sides.

I found some nicely matching grosgrain ribbon in my stash to put over the joins.

A quarter sheet insert and white envelope. 


This card features a Copper Skipper which is a butterfly that comes out in early spring.  Usually the first one I see on my walks.

The card base is Mellow Moss and the Top Note layer is Really Rust

I found some Stitched grosgrain ribbon to match the tones of this card.  It is a chocolate brown.

There are a couple of the cards in this set that came from the Nature Photo Calendars so they are more masculine and tones and colors. Works out to balance the set of cards.


This makes a nice set of cards. 


Simple Sentiments - Photo - Set 1

I made some cards with my 4x4 photos.

These are Aspen Leaves taken at Elk Island Park in the fall.

I chose a Stampin Up Summer Sun A2 card base, scored in half and folded.

I then cut a 1/4 sheet of Brocade Blue with the Tim Holtz Cameo Frame die.

I had to trim the photo to 3.5 W x 3.75 T to fit within the score line on the die cut.  I adhered the photo with double sided tape.

I added caplets in warm gold yellow at the top and bottom. This layer was then adhered to the card front.

I added a quarter sheet insert and a white envelope.


This card features a Dandelion Seedhead with tiny water droplets from a misty morning.

I chose Winter Wisteria as the card base and Lovely Lilac as the frame layer.

I added iridescent snowflakes embellishments held in place with purple mini brads on the right and left hand side.

A quarter sheet insert and white envelope.


This card is a photo of a Palm Leaf I took at the Muttart Conservatory.  The sunshine through the lace curtains when I photographed this card makes it extra cool.

The A2 card base is SU Garden Green.

The frame layer is Gable Green.

I added leaf green star brads on either side of the frame diecut and adhered it to the card base.

A quarter sheet insert and a white envelope.


This is the very textural center of an orange Dahlia taken at the St. Albert Botanic Park.  Love the water drop in the right hand corner.

The card base is SU Ruby Red and the frame layer is Dusty Durango.

I added red caplets on the top and bottom of the frame layer.  These are easily installed with my Crop-a-dile.  The layer was adhered to the card front.

I quarter sheet insert and an ivory envelope and it is ready to go.

Note: I had to replace the photo on the card because it end up with double side tape on it.  I replaced the photo with tulips which works just fine.

Saturday, September 30, 2023

Exchange Cards - September - Yellow Flowers

My Exchange Cards for September feature autumn colored flowers.

This first one is a sunflower.  The 4x4 inch photograph is from one of my annual photo calendars.  Trimmed the numbers off and it was ready to go.

I chose a Stampin Up Summer Sun card base.  I cut a 2" strip of black card stock which I punched with the SU Banner Triple Punch.  

It is very versatile as it easily centers the V on several widths of banners. Allow allows you to make any length.

Once that was adhered I installed 3 golden yellow caplets by making holes with the Crop-a-dile and then inserting the caps and choosing the right settings to press these into place.

A full half sheet white insert make this a card which can be used for any fall occasion.

This card features the same Summer Sun card base. This time I chose a Chocolate Chip piece of card stock which I aligned closer to the top of the landscape oriented card.

I adhered the 4x4 inch photo of a dahlia aligned on the left.  

Then, I chose a metal postage stamp brad in a golden yellow color.  I marked the spot for the prongs on the back and used a push pin to create a hole for them.  Press the prongs apart on the inside.

A full half sheet insert and this card is ready to be mailed on Monday.

Saturday, August 5, 2023

Photo Cards

I made another couple of cards from my photos. A lovely Dahlia taken at the Botanic Park.

I cut a piece of Garden Green card stock with the Tim Holtz Brackets border die.  I glued it behind the 4x4 photo and taped it down. 

I added a length of Elegant Eggplant grosgrain ribbon on the join and taped the ends to the back.

I added a silver flower sequin with a white tiny star brad at the point of the green diecut.

This layer was then adhered to the front of the Elegant Eggplant card base. 

I added a quarter sheet white insert on the right han panel. 

A greeting can be added centered just above the sequin.

On this card is the Astrantia Major Alba. 

I used the same border die on a piece of Elegant Eggplant card stock.  Taped it to the back of the photo.

I added a strip of silver glitter card stock over the join.

I added silver flower sequins held in place with white star brads on the 3 bumps in the die cut.

I adhered this layer to the front of a hot pink card base.  Added a quarter sheet insert.

Friday, August 4, 2023

Cards - Exchange

My August exchange cards are ready!

Again, I am using 4x4 inch photos from my 4x6 photo calendars.

I believe this is a strawberry flower with morning dew.  I would have taken it at the Community Garden.

I chose a Handsome Hunter card base.  

I cut a Stampin Up Lattice die in white.  I adhered it behind the flower photo allowing only a portion of it to show on the bottom.  

I added small yellow handmade paper flowers, white flower sequins and black tiny brads on the intersections of the die cut.

I then adhered this layer to the front of the card base, added a quarter sheet insert on the right hand panel and a white envelope.

Excellent.


My next card features a Queen Anne Lace flower which I would have taken in Ontario when visiting my sister.

The colors on this one were warmer so I chose a white card base.

I cut the SU Lattice die from a warm green textured card stock.  I split the diecut in two and placed one half on top and bottom of the photo.  The diecut was taped to the back of the photo then the layer was adhered to the card front.

The photo needed a bit of something so I used my fine black marker and added a dash frame all the way around the photo.

The photo has been trimmed to about 3.5 inches square.

I added a white quarter sheet insert and a white envelope and it is ready!

Tuesday, July 18, 2023

Exchange Cards - Purple Flowers

My cards for my exchange group are ready.

This month I chose purple/blue flowers for the cards.

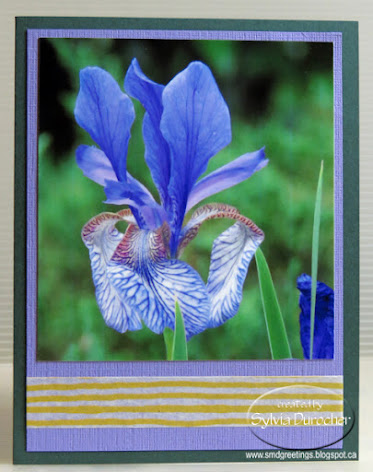
The first card is a photo of a blue iris.

I trimmed the photo to make it skinnier and  mounted it onto a piece of Lovely Lilac textured card stock. 

I added a length of yellow striped SU designer Washi Tape below the photo.

This layer was adhered to the front of a SU Handsome Hunter A2 card base in the portrait orientation.

A white quarter sheet insert was added to the inside of the card.


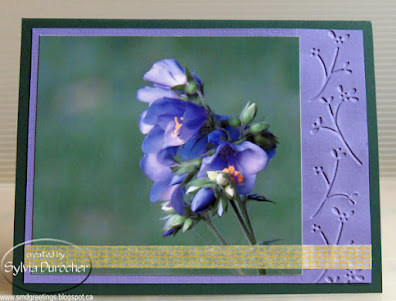
The second card features a photo of Jacob's Ladder taken at the Botanic Park.

The 4x4 photo was trimmed at the top to fit the Lovely Lilac layer.  The lilac layer is textured card stock from Stampin Up and was embossed with a border folder.

I chose a yellow SU Washi Tape with a plaid pattern to place below the flower.  I had to trim it in half so it would not interfere with the flower.

White quarter sheet insert.

Monday, June 12, 2023

Exchange Cards - Pink flowers

I got my exchange cards made today.

I started with 2 4x4 photos from my previous calendars. I chose 2 pink flowers - a rose and Ninebark.

I chose Stampin Up Pretty in Pink card stock as the base for both cards.  I used a corner round punch on this photo.  I used the SU Slot punch to make a slot in the fold where I could pull my ribbon through. I used Basic Black Scallop Dots ribbon for both cards.

I wrapped it around the card front and taped the ends together in the front.  I then used a black mini brad to adhere the Martha Stewart champagne butterly punchie to the ribbons and press the prong apart between the ribbon and the card.

The photo was adhered to the card front with 3D foam tape in all four corners.

I added a quarter sheet insert to the inside.


On this card I changed the orientation to landscape/wide.

I wrapped the ribbon around the card front and taped it down in the front where the photo would cover it.

I chose a corner punch which added 2 notches to either side of the photo.

I added a sentiment which was printed black on white cardstock and punched with 1 inch punch then mounted to a 1.25 inch black circle punchie. I put a hole and threaded through a white thread and hung it on the Scallop Dot black ribbon.

The photo was adhered to the card front with 3D foam tape.  These are off tomorrow.

Monday, May 29, 2023

Exchange Cards

I got my Exchange cards made for May.

I have decided to use my 4x4 photos from my past calendars.

This is a beautiful Red Poppy I think taken at the community garden.

I chose Tangerine Tango card base with a small piece of green card stock that I taped together on the back.

I stamped the green with Border Builder stamp set - script in Basic Black ink to just to knock down the plainness.

I wrapped a piece of Daffodil Delight ribbon around the element over the join and taped the ends to the back.

I then adhered the full layer to the card front with double sided tape.


This card features a warm rich orange rose taken at the Botanic Park.

I chose the same Tangerine Tango card base.

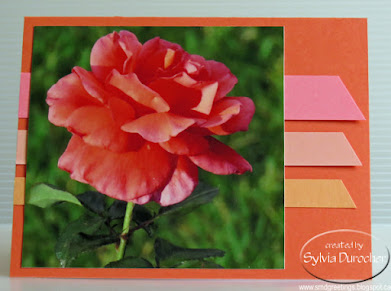
I added some complimentary strips of card stock behind the photo. Cameo Coral, Groove Guava and Peach Parfait.

I adhered the strips and trim the right hand end with scissors cutting at an angle.

Adhered photo with double sided tape.

Tuesday, May 18, 2021

Seniors Week - June 7-13 2021 - Card Donations

I worked on more cards for the Seniors Week Project.

I started with the yellow and blue layer which I made last summer.  It involves making a marking tool with old toilet paper rolls to create dandelion flowers.  

That layer was trimmed to 4.00 x 5.25 inches. 

I placed a piece of blue rick rack across the bottom third and taped the ends to the back. This layer was then adhered to the front of a medium blue card base.

I added a color printed greeting punched with the Stampin Up Decorative Label adhered with 3D foam tape.

This card was created with a 4x4 photo reused from one of my photography calendars. 

I trimmed the 4x4 down a bit to leave a bit more of a border. 

I added the vellum sentiment which I adhered to the photograph with gold flower sequins held in place with orange tiny brads.  This full layer was then adhered to the front of a yellow card base.


These cards are reusing a small card I made for a Stampin up party I held years ago.  I had leftovers and they just sat. 

The accent layer has a Tango Tangerine base with Tempting Turquoise designer paper.  I added an accent strip in orange punched with the Stampin Up Dotted Scallop Ribbon border punch. 

The tag was stamped with the Too Terrific Tags set in Tempting Turquoise on Whisper White. Layer onto Tango Tangerine with a Tempting Turquoise grosgrian ribbon held in place with an orange tiny brad. 

The Whisper White layer was embossed with the Swiss Dots folder and trimmed to leave a small border. It was adhered to the turquoise card base.

The stack is growing!

Friday, March 26, 2021

Card - Heart Tea Cup


Another card for the Coffee Loving Cardmaker Spring and Summer Blog Hop.

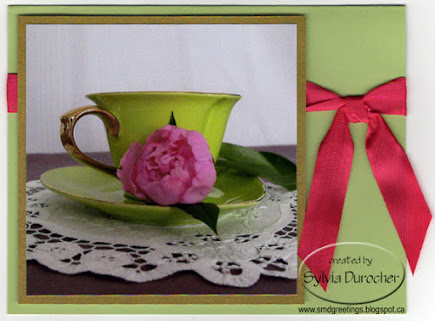
I chose a 4x4 photograph from my 2018 photo tea calendar.  I trimmed it to 3.75 inches square.  

I added a piece of gold metallic card stock behind the photo.

I chose a bright green card to match the tea cup in the photo. 

I wrapped a piece of deep pink seam binding around the front of the wide card and knotted and trimmed the ends. 

The tea layer was adhered to the card front with 3D foam tape.

Thursday, March 18, 2021

Cards - 4x4 set 2 - Thanks

A few more 4x4 photograph cards.  More photos from my calendars.

Great Black Capped Chickadee on a purple card base.

I have added a Modern Label punchie greetings adhered with 3D foam tape.


A Yellow Warbler on a textured yellow card base. I added a circle greeting which I mounted under the 4x4 photograph.


 A Koy Fish in the pond at the Japanese Gardens.  

I selected a terra cotta card base.

I added a Word Window greeting mounted onto a Modern Label punchie.

These will be donated to Compassion House.

Wednesday, March 17, 2021

Cards - 4x4 Photos - Thanks

A few more thank you cards.

This Don Juan Cricut "thanks" die cut is perfect for my 4x4 inch photo cards made with recycling my calendar images.

A wonderful Black Capped Chickadee perched on a branch on navy card stock.  The greeting was cut from white pearl card stock and adhered with double sided tape.


A rain soaked pink rose at the park for this card on a magenta card base.  The greeting is diecut with the Cricut in white pearl card stock.


This owl is one of my paper piecing creations.  I designed 12 owls for my calendar in 2016. 

I mounted it to a navy card base. 

A Don Juan Cricut die cut as the greeting.  Adhered with Quick Dry adhesive.

Really like these.