Showing posts with label flannel. Show all posts

Saturday, September 5, 2026

Bottle Bag V2 - 05

I continue to make my bottle bags in order to be ready for the Christmas season.

On this bag I started with a piece of beautiful African 100% cotton fabric. Dutch veritable wax Hollandais African fabric printed by Vlisco in Holland. Both sides were very good like batiks. I got the piece from RU and it was just the right size to get a bag from it.

I wanted the dark band at the top of each side of the bag. I could have cut the pieces 15.00 inches and stitched them together to make my 29" pieces but I forgot.  I then had to cut a piece of border 4.5 inches wide and sew it onto the other end of both pieces. Now I have edge banding at the top all the way around the bag.

I quilted the bag to the flannel layer along the dark brown diagonal lines with brown thread so it does not show at all but helps to keep the layers together.

Outer - African 100% cotton fabric

Batting - Grey flannel 100% cotton

Lining - Ivory polyester lining fabric

The strap is cut 12" x 4". The left and right ends are folded in then the strip is ironed in half lengthwise. It is opened and the long edges are folded into the center and ironed. Then I top stitch all the way around.

I laid my finished strips perpendicular to each other perfectly centered and sewed my bottom closing the spaces in the seam which I used to turn it right side out. I then top stitched my side seams. 

The strap/handle is attached with a secure Z stitching on the sides of the bag.

I added "My Bag" tag sewn on with yellow thread.  

I added a yellow and brown button accent on the right hand side on the edge band.


Saturday, August 29, 2026

Bottle Bag V2 - 04

Another bottle bag. I chose a heavier fabric this time but I think I went a little far on the other side and bent a needle in the process.

This was beautiful botanical fabric in a soft green color.  It was a remnant but enough fabric to make a bag.

I chose a pale warm blue 80% cotton 20% polyester fabric for the lining and a regular flannel fabric for the padding.  Maybe this one did not need padding.  Not sure.

I chose to put the green fern accent strip 3" from the top of the cut piece, which may be a bit low. 

I sewed the "My Bag" tag and the green button .

I created a strip of chipboard to iron my green strip to 1.25 inches tall. Worked very well.  It was then topstitched top and bottom before the sandwich was assembled.

The strap/handle was cut 12" x 4" and folded to 1" wide.  The ends are folded in to make it all nice and tidy.

Outer: 100% heavy fabric

Lining: Pale Warm Blue 80% cotton & 20% polyester.

I tried several colors of buttons but this soft green was the best one.

The accent strip was added to each of the four sides before assembly of the sandwich.

When I was sewing the sides and I at least 6 layers of fabric. That is when I bent my needle.

I chose to put my opening for turning right side out in the middle of the strip which ends up on the bottom and that was a great idea!  No bumps on the side seams.

The strap secured as usual.  I then hand sewed the "My Bag" tag and the button.

Tuesday, August 18, 2026

Bottle Bag V2 - 02

 I made another bottle bag this morning.

The fabric is 100% cotton vintage I expect. It was a left over I picked it up at the GA fabric sale this spring.  Fortunately, there was enough to make a bag.  I did have to piece one of the cross pieces.

I decided to put the flannel into the seams this time so it was cut 4.5" W x 29" L same as the outer fabric and the ivory cotton poly lining fabric.

I decided to add a band of turquoise blender fabric at the top. It was cut 2.5 inches T by 4.5 inches W. It was stitched to each end of the cross pieces and then ironed to face the raw edge.

I did measure my legs of the cross this time to ensure that the join was perfectly in the center.  I got lucky on the first one.

I top stitched the bottom square then top stitched the four side seams. 

I decided that one strap is enough so I cut a piece 12"L x 4" W, folded the ends in then ironed it in half then folded the raw edges into the center to make a 11" L x 1" W strap.


I tacked it to the right and left sides of the bag once I had decided which was the front.  I chose the bluest side to coordinate wit the turquoise.

I sewed on my "My Bag" tag.  Less time spent this time around.

With the corner seams being top stitched it gives the bag some stiffness which allows it to stand on it's own.

The strap is well reinforced to the bag.

A generous bottle bag which will hold a champagne bottle and hence almost any other bottle.

Super happy with this one.

Sunday, July 12, 2026

Placemats with Zippered Pocket

 I made this pair of placemats for a prize at our family event. 

I chose a piece of cotton I purchased at the GA fabric sale a couple of weeks ago (pink floral with a black background).  I made that the front.  I chose a piece of black polka dot poly cotton for the back.  

I cut the back and flannel backing 12 " T x 17" W. 

The front I pieced because my cotton was not long enough.  I added a piece of raspberry polyester knit on the left and side of the zipper.  The solid color helps to direct the user to the zippered pocket on the left.  I added raspberry colored tabs on each end of the zipper to fill in the gaps. 

I added two 12" ties on the opposite side which will keep it closed when rolled up.

Once I had pieced my front with the zipper and the raspberry piece I placed right sides together onto the backer and sewed all the way around leaving a gap to turn it right side out.

I ironed it and then did a top stitch all the way around closing the gap I had left. 

I then made 2 seams across the height of the placement. 1 to define the pocket and another just to keep the backer, flannel and cotton together.

The pocket can hold utensils and a napkin, markers, crayons, or other crafty things.

The fabric is completely washable. The color helps to hide the dirt. 

When going on a picnic at a park it gives you a clean place to eat no matter the condition of the table.

Sunday, May 17, 2026

Sewing Project - Shopping Bag - Pink Floral

Another shopping bag from project bags which I unpacked this week.  This collection has been put away for at least 2 years with the flood and the move I was not sewing much. 

The pink floral fabric is 100% polyester and therefore quite thin.  I decided to supplement it with some flannel. Both were cut to 20"W x 36" T which will be folded in half.  I put some curvy decorative stitch seams through out the piece to hold those layers together.

The lining is good quality white microfiber fabric. 

I created 2 pockets for the inside with some of the dark pink pieces in the print.  I put on both the front and and the back of the lining.  They measure about 5:00"W x 6.5"T and are lined with the same white fabric. I stitched the layers together, turned it right side out, added top stitch to the top edge then top stitched it to the lining on the center line.  Making sure that the opening was facing the top of the bag.

I created a narrow strip for the key clip and strung it onto the black support.  I connected the 2 ends to give me a loop on the outside of the bag while the clip was on the inside of the bag.

The straps were 1" wide by 31" long.  They were placed between the outside fabric and the lining leaving about 4" on the inside of the bag to allow me to reinforce them to the bag later.

I created the sandwich of front floral/flannel layer and the back white lining and stitched all the way around leaving a gap for turning it right side out.  That done, I ironed it carefully. I folded it right side out. I then topstitched the top edge and followed the strap extra between the layers to reinforce the straps to the bag and closing the gap I had left earlier. I placed the key clip between the layers with the key on the inside and loop on the outside.  I then topstitched both side seams. 

The bag measures 17.25 T  x 18" W.  It is quite a large bag.

Wednesday, April 22, 2026

2026 - Quilt 02

My second quilt of 2026 is done - Musical - Orange Strips Quilt.  

Accents - I chose to make the columns random so there was little chance of my seams looking misaligned.  I chose an orange cotton poly blend and added random strips which were appliques to the 11" fabric squares.  I then added gold sash pieces in different heights and placements to ensure that my columns in the end where the same length. 

Quilting - This was done randomly based on the shapes that were in each column.  The thread is a gold color.

Batting - The batting is a flannel sheet. 

Binding - I was advised to make the binding orange and I am glad I listened.  It did mean changing my mind about the self binding I was going to make with the gold backer.  Cut to 3" folded in half, sewed to the front and fold over to the back. Stitched right next to the binding from the front to catch the fold over on the back. I followed this video for the installation of the binding and will likely continue this process. 

Measurements: 40.75"W x 65" T

It took time over 4 days to get it done. It will be donated to Project Linus.

Note: I made my seam attaching the bind generous because of the width of the binding but in the end I had to trim the quilt edge to have the binding fold over nicely. Not sure what happened there.

It is hanging on the the dowel I set up above the trim on the closet doors in the craft room. You can see more details on it here.

DIY Project - Quilt Design Wall / Photography Backdrop

I finally got my Quilt Design Wall put up so I could hang my second quilt this year and photography it.

This is a multi purpose set up because space is at a premium in this place.

1. I can hang quilts for my final photos.

2. I can use this as a photography backdrop - Hanging fabric/paper from the cafe hooks at the top lets me set up my camera on the tripod and go back 7ft which gives me a lot of flexibility. Always there to use at a moment's notice.

3. I can hang my flannel design wall when I am making a quilt. The design wall is white 100% cotton flannel and the quilt fabric pieces stick to it and make moving the pieces around really easy. The size will accommodate any quilt I will make.  It measures 72" Wide x 80" Tall.

I was lucky to get the right hand hanger and the middle one into 2x4 with the left one in an anchor.  That will support anything I will use this for.

The tools came in handy. Drill for the anchor install, level, screwdrivers, hammer and nails to assess whether I was in only dry wall or I had hit a stud. I did use my stud finder as well. The square to make sure I was even to the closet wall.

The dowel at 3/8" in diameter and 72 inches long was not straight so you can see in the top right hand photo that I had to tie the dowel to the hook support so it would not pop out of the hooks.  The dowel and cafe hooks will stay there all the time as they are placed above the trim of the closet doors. 

The metal rods which acts as weights for the design wall will stay in all the time.  I fold the wall in half height wise then roll it onto the rods.

To store the wall I made a custom bag to hold it.  This way it stays clean and some what wrinkle free.

I then added a hook to the shelf in the craft room closet where the bag can hang. 

Done and dusted.

Super happy with the final result.


Upgrade: 20260427 - I found out that I could put a larger dowel if I pulled it through the sides instead of passing it by the mouth of the hooks so I headed to RONA and purchased a 1/2" x 72" dowel.  I sanded it and gave it a coat of Tung Oil. I hung it up the next morning.  Much better.


Monday, March 30, 2026

Sewing Project - Front Zipper Pouch

I made another bag the other day.  I wanted to give the Front Zipper Pouch a try.

I chose this beautiful floral print in cotton.

I chose ivory thread and a taupe zipper.

I added a layer of flannel for a bit of padding.

The lining is gorgeous navy microfiber fabric which will wear well.

The cotton outer layer was cut 9 3/8 inches x 23.25 inches.  The flannel was cut 9 3/8 inches by 21.75 inches long.  The zipper is a 9"/23cm one.

The flannel was quilted to the cotton with the curvy decorative stitch vertically along the full length. 

I made a wrist strap by cutting a length of the cotton outer fabric, folding it in half then in half again and top stitching both sides. Finished it measures 4 inches long.

Then I inserted the zipper on the short end between the outer and the lining.  Now, I have a tube with the zipper inserted.  It was a matter of deciding where the zipper would be placed. I could be at the very top or some where along the top third of the pouch. I chose 2.5 inches down from the top fold. Once decided, I pinned the side seams right side out, added the wrist strap above the zipper and stitched about 1/8 inch from the edge then turned inside out and sewed the side seams at generous 1/4 inch to enclose the first seam inside. Turned it right side out.  Pressed really well.

I added a metal charm on the zipper pull so that it would be easy to open and close.

Note: I should cut the flannel from the sides seams as they are quite thick.  I was planning on doing some stitching on it but I have not come up with an idea that seems to fit so I will pondering it over the next few weeks.

Finished size is 8" wide x 11" inches tall.

Monday, March 9, 2026

Sewing Project - Fabric Vase Wrap - Green Fern


This wrap started with the fern embroidery which is machine stitched and was acquired as a left over from someone else project.  I chose a moss green linen for the base fabric and some green flannel as the middle layer.  I pinned the embroidery until I was happy but there was not much choice because I did not want the braid in the side seam.  I sewed the fern pieces on to the linen & flannel then placed it right side together with the lining fabric which is a leaf pattern polyester fabric. Stitched all the way around leave a gap to turn the piece right side out. I trimmed the 4 corners then turned it. I pressed it then sewed my curvy top stitching all the way around.  I then wrapped it around the bottle I had chosen and determined where the side seam would be.  Sewed the side seam creating the flap which in this case are the same size. This makes it identical either way it is placed on the vase/bottle. 

The bottle I used for this wrap is a bit shorter then the others and a bit bigger in circumference.

The fabric layers were cut 7" T x 12" W to give me a finished piece which is 6.5"T x 11.5" W using .25 inch seams.

Saturday, February 28, 2026

Sewing Project - Fabric Collage Vase Cover/Wrap

My sister and I discovered vase wraps back in early February.  I was intrigued so I decided to give it a go.

I started with a piece of flannel 9" x 9" square to allow me to trim it after I had quilted it.

I then used Mom's Quilt as you Go method to sew strips of curated fabric and lace along the length of the flannel. I used 8 strips in varying widths.

There are many ways to finish it into a tube to go over the vase/bottle.

I decided that I wanted a flap to extend from the body of the wrap.  So, I added a strip of turquoise fabric to the lining piece so it would be exposed when I sewed the wrap closed.

I trimmed the fabric collage piece to 8.5" tall and extended it to 9.5" wide with my final piece on the collage. I trimmed my piece of lining to the same size.  I then placed right sides together and stitched all the way around leaving a gap in order to turn it right side out.  Once turned right side out I pressed it well and top stitched all the way around very near the edge with a decorative stitch. 

Then, I wrapped it around the bottle I was going to use as a vase and played with where the seam would be placed.  The option was a bit, none, or lots of turquoise showing. Once, I decided I pinned it as tight as I could and removed the bottle. I sewed the seam along the very edge of the pattern fabric edge. 

The beauty of the wrap is that it folds flat and stores away when not being used.

The bottle I chose is a sauce jar that measures 7.75" Tall, 2.25" in diameter and about 8" in circumference.

You can adjust this design any size bottle you have one hand.

Wednesday, January 21, 2026

Sewing Project - Musical/Blue Dots Blanket 2026 01

I am back to sewing!

I finished this blanket this week.

Music Squares with Blue Dots

Final Size: 41W x 67.00T inches

Technique: Front QAYG Mom Style onto foundation layer which is poly cotton.  Quilted the front to the backing traditionally.

Colors: Yellow, Khaki and Navy

Squares: 10.5 inches 

The squares came from the ReUse Center. Nice quilting cotton.

The yellow sashing is cotton poly fabric.
The backing is army green 100% cotton flannel.

It took 3 days to complete but after almost a 2 year break from sewing I am happy with that.

I added blue dots to fix a problem where the sashing seam had missed the fabric. I put heat and bond behind a blue batik fabric and cut 5 circles with my SB smooth round thinlets.  I adhered them to the quilt then applied hand stitching which was crazy hard because of the glue.

The flannel backing is dark and will be useful for needing less laundering.

You can see the quilting in the shape of squares.

The quilting was done with a thread that matched the flannel so they are not very visible and the same on the front. 

I used yellow thread when I sewed the sashing.
I had to pin it very well with my quilting pins as it had to go through the throat of the sewing machine.

I cut a 6 inch square of paper which I used for the quilting of the front to the flannel back. I angled the template so they are wonky and do not track the edges of the yellow sashing.

I followed the edge of the paper with my sewing machine foot which worked very well.


I did a variety of hand stitching on the blue dots but it was very difficult for 2 reasons.

I had to make holes in the glue with a large pin so I could get my embroidery needle through.

It was already all finished so I could not use a stab stitch and go through right to the back. I had to stay between the foundation layer and the flannel.  I did have to undo quite a few stitches because I caught the flannel.

Note: I was aware of the issue and did not think it through before finishing the quilt.  Would have been much easier to fix then it was just the front and foundation layer.

Sashing measured 2.50 inches between the squares.  I cut the sashing strips (3"x11") for in between the squares and sewed those in between to create 3 columns of squares. Then, I cut the tall vertical sashing strips 3 by 70" to go in between the square columns. Then I sewed the columns to the foundation layer.  My front was too small because I had missed the outside sashing.

Note:  When I started sewing the columns to the foundation layer I started with a musical square column but it should have been a sashing column.  I should have cut the side sashing strips as well and maybe I would not have missed them.

Now I had a blanket with no outside sashes at all.   After a think overnight, I decided the only choice was to cut the foundation layer to the edge of the sandwich I had and add strips of foundation layer and yellow sashing to top, bottom, left and right sides. The flannel layer was the size I needed for the final blanket so I just left that the size it was.

I sewed the extra yellow sash/foundation layer to the top and bottom then cut the side pieces to the 70 inches.  Then sewed those in place right and left sides.

Fortunately, I decided to fold the sashing from the front to the back for a binding before I cut the outside strips. Now the strips needed to be 5 inches wide instead of just 3 inches. 

Learnings: 
I have to reacquaint myself with Quilt As You Go so I get it right next time.  Pushing the bulk through the the throat of the machine was no fun.

Addressing the sash issue right away would have saved me a lot of headache.

This blanket will be donated to Project Linus. 

Monday, December 1, 2025

Sewing Project - Hot Pad

I decided to make a hot pad so I can use my peninsula for serving food. The plan is to make 3 of them but one is a start.

My sister has made this one.

I did want to make a removable cover so that if this is not my final color choice at least the time making the pad was not wasted.

I chose a pear fabric for the top and a deep yellow fabric for the bottom.


I tested the fabric sandwich before I started sewing.

Cotton cover top and bottom.

Pad
  1. Flannel - snowflake
  2. Terrycloth - navy
  3. Insul-brite Thermal Batting
  4. Terrycloth - yellow
  5. Flannel - snowflake
I heated my iron to the hottest cotton setting then set it down on the sandwich with out steam for one minute. The counter was slightly warm but not hot to the touch at all.

I set about making the pad.  I decided to make it about 12x12 inches square. My casserole dishes are around 9x9 inches.

I pieced together the yellow terry cloth and the navy terry cloth layers until I had the size I needed.

I cut the Insul-brite to 12x12 inches.  

I used my walking foot to stitch these layers into a cohesive piece.

Installing the walking foot took a long time.  After a couple of videos, I worked it out but my needle was hitting the foot.  I verified I had the right foot for my machine so I kept trouble shooting. After replacing the not quite straight needle I was finally able to stitch the middle layers together. It worked really well.  It's been at least 2 years since I bought it and had not used it.

Then I cut a piece of snowflake flannel to 14 x 28 inches which will be the pad cover. I sewed the 3 edges to just encase the middle layer. I inserted the middle piece into the case and folded the open end to the inside. I top stitched all the way around at about 1" from the edge. Then I closed the open end with a seam closer to the edge.  I top stitched a cross in the center but that may not have been the best idea was that is where the loft needs to be to protect the space below. 

NOTE: Keep the stitching away from the center.


Now I could get started on the removable cover.  Upon inspection of the pear fabric the pieces were smaller than I needed. I decided to apply a couple of fabrics to a foundation layer with the Quilt As You Go method.  I started with my foundation piece being bigger than I needed. I started with the pear fabric, and alternated strips of yellow and pear until I ended with pear fabric. 

I cut the deep yellow fabric to 13 inches by 15 inches which I thought was plenty but forgot about the thickness. My seams ended up at .25 inches and I zigzagged the edge as well.  I was going to felt the seams but there was not enough fabric for that. I sewed pear pieced fabric and the deep yellow fabric on the 3 sides, trimmed the corners to the zigzag and turned it right side out.  Ensured that the pad would fit inside. Good to go.

I was able to made a generous hem on the open end and top stitched that edge.

Now I could place the pad into the removable cover.  Paying attention to getting the far corners aligned properly.

The cover is just a slightly bit deeper than the pad.

It is reversible so I could use the pear side or the deep yellow side as the top.


The pad and cover now all settled in place provides about 12 x12 inches of protection for my counter.

Should the cover get dirty from the bottom of pans or casserole dishes it can be removed for laundering. 

Of course, the pad is also washable should the need arise. The pad could also be inserted into a new cover based on design or wear. 

There is a potluck at the end of the week so it was the big motivation to get this project done. Besides, I needed a day at home.  Last week was full of activity and being out of the house or contractors in my house.

I enjoyed my day sewing and used some fabric from my stash.

Monday, July 8, 2024

Slow Stitching - No. 028 - Zokin - Japanese Cleaning Cloth

Week 28 in K3N 's Slow Stitching Challenge on her Youtube channel, K3NClothTales. 

This week we learn about Zokin - Japanese Cleaning Cloths.  A method of making worn cloth useful again by stitching 2 or more layers together.

I easily found several options in my rag bin.  For this piece I combined a piece of plaid flannel that was part of Dad's pajamas and a piece of navy terrycloth.

The stitching is all over the place but with my hectic renovation schedule I was not as relaxed as I should have been.

I am loving this idea and forsee a few more of these in my future.  I have a hard time throwing away cloths - dish cloths, face cloths, tea towels etc. Now I can layer them and make them useful.

Monday, April 8, 2024

Sewing Project - Wine Bottle Bag - Updated

When I visited my sister a while back we worked on a wine bottle bag design.

I brought the pieces to make one as we ran out of time to finish one for me.

We had decided to add some height to the bag so we could have 1.5 inches in the top band where we were top stitching. This would add strength and a bit of stifness.

The one on the left was the one I brought home so I cut the outer fabric and added the 1.5 inch blue strip.  That meant I had to add some to the lining as well.  We decided to leave the flannel so it would only reach the top of the bag with out being folded over in the seam.

Learning is challenging. I did add the pieces I needed but failed to remember to put the flannel in and to make the top seam 1.25 inches so there would be extra fabric in the top edge. You can see that it is higher than the other one. Made on Sunday.

The one on the left is the one I made on today which incorporated all the things we planned.  A cotton outer fabric, a flannel layer shorter than the cotton, and a poly-cotton lining the same size as the outer fabric.  The fabric measures 15.5" tall by 12.5" wide. Flannel is 14" T x 12.5" wide.

I quilted the flannel to the diagonal patterned fabric along those lines in black thread. Then I made the box corners on the outer and lining fabrics.  Then made the strap.  Pinned the strap first to ensure it was right with the same side facing the outer, that they were on the sides with the seam at the back, and that they were aligned with the edge of the fabric. I then added the lining ensuring that the box corners were sitting opposite the ones on the outer fabric.  I sewed the seam 1.25 inches wide along the top leaving a opening to turn everything inside out. 

Once the lining is pushed into the bag and aligned, then pressing the top edge flat I sewed the 2 top stitching seams. One really close to the edge to close the opening.  The other to capture the handles a second time to ensure strength.

Note: Maybe a bit of trimming of the flannel in the box corners would help balance out the bottom. They stand on their own without a bottle inside.

Updated:  I redid the one on the right to include flannel, the 1.5 inch top stitched edge and an accent on the blue strip.

I have added the accent for number 2 so this set is finally completed.


Sunday, February 25, 2024

Sewing Project - Food Storage Coths

I made another batch of food storage cloths as I found the very cute flannel at the ReUse Center this week.

With pizza on them there will be no mistaking them.

I use these in my veggie and fruit tupperwares in the fridge as well so now I have plenty for all my food storage needs.

They are 6x7 inches and I just cut it into 8 pieces and serged the edges.

Job done!


Friday, September 15, 2023

Fabric Coasters - Set 2

Another set of coasters done today.

The turquoise set in the corner is fabric I dyed in the microwave with Rit dye.  It worked pretty well.  I had cut the pieces to a bit larger than what I needed so if it shrank or the edges got messy I would still have enough to cut my 5" squares.  

It is interesting the different weights and tightness of weave in linen.  The loosest weave was the blue denim and the rust colored ones. The olive linen was tightly woven. 

Mostly I put in the scraps of flannel I had.  The yellow ones needed white flannel as they were quite thin and the pattern showed through.

This is 22 sets of two coasters.

I am really happy this effort.

The changing of thread for each color took some time but was absolutely necessary.

These measure 4.25 inches square.

I was very fortunate to have a 5 inch and a 4 inch quilting ruler so that made cutter a lot easier.  

The rotary cutter and large cutting mat was the foundational. 

The chop stick for pushing out the corners was the perfect tool for the job. Not too sharp to ensure that the corners were not pushed through.  

The large fabric scissors went well to trim the excess fabric off the corners in one stroke in each direction.

I did have to purchase thread for the wheat colored and the olive colored ones.  That was expensive but worthwhile.

I have started using golf tees to keep my bobbins with their parent spool of thread.  The connectors I spent a lot of money on just broke after a couple uses.

The flannel squares were easy to cut and quickly make as stack so I could just pull them off as needed.

Wednesday, September 13, 2023

Fabric Coasters - Set 1

I've decided to make fabric coasters for sale.

I've chosen to use linen/cotton fabric.  Generally, the outer layers are linen and I have put cotton flannel in the center.

The outer layer is cut to 5 inches square and the flannel layer is cut at 4 inches square.

I sew the flannel to the front piece with a wide seam then sew the 2 outer layers together with a narrower seam leaving a space to turn them out.  

I trim the corners to remove fabric bulk in the corners. I turn them right side out.  Press them flat making sure that the opening slot is well pressed.

I sew a seam really close to the edge all the way around closing the slot at the same time.

This is 11 sets of 2.  I am halfway to where I wanted to be. I have several other colors to make up yet.

Really happy with this day's work.

I am also working on packaging and how I will display them for sale.

Saturday, April 29, 2023

ReUsable Make Up Remover Pads - Gift

I put together this gift of ReUsable Make Up Remove pads for my grand niece. 

It is always good to reuse and reduce and this way the pads came be washed and reused for a long time.

They are made from 2 layers of flannel with serged edges.  I will link to the detailed post here. 

The mesh bag included is for laundering this small pieces of flannel.

I made a card in Elegant Eggplant card base with a watercolor layer topped with stars and a greeting.

The greeting is punched with the Modern Label punch and off set with a piece which matches the card base.

I used turquoise stars with a grey one to coordinate with the watercolor piece.


Monday, March 13, 2023

UnPaper Towels - Improved

Here's the second set of UnPaper Towels I've made.  

It was great to use the serger to finish the edges very professionally. 

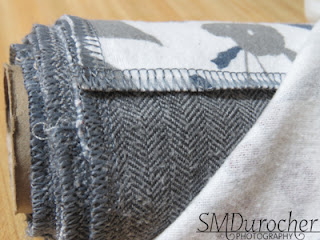
I paired the 100% cotton grey flannel with this winter pattern which also included some grey along with teal and cranberry.

I included 10 towels in the set - 5 of each fabric.

They measure 10x10 inches square.

There are many ways to store and use these.


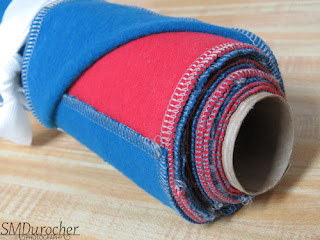
They can be rolled onto the roll from your paper towels.  They cling to each other nicely and would roll off just like the paper towels used to.

Whether you have a paper towel holder that sits on the counter or one that hangs under the cupboard this roll should work the same as before.

Once used, they can be handled just the way wet towels would.  A container under the sink until they head to the laundry should be just fine.


I thought I would try recycling a tissue paper box to hold them and I think that works quite well.  This box was too shallow to hold all of them but there are deeper ones.

If they were folded in such a way that one would pull the next one out  that would be cool but maybe more hassle than its worth.

A basket, a box, a bag would all be options.

This set is 100% cotton fabric and in bright primary colors.

I paired a deep turquoise color and red.  Beautifully soft.

Again, 10 in the set with 5 in each color.  

I have tied the set with a large twill tape and added a tag to explain what they are and how to use them.


These rolls will be donated to the fundraiser to be held later this year.

Saturday, March 4, 2023

Sylvia's Simple Shots

With my machine in a desk and not really portable I choose to take other tasks for my time with the ladies at quilting. 

I  took cutting to quilting on Monday since I just need my cutting mat, my rotary cutter, measuring tape, my long quilting ruler and some scissors.   I cut 16 UnPaperTowels - 6 sets of 2 in the grey flannel and 2 sets of 2 in the red flannel.

You can see that I have trimmed the corners on the top 2 sets making them ready for the serger.

I have quite a bit of flannel to cut and serge.  I think I will just put all of them in a pile then assemble sets of 10 somewhere along the line so I can put together nice looking colors.

When I picked up the serger I realized that I would need 2 cones of serger thread for the needle threads as they had been cut off.

I checked Michaels - they carry Coats and Clark but only in black and white on the 3000m spools.  Price is pretty good with a coupon.

I checked Fabricland which carries the Tailor brand and the price was pretty good.  I checked on the fuzziness of the thread and it was not as smooth as a sample I had from home so I moved on. They carry high end brand at a very high price.

I headed to Walmart where the price was about the same as Fabricland with the same manufacturer as Michaels and there was some grey.  Upon checking, the thread was smooth and very comparable to the the one I had with  me.

At quilting, Linda had brought fabric from one of our prolific quilter's stash.  This lady has experience health issues and has given up her hobby.

We were told all the pieces had to go.  There was a nice collection of fat quarters in beautiful colors and 100% cotton.

I took a stack of these fat quarters for my sister who is making different kind of sewing projects for the Grandma Africa chapter in Red Deer.

She has made casserole carriers, pot holders, aprons, and bunch more.  

She is working on getting rid of her stash but this will help a bit in offering different colors for her projects.

You know what they say - be careful what you wish for.  I had been wondering how to find flannel for my UnPaperTowels at a reasonable price since they will be donated or given as gifts.

Well, there were some pieces in the stash that Linda brought on Monday.

Here's the pieces I found.  There are a few darker pieces for the Make Up Remover pads projects.

I washed all the fabric and ironed them all so that they lie nice and flat and I can see what I have.

I will cut UnPaperTowels first then use the leftovers for the pads as they need pieces about 4 inches square.

Thanks so much for the donation of fabric.

I had a friend over for tea on Thursday.  I had not seen her since early December.  Of course, my life has been turned upside down since then.

We had a great visit. 

I used my Signature Turquoise and Yellow tea set which was a nice springy color.


I was invited to my aunt's new place for lunch on Saturday.  They sold their house and bought a condo much closer to me.  I am very happy to have her and her husband closer.

I decided to make Saskatoon and Rhubarb crisp in small pie size.  I used honey for a bit of sweetener in the fruit and brown sugar in the crumble topping.

I made 4 - 2 for my aunt, another for my other aunt who was invited to lunch as we were dropping off our art in the Juried Member show that morning.  One for me.

I ate mine for supper on Saturday.


Another book this week - J is for Judgement by Sue Grafton.

The story is about Wendell Jaffe who was recently declared dead after being missing for the last 5 years.  His widow Dana has collected the insurance money and has spent a lot of it clearing debts incurred while raising her 2 sons alone.

Kinsey Millhone has been hired to investigate a reported sighting of Wendell in Mexico.  Off she goes to spend a few days south of the border.  Based on her sighting it does seem that Wendell is alive. 

He has a new partner Renata and they just packed up in the middle of night.  Where are they headed. Kinsey heads back to California and starts tracking leads. One of his sons has been arrested so the speculation Wendell is headed north.

Life is always exciting with Kinsey.  We find a bit more about her personal life this week.  Some of her extended family reach out and she as always thought she had no family because the aunt who raised her never mentioned others.  There was a reason and it was hard to accept by Kinsey.