Showing posts with label Handsome Hunter. Show all posts

Tuesday, June 18, 2024

Cards - All Occasion

I wanted to finish a few more cards before cleaning up my space for company as well as use up the rest of this gold speckled paper. 

An Island Indigo card base with a piece of the gold decorative paper adhered with ds tape and glue stick.  

I added a gold fabric ribbon along the left hand edge knotted to the top of the card.

A flower element with leftover flowers from the earlier set. Cut with the Tim Holtz Tattered Flowers die.

Rust, golden yellow and blue to match the card all held in place with a copper mini brad.

White quarter sheet insert and envelope.

A masculine themed card with Not Quite Navy card base with a piece of the gold speckled decorative paper. 

A length of gold fabric ribbon tied along the top edge and knotted.

I cut a Tim Holtz mover and shaper Jalopy truck from same card stock as card and adhered with 3D tape.

A white quarter sheet insert with a white envelope.


For this card I used a SU Handsome Hunter A2 card base.

Adhered a piece of gold speckled decorative paper and trimmed the left hand side to the card edge with scissors.

Added a length of gold fabric ribbon along the fold edge of the card and knotted.

There was a star shaped hole where I had cut a shape earlier.  I cut a yellow star with the same cutter (SU Star Thinlits). It was adhered over the hold with 3D foam tape.

A white quarter sheet insert and white envelope and it is ready to give.


A bit of change of pace in color for this card.

The star was a leftover from earlier cardmaking so I mounted it to a piece of Tempting Turquoise card stock trimmed to leave a border.

I chose a bright green card base - Glorious Green I think.

I tacked the large star in Summer Sun then the small star in the same color as the blue layer. 

Made a hole in these layers and added a yellow star brad.

This layer was then adhered to the green card front.

White quarter sheet insert and envelope.

Sunday, June 16, 2024

Card - HB - Floral Ribbon

I found this floral ribbon at the ReUse Center this week and I thought it would work for a card.

I chose to make an A7 card because it did not cut off any of the rose ovals.

I chose a SU Handsome Hunter green card base. Then I added a smaller layer of SU Rose Red card stock. Then a piece of Very Vanilla to highlight the rose ovals in the ribbon.

I painted the right hand side of the VV layer with some rose colored watercolor leaving a spot of a greeting. Once the watercolor was dry and pressed flat I adhered the pieces in the layers you see.

I stamped the greeting with SU Cherry Cobbler ink with a SU greeting stamp.

I then wrapped the ribbon along the left hand side and taped the ends to the inside of the card.   I added an insert and 5x7 inch envelope and the card is ready to go.  This is for my sister who celebrates a birthday soon.

Friday, October 20, 2023

Christmas Cards - Arched Joy

Here are my first Christmas Cards for 2023.  I generally do a Christmas Card Challenge but it did not happen this year.

I used the TH Arched Frame die into which I placed the TH Joy Mover and Shaper die.  Running this combination in the Big Shot with the striped designer paper I got my main element.

I chose a designer paper with a variety of colors which allowed my to use several colors of card stock.  Top left - Handsome Hunter, top right - Tempting Turquoise, bottom left - Kiwi Kiss and bottom right - Island Indigo.

The Joy is visible against the darker card stock.   

I printed the words "to the World" on white card stock in coordinating colors and trimmed them to .75" tall and then cut the left hand end into a banner by hand.  This was mounted to the card with 3D foam tape aligned on the right hand side. 

I added a quarter sheet insert and a white A2 envelope.

Friday, August 4, 2023

Cards - Exchange

My August exchange cards are ready!

Again, I am using 4x4 inch photos from my 4x6 photo calendars.

I believe this is a strawberry flower with morning dew.  I would have taken it at the Community Garden.

I chose a Handsome Hunter card base.  

I cut a Stampin Up Lattice die in white.  I adhered it behind the flower photo allowing only a portion of it to show on the bottom.  

I added small yellow handmade paper flowers, white flower sequins and black tiny brads on the intersections of the die cut.

I then adhered this layer to the front of the card base, added a quarter sheet insert on the right hand panel and a white envelope.

Excellent.


My next card features a Queen Anne Lace flower which I would have taken in Ontario when visiting my sister.

The colors on this one were warmer so I chose a white card base.

I cut the SU Lattice die from a warm green textured card stock.  I split the diecut in two and placed one half on top and bottom of the photo.  The diecut was taped to the back of the photo then the layer was adhered to the card front.

The photo needed a bit of something so I used my fine black marker and added a dash frame all the way around the photo.

The photo has been trimmed to about 3.5 inches square.

I added a white quarter sheet insert and a white envelope and it is ready!

Tuesday, July 18, 2023

Exchange Cards - Purple Flowers

My cards for my exchange group are ready.

This month I chose purple/blue flowers for the cards.

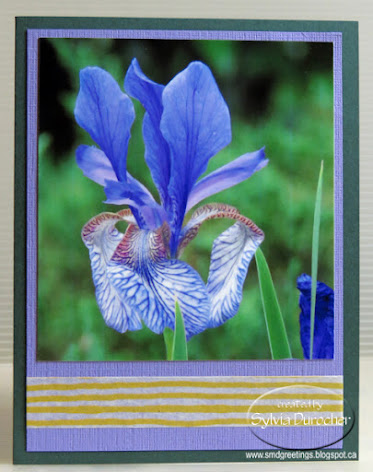
The first card is a photo of a blue iris.

I trimmed the photo to make it skinnier and  mounted it onto a piece of Lovely Lilac textured card stock. 

I added a length of yellow striped SU designer Washi Tape below the photo.

This layer was adhered to the front of a SU Handsome Hunter A2 card base in the portrait orientation.

A white quarter sheet insert was added to the inside of the card.


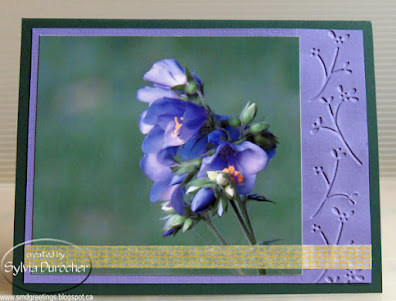
The second card features a photo of Jacob's Ladder taken at the Botanic Park.

The 4x4 photo was trimmed at the top to fit the Lovely Lilac layer.  The lilac layer is textured card stock from Stampin Up and was embossed with a border folder.

I chose a yellow SU Washi Tape with a plaid pattern to place below the flower.  I had to trim it in half so it would not interfere with the flower.

White quarter sheet insert.

Saturday, October 31, 2015

R2G Card Kits - SU - Wonderful Wreath

I used the Stampin Up Wonderful Wreath on this card as the central element.  It's done in Handsome Hunter.  The greeting is from the All Holidays set, done in Cherry Cobbler. These are on a Whisper White layer trimmed to 4.00 x 5.25 inches leaving the small border all the way around. I added a bow made with Cherry Cobbler Scalloped Tulle Ribbon.  I cut the piece to about 3.5 inches then gathered it together in the center and tied it off with a piece of white thread.  The tails were trimmed even. Some times I trimmed the ends of the bow as well to have each side even. It's held in place with a Zot. This is a bow that does not create a lot of thickness so it makes it mail friendly.