Showing posts with label 2021 Christmas cards. Show all posts

Tuesday, July 6, 2021

Christmas Card Challenge - July - Trees

I found a set of these little trees when I was cleaning up.  I have no idea where I got them but they may have come from my niece.  I don't have this die so I did not cut them. They are Stampin Up Gumball Green.

I have chosen the same elements and arranged them slightly differently in each card. 

Trees - Gumball Green die cut spruce tree - die unknown

DSP - SU Winter Bright collection

Colors - Bashful Blue, Gumball Green, Whisper White

Tiny White Brads

Greeting - SU Artisan Label punchies in BB & GG

Card bases - Textured Gumball green 12x12 cut down to size

The greeting was mounted to card front with 3D foam tape. 

I added 3 tiny white brads to the main tree then adhered with double sided tape. 

The snowbanks were ripped from white card stock and I used a bit of Bashful Blue chalk along the rough edge.

The star is a punchie from white pearl card stock adhered with a Bling Zot.

The DSP was cut to leave a small border and in one case cut to 3 inches wide by 5.25 inches tall.


Thursday, June 3, 2021

Christmas Card Challenge - June - Dove

The challenge for June is Dove. These card feature a die cut white dove.

The watercolor background is one I did earlier.  I cropped it to square and applied a fade to blur the right hand side edge. 

I drew the olive branch and added it to the digital background. Added the sentiment below and printed this on white card base.

I die cut the dove from heavy card stock with the Sizzix Green Dove die.  It was then mounted to the card front aligning it on the olive branch.

The 2 cards below are using copies of this card which I had messed up when printing. I trimmed them to leave a small border and mounted them to coordinating blue card bases.

Added the die cut dove.

A few more cards for the Christmas card box.

Saturday, May 1, 2021

Christmas Card Challenge - Pencil Crayon on Kraft

I chose pencil crayons on kraft card stock for my challenge in May.  

I printed the main image from the Gentle Peace stamp set onto kraft card stock.  I then spent a pleasant evening coloring them with pencil crayons. Laurentian pencils I found the nicest to use.  I ran the black pencil along the edges to remove the lightest of the edge.

I chose a light blue card base to coordinate with the image as well as a strip of warm green to put behind the Holy Family image. 

I printed the sentiment onto kraft card stock, flagged the ends, ran a black pencil crayon along the edges and 

adhered it with 3D foam tape.

Adding a seasonal insert and an envelope and they are ready for the card box.


This next card I coordinated the card base with the edge of the frame of the stained glass window.  I chose a Pea Green textured card base.

I chose a warm brown strip of card stock to coordinate with Joseph's garment.

Both the main image and sentiment has black pencil crayon edges.

The sentiment is adhered with 3D foam tape.

This card has blue in the rays and a light mustard yellow in the window behind the family.

I chose a blue card base and a piece of coordinating card stock.  I added a bit of texture on the light piece with pencil crayon.


This card has a warm green card base onto which I rubbed gold pencil crayon to match the gold in the stained glass frame.  

I adhered the main image onto a layer of gold paper and trimmed around leaving a small border.

I cut the ends of the sentiment square this time.

I did a similar technique last year in March 2020.


Friday, April 9, 2021

2021 Christmas Card Challenge - Refurbished Cards - Session 2

I continue my clean up of old cards and they need to be use or otherwise disposed of.

A beautiful manger scene which is simple and elegant.

I just added a brown texture card stock layer to the golden rod card base.

The manger layer was then adhered to the brown layer.

I added a greeting with a Stampin Up Modern Label in the the card color and a brown Word Window punchie.  This was adhered to the card front with 3D foam tape.

While shepherds kept their watching
Over silent flocks by night,
Behold throughout the heavens,
There shone a holy light:

I love the beautiful greens in this stain glass window of the shepherds in the fields.

I trimmed the window from the commercial card front.  It was not wide enough so I added a strip of purple to the right hand side.

The stained glass layer was adhered to the card front with 3D foam tape.


A well lit church scene inside a Christmas tree shape with gold foil stars all around.

I trimmed it and then layered it on a piece of white card stock.  Then added to a medium blue card base.

I added a Stampin Up Modern Label punichie greeting in blue. This was adhered to the card with 3D foam tape.


The name above all names "Jesus".  The reason for the season.  Gorgeous trio of candles with holly around the base. I added a green layer to the golden rod card base. Adhered the focal element with 3D foam tape.


The trip to Bethlehem on a donkey.  Mary pregnant with Jesus and Joseph leading the family to their destiny. 

Love the blues and purples in this card.  Adhered with 3D foam tape to a purple card.

I am really happy with these cards. 

Five more cards for the Christmas box.

Tuesday, April 6, 2021

2021 Christmas Card Challenge - Refurbished Cards

With the power off most of the day I had to keep my hands busy.

I decided to refurbish some commercial Christmas cards.  Use the A2 size is a bit challenging because the commercial cards are so much bigger.  It means finding a focal element and trimming to keep in the center of the element.

Here I chose the star and Rejoice as the focus.  The width was not full so I added a strip of gold on the warm deep teal card base.  The focal element was adhered with 3D foam tape.


This snowman seems to enjoying the Christmas season.  

I chose a card base that matched the twig arms which is a warm taupe color.

I just trimmed the snowman to leave an even border all the way around.  It was adhered with 3D foam tape.


I trimmed the candles then trimmed the scripture verse so that I could overlap these elements.

I chose a warm blue green card base.  This is in the portrait or tall orientation.

The candles were adhered with double sided tape then the scripture was adhered with 3D foam tape.


A sleigh ride is always fun at Christmas time.

I chose a deep red card base.  Once again choosing the focal point of the sleigh and trimmed accordingly. 

Mounted with 3D foam tape leaving a tiny border.


I am imagining headed off the a Christmas Eve service by horse and sleigh.

I chose a lavender card base.

The focal element was adhered with 3D foam tape. 

Each card had a seasonal insert adhered inside and a new envelope was matched to it.

A few more cards for my Christmas Card box!

I had to make do with not electric tools today so a paper cutter and tape worked really well.

Friday, March 5, 2021

Christmas Card Challenge - March - Large Greetings Small Cards

I continued my large greeting Christmas Cards making with the aim to create A2 (4.25"x5.5") sized cards. 

I continued to use the Winter Frolic Cricut Cartridge. This greeting is 3.5" T x 3.5" W. I cut it from Champagne pearl card stock and paired it with an ivory card base.   

The acrylic ink background features royal purple color with some bright spots.

I used copper accents layers with the crown is part of the shift layer of the greeting then I cut stars with the Sizzix Star#2 die.  

These were adhered to the acrylic ink background and the large greeting was adhered with 3D foam tape.

I spattered it with copper acrylic color, a toothbrush and straight edge.


 This next card I chose a blue green piece of acrylic ink background on glossy photo paper.  It was trimmed from 4x6 to 3.75 x 5 inches.

It was adhered to a white card base.

The pearl white large greeting was mounted aligned to the bottom of the background with 3D foam tape.  

I added a silver star in the upper left hand corner.  It was cut with the Sizzix die.

It was spattered with an iridescent liquid acrylic.


Another ivory card with the champagne large greeting.  

I cut the crown from gold card stock and adhered with double sided tape. 

I added sequins in gold and copper adhered with Bling Zots. 

Since the copper was out this one was spattered at the same time as the other.

I added seasonal quarter inserts and white envelopes and they are ready for December 1st.

Thursday, March 4, 2021

Christmas Card Challenge - March - Large Greetings

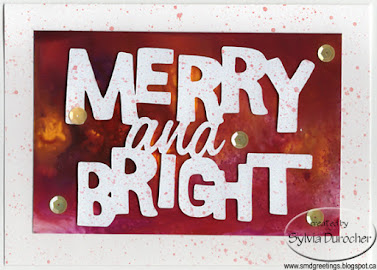
I decided to make Christmas cards with large greetings for my March cards.

It was easy to find some greetings on some of my Cricut cartridges.  They are easily sized and cut.  I chose the Winter Frolic cartridge.  It's hard to tell how large they will be on the first cut so I ended up with some larger die cuts than I planned so I used 5x7 cards (A7). 

The large greeting was cut from white pearl card stock at 3.5" T.  

Of course, the fun part was making acrylic ink background with photo paper.  These are 4x6 sheets and I used my Nick Bantock liquid acrylic colors for these. The colors were: Deep Turquoise, Cerulean Azure, Prussian Blue, Chrome Yellow, Chartreuse Leaf, Vermillion Lacquer, and Sapmoss Green.
I added colored sequins to the card fronts adhered with Bling Zots. For the first one the sequins were Christmas green, the red one was gold,  and the other was red and green.

I used a bit of color watered down to spatter the card fronts once I was done which helps to marry all the elements.

For the 5x7 cards I needed a clean pull of color across the 4x6 as I could not trim it.  Sometimes I end up with white edges or finger prints in the corners as I turn them over.

I see that I ended up with some pink sequins as well as red on this card. Not my intention but that's how it goes.

I have documented these in my Cricut manual so I can get smaller die cuts next time.

Always nice to have a few larger cards in my Christmas card box.

Super happy with these.

Friday, February 26, 2021

Christmas Card Challenge - Feb - Watercolor Cards 2

Here are the next 4 cards in this watercolor challenge.

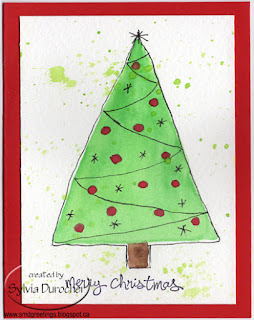
I lightly drew the shapes with watercolor pencils. I then used red watercolor to paint this trio of elliptical ornaments.  The 140lb watercolor paper was taped down to a piece of glass and allowed to dry taped down.

Once dry, I added the black lines with a thin permanent marker.  

I then added spatter with gold liquid acrylic color. 

I mounted this on a dark card base.

This card is a round  ornament in fuchsia color.

I added a string where it hangs and a tiny bow. I added some pearl liquid acrylic to the sections of the shape.  Spattered with fuchsia color.

The greeting is from the Stampin Up Good Greetings set in permanent black ink.

I really loved the snowbanks I created in this composition. 

I added a twig tree with the black marker.

Stamped the greeting on the lower right hand quadrant.

This wreath was created with light and dark leaves. Remember to keep them in the same direction.

I added black outlines on the leaves and a bow at the bottom of the wreath.   

Stamped greeting above the wreath. 

Spattered with red watercolor.

Wednesday, February 24, 2021

Christmas Card Challenge - Feb - Watercolor Cards

I decided to try watercolor cards for my February challenge.

I watched several Youtube videos from Maremi Small Art.

She has several at the beginner level.  It seemed pretty easy so I gave it a try.  I chose to tape down my Cotman 140lb Watercolor paper to a piece of glass before I started.  I painted my color then allowed them to dry still taped down.

I cut them down into individual art pieces measuring 3.75 x 5.00 inches and added the black lines with a permanent fine tip marker. I stamped the Christmas Greeting from the Stampin Up Good Greetings set.

I adhered the watercolor piece with double sided tape to a coordinating colored card base.

I chose various color to spatter the small pieces of art. 

For the first one I chose a lavender card base with black spatter.

I did draw a rough outline with watercolor pencils before I started applying watercolor with a brush.  I picked up this tip from another video I watched and it was a great idea.

For the card on the right I chose a ultramarine blue card base for the yellow star watercolor image. 

On the tree card I used gouache (opaque watercolor) for the red balls because mixing red with green watercolor would have yielded brown ornaments.  

I used the same green for the spatter then a nice red card base. 

On this next card I painted a round ball which I turned into an ornament.  

I added the hanger and string with the black marker. Then patterns onto the ornament itself.

I added copper accents to the patterns I had drawn with the marker.

I added quarter sheet inserts with a seasonal sentiment.

I have made another set of four but they have not been turned into cards yet.

This was a lot of fun but harder than the videos make it look.

Friday, January 15, 2021

Christmas Card Challenge - Jan - Handmade Paper

I started on my 2021 Christmas Cards. I was inspired by a photo shoot I am planning.  

I used small sheets of handmade paper in light warm blue color.  I chose a deep warm blue card base.

I color printed a star and a greeting from the Stampin Up Bright and Beautiful set in Baja Breeze.  I heated embossed them with clear powder.  I cut the stars by hand and ripped the top and bottom edges of the greeting.

I used tiny blue brads to attach the star and greeting to the sheet of handmade paper.  I added a small sequin to the star and a snowflake sequin behind the greeting.


I have four cards in the card box.

I have not used handmade paper sheets in forever.  It was nice to get some onto cards.