Showing posts with label ivory. Show all posts

Sunday, March 16, 2025

Tree Scent Ornaments - A few more

Colonial Candle Co. Angel Candle Hugger Vintage Made in Taiwan in the 1950s. Made of porcelain and measures 2.5" tall.

It holds an ivory felt candle which I fashion myself with a yellow flame at the top. It hangs from a warm toned ribbon gathered around her wings.

She is an oil diffuser where pure essential oil is placed on the felt and the scent is dispersed into the space.

Can be used with tree scented oils to provide a Christmas Tree scent to your artificial tree. She also stands so can be used in other spaces.

Use in any personal space to disperse a calming scent as you drink your favorite beverage and relax.

A wonderful clear glass heart ornament that features a frosted cupid playing its flute.

The felt diffuser is a small pink heart whose edge has been blanket stitched all the way around.  

A small E bead has been added to the front where it has been stitched to the pink satin ribbon hanger.

I can be given to a loved one as a token of affection and is practical.  It allows one to diffuse scent in a personal space and on the Christmas tree during the holiday season.

It measures 3.5 inches tall

The diffuser features a wooden kitty cat.  It has eyes and black whiskers.

Its tummy holds a black felt ball which is the diffuser.

Place a few drops of  pure essential oil of your choice onto the felt ball and the scent will fill your personal space.

It makes your morning tea or your afternoon snack break a time to relax.

It can be hung but it also stands on it own making it move with you as needed.


Another small frame turned into a tree scent ornament.

I chose a seasonal theme for this diffuser by stitching a bright green Christmas tree on green felt. I added a yellow star at the top and brown trunk at the bottom.

I used French Knots for the red ornaments along the branches.

I crocheted a hanger from cotton floss in the same red as the ornaments.  It was stitched directly to the felt oval to ensure it is secure.

The gold frame features enameled green decoration around the edge.

Friday, March 15, 2024

Sewing Project - Book Sleeve - Blue Abstract


I found this cotton poly fabric at the thrift store and thought that would make a great bag. I liked the blue abstract pattern at the top which was different than the rest.

Cut the outer fabric, flannel padding and the ivory lining cotton poly fabric to 9 x 12 inches. Quilted the outer fabric to the padding with a wavy decorative stitch. Sewed both side seams on both pieces.  Managed to cut handles 3 x 12 inches with similar pattern.  Folded both edges in then again in half to make .75 inch wide handles. Top stitched left and right edges with ivory thread.

Placed the handles 3 inches from the edge and pinned, added the elastic on the back piece and tacked those down with a bit of stitching and checked their orientation o make sure I got it right.  Then pinned the two pieces together and sewing the top seam leaving a gap to turn out the piece. Back to flat elastic. 

Top stitched the top edge to close the gap and finish the edge.  

Added a vintage button just the right color.


For information on the "My Bag" Line


Sunday, March 10, 2024

Card - Slow Stitching - Flower

I love the colors in this fabric.  

I chose an ivory thread to outline the flower and a light green to outline the stem.

I added several French Knots in the center of the flower.

The stitch I used is the back stitch.

This was a long one which took 2 evenings to complete.

I chose an Early Espresso card base in the A2 size.  

A quarter sheet insert and an envelope added it is now sitting under a pile of books to ensure the double sided tape sticks the fabric on very well.

Sunday, January 8, 2023

Small Gifts - Car Cup Holders Coasters - Bunch 3

Another set of bespoke Car Cup Holder Coasters for nieces and nephews.

Top row - A new house for a niece who is moving in the new year.  A daisy for the wife of a nephew. An "D" initial for a nephew.

Middle row:   Yellow stars of a compass on navy with navy cotton and navy tabs.  I'm not sure I succeeded with my representation of a tire on the middle one. Red background, black tire and 2 tone grosgrain tabs. Black maple leaf on red for a niece with white tabs.

Bottom Row:   Airplane for the pilot nephew - ivory on black with grey cotton and ivory tabs. "T" initial for a nephew in orange and brown background, grey cotton and orange tabs.

Sunday, October 16, 2022

Small Gifts - Oil Diffusers - One of a Kind - Set 3

I am loving this creative process of making cool felt diffusers for these diverse type of containers. 

Here, I have a two inch square crystal napkin holder laid down flat with the hole facing up.  I made a different type of felt flower for this one.  You can find the tutorial for this flower here

Teal Blossom - I chose teal felt and cut six 2 inch circles then a yellow one for the center of the flower and a green one for the base.  I thought the green one suggests leaves without having actual leaves imposing onto the edge of the glass. I really wanted to be able to see the 4 corners of the napkin holder.

The video suggests hot glue but I chose to stitch this flower together which makes a cleaner end product.

I then stitched it to a white felt ball which helps the flower stay in place on the napkin holder.

This flower design is full and very easy to put together.

On the right is a photo of the top. 

With the oil being placed on the yellow center it will keep any discoloration to a minimum.

With Love Cup - This is a beautiful Mikasa - With Love pattern ivory bone china cup from the early 1980's.  

I decided to make the diffuser an ivory felt stuffy decorated with a  round petal pattern. 

I found this Petal Pattern video on line. The opening of the cup measures 2.75 inches but I needed to add some for seams and for puffiness. I cut 2 ivory felt circles measuring 3.5 inches in diameter and sewed them together with a 1/4 inch seam leaving an opening to turn it inside out. I then stuffed it with cotton batting and slip stitched the opening closed.  I then created the petal pattern according to the video using warm rose yarn to match the cup.

To accent the center I added a warm green circle topped with a gold metal filigree accent which was stitched on with the same yarn. 

I have created a spacer to place under the petal to keep it at the top of the cup.  I could keep the drops of oil to the center to lessen an discoloration of the ivory felt.  This diffuser would fit in nicely in a kitchen, a dining room, a reading nook or even on a bedside table. 

Time to Unwind - A ball of variegated yarn to encompass many shades of brown and reds which brings in the colors in the basket as well.  I created the ball by hand to be just the right size for the basket.

I created custom sized knitting needles from skewers cut down to about 4 inches.  I glued wooden beads to the blunt end.  Once the beads were dry I used Distress Ink of Antique Linen and Vintage Photo to add some color to the needles to be more in keeping with the overall color scheme. 

I added the More Mustard tag which was color printed and punched with the 2 inch circle punch.

Perfect quiet time to enjoy the aromatherapy of essential oils.

Triangular Trio - A set of three felt flowers with white pom pom centers set in a triangular bottle.

The flowers are purple, grey and light blue.  Each has a yellow fringe surrounding the white pom in the middle.

Each flower has a twisted silver wire stem which is terminated at the bottom with a iridescent ebead just before the end curl.

I have wrapped a length of yellow grosgrain ribbon around the neck of the bottle to repeat the yellow in the bouquet.

The essential oil can be applied to either the felt or the pom pom. The essential oil may discolor the white centers.

I wanted a less flowery option in a diffuser.

Tiny Beer - This diffuser started with a vintage etched crystal shot glass with a nice handle. It measures 4 inches tall. 

I rolled a piece of ginger colored felt to be the beer and placed it in the bottom of the glass.

Now I needed to create the frothy foam at the top of the drink.  I rummaged through  my yarn stash to find a messy white yarn which I wrapped around a white pom pom.  I secured the head to the beer with hot glue.

I think it looks great!

Sunday, November 28, 2021

Decorate A Bag Fundraiser - 2 more

 I picked up 2 more bags when I delivered my 3 pieces of art for the Four Seasons Member show on Saturday.

You can find the details of the first in this post

I was gifted the batik embroidered leaf squares by a fellow quilter a couple of years ago.  I made a quilt with several of them.  Check out the details - Applique Leaves Quilt.

I added a 2" wide strip of black cotton fabric around the square.  I was thinking of making a pocket but I felt the leaf had to stand up straight so that idea was out.  I pressed the edge over and pinned it really well and appliqued it to the front of the bag.

I found on the first one it helped to have a strip at the top to stabilize the top edge.

Here I added a strip of black.  I cut 2 inch strips, sewed them together to have a strip at least 30 inches long.

Sewed it up and turned it inside out.  Once well pinned I appliqued it along the top edge of the muslin bag.

There is a tab of strip which is held down by the blue button.  This gives a place to hook something should the need arise. 

Again, the strip provides some stiffness to the top edge which is helpful with such a light bag.

Love the wonderful blue colors in the leaf.  

The black sashing really makes the leaf the focal point.

The blue button picks up and repeats the blue in the leaf.

I just love the watercolor effect of batik fabrics.  The background as well as the leaf are this type of fabric.

 
The button is simply decorative.

On this third bag, I did put a pocket.   I used leftovers from a man's shirt which I turned into an apron a couple of years ago. 

The pocket was cut from one of the sleeves.  Wonderful navy and burgundy stripes provides a bit of a different style to this one.

Tacked the upper corners well.  Added another strip along the top edge.  I wanted the stripes to go up and down so I had to combine several pieces to make all the way around the bag.  I chose 3 buttons to go on the strip. The center one is shanked to accommodate the loop from the pocket.

I am really happy with these contributions to the fundraiser.  I will deliver them to the gallery later this week.


I like that fact that the loop is long so it will accommodate a book or something a little taller than the 8" pocket.

The loop is just a piece of fabric folded the edges to the center then onto itself and I put one line of stitching down the edge.

The bags are about 13 inches square with fairly long handles.

Makes a great bag for all kinds of purposes. 

Tuesday, May 11, 2021

Anniversary Card - 67 years

Mom and Dad celebrate their 67th Wedding Anniversary this week.  Love does endure.

I chose an ivory card base.  I added a layer of Anna Griffin designer paper leaving a small border.

I wrapped a piece of moss green satin ribbon around the designer paper, taped the ends to the back and adhered the layer to the card front.

I created the focal element with 2 Stampin Up Sweetheart punches in off white.  I embossed them then mounted them to the gold scallop oval.  The oval was adhered over the ribbon on the card front with 3D foam tape.

Wishing them many more years of love and happiness.

Wednesday, April 21, 2021

Birthday Tag

I made a tag for a joint gift for my niece who has a birthday in April.

I started with the QuicKutz Sewing Machine 4x4 thinlit.  The die cuts all the pieces which needed to be assembled.  It meant cutting once for each of the 4 colors - the body of the machine from olive green, feed dog plate, pressure foot and buttons in black, the other adjustment buttons in taupe, the spool of thread in black and red.  

I placed a piece of packing tape on a hard surface and slowly placed the pieces in place sticking them to the tape.  Once all the pieces were in place I used an exacto knife to trim the excess tape from around the outside edges of the die cut.

I then cut the tag with the Tim Holtz Cabinet die one kraft embossed with the SwissDots folder and one ivory.  I used the Crop a dile to make a hole in the top.  I adhered the sewing machine die cut to the tag with 3D foam tape.

I ran a length of red twine through the hole and it's ready to be attached.

The HB diecut was received in a swap so I have no credits.

It is very cute but a lot of work which explains this is the first time I have used it.

Sunday, March 21, 2021

Cards - All Occasion for my box

From the kits prepared for Compassion House a year ago I made a few cards for my upcoming family birthdays.

This is beautiful deep teal card base with a half circle of decorative paper, caramel seam binding tied on the fold, with a butterfly accent.  

The butterfly cut from deep teal with the Sizzix Winged Beauties thinlit set mounted on a ivory circle to highlight it's shape.


On this card it is a true blue A2 card base with polka dot designer paper in the half circle with the navy seam binding tied on the fold. 

Same Sizzix Winged Beauties thinlits set diecut on a white circle. 


Same supplies of the first just arranged in the portrait orientation.

On this true blue card base I added a circle greeting above the butterfly accent.


A bright orange card base with a geometric patterned half circle with a Hampton Arts tree diecut and a circle greeting. 

 A couple of nice male themed birthday cards with the same supplies as those above. 

The greetings are color printed and punched with the Modern Label punch by Stampin Up.


Wednesday, April 1, 2020

Christmas Card Challenge - April - Holy Family

The theme for my April Christmas Card Challenge is Holy Family. 

I chose a ivory card base and the designer paper is by Provo Craft - Stone Washed Denim Suede cut to 4.00 x 5.25 inches and adhered to the card front.

I chose my Penny Black Manger Die to cut the family from ivory pearl card stock. 

I cut the navy ornament from textured linen card stock with the one of the Spellbinder 2011 Heirloom Ornament Nestabilities dies. I punched a hole at the top with a 1/8" hole punch. Added a length of ivory thread. 

I used tape runner on the back to of the family to adhere it to the center of the ornament.  The ornament was adhered with double sided tape.  I added a bit under the greeting to keep the threads in place.

The banner greeting was color printed in navy then fussy cut with scissors.  It was adhered to the card front with three small pieces of 3D foam tape.  A seasonal insert quarter sheet insert was added and I have 6 more cards in the box. Yeah!

Thursday, March 19, 2020

Nativity Card Selection

I finished the card order today.  This is the selection my friend made from the choices in this post.

The prints turned out a bit warmer than the first print so I chose ivory card stock instead of white.

The photo has been trimmed to 3 3/8 x 5 inches which was done at the top.  The sentiment on the front was printed at the same time as credits.

The photo was adhered with double sided tape.

Love the color in this image.

Thursday, January 30, 2020

Sewing Project - Quilt 5 - IKEA Fabric Panel

I finished the companion quilt from the IKEA cotton panel of kid design.

Finished Size: 38.5" W x 44" T

Front: IKEA fabric panel

Backing: Caramel textured cotton fabric

Batting: Fleece

Binding: Striped cotton fabric

Quilting: Followed the stripes across the quilt.

Applique: Star from warm yellow fabric with ivory thread.


The backing fabric is opaque enough to hide the red color of the fleece inside.

The binding was leftover fabric in bright cheery colors similar to the front fabric.  It was cut to 2.5 inches.  You can check out this video for binding how to. Fool Proof Quilt Binding.

I pinned the layers together with small safety pins before I ran the lines of quilting across the front.  I chose ivory thread to hide it as much as possible.

I then squared it and applied the binding.  It will make a child a nice quilt to help them through a difficult time.

For the batting in between the front and back I used leftover pieces of fleece from this Pot Protector Project.

Lessons Learned: I decided to make my last seam along the binding. I ironed the binding at pinned it before making my last seam thinking I would have a better chance to catch the back layer but I did miss a few spots - more than I expected.  I will work on that.


Monday, January 27, 2020

Sewing Project - Quilt 3 - Debbie Mum Fabric

I put together this quilt today.  This is another piece I inherited from the lady that passed away.

The fabric is a Debbie Mum pattern with guardian angels saying on it.  I could not find the name of the pattern online.

Finished Size: 43" W x 47" T

Front: Debbie Mum fabric


Backing: Ivory mottled pattern

Batting: Blue Knit Fleece

Binding: Red Mottled Fabric
You can check out the video for details on doing the binding.  Fool Proof Quilt Binding

Quilting: Followed the lines across the quilt but went around the angels and saying.

This was another quilt that I pinned before quilting which was quite large for my space.  I got it done.

I took it to quilting and a friend from quilting added the binding.  This was a collaboration.

It will make a kid in crisis a wonderful warm reminder that someone cares.

We will soon be gathering these quilts to give to a women's shelter.

Thursday, January 16, 2020

Sewing Project - Quilt 1 - Red, White & Ivory

I have started quilting again following the holidays.  

I inherited this quilt top, backer and binding fabric following the death of a member of our quilting group.  I received the material in October about a year after her death.  She volunteered with Grandmothers in Alberta for a New Generation who organizes "Fabric Frenzy" every year in the spring.  This is a fundraiser for grandmothers raising grandchildren in Africa due to the HIV epidemic. 

The finished quilt measures 48.5 inches wide and 56.5 inches tall.

The topper is designed with 4 inch squares.  There are two different 4 patch squares with red ones and ivory ones with patterned deep red squares.  The fabric is 100% cotton.

The backer fabric is created by Marcus Fabrics - American Pastimes by the New England Quilt Museum.


The same fabric was used for the binding.

The batting on the inside is a heavy flannel fabric.

I cut the backer fabric and the flannel with extra to allow space to trim it once the quilting was done.

I then pinned the 3 layers together and quilting it by sewing on the diagonal on the single deep red squares.  I only had very small pins but it seemed to do the trick.


I normally do Quilt as you Go which works better with my space and sewing machine.   It was a bit of challenge to do the quilting with my machine and small table but perseverance provides success in the end.


This quilt will be donated to the children who find themselves in crisis.

I was honored to be asked to complete this project for our friend.   She enjoyed quilting and working with the group of women who work all year long to organize this popular fundraiser.

Of course, working with fabric was right up alley and many members of our group support the fundraiser which add to our fabric stash.

The fundraiser separates the quilting fabric from the other types of fabrics like fleece, upholstery, knits, etc.  That is very convenient for us quilters.

I will bring it to quilting before it is donated so the girls can see the finished quilt.

Wednesday, June 5, 2019

Exchange Cards - May - Late

I am late with my Exchange Cards for May. 

I used supplies from the card order I delivered today to whip up cards so they can be mailed this afternoon.

A warm green (Pear Pizzaz) card base in the landscape orientation. 

I cut designer paper from K&C Company - K Classic - McKenna 12x12 pad.  I taped the piece together then ripped the bottom edge.  I wrapped a piece of ivory & gold metallic organza ribbon across the join and taped the ends to the back. This layer was adhered to the card front. 

I created the greeting layer with another sheet of the designer paper cut to 2.5 inches.  I stamped the greeting in Always Artichoke with the Stampin Up Sincere Salutations stamp set.  These were layered together and then adhered to the card front over the ribbon with 3D foam tape.

The second card is an ivory card base with the dusty blue and ivory designer paper from Frances Meyers - Suzanne Nicoll. Trimmed to leave a small border and adhered to the card front.

Wrapped a piece of organza ribbon across and taped the ends to the back.  It was adhered to the card front. 

I added a pink balloon card stock punchie (MS) adhered with 3D foam tape.  I tied a warm blue string to it and cut to the length of the card.

The greeting is a large oval in navy blue layered with a ivory and blue greeting.  These were layered together then adhered to the card front with 3D foam tape.

They are addressed and going in the mail right away!

Monday, June 3, 2019

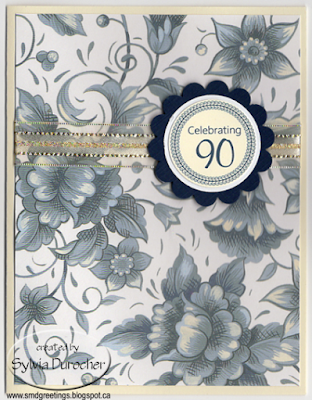
90th Birthday Invites - Samples

I was asked by a friend to make custom invitations for her 90th birthday celebrations.

I put together two samples and met with her on today to review the options and finalize the details for the insert.

This sample features designer paper K&C Company - Classic K - McKenna.  It is a pad of coordinating patterns in pink, green and ivory in 12x12 size.

I cut a strip of the striped paper to 1.5 inches by 5.5 inches wide.  I wrapped a piece of ivory & gold organza ribbon across it and taped the ends to the back.  This was then adhered to the card front.

The accent is a pink layer cut from another sheet in the collection to 2.5 inches square.  The text layer was printed in Rose Red & True Thyme on a piece of warm green card stock which was cut to 2.00 inches square. If features a frame from Pixabay.  The accent was adhered to the card front with 3D foam tape.

This sample features designer paper by Frances Meyer - Suzanne Nicoll - blue floral.

It features dusty blue flowers with ivory highlights.

I chose an ivory card base with the same ivory and gold organza ribbon. 

The accent is a scallop circle punched with the Stampin Up punch in navy blue linen card stock.  A 1 3/8 inch circle of white card stock then the text layer in ivory.  The circle text features a frame and the text in Night of Navy.

I cut the designer paper to 4.00 x 5.25 inches and wrapped the ribbon across at 1.5 inches from the top.  The ends were taped to the back.  This layer was adhered to the card front.

The assembled accent was adhered to the card front over the ribbon with 3D foam tape.

Friday, November 16, 2018

R2Go Christmas Stack - Gold, Red, Green

I cut the Merry Christmas layer with one of the thinlets from the Sizzix Square set which is 3.75 inches square.  I cut the Christmas green layer to 4 inches square.  These are adhered together. I used a push pin to create the 2 holes for the brads - Star Glitter and Green Pine tree brads.

I spattered the red card base with gold Gleams acrylic paint and let it sit till it was dry - a couple hours. Once dry I wrapped a piece of ivory and gold metallic organza ribbon around the card front and taped the ends to the card front under where the greeting will cover.

I cut the 3D foam tape square into 4 pieces and placed them in the four corners.  I then adhered the greeting square over the taped ribbon ends leaving even border top and bottom.

Glue the quarter sheet insert inside.


I cut the metallic gold NOEL layer with the Tim Holtz Bracket die.

I used a push pin to create the hole in the middle of the O in NOEL and pushed the brad through and spread the prongs apart on the back. 
Inny Outie Bow - Put one end of the ribbon through the left hand hole then repeat with the other end through the right hand hole. Cross the ends on the back and reinsert the ends through the opposite hole from the back. Pull gently to take up the slack. 

I cut the 3D foam tape square in 4 and put on on each corner.  I then adhered the NOEL layer to the front of the green card.

Trimmed the ends of the ribbon with scissors and glued the quarter sheet insert on the inside of the card.

Monday, October 15, 2018

All Occasion Stack Class

I held my All Occasion Stack Class tonight. 

I made a set of cards while the other 3 participants made their cards.

This card came from a full of Thank You cards.  The gold scallop is sticker paper. The gold foil greeting was trimmed and holes were placed on the left and right with the Stampin Up slot punch.  I ran the gold organza ribbon through the holes and knotted on the right hand side.

We had a great time and then a cup of tea and a bit of cake.