Showing posts with label metal accent. Show all posts

Wednesday, December 11, 2024

Christmas Ornaments - Mom's Memory

I am working on making these ornaments for mysiblings and grand kids as a memory of Mom who passed Jan 2023.

We are having a family get together on the Dec 27-28, 2024

We did a similar one for Dad 2 years ago.

Wooden spool, with navy wool felt, a piece of Mom's favorite dress and a LOVE heart held with a safety pin.

Mom sewed all her life so the spool works well. We all remember Mom's special dress which she made herself.

She loves us a lot. 

Nice slow stitch project which my sister helped with preparations since I have limited access to my tools!  

Thursday, April 25, 2024

Slow Stitching - Embellishments to Book Bags

I went back and revisited my book bags and chose embellishments for some of the earlier ones. 

1. I added a dragonfly charm on a peice of blue felt

2. An orange cloth flower on a blue bag.

3. A yellow and green circle accent for the masculine striped one.

4. Just a bit of a strip of turquoise fabric with stitching for the first one I made.

You will see that I have added a "My Bag" tag to each of them as well.


Saturday, July 2, 2022

Exchange Cards - July - Chrome Circles

I had these chrome circles with flowers inside in my stash.  I believe they are old earrings (when big earrings were a thing).   I have clipped off the hanger with my wire snips.

I punched a 2 inch circle from coordinating card stock which in this case is Garden Green.  I placed it behind and pushed holes through for the mini brads. 

I chose a card base of Bashful Blue and scored it to create a tall card standing with fold at the top.

I wrapped Early Espresso seam binding around the card front and taped ends on the left hand side.  I adhered the metal circle with 3D foam tape over the place where the ends were taped.

I added strip of designer paper along the bottom edge of the card.  

I chose an oval color printed greeting to match the card color and adhered that with 3D foam tape.

This card is just a swap of the Bashful Blue to the Garden green for the card base.

Bashful Blue 2" circle behind the chrome accent with mini brads in Bashful Blue, Garden Green and Early Espresso.

They are finished off with a blank quarter sheet insert on the inside with a white envelope.


Sunday, April 17, 2022

Exchange Cards - April

We are starting a new session of card exchange.  I've decided to get my cards ready ahead of time so I will not disappoint folks when I am busy moving.

I had these silver chrome metal earrings in my stash so I off the hanger and mounted them with brads.

I chose Striped designer paper by SU in Rose Red and cut it to about 4x3 inches. I adhered it to a piece of sold Rose Red card stock measuring 4.75 x 3.5 inches. I placed pink and silver brads into the holes in the larger flowers in the metal accent.  

I strung a piece of silver cord through one of the flowers and wrapped around this layer and knotted it on the right. This layer was then adhered to the front of a Pretty in Pink card with 3D foam tape.  I added the round greeting in the bottom right hand side again with 3D foam tape.

On this card it the same layout with different colors.  The card base is Chocolate Chip.  The designer paper seems to have pink and brown lines so I chose those colors for the brads in the metal accent.

I cut the designer paper larger this time to 4.00 x 5.5 inches.  Attached the silver cord in the same way.

The greeting is punched with the Modern Label Punch in color printed in Chocolate Chip with an offset of solid card stock same as the card base. It was adhered with 3D foam tape.

Wednesday, September 1, 2021

Exchange Cards - Blue Wash

I am using up supplies from old kits.  I had the blue card base, the white silk flower, the metal flower, the brad and silver ribbon.  

I needed a new background and some sort of greeting.

I found a couple of pieces of the Blue Wash designer paper which matched the Brilliant Blue card base so that was trimmed to leave a small border.

I taped the ribbon to the back and across the front and again to the back. I found the greeting in my Stampin Up box.  I aligned the flowers to the left of the greeting and adhered these layers together.  I then adhered this layer to the card front.   I then trimmed the greeting to the card edges with scissors.


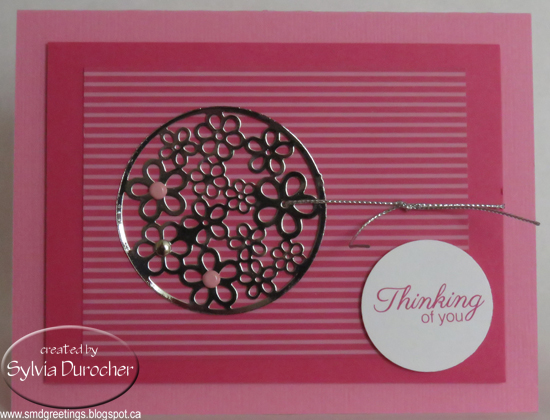
I used similar supplies for this card. 

I needed a flower diecut which had 6 petals. After perusing my stash of dies, I used largest flower from the Sizzix Flower Layers and Leaves die and some heavy card stock.   I colored it with a bit of Brilliant Blue reinker in watered down and brushed on.

I added the ribbon across the designer paper and then adhered the three flowers with the tiny brad over the ribbon. 

I stamped the greeting on the same heavy card stock, ripped the top edge and soften it with a bit of water. Adhered with double sided tape.

These are headed out to my exchange partners.


Monday, June 20, 2016

Card Club - June - Floral Metal Accent

I chose the metal accent first.
I then cut a white circle with Spellbinder smooth circles at 2 3/8" just a bit larger than the metal circle. I cut the coordinating scallop circle from pink card stock.  I chose pink ribbon which matched the pink scallop.  I embossed a piece of white card stock with the Cuttlebug Swiss Dots folder. I placed a piece of ribbon across the bottom third of the embossed layer and tape the ends to the back.  I then tied the shorter piece onto it.  This layer was then adhered to the card front.
I then assembled the scallop accent by adhering the white circle to the pink scallop.  I tacked this layer to the card front.  I then used a push pin to make holes for the 3 small brads.  These are blue which matched the card of the card. I pushed the prongs through the holes and spread them apart on the inside of the card.

Tuesday, February 3, 2015

Card Exchange - Key with Heart

I made these cards for my monthly card exchange. These hearts are left over from this project. I decided on the color combo of brown, red and cream.  I chose a brown texture card. I cut a piece of white pearl paper to 2.5" x 5.5" and embossed it with the Stampin Up Pretty Print folder.  I adhered it to the card front leaving even spaces on the top and bottom. I rubbed the edges of my heart die cut with a brown ink pad.  The heart was cut with the Cricut and the Folk Art Festival Cartridge.  I added a antique metal key on the heart and held it in place with a tiny brass brad.

Monday, January 26, 2015

Card Club - Jan - Heart Doily

This is my nod to Valentine's Day.  I colored the white paper doilies with scarlet and bronze liquid color.  You can check the process in this post.

I stamped dots on the hearts with a VersaFine Onyx ink pad to repeat the dots in the background. I printed the polka dot background I designed onto a 4.25 x 11 inch card.  Once folded, I placed adhesive on the solid center of the heart and placed it near the fold at the top of the card.  I used a piece of thread which was dyed that the same time as the heart and added a piece of black thread.  These were wrapped around the card front and knotted once.  The metal heart charm was then added and then the another knot was made. The ends were trimmed.

Sunday, January 18, 2015

R2G Card Kit - Valentine - Paper Heart Doily

This is the first card design of a large order of Ready 2 Go Valentine card kits I have just finished preparing.  It was an order for 100 card kits. Valentine is not my usual thing so creating these card designs was a bit of a stretch for me.

You will remember these doily hearts from this posting.  I created a polka dot background in black that I printed directly onto the card.  This card is 4.25 x 11 and therefore has the fold at the top of the card.  I wanted to add a bit of black to the heart to help tie it all together. I used a Stampin Up Itty Bitty Background stamp with Versafine Onyx Black. I placed my adhesive on the solid centre of the heart and placed it at the top of card. I dyed the thread at the same time as the hearts so they match perfectly.  I added a black thread as well which I wrapped around the card front and knotted on the front.  I added a metal heart charm before I tied the second knot. I trimmed the thread ends and added my insert.

Saturday, April 26, 2014

Ready 2 Fill - Tea Pot Boxes

Working on my supply of product for sales. Makes a great presentation for any small gift!

These are great boxes to give tea related gifts such as individually wrapped tea bags, loose tea in a twist tie bag, or even gift card. It could be a small gift which not tea related such as jewelry, tickets, a couple pieces of great chocolate, and many other ideas.

The die is the Sizzix Bigz Pro Die Box Tea Pot.  The box features a clear faceted glass bead and a metal accent on the lid.

You can find them here.

Friday, May 4, 2012

Card - Exchange

I made these cards for my exchange group.  I started with the metal medallion in white.  I wanted a paper that would contrast nicely.  I had these Cricut cut with "Just because Cards" cartridge backgrounds left over from these cards. I thought that would well. I placed a length of white ribbon across the shape below the centre. I tacked it with a bit of snail adhesive in the centre to hold in place then taped the ends to the back.  I glued the shape to the black card front. I mounted the metal medallion in the top curve with 2 tiny black brads.  I glued the color printed oval greeting(cut with Creative Memories cutter)  in the bottom curve.  I added 3 silk flowers running along the length of the ribbon and those are held in place with tiny black brads. They worked out great!  Very versatile design because with just a change of flower you can have variety.

Tuesday, May 1, 2012

Cmas Card Challenge - May - Metal Accents

The challenge this month is Metal Accents.  I thought about this for a while.  I came up with embossed metal foil accent.
I used sticky foil tape which I pressed to a piece of thin white card stock.  This was embossed with one of the folders from the Cuttlebug Cricut Companion Embossing Folder Give a Hoot Bundle.  I trimmed the metal to the embossed edge. Then I mounted it on hunter green card stock.
I started with a hunter green card onto which I stamped snow with the Stampin Up! Itty Bitty Backgrounds with white Craft ink.  I ripped a piece white card stock from corner to corner and I placed one piece on the card front.  I then placed a length of Handsome Hunter gross grain ribbon across the card front and taped the ends to the inside. I knotted a short piece along the length and trimmed the ends.  I stamped the greeting with a clear stamp in Handsome Hunter.  Then, I mounted the metal embossed tree accent I put together earlier onto the card front with 3D foam tape.  I'm happy with these!

Monday, February 20, 2012

Guest Book

I was asked to design a guest book for an upcoming special 10th anniversary event.  She wanted something nicer than one you can purchase at a retail store, one where photos of the anniversary could be placed and one with a place for a photo on the cover.
After a bit of research I decided on a 8x8" scrapbook.  I found a black leather look one. She selected a black and white stripped ribbon which would add a bit of a focal point to the front cover. I diecut a red ribbon slider with a Spellbinder die.  To it, I added a white paper flower and a metal medallion and held it all in place with a tiny black brad. Once it was strung onto the ribbon I just knotted the ribbon onto the album placing the knot to the inside.
Then I went looking for paper for the pages.  I tested the weight of many sheets of paper.  I looked at drawing paper, watercolor paper, and sketch paper.  I needed 10 sheets for the actual signatures and greetings then a few pages in the front for "then and now" photos.  I settled on a pad of white 90lb watercolor paper with 15 pages.  I determined that the sheets should be 8"Tx9.25"W based on the page protectors I had removed from the album. I cut the paper down to 8.5 x 11 so I could put them through my printer.  Then I designed the pages on the computer and printed them in black.  The sheets were then was cut down to the correct size.  I punched the holes in the pages on the left hand side based on the spacer that came with the album. She had asked to have a bit of accent added to the pages.  Based on the red on the front I stamped a small flower on the left hand corner of the pages and added a small swirl on the bottom right hand side in Real Red.  The album has a sleeve at the back for a CD so that photos from the event can be stored for history's sake.  She will find a photo which is just right for the front cover.

Sunday, September 18, 2011

Card - Ribbon Slider

I made this card for friend whose granddaughter is celebrating a birthday soon.  I selected some designer paper and mounted it on a pink card.  I cut a Spell Binder ribbon slide in chocolate brown and placed it on the card on a silver 5/8" ribbon through a slit in the fold on the left hand side. Scotch taped the ends to the inside of the card. I color printed the greeting and cut it with  my Creative Memories oval cutter and glued it down onto the slider. I added a white silk flower with a metal on layered over all held in place with a tiny pink brad. I made an identical card with a Thanks greeting for my card box.

Were you one of the lucky ones to get a Spellbinder die at Michaels with a 50% coupon last week?  This set of 3 ribbon sliders was my choice.  They are great because they take 5/8" ribbon and my Cuttlebug sliders take 3/8" ribbon.

Saturday, June 11, 2011

Christmas Stack Class - Silver Snowflakes

This is the last card of this Christmas Card Stack Class. This is a very versatile design in the sense that the color can easily be changed to create different looking cards. I choose turquoise and navy for this class but have plans for another kit with 4 different colors. The colors suggested at class were pink and purple. Keep I eye out for it.

I designed the snowflake background myself and color printed it on white cardstock. It was trimmed and glued to the card. I used my Sizzix Large Snowflake die and cut them from silver foil paper. I placed the snowflake and used a push pin to make a hole in the centre for the brad. I added a Martha Stewart snowflake punch in the card color then a silver metal embellishment which is all held in place with a tiny silver brad. The circle greeting is something I designed and color printed. Punched with a 1 1/4 inch punch then layered onto a 1 3/8 circle punchie same color as the card. The strip in the card color is embossed with the Cuttlebug Snowflake folder and cut to .75" X 4.25" and glued below the snowflake. The circle greeting is assembled and using a push pin to create the hole is held in place with another tiny silver brad.
I made 12 cards
Total = 61

Wednesday, March 2, 2011

Card - Spring Colors

I've been saving this paper for a long time. We need a reminder of spring this week.
I selected matching card stock to the layer of patterned paper. I found silver cording to go with the metal flower accent. It was layered over a white silk flower held in place with a tiny silver brad.
Just a nice bright card!

Monday, February 28, 2011

Card Club - Feb - Metal Flower

It's cold here but I hope most of my ladies show up for card club tonight. I had 5 ladies in my group and it went very well.
I used a bright pink card to match the pink in the vellum. I layered 5 inch squares of white cardstock and vellum and then ripped the edge of both. Glued the white layer on and trimmed it to the card edge. The vellum I trimmed longer on the top so I could glue it to the inside of the card. I placed a small piece of tape on the left hand side under where to ribbon will be. I created the knot by tying a short piece of ribbon on to the long piece. I taped the ends to the inside. I placed the metal flower over the white silk flower and braded the whole thing to the card with a tiny silver brad.

Saturday, January 31, 2009

Card Club - January - Cuttlebug Embossing

I try to add a variety to my card selections for any month. This card would be great for a guy. The antiqued gold metal key is mounted on an ivory circle of that has been smudged with ink and then added on top of a gold circle. Those graduated circle punches from Stampin Up! are great. The ribbon is Martha Stewart twill tape. Easy cuttlebugged embossed layer. I made this one in brown, green, and black and white with a red heart on the circle for those who wanted a card for Valentine's. Another very versatile layout. The size is a #9 envelope which takes paper on the 8.5 inches.