Showing posts with label rick rack. Show all posts

Wednesday, March 19, 2025

Slow Stitching 2025 - March - Week 3

K3N Cloth Tales Comfort Coverlet 2025 Slow Stitching project - March - Week 3.

I continued to add stitching to the remaining bands of color. I stayed with my four colors and added yellow circles to the turquoise band.  

Then tight waves in navy on the yellow band.  Then wider waves in turquoise on the pink band. I used a scrapbook tool to mark out the waves onto the fabric. 

I then added a circle of tiny white rick rack couched down with pink thread. 

It is looking pretty good.
 

Wednesday, January 22, 2025

Slow Stitching 2025 - Week 4

This is week 4 of the 2025 Slow Stitching Comfort Coverlet hosted by K3N Cloth Tales.

This week I couched a circle of white tiny rick rack all the way around the outer circle of my design.

I really enjoyed the couching and I think it solidified the outside circle.

I have gone ahead with my stitching because I may be moving back home this week. Yeah!

Tuesday, August 13, 2024

Slow Stitching - No. 032 - Inspired by Judy Martin

I am catching up on my slow stitching now that the floor has been installed and all the furniture is back in place.

This is week 32 of K3N Cloth Tale's Slow Stitching challenge.  Prompt - Inspired by Judy Martin. K saw Judy's show in Birmingham but was inspired by an older piece.

The piece took 3 years (over 1000 days) to complete and was over 200 feet long and titled "Not to know but to go on".  The idea to stitch every day and take things as it comes. 

I chose the items to couch from one of my scrap bags and just laid them down as they came along. Started with one color and just changed as that one ran out.  I couched yarn, ribbon, rickrack and cording.  I really loved how the tiny rick rack looked couched. All kinds of ways to stitch it as well. Of course, there is as many colors as the rainbow.  I then stitched in between the couched rows till I was happy with the whole piece from either side.

Not sure how this will make it into my squares as it is too long.  Can I fold it effectively, I am not sure.  

Thursday, June 13, 2024

Cards - All Occasion - Gold Decorative Paper

 I found a sheet of this decorative paper at the ReUse Center a while back. I have used it as a background for photography but now it had to be used.

I recognized that almost any card color would work with it so then it was to decide embellishments.  

I need cards for my card box.

I chose SU Soft Sky A2 card base. I ripped a piece of the paper and adhered it to card front with ds tape and some glue stick. 

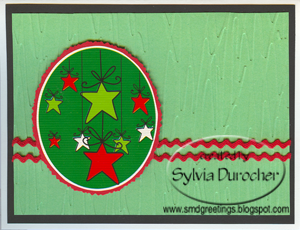
I cut a label with one of the labels from the Chalk Talk die set which included the small oval hole die.

I chose a gold ribbon to go across the bottom so I had to use the SU Slot punch to make a hole in the fold to allow the ribbon to go through.  Once pulled across I taped the ends to the inside of the card.

I cut a star from the gold decorative paper and adhered it to the label.  The insert had to be adjusted a bit to allow for the slot in the fold.  I used the slot punch again.  A half sheet insert and a white envelope.

For this card I chose a red A2 card base and again ripped a piece of the gold decorative paper to fit the card front.  I use double sided tape and glue stick to ensure adhesion.

I wrapped a piece of gold grosgrain ribbon across the front and taped the ends to the inside.  

I cut a heart with one of Sizzix Hearts thinlit die set.  I embossed it with the D'vine Swirl folder.  I mounted it over the paper and ribbon with 3D foam tape.

A half sheet insert and white envelope and an another card in the box.


This card has a SU Crushed Curry textured card stock base in the A2 size. 

I ripped a piece of the decorative paper for the card front and used DS tape and glue stick to stick it to the front.

I added a length of So Saffron rick rack along the left side and taped the ends to the inside.

I chose a SU Really Rust and So Saffron quarter sheet pieces of card stock and ran them through the Big Shot with the Tim Holtz Tattered Flowers die.   Then I choose the alternating sized flowers and layered them.  I did embossed the 3rd one with the Swiss Dots folder. I added a gold round sequin on to the gold mini brad which holds all the layers to the card front.   I added a half sheet insert and white envelope.

I chose a SU So Saffron A2 card base for this card. 

I ripped a piece of the gold decorative paper and adhered to the card front. 

I ran a length of So Saffron rick rack along the top edge of the card and taped the ends to the inside. 

I cut a star from SU Daffodil Delight card stock with the SU Star thinlit dies and glued a gold star sequin onto it with a Bling Zot.  Then this accent was adhered tot he card front with 3D foam tape.

A half sheet insert and white envelope and I had a set of 4 cards.

Tuesday, June 11, 2024

Card - HB - Blue Birdie

A blue bird card for a friend celebrating a birthday this week.

I chose a SU So Saffron A2 card base.  Then a piece of blue watercolor designer paper but to leave a narrow border.

I added a length of rick rack along the left hand side and taped the ends to the back.  This was then adhered to the card front with ds tape.

I punched the bird with the SU Bird Builder punch. Punched the branch again in green.

The bird was assembled and then adhered to the card front with 3D tape. 

Quarter sheet insert and it is on its way! 

Monday, June 10, 2024

Slow Stitching - No. 024 - Crazy Patch Work - Stitching

I worked on the stitching all week because I knew it was going to take some time.

Week 24 - This is part 2 of the Crazy Patch Work challenge from last week.

I worked all week because I knew it was going to be a lot of work to get all the stitching done.  I added 3 accents pieces - a bead, a button, and yellow double holed thingy.  Then there is lace, rick rack, and gold cording.

I used French Knots, Seed Stitches, Couching Stitch, Cretan Stitch, Sheaf Stitch, Chain Stitch, Running Stitch, and Stem Stitch. This project increased my comfort zone with using different stitches.  The Elegant Stitches book was very helpful. 

The color scheme was totally based on the center piece of fabric.

Wednesday, August 23, 2023

Card - Thank You

I am so grateful for the physiotherapy I received at the beginning of this year.  

It's been six months since I was released by my physiotherapist. I decided to drop off a thank you card to express in my gratitude in being able to climb stairs, be pain free, and in general enjoying walking and movement again.

It does mean 30 minutes of ongoing therapy at home but I know all my routine and it is keeping  my mobile.

Thank you!


The card base is Stampin Up Lost Lagoon in the A2 size.  I cut a piece of watercolor saran paper I made years ago.  I cut it to leave a nice border all the way around. I wrapped a length of SU Pool Party tiny rick rack around the front of the landscape oriented card.  I cut the word from heavy white card stock. It was adhered with Bling Zots. A few of those also keep the knot in place and the rick rack straight on the inside. 

Tuesday, May 18, 2021

Seniors Week - June 7-13 2021 - Card Donations

I worked on more cards for the Seniors Week Project.

I started with the yellow and blue layer which I made last summer.  It involves making a marking tool with old toilet paper rolls to create dandelion flowers.  

That layer was trimmed to 4.00 x 5.25 inches. 

I placed a piece of blue rick rack across the bottom third and taped the ends to the back. This layer was then adhered to the front of a medium blue card base.

I added a color printed greeting punched with the Stampin Up Decorative Label adhered with 3D foam tape.

This card was created with a 4x4 photo reused from one of my photography calendars. 

I trimmed the 4x4 down a bit to leave a bit more of a border. 

I added the vellum sentiment which I adhered to the photograph with gold flower sequins held in place with orange tiny brads.  This full layer was then adhered to the front of a yellow card base.


These cards are reusing a small card I made for a Stampin up party I held years ago.  I had leftovers and they just sat. 

The accent layer has a Tango Tangerine base with Tempting Turquoise designer paper.  I added an accent strip in orange punched with the Stampin Up Dotted Scallop Ribbon border punch. 

The tag was stamped with the Too Terrific Tags set in Tempting Turquoise on Whisper White. Layer onto Tango Tangerine with a Tempting Turquoise grosgrian ribbon held in place with an orange tiny brad. 

The Whisper White layer was embossed with the Swiss Dots folder and trimmed to leave a small border. It was adhered to the turquoise card base.

The stack is growing!

Sunday, May 10, 2020

Mother's Day Card


I made my Mom a card for Mother's Day.

I used paper strips in blues because that is her favorite color. I glued them inside a black color printed frame on the card front. Most they were trimmed to 1" wide or less. I added a length of blue rick rack along the top adhered with Quick Dry Adhesive.

I added an oval greeting with 3D foam tape above a piece of floral designer paper in the bottom right hand corner.

Monday, April 27, 2020

Birthday Card for a Teen

I started with the polka dot designer paper squares which were corner rounded on 2 corners.  I layered those onto corresponding blue card stock squares.

I chose a medium blue card base.  I added a bright green designer paper layer leaving a large border.

I added a rick rack accent which involved my twisting together blue and white rick rack and then ironing it flat.  It goes right around the card and is joined under the scallop greeting.

A scallop circle in the same blue card stock with a 1 3/8 inch circle greeting in blue and white.  Adhered with 3D foam tape.  The corner rounded squares were adhered with 3D foam tape too.   This one will get there in time for her birthday.

Tuesday, April 21, 2020

Birthday Card - Paper Strips

With using a lot of 12x12 inch designer paper I generally end up with a strip at the end with about an inch and the credits.  I have a lot of paper strips in my scrap drawer.  I decided to try in find a design to use them in a card layer.


I pulled from my stash, paper that fit within a certain color scheme.  I then used my small paper cutter to cut the paper into strips about .75 inches wide.  I cut a piece of card stock just under the 4.00x 5.25 inches I need for the layer.
I started with the single strip that goes from top to bottom. The next strips I layed perpendicular to that first one on the left side and created 2 sections on the right hand side. I dontinued to add strips until the cardstock was completely covered. I turned it over and trimmed the strips to a bit away from the edge.  I reused bit I cut off to stay within the color scheme.

I chose a deep teal card base.  I adhered the stash busting background to the front.

I added a piece of large rick rack in white along the left hand side.  It was wrapped around the full card front and the ends were taped down which falls under the greeting.

To add the greeting I punched a scallop circle from one of the prominent designer card stocks.  I then added a dark grey 1 3/8 circle punchie then the color printed greeting at 1 1/4 inch.  These were layered and adhered then glued to the card front with 3D foam tape. 

Thursday, April 16, 2020

Leaf Birthday Card

I started with a brown card base.

The designer paper is by Authentique - Seasons - Autumn Three.  It was trimmed to leave a small border.

I cut several leaves with the Tim Holtz Mini Tattered Leaves Set of Movers and Shapers.  I cut beige, copper and warm green ones which I chalked with warm colors.

I wrapped a piece of yellow rick rack on the left side of the designer paper and taped the ends to the back. I glued the leaves along the rick rack with double sided tape.

I added a Stampin Up Decorative Label greeting which edges were chalked as well.  It was adhered with 3D foam tape.


Wednesday, April 15, 2020

Exchange Cards - Paper Strips

I have tons of strips of paper cut off from 12x12 designer paper.  I was looking for a way to use these so onto the internet to find solutions.

This is a technique I found.

I cut the designer paper strips to half inch and sorted them into similar colors schemes.  Selecting designer card stock that I am not inspired by I cut it into 4.25 x 5.5 pieces.

I applied glue stick to the quarter sheet and laid my first long strip.  I then applied the other piece perpendicular to the first one.  I continued till I had covered the whole piece of ugly card stock.

I trimmed the strips close to the card edge and pressed them under books to let the wet glue to set up and dry.   After several hours I trimmed this background to 4.00 x 5.25 inches.

I then chose a warm dark blue card base onto which I adhered my paper strip background.
Then I added a piece of white rick rack wrapped around the card front.   I taped the ends under the accent.  The accent is a scallop punchie, a 1 3/8 inch circle then a white color printed greeting.  These were adhered into an embellishment.  It was adhered over the join of the rick rack with 3D foam tape.

In the tiny gaps between strips I applied chalk to lessen their impact. I chalked the edges as well.

The pink background was adhered to a bright pink card base.  It also received a scallop greeting.

These are headed to my card exchange partners.

Monday, September 26, 2011

Card Club - Felt Flowers

I found these felt flowers at Michaels in red, royal blue and yellow. So I alternated these colors in the elements of the kits.  This card has a white card with a red embossed layer with the Cuttlebug Polka Dots folder.  I added white rick rack at the 2/3 point on the card which was taped into the inside of the card.  I cut the leaf with a Sizzix medium die from forest green felt.  The leaf is glued behind the flower, then the flower is placed on the card front and create a hole in the centre with a push pin.  Place the red sequin onto the tiny white brad then place the brad and spread the prongs on inside of the card.  I had yellow, red, and white rick rack. 

Thursday, February 3, 2011

Cards - Daisy Pink/Brown

I made a couple of these for my exchange group. I selected my patterned paper then started with a Kraft card. I wanted the element to fit into an opening in the card front. I made the half circle opening on the card front with my 1 3/8" circle punch. I created my circle accent with a dark brown 1 3/8 inch circle, then a 1.25 inch patterned paper circle, then a white daisy punchie. The pink colored brad holds the daisy and the patterned circle which is then glued to the dark brown so the brad would not show on the back of the card. This accent was glued on the bottom half to the back card. I added a bit of rick rack on the right hand side with quick dry adhesive. The daisy flower was repeated on the front right hand corner of the patterned paper layer. I added a quarter sheet insert.

Saturday, January 1, 2011

Cards - Cmas Thank Yous

Here's the cute little tree. I mounted the recycled gift wrap element onto card stock and trimmed it with decorative scissors. I mounted the Cuttlebug Swiss Dots layer onto a white card then layered some small rick rack. I mounted the central oval image onto the rick rack with 3D pot dots.

Cards - Cmas Thank Yous

My focal oval image is recycled from gift wrap. I mounted it onto coordinating cardstock and trimmed it with decorative scissors. I started with a white card, then a black layer then added a green Cuttlebug embossed layer. I added 2 rows of small rick rack over which I mounted the oval with 3D foam dots.

Cards - Cmas Thank Yous

Christmas was a very good! I made these cards for thank you cards for the gifts I received.

The central oval image is recycled from gift wrap that was on a gift I received. I made these with blue card stock. I mounted the central images onto coordinating card stock and trimmed with decorative scissors. The images had reindeer, trees or stars. I added a white Cuttlebug Swiss Dots embossed layer and some red small rick rack.

Tuesday, February 23, 2010

Card Club - Feb - Victorian Paper

This card has a layer of really nice giftwrap glued to the front. I added a length of ivory rick rack across the bottom third. I assembled my accent starting with a pink Stampin Up! Scallop punch, a black circle, a pink foil circle topped with an ivory circle greeting which has been raised with a pop dot. The accent then is mounted over the rickrack on the bottom right hand corner.