Showing posts with label acrylic paint. Show all posts

Wednesday, May 31, 2023

Senior Art Show at the Gallery

These are the two pieces I put into the Seniors Show which opened this week.  The reception will be on Saturday at 1pm. 

I chose to try something new for art.

I started with a 9x12 inch sheet of watercolor paper. I laid some deep rich colors with Nick Bantok ink.  I let that dry.

I chose white gouache to do my Dandelions but unfortunately what I thought was permanent was not so the color ran into my gouache.

I used a straw to draw my flowers by blowing the white around.

Title: Dandelions
Size: 11.00 x 14.00 inches
Mixed Media
Mat: Archival off white / black narrow
Frame: Silver Brushed Metal


On this piece I was thinking of deep space images from the Hubble telescope.

Once the deep colored layer had dried on the watercolor paper, I spattered both white acrylic and black acrylic paint using a toothbrush and kitchen knife.

I like the dark and light spots which suggest deeper places in space.

Title: Nebula
Size: 13.00 x 16.00 inches
Mixed Media
Mat: Archival white double mat
Frame: Wide Black Wood

Tuesday, August 2, 2022

Sylvia's Simple Shots

I dropped by a green house yesterday on my way back from a short morning of photography.  I managed only 10 shots before I was out of battery and I had not recharged the extra from my trip the day before so more more photos for me.

I walked around the botanic garden just to get the exercise I needed and the greenhouse did not open till 10 am.

I was at the door at 10am and wandered around to eventually find the Sansevieria / Snake Plant / Mother-in-Law Tongue plant.

It measures about 7 inches high so the price of $13 dollars was worth it.  This is not likely the final decorative pot for it but it will do for the photo shoot.

I did some investigation of the Pothos or Devils Ivy and it is soaking wet so that is why it is not doing so well.   I have to learn to water according to the plants needs and not just once a week.

I am learning and now I have 7 plants which a huge improvement over 0 when I worked.  Just did not have the energy and connection to handle it then.

We had several days in the last 10 which were what I would call heat wave days.  Above 30C in the day and the overnight temperature not dipping below 18C.  

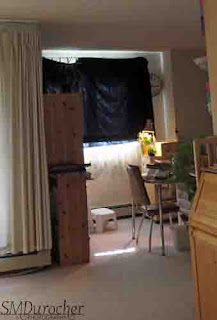
I had to put a dark sheet in the dining room window to keep the morning sun out of my place.

Thank goodness it did not last as long as last year.


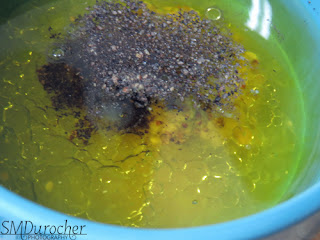
I made a bottle full of Lemon Dijon Vinaigrette this morning.  Love this dressing on almost anything.  I use it for salads, I put it on my fish for the bake oven fish dish, and just to add a tang of flavor to a whole grain dish.

You can find the recipe here in Jenn Segal's French Grated Carrot Salad posting.

I just store in a cleaned out Dijon Mustard plastic jar in the fridge.  I double the recipe.


I enjoyed this book a lot. The Road Home by Tommy Tenney and Mark Andrew Olsen.

It is a Naomi and Ruth story based on the bible but set in modern times.

The women are living in Las Vegas and have fallen on hard times.  They have both lost husbands in the last few years and Ruth is Naomi's daughter in law.  Naomi is now in her 60's and wants to go home to Pennsylvania where she grew up.  Ruth grew up in the foster system and has no real home so decides to make her home with Naomi. 

They travel across the country in an old Impala that Naomi's husband had both here years ago.  They work along the way to have enough cash to get HOME. 

Beautiful story!

I want to do some work on the kitchen.  

I painted the middle panel of the kitchen doors in 2017.  You can check out the improvements made then in this post

Now I want to paint all of the cupboards in order to freshen up the kitchen again.  I have chosen a light yellow and a warm grey in craft paint to paint paper which I will tack up against the cupboards to make a decision on a color.

I did investigate replacing the hinges but that was a no go as they have changed - the holes are not in the same place and the plates are not the same size so I think they will just be painted.

I want to had knobs or handles to the doors and drawers but I have not made a final decision on those yet.

I will post updates as they happen.

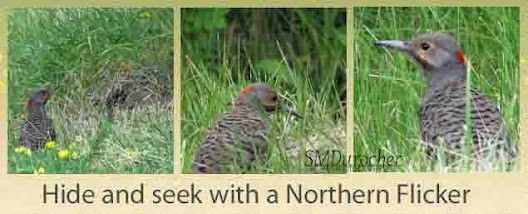
I played hide and seek with a Northern Flicker the other day.  They are a wood pecker which spends a lot of time on the ground looking for food. 
An enjoyable time.

Flickr Macro Monday was Miniature.

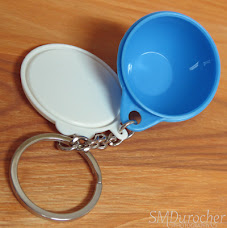
I got this miniature Tupperware Thatsa Bowl key chain in my prize from reunion raffle.  It is so cute and you can see the lid comes off.  I have a couple of the regular sized bowls in the Tupperware in the cupboards.

Love the color of this bowl as well.  The ones I have are white and red.

Have a great week.


Thursday, December 16, 2021

Bespoke Shelf Art

I wanted a piece of Christmas art for the shelf above my wall tree.

It's snowy and cold outside so not too interested in heading outside and shop.

I use the frame with the JOY word in the previous photo.  I cut a piece of paper to fit inside the frame (8x16 inches) approximately. 

I printed a few words with fonts that I liked and adjusted the size to suit the composition.

I traced the words onto the white paper then painted them with black acrylic paint. 

I added the holly in the corner for a bit of color. It was a quick solution for this year.  I really like it!

Friday, August 7, 2020

How To: 12x12 Splattered Decorated Paper

I'm finding it harder to use scrapbooking 12x12 paper for my card making.  I want original and unique paper.  I have so many sheets of designer paper so why wouldn't I use some of that to make something new rather than using plain white card stock to start with?  I went into my stash and chose patterns that I have lots of or that I am not too thrilled about. 

I chose the tools of the trade which are a collection of various paint brushes and tooth brushes.  

Some acrylic paint with a couple of plates to use as palettes.  A spray bottle to thin the acrylic paint.

I chose several sheets of designer paper.  I covered my kitchen area with a blue plastic sheet to prevent splattering the nearby surfaces.   You can see the before and after pictures below.  I just loaded my paint brushes with color and flicked the brushes toward the paper.


To the left are the 4 sheets that I decorated.  I think the light sheets have been very effective.  The orange and yellow ones I am not sure they are as effective. 


This new interface for blogger - I had to make sure that I chose a placement then I could have my text go beside my images.

Resizing is better and more adjustable.

Labels are a nightmare!  It is very slow and eventually it did not find labels which I know are there.


Tuesday, July 14, 2020

Toilet Paper Roll Dandelions

I am wanting to do something different for cards so I researched Toilet Paper Roll Dandelions and watched a few video tutorials.

I cut the toilet paper roll less deep than most of the videos and got flowers over 4" wide.  That is pretty large for cards.  I have decided to just decorate a 12x12 sheet of designer paper then just cut it up into 6 pieces and just go with what I get.

I chose dark, medium and light blue acrylic paint.  I used QTips to make the centers.  Then I spattered the whole sheet with pearl white acrylic paint. 

The toilet paper roll gets soggy very quickly so you need a few ready ahead of time.   Maybe a couple for each color.  I guess you could cut both ends which would make them last a bit longer.

Friday, May 10, 2019

Artist Get Together - Printmaking

I hosted a morning of mark making, paint mixing and playing with texture with a couple of artist friends.  They were in town for an art show set up later this afternoon.

The 2 ladies MS & DM arrived at 9:30 am and the space was all ready to play with paint, paper, and texture.

Of course, the coffee was on.

The tools and supplies were out.  Craft table, work space mats, acrylic paint, water spray bottle, rubbing alcohol and rags for clean up.

Tools were brushes, collagraph plates, rubber stamps, brayer, stencils, and gelli plates.

Texture -The first was playing with texture and the ladies had brought collagraph plates.  Paint was applied with brushes then a damp piece paper was laid on the surface and pressed with fingers into each nook to capture the print.
This is a plate created by one of the ladies.  It is sort of trees.  It is hot glue onto board.  What a fun thing to do - creating art with hot glue.

Rubber Stamps - Paint was applied to the gelli plate and used like a large ink pad.  The stamps were pressed onto the plate and stamped onto white card stock.


The advantage of this method your print is permanent when dry.

Stencils - The gelli plate was cleaned with rubbing alcohol.  The stencil was laid onto the plate and paint was applied with a brayer.  The stencil was carefully removed and then a piece of white card stock was placed onto the gelli plate to capture the print. 

In a couple of hours several prints were created with various methods, we got to know each other a bit better, the creative process include collaborations and discussions and a good time was had by all.

This is one of the pieces created by DM

It was created by using rubber stamps as texture on the gelli plate then capturing the print onto card stock. 

I think it is wonderful.

Some of the prints stayed at my house as they were not dry yet.  I will connect with MS in a couple of weeks.

Friday, July 20, 2018

The Craft Kingdom - Project 2 - Decorating Rocks

This is my second project from the book - The Craft Kingdom.  Check out my second post.  Find a link to the book here.


I hope that you are inspired to do art today. Check out the book at your local book store.
 
I chose Decorating Pebbles on page 32 of the book.
 
First I picked my rocks.

I chose smooth rocks with flat surfaces where I could paint.

I wanted to make one a Thank You one and others to just paint something interesting.

Pick shapes that appeal to you and sizes that fit with the art you are planning to paint onto it.


I chose a turquoise color named Laguna, a green called Yellow Citron, my favorite Cadmium Yellow and Kelly Green.

I chose acrylic paint in a variety of colors and brands.  Make sure you have an opaque paint.  I have glazes and semi transparent colors.

I did not prime the rocks with white but it may have been a good idea.

I  did make a couple coats of color so that turned out okay.


I chose a plastic lid for a palette for the dollops of paint.  The middle rock is a mixture of the dollops once I was done with the others.

I chose a medium sized paint brush.

You have to plan because you will have unpainted spots where you are holding it.  Two times by 2 coats.  The acrylic paint dries very quickly.


Check out page 32 in the book titled decorated pebbles.

As you can see a pile of rocks was included in the book.  Lots of color and pattern was used.


Here are my rocks.  Spattering paint with a toothbrush is always a easy process for anyone to try.

I used a smaller brush to paint my flowers.  I love the shape and color in the turquoise one!

Monday, August 21, 2017

Perky Poppies - Card Exchange

Today, I made some cards for my monthly card exchange.

I chose a piece of decorative paper from my stash featuring yellow, orange and blue.  This is acrylic paint on white card stock with sponging using stencils to provide some texture and interest.

I cut it to 3.75 x 5 inches. 

I then cut my flowers with the Memory Box Perky Poppies die from navy card stock.  I trimmed the die cut down to fit onto the decorative paper.  I adhered it with tape behind the band at the bottom and a bit of quick dry adhesive behind the poppies.

This was layered onto a navy piece of card stock which matched the flowers.  I then adhered it to a golden yellow card base.


My second card was a navy and orange combination.  I chose the same decorative paper and the navy poppy die cut.

I cut my die cut too short so it did not meet the bottom of the navy layer but since they are both the same color it works. 

On this card I chose a tangerine colored card base which works well with the decorative paper.


These cards are off to my card exchange buddies today.

Wednesday, December 7, 2016

Art Canvas - Aspen Grove

I finished the 10x10 inch painting I started in the summer.  I had to research impasto panting with a palette knife.

I mixed some Ranger Texture Paste, some Golden Regular Gel (Semi-Gloss) medium and some Deep Yellow acrylic paint by Artist's Loft.  I applied it with a palette knife to the top in the trees and a few on the snow on the ground. I let that dry overnight.

I created the aspen leaf and drew it onto deep yellow card stock then fussy cut it around the edge.  It is mounted to the bottom right hand corner with 3D foam tape.

I added a wire hanger to the back along with bumper pads in the bottom corners.


Being delivered for the Miniatures Show at the CAVA Gallery which opens on Friday.

 I'm sending my Cardinal in Birches as well.  See the details here.

Tuesday, September 20, 2016

Nature Print Cards

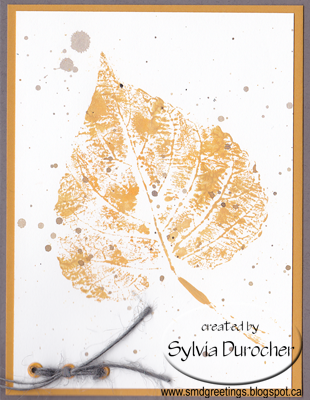
I made some cards with the leaf nature prints from I made the other day.

This is an aspen leaf so I chose 2 different shades of yellow for this print - Cadmium Yellow and Golden Straw, the brown was Dark Burnt Umber.

I trimmed the print to 3.75x5.00 inches and layered it to a piece of warm golden yellow card stock.  I punched holes in the bottom left hand corner and inserted yellow eyelets with the Crop-a-dile.  I added grey cording and knotted it.  The layer was then adhered to a taupe card.

You can check out my HowTo: Nature Printing Tutorial.


On this card I swapped the colors around with grey eyelets and yellow cording.  This leaf is from an oak tree.  The coloring is very similar.  These are a bit more brown, where as the aspens can be bright yellow.

These cards are on their way to my card swapping friends. 


How To: Nature Printing

I created some Nature Prints last week.  I have done this many times in the past.  I came across the maple leaf the other day and thought I should make some more.  The leaves are falling here so it was time do it before there was only dried ones left.

I plan to use these four as a set of Nifty Notes for sale this craft sale season.

I have put together a HowTo tutorial to show step by step how to produce these lovely images from nature.  There are so many interesting shapes in leaves.  You will be able to pick supple ones not dried ones from the trees or the ground. Check out my HowTo Tutorials.

This makes a fun activity to do with your kids or grand kids.


Monday, August 29, 2016

Sunflower HB

I made this card for an aunt who is celebrating a birthday this month.  She is a painter so I thought part of the card should be painted so I created a painted background.  I chose Cobalt Blue, Cadmium Yellow and Sap Green in the Folk Art brand to paint the background onto yellow parchment card stock.  I wanted to create the illusion of sunflower fields.
I cut the Spellbinder Sunflower die from bright yellow and golden yellow and the centre from warm brown.  I chose a card from the same card stock as the centre of the sunflower.  I cut a leaf from green card stock.  I cut the greeting from the same golden yellow card stock as one of the layers of the sunflower with the Memory Box Grand Happy Birthday die.  This was trimmed to leave a small border on 3 sides and adhered to the bottom of the background layer.  I then layered the flowers and the leaf which were adhered with Quick Dry adhesive.  I embossed the brown center with a polka dot embossing folder from Cuttlebug.  This was adhered to the center of the flower.  I adhered this layer to the card front.  I needed something above the sunflower so I added 3 birds in the sky with a black marker.  Really happy with the way it turned out.

Tuesday, August 9, 2016

Decorative Paper Cards

We had a good day on Saturday. Today, more cards for the Gallery.

I created these sentiment layers which have the words in the middle of the frame line.  I printed them on a white quarter sheet then trimmed it. I chose a piece of blue acrylic paper and ripped the bottom edge.  Trimmed it to leave a border inside the border.  Adhere to the sentiment layer then that layer to the card front on a textured navy card.  Punched a navy star from the same card stock as the card and adhered it to the card front with 3D foam tape.

This card features ink applied with a sponge onto Whisper White card stock.  Colors are Melon Mambo, Crushed Curry and Rich Razzleberry.  I printed the greeting in RR directly onto the decorative paper.  I punched a large daisy flower from the Crushed Curry card stock to match the card.  I glued the decorative layer to the card front. Placing the large daisy going with the movement in the pattern I drew a stem and leaves with a black marker.  I then adhered the daisy punchie and the black centre to coordinate with the stem. 

This card features spattered dots of liquid purple ink which has silver mixed into it. You can see the silver pooled to the center. 
I printed the sentiment directly onto the decorative paper.  It was trimmed to fit the card front leaving a border. It was then adhered to the purple card front.
I die cut the candle with the QuikKutz die which cuts the solid and decorative one.  The decorative one and the flame is silver foil.  Adhered the candle layers together then glued the candle to the card front.

Friday, June 10, 2016

Painting on Silk Workshop

As part of our AGM today one of the artists held a workshop on painting on silk.  We did scarves.  The steps were:
1. Sketch your layout
2. Add resist if you need it to keep some areas white.  Let it dry completely before proceeding.
3. Collect your colors. We used Dye-Na-Flow paints by Jacquard Products.  Use water to dilute if you would like a paler version.  These paints were chosen for their ability to provide vibrant and vivid colors.
4. Paint on silk scarf which was suspended between tables.  We covered to the floors to ensure paint dripping would not touch the floor.
5. We steamset the colors with a steam iron.
6. Hand wash to remove the water based resist.
7. Enjoy it and let it bring a smile to your face every time you wear it.

The colors I used are: 802 Gold Yellow, 806 Brilliant Red and 816 Midnight Blue.

We had 12-15 participants who all did a great job.  This is my first silk scarf and I can see more in my future.  It was a lot of fun and I am happy with my final product.   We are blessed to be provided with level of instruction. Instructor was Doris Charest.

Friday, April 1, 2016

Christmas Card Challenge - April - Green/Foliage

It's time again for my monthly Christmas Card Challenge.  The challenge for April is Green / Foliage.  Foliage could be pine trees, wreaths, evergreen branches, Christmas tree, poinsettias, holly, and much more.
My choice is  a green wreath on a window with a night sky behind on a deep red card. I pulled the Cuttlebug Holly Wreath die and folder combination from my die storage, which I have never used. I chose dill textured card stock. First, I cut the wreath with the sizzlet die then ran it through the embossing folder to add the textured design.  I cut the window from white card stock with the Memory Box Grand Madison Window die.  I spritzed a piece of navy card stock with white acrylic paint to create a night sky and adhered it behind the window.  The element was adhered to card front aligned along the top edge.  I then adhered the wreath centered on the window.  A bling Zot holds the red thread bow over the embossed one on the die.  I color printed the greeting onto white card stock and cut it with the Stampin Up Bitty Banners Framelits thin dies.  I adhered it  below the window.

Monday, November 2, 2015

Mosaic Monday - House Canvas

Here's my last canvas.  I wanted to make a house one which could be given to someone who just purchased a house or just place in the front hall.
I started by creating a gradient background from blue at the top to earthy colors at the bottom using artist pigments Carribean Blue, Laguna and Yellow Citron. I painted yellow onto watercolor for the bright windows. I cut my house from white textured card stock. The main body, the roof and chimney.  I cut out windows and framed them with paint.  I painted the door and cut it out.  I painted a path way to the door and the tree trunk in darker colors.  I cut out the foliage for the tree and added birds and flowers.  I crunched and stained tissue paper in green and adhered it to the bottom of the canvas to create grass.  Added some clouds in the sky, smoke from the chimney and a red heart in the peak of the roof.

Submitting this to Mosaic Monday hosted my Judith at Lavender Cottage.

Wednesday, July 1, 2015

Christmas Card Challenge - July - St. Nick Spatter Buttons

It's time for the Christmas Card Challenge again.  This month it is Santa/St. Nick / Spattering / Buttons.  Santa could be die cut, stamped, color printed. Spattering could be paint, ink or some other color medium.  Buttons could be chipboard, real, die cut. All kinds of options. Be inspired!


I chose a St. Nick I found on-line which has a rich colored tunic, a snowy grey background and majestic stags.  I color printed it in the size I needed.  I trimmed it leaving a white border.  I dug through my button collection to see what I had that matched either the tunic or the stags.  I chose a grey card which matched well with the background in the picture. I spattered white pearl acrylic paint on the front of the card with a spatter tool then sent them aside to dry.  Once dry, I wrapped a piece of white seam binding around the card front and knotted it on the right hand side.  I repeated the colors in buttons - white, burgundy and grey.  These are held in place with Zots.
Submitted to the following challenges:
Sparkles Christmas Card Challenges - Anything Goes 

Thursday, June 25, 2015

Cards with my Decorative Paper

I'm working on creating cards with the stack of decorative paper I have made in the last little while.
On this card I used one of my alcohol ink backgrounds from this session.  I cut the decorative paper with the Memory Box Grand Happy Birthday die then mounted it on a piece of white card stock which was trimmed to leave a small border. This layer was then adhered to a pink card.  I added 3 deep pink sequins in the top right hand corner held in place with bling Zots.


This card has some of my bubble paper which tends to be softer in color. The paper was made in this session. I printed the greeting in a coordinating color then I die cut some leaves from it with Spellbinder Foliage thin dies.  They are individual dies so I could add a couple single leaves and place them as I wanted.   The white layer is trimmed to leave a small border of the decorative paper which was trimmed to leave a small border of the green card.


This teal card features a piece of decorative paper as a background to the white frame.  The frame was cut with the largest die from the My Favorite Things - DieNamics Stitched Frames set.  I used white card stock for the frame and the butterfly which was cut with the Sizzix Winged Beauties framelit set.  I added a bit of stamped stippling below the frame in case it is used with out a greeting. A greeting could be added if one chose.  On this card I used one of my alcohol ink backgrounds from this session.
I chose to make a more masculine looking card from decorative paper made with acrylic paint in various shades green and brown applied with a sponge over material to create texture such as a mesh bag.  I chose an ivory greeting layer into which I cut the word with the Stampin Up Little Letters framelits.  I cut this layer to highlight a generous frame of the decorative paper. This was then adhered to a brown card. 
This decorative paper is acrylic paint with paste paper technique.  I cut it down to leave a border of the blue card. I punched all 4 corner with a decorative corner punch. I cut a flower with the Cricut at and the Straight from the Nest cartridge from white card stock. I cut it at 4 inches.  I adhered the flower on the card front in such a way to leave some room on the right hand bottom for a greeting if a person chooses.
I started with a turquoise card onto which I stamped a Stampin Up Itty Bitty background with Island Indigo.  I cut the decorative paper with the SU Top Note die.  I tied a piece of white seam binding around the bottom half and knotted in the front.  I then created a focal element with silk green leaves, then a purple card stock flower cut with the SU Flower Fair framelits.  I curled the ends forward.  I added a large white silk flower, a medium silk flower then a white iridescence sequin which are all held in place with a tiny turquoise brad.


 These are a result of discussions on the weekend with my sister.  Here are her cards.