Showing posts with label R2G AO Stack Kit. Show all posts

Tuesday, June 2, 2020

Ready 2 Go All Occasion Stack Kit - Set 04

Angled Rectangle

I started with a ginger card base.

I chose designer paper by Graphics 45 - Communique Collection - On the Dot cut to 4.00x5.25 inches. I laid the designer paper onto the card front at an angle then adhere it.  I trimmed the excess to the card edge with scissors.

I cut the dark brown Decorative Label punchie in half crosswise then trimmed the points off with scissors.  I offset these behind the greeting.   The accent was then adhered to the card front with 3D foam tape.
Split Square

I cut a 4 inch square of designer paper into 2 equal triangles by cutting top left hand corner to opposite corner with a paper cutter.   These were glued to the card front aligned to the top and the bottom.   That leaves a nice band of card color on the diagonal.

I wrapped a length of white grosgrain ribbon around the card front and knotted on the front.  Trimmed the ends on the slant.

I assembled the flower accent by putting the small flower then the large flower onto the brad.  Press the prongs apart on the back.

I added the 3D foam tape to the back of the flower accent and adhered it to the card front.

A quarter sheet insert is glued to the right hand side.

 Masculine DSP Split

I selected a deep red brown colored card.

I chose designer paper by Graphics 45 - Communique Collection - On the Dot.  I cut it to 4.00 x 5.25 inches then cut again at 3.5 inches.  Turned the small over and tape to 2 pieces back together.

Wrapped the designer paper layer with brown grosgrain ribbon and taped the ends to the back.  Adhered to the card front.

Assemble the leaf accent and adhered to the front with 3D foam tape.

Ready 2 Go All Occasion Stack Kit - Set 03

Angled Rectangle

I started with a grey card base.

I chose designer paper by Creative Imaginations - Art Warehouse - Danielle Johnson cut to 4.00x5.25 inches. I laid the designer paper onto the card front at an angle then adhere it.  I trimmed the excess to the card edge with scissors.

I cut the dark green Decorative Label punchie in half crosswise then trimmed the points off with scissors.  I offset these behind the greeting.   The accent was then adhered to the card front with 3D foam tape.

Split Square

I cut a 4 inch square of designer paper into 2 equal triangles by cutting top left hand corner to opposite corner with a paper cutter.   These were glued to the card front aligned to the top and the bottom.   That leaves a nice band of card color on the diagonal.

I wrapped a length of white grosgrain ribbon around the card front and knotted on the front.  Trimmed the ends on the slant.

I assembled the flower accent by putting the small flower then the large flower onto the brad.  Press the prongs apart on the back.

I added the 3D foam tape to the back of the flower accent and adhered it to the card front.

A quarter sheet insert is glued to the right hand side.

 Masculine DSP Split

I selected a kraft colored card.

I chose a designer paper by Creative Imaginations featuring stars.  I cut it to 4.00 x 5.25 then cut again at 3.5 inches.  Turned the small over and tape to 2 pieces back together.

Wrapped the designer paper layer with ginger grosgrain ribbon and taped the ends to the back.  Adhered to the card front.

Assemble the star accent and adhered to the front with 3D foam tape.

Ready 2 Go All Occasion Stack Kit - Set 02

Hexagon Trio

I chose an ivory card.

I wrapped the ivory grosgrain ribbon across the designer paper and taped ends to the back.  Adhered it to the card front.

I adhered the 3 hexagons to the bottom half of the card below the grosgrain ribbon.

I assembled the greeting by adhering the greeting to the colored circle then to the scallop circle.  The whole greeting was then adhered over the grosgrain ribbon with 3D foam tape.


Masculine DSP Split

I selected a kraft colored card.

I chose a designer paper by Creative Imaginations featuring stars.  I cut it to 4.00 x 5.25 then cut again at 3.5 inches.  Turned the small over and tape to 2 pieces back together.

Wrapped the designer paper layer with ginger grosgrain ribbon and taped the ends to the back.  Adhered to the card front.

Assemble the star accent and adhered to the front with 3D foam tape.

Nature Sticker

I layered the nature sticker onto coordinating card stock and trimmed leaving a narrow border.  I added 3D foam tape to the 4 corners on back.

I adhered an embossed layer leaving a small border to the card front.

Adhered the strip of black card stock onto the embossed layer.

I adhered the nature sticker to the card front.

I added the aligned on the black strip

Monday, June 1, 2020

Ready 2 Go All Occasion Stack Kit - Set 01

Split Square

I cut a 4 inch square of designer paper into 2 equal triangles by cutting top left hand corner to opposite corner with a paper cutter.   These were glued to the card front aligned to the top and the bottom.   That leaves a nice band of card color on the diagonal. 

I wrapped a length of white grosgrain ribbon around the card front and knotted on the front.  Trimmed the ends on the slant.

I assembled the flower accent by putting the small flower then the large flower onto the brad.  Press the prongs apart on the back.

I added the 3D foam tape to the back of the flower accent and adhered it to the card front.

A quarter sheet insert is glued to the right hand side.

Nature Sticker

I layered the nature sticker onto coordinating card stock and trimmed leaving a narrow border.  I added 3D foam tape to the 4 corners on back.

I adhered an embossed layer leaving a small border to the card front. 

Adhered the strip of black card stock onto the embossed layer.

I adhered the nature sticker to the card front.

I tucked the circle greeting just under the corner of the sticker.

Hexagon Trio

I chose an ivory card. 

I wrapped the ivory ribbon across the designer paper and tape ends to the back.  Adhered to the card front.

I adhered the 3 hexagons to the bottom half of the card below the grosgrain ribbon.

I assembled the greeting by adhering the greeting to the colored circle then to the scallop circle.  The whole greeting was then adhered over the grosgrain ribbon with 3D foam tape.

I am glad to have a couple of customers who want card kits during this isolation time.

Thursday, October 3, 2019

R2Go All Occasion Stack Kit - Set 9

I started with a medium teal colored card base in linen finish.

I added a layer of dark warm blue green designer paper with spots of yellow.  I have no credits for this paper.

I angled it until I was happy on my tall card then adhered it.  I trimmed the excess paper away along the card edges with scissors.

I created an accent with a deep teal 1.75" circle topped with a yellow card die cut.  The circle punched and the star die cut with the Stampin Up Star Thinlit set from deep golden yellow card stock.  This was adhered to the card front with 3D foam tape.

The greeting was color printed and punched with the Stampin Up Modern Label punch.  It was adhered with 3D foam tape aligned in the top right hand corner.

I started with a red card base in the wide (landscape) orientation.

I chose designer paper - Aspen Frost by BasicGrey which was trimmed to 4" by 5.25" then cut with the Stampin Up Sunburst Thinlit.  I adhered it to the card front aligned along the edges leaving a small border.

I created an accent with a large 2" circle punchie in white, a medium teal circle punch measuring 1.75", a large white silk flower, a smaller red flower with a teal brad.  It was adhered to the card front with 3D foam tape. 

These layouts are very versatile as they work in both orientations and a greeting can easily be added to either.  I included SU Modern Label punchie greetings in this kit with 3D foam tape to adhere them.

R2Go All Occasion Card Kit - Set 8

I made a couple more Ready 2 Go All Occasion Card Kits today.

This card started with a navy blue card base set in the tall orientation.

I chose designer paper Color Ways Sapphire Collection by Paper House. I trimmed it to 4" by 5.25" and then cut it with the Stampin Up Sunburst Thinlit die.  I adhered it to the card front aligning all edges leaving a small border.

I created an accent with a 2" white circle punchie then a blue 1.75" punchie.  I added a large white silk flower, then a smaller blue one.  I aligned them on the circle and used a push pin to create the hole for the brad.  I placed the silk flowers on the brad and pushed the prongs through the hole and spread them apart on the back of the circle.  This was adhered to the card front with 3D foam tape.
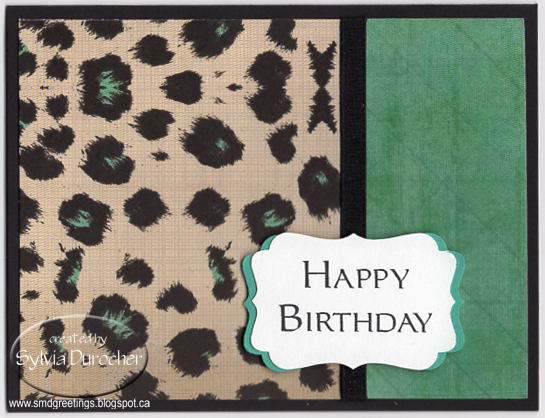

I generally include cards in a stack kit which would work for the guys in our lives.

I started with a Soft Suede colored card base.  I added a layer of gorgeous designer paper but I can't find the credit now.  I trimmed it to 4" by 5.25" then angled it on the card front until I was happy.  I adhered it with double sided tape and then trimmed it to the card edges with scissors.

I added a Tim Holtz Old Jalopy die cut in dark brown card stock.  It was cut with the Movers & Shapers set.  It was adhered with 3D foam tape.

The greeting was printed and then punched with the Stampin Up Modern Label punch.  It was adhered with 3D foam tape as well.   

These layouts are very versatile as they work in both orientations and a greeting can easily be added to either.  I included SU Modern Label punchie greetings in this kit with 3D foam tape to adhere them.

Tuesday, March 19, 2019

Ready2Go AO Stack Kits - DSP Split - Artisan & Apothecary Labels

These kits are based on the DSP Split layout where the designer paper layer is cut to 5.25x4 inches then cut again at 3.5 inches. One of the pieces is turned over and the pieces are taped together on the back.  A ribbon is laid across the join and the ends are taped to the back of the DSP layer.  This layer is then adhered to the card front.  This is a versatile layout as you can see it can work tall or wide with the narrow piece on the left or right. With alternating the combo on the double sided paper each card can be different.

The Stampin Up Artisan Label was used on this set.  The greeting was printed on white card with Kiwi Kiss and Early Espresso and punched with the coordinating punch.

The designer paper used on the card shown is by BoBunny - Little Miss - Little Miss Dorothy.  The other I selected is Basic Grey - True Love - Giddy.

The grosgrain ribbon is pink.

The greeting is adhered over the ribbon with 3D foam tape.

I chose this set of cards to have no greeting which allows it to be used for any occasion.  The designer paper for this set is by Simple Stories - Snap Color Vibe - Dot/Stripe in Green and Yellow.

The ribbon is white grosgrain ribbon.

The textured card bases coordinate with the color of the DSP in green and mustard.

It label was cut with one of the Stampin Up Apothecary Framelits.

The accent has a white silk flower in the center held in place with a coordinating mini brad.  The 2 white buttons on either side are held in place with Bling Zots.

 It is adhered to the card front over the ribbon with 3D foam tape pieces.

Monday, March 18, 2019

R2Go AO Stack Kits - DSP Split - Scallop & Decorator

I have been working on Ready2Go All Occasion Stack Kits for my upcoming class in April.

These kits are based on the DSP Split layout where the designer paper layer is cut to 5.25x4 inches then cut again at 3.5 inches. One of the pieces is turned over and the pieces are taped together on the back.  A ribbon is laid across the join and the ends are taped to the back of the DSP layer.  This layer is then adhered to the card front.  This is a versatile layout as you can see it can work tall or wide with the narrow piece on the left or right. With alternating the combo on the double sided paper each card can be different.


For this card I chose 2 different designer paper to use with the Stampin Up Scallop Circle accent.  I chose black card bases for both papers.  The designer papers feature floral on one side and stripes on the other. 

The one shown on the left is October Afternoon - Sidewalks - Hide and Seek.  The other paper was from a pad for which I do not have the details and features blue, ivory and green as colors.

I chose the same light blue stitched grosgrain ribbon for both designer papers.

The greetings were printed on ivory card stock in black and punched with the Stampin Up 1.25 inch circle punch.  The scallop circles were all punched from black card stock to match the card. They are adhered to the card front with 3D foam tape position over the ribbon.


For this card with the Decorator Label I chose 2 designer papers.  The one shown is by Heidi Swapp - Sugar Chic - Fabulous.  The other is by Kaiser Craft - Secret Bird Society Collection - Mystery.

The card base is black with black grosgrain ribbon across the join.

The greeting is created with a solid card stock offset behind the black greeting on white card stock.  They were punched with the Stampin Up Decorator Label punch.  The solid one is cut in half on the short side then the points of the straigth edge are trimmed off.  These are then adhered to the back of the greeting offset on the right and left sides. Once assembled 3D foam tape is placed on the back and it is adhered to the card front over the ribbon.

Monday, October 15, 2018

All Occasion Stack Class

I held my All Occasion Stack Class tonight. 

I made a set of cards while the other 3 participants made their cards.

This card came from a full of Thank You cards.  The gold scallop is sticker paper. The gold foil greeting was trimmed and holes were placed on the left and right with the Stampin Up slot punch.  I ran the gold organza ribbon through the holes and knotted on the right hand side.

We had a great time and then a cup of tea and a bit of cake.

Saturday, July 28, 2018

R2Go All Occasion Stack Kit - Set 04

I cut the flowers from black card stock.

I selected designer paper and coordinating card stock for the base.  It was cut to leave a small border.  I adhered the DSP to the card front.

I then aligned the flower and and stem onto the card front. Once happy, I adhered the flower then the stem and trimmed it to the edge of the card.

I made a hole in the center of the flower with a push pin.  I placed the flower sequin then the handmade flower by Prima onto the tiny black brad and placed the prongs through the hole and press them apart on the inside of the card.


This set features black and white printed elements.  The images were downloaded from Pixabay. They were printed onto white card stock then they were punched with a 2" circle punch.

I chose designer paper which would coordinated with the elements and then cards in black, white or kraft.

Once the desinger paper was adhered to the card front I wrapped a piece of black knitting ribbon around the card front and knotted it.

The element is created when the white circle is adhered to the black Stampin Up Deco Label die cut.  The label is then adhered over the ribbon with 3D foam tape.

This card features a large metallic copper diecut daisy done with the Sizzix Daisy #4 die.

I chose designer paper and card stock combinations that worked well together.  The DSP is cut to leave a small border then adhered to the card front.

I tack the copper daisy lightly with adhesive.  This time because I have a greeting I swung the stem to the right.  I used a push pin to create a hole in the center of the flower.  I placed the teal and copper flowers onto the tiny copper brad and pressed it through the hole I made. Spread the prongs on the inside.

The greeting was printed in teal on ivory card stock and punched out with the Stampin Up Artisan label.
Check the kit tab for availability.